


22
23
V
iewing
V
iewing from SD Card
Viewing from an SD Card
You can view movies and photos taken with a digital camera or digital video camera and saved on an SD
card. (Media other than SD Cards may not be reproduced properly.)
■
Press to exit from
a menu screen
■
Press to return
to the previous
screen
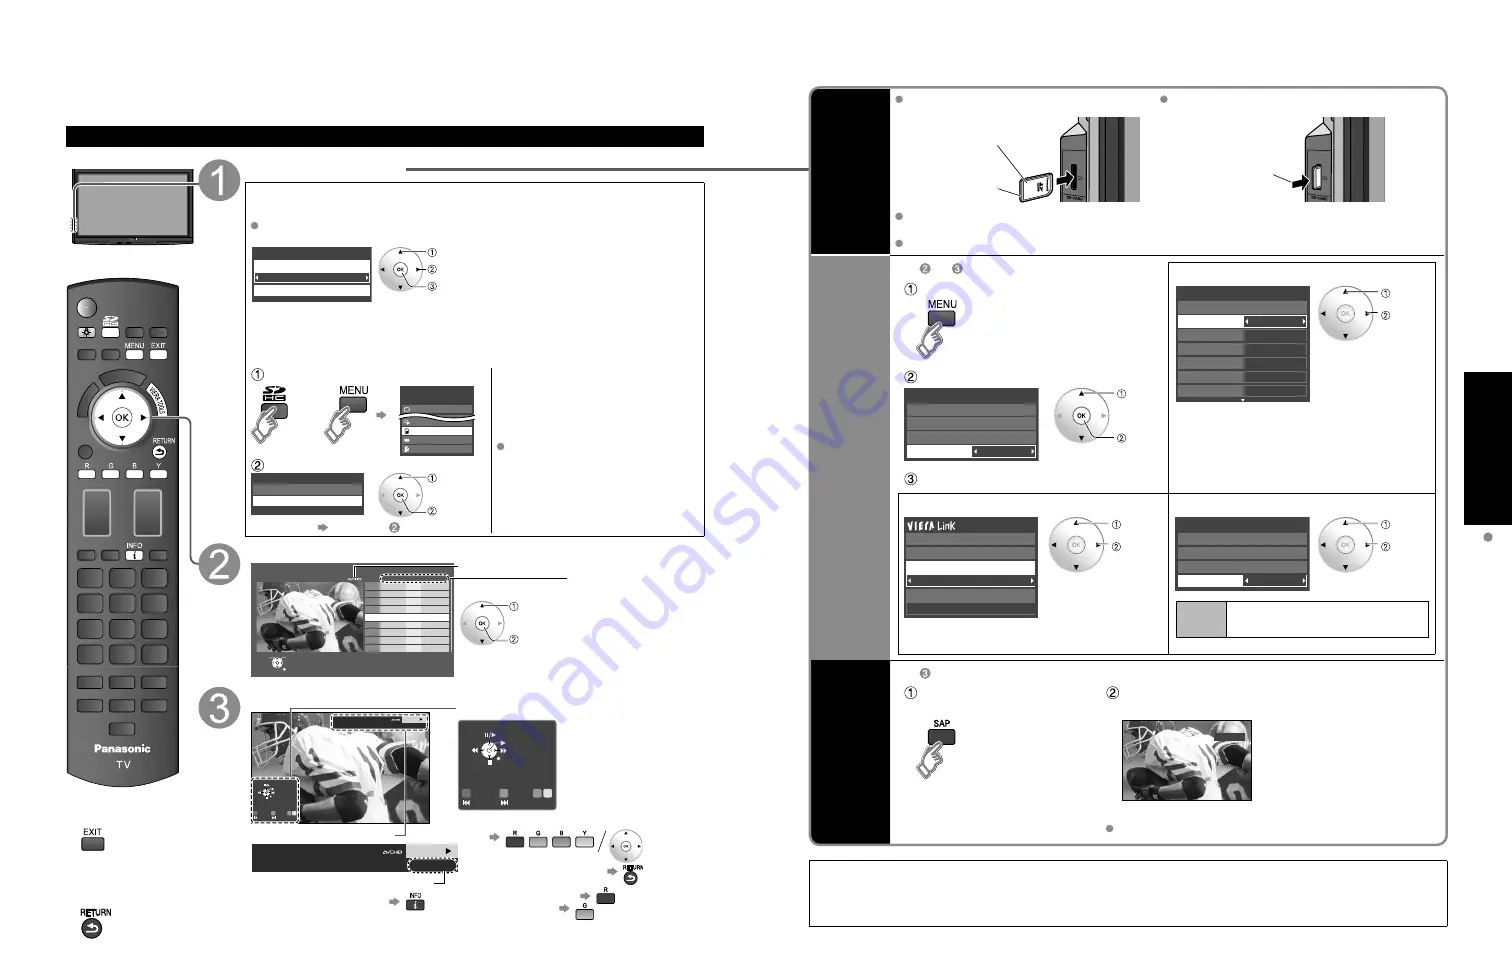
Insert the SD card
* This setting will be skipped next time unless you select “Set later”.
Set “SD card setting” and select “Play SD card now”
“SD card setting” will be displayed automatically each time an SD card is
inserted for the first time.
Set later
SD card setting
Play SD card automatically
Play SD card now
select
change
set
Slideshow:
A Slideshow will start
automatically next time.
Thumbnail:
The Photo viewer menu will be
displayed automatically next time.
Movie:
The video data plays
automatically from next time.
Set later:
“SD card setting” menu will be
displayed repeatedly.
Off:
The data can be played manually.
■
Manual operation
(“Play SD card automatically” is “Off”)
Display “SD card”
Using VIERA TOOLS (p. 21)
or
Menu
Picture
Audio
VIERA Link
SD card
Closed caption
Setup
Select the item
SD card
Photo viewer
Movie player
select
ok
Photo viewer Go to P. 24
Select the movie to be listed
Movie player
No.
Date and time
Duration
12/20/2008
01/17/2009
03/07/2009
04/24/2009
06/10/2009
08/19/2009
10/02/2009
10/13/2009
12/01/2009
10:26
14:25
07:25
09:25
11:34
10:25
12:25
14:25
16:25
00h16m35s
01h45m35s
00h05m35s
01h10m35s
00h05m27s
00h35m35s
00h12m35s
00h53m35s
01h24m35s
1
2
3
4
5
6
7
8
9
Select
OK
RETURN
Recording format (MPEG2/AVCHD)
Movie information
Date and time:
Date and time of
recording are displayed.
Duration:
Recording time is
displayed.
select
ok
View
Skip
Skip
R
Y
G
B
Stop
RETURN
Play
Date and time
Duration
06/10/2009
11:34
00h05m27s
PLAY
00:00.14
Pause
Date and time
Duration
06/10/2009
11:34
00h05m27s
PLAY
00:00.14
Skip
Skip
R
Y
G
B
Pause
Stop
RETURN
Play
•
To display/hide banner
Navigation area
Elapsed time of current movie
Movie Banner
•
To display Navigation area
•
To hide Navigation area
•
To previous movie
•
To next movie
Movie player
SD Card
Insert the card
Remove the card
Label surface
Push until a click is
heard
Press in lightly on SD
Card, then release.
Compliant card type (maximum capacity): SDHC Card (16 GB), SD Card (2 GB), miniSD Card
(1 GB) (requiring miniSD Card adapter)
For cautions and details on SD Cards (p. 58)
Movie
settings
In or
■
Adjust the picture and Audio
Display “Movie settings”
example: Picture menu
Picture menu/Audio menu
(p. 34)
0
0
0
0
0
Vivid
Picture
1/2
Brightness
Color
Tint
Sharpness
Picture mode
Contrast
Reset to defaults
Select
Adjust
Select the item
On
Movie settings
Picture
Audio
VIERA Link
Repeat
select
ok
Set
■
Use VIERA Link function
■
Set up Repeat playback
VIERA Link (p. 34, 42)
Recorder
TV
VIERA Link control
Speaker output
Record now
Stop recording
Select
change
On
Movie settings
Picture
Audio
VIERA Link
Repeat
Select
change
Repeat
Turn the Movie play Repeat
function On or Off.
Change
Audio
current
status
In
Display “current audio
status”
Each press of SAP will change the audio mode.
(If the movie has multiple audio signals.)
stereo
(Current audio status)
It may take several seconds to change the sound.
This product is licensed under the AVC patent portfolio license for the personal and non-commercial use of a consumer to
(i) encode video in compliance with the AVC Standard (“AVC Video”) and/or (ii) decode AVC Video that was encoded by a
consumer engaged in a personal and non-commercial activity and/or was obtained from a video provider licensed to provide
AVC Video. No license is granted or shall be implied for any other use. Additional information may be obtained from MPEG LA,
LLC. See http://www.mpegla.com.


