17
Step 9
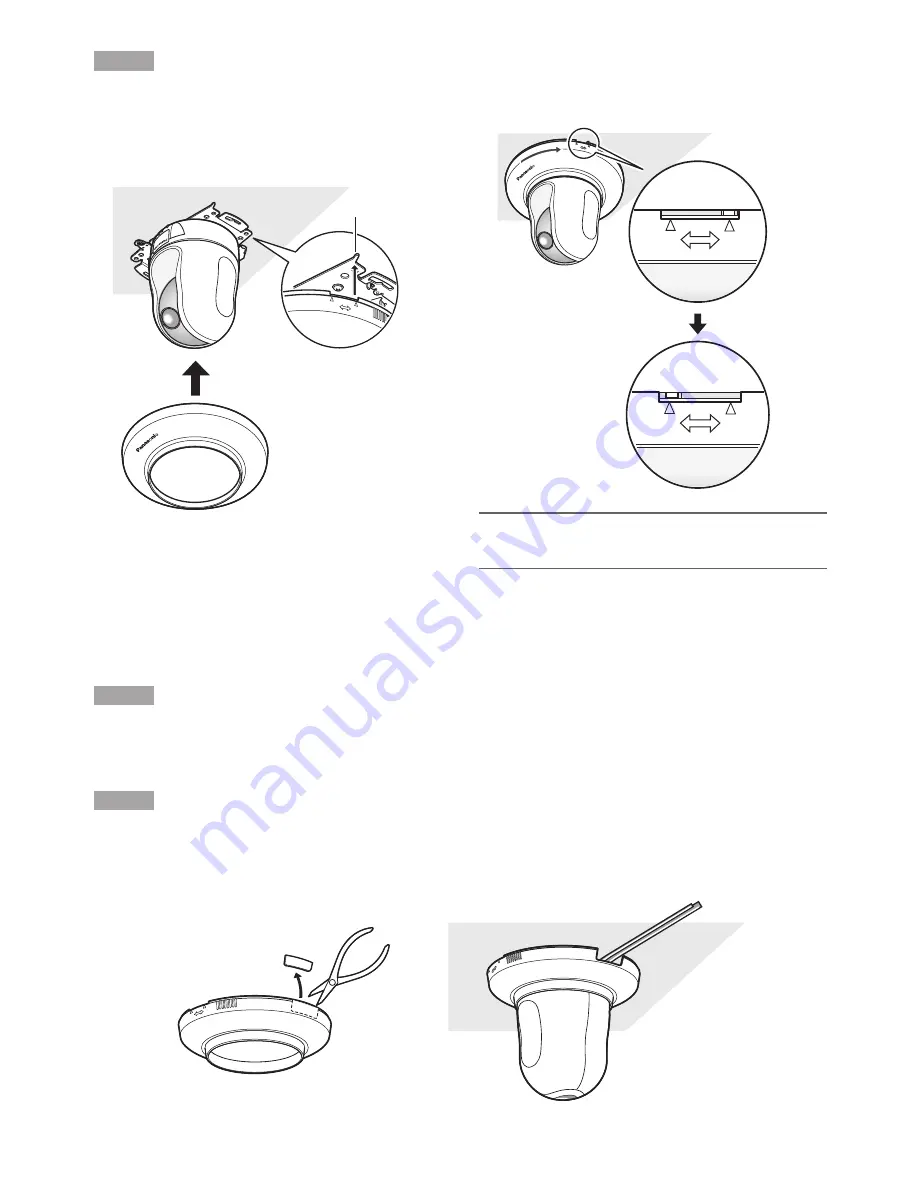
After completing the cable connections, attach the pro-
vided decorative cover.
q
Align the indication "OPEN" of the decorative cover
to the decorative cover guide of the mount bracket.
w
Rotate the decorative cover clockwise until the indi-
cation "LOCK" reaches the decorative cover guide
of the mount bracket.
Important:
Make sure that no cable is pinched by the decora-
tive cover.
LOCK
OPEN
Decorative cover
(standard accessory)
Decorative cover guide
LOCK
OPEN
LOCK
OPEN
LOCK
OPEN
Wire without making a hole in the ceiling
Step 1
Install the camera by following step 1 and steps 3 – 8 of the "Wire through a hole in the ceiling" section (
☞
pages 14 -
16). It is unnecessary to make a hole in the ceiling as described in step 2 of the "Wire through a hole in the ceiling"
section.
Step 2
Remove the tab on the rear of the decorative cover that is blocking the wiring hole.
Attach the decorative cover by following step 9 of the "Wire through a hole in the ceiling" section (
☞
pages 14 - 16).
Wire through the wiring hole of the decorative cover.
LOCK
OPEN
OPE
N
LOCK
Summary of Contents for Super Dynamic III WV-NS202A
Page 27: ...27 ...


