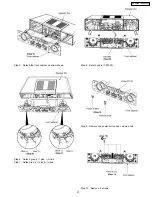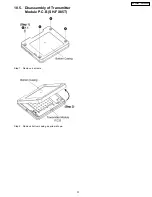
10.4.5. Disassembly of Bottom Chassis
Unit
Step 1 : Lift up the antenna as arrow shown.
Step 2 :Remove 5 screws.
Step 3 :Upset the unit.
Caution : Place the unit on a cushion to avoid damage to
the antenna.
Step 4 : Remove 1 screw.
Step 5 : Detach rear panel unit as arrow shown.
Step 6 : Detach cables (CN1005, CN1002 and CN1007).
29
SH-FX85P / SH-FX85PC
Summary of Contents for SH-FX85P
Page 12: ...7 4 Digital Receiver Operations as stand alone audio amplifier SB FX85 12 SH FX85P SH FX85PC ...
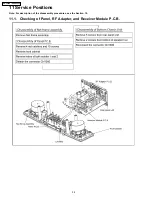
Page 39: ...11 2 Checking of D Amp and D Port P C B 39 SH FX85P SH FX85PC ...
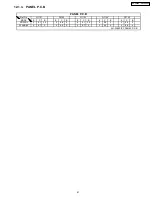
Page 41: ...12 1 3 PANEL P C B 4GH 0Q 1 2 56 0 5 2 2 2 0 2 2 0 2 3 3 3 3 3 41 SH FX85P SH FX85PC ...
Page 42: ...12 2 Waveform Chart RF TEST POINT PLAY 42 SH FX85P SH FX85PC ...
Page 44: ...SH FX85P SH FX85PC 44 ...
Page 48: ...SH FX85P SH FX85PC 48 ...
Page 50: ...50 SH FX85P SH FX85PC ...
Page 66: ...SH FX85P SH FX85PC 66 ...
Page 70: ...70 SH FX85P SH FX85PC ...
Page 71: ...20 Exploded Views 20 1 Cabinet Parts Location SH FX85P SH FX85PC 71 ...


