background image

3

Dispenser lid

To open: press latch and lift lid up

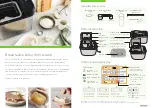
Bread tastes better from scratch.

There’s nothing like the homemade aroma of baking bread wafting through the kitchen. 
Whether you’re a breadmaster or a brand-new baker, the Panasonic 

Bread Bakery

SD-R2550 breadmaker is here to help you bake delicious bakery-style loaves every time. 

This quick start guide includes recipes for various breads, delicious cakes, rising doughs, 
and even gluten-free options! The enclosed 

Operating Instructions and Recipes

 booklet 

contains even more mouth-watering recipes, including jams and jellies. 

Thanks for having us in your home.

Control panel and display

*

Parts identification

Included accessories

Measuring cup

(liquid)

Sourdough cup

(liquid)

Sourdough starter

spoon 

(yeast)

Measuring spoon

(dry)

Tablespoon

Teaspoon

IMPORTANT: Please read the Operating Instructions before using the bread maker.

*During operation, only relevant symbols and words will be displayed. **Light flashes when program ends.

Bread pan

Control panel

Lid

Bread pan

handle

Raisin nut 

dispenser flap 

Kneading blade 

Steam vent

Latch

To close: close the dispenser lid 

until the latch “clicks”

Program end light

**

Raisin/nut dispenser

Use only when “raisin nut” 

program menu is selected

Operation status

Displays and lights the 

current program stage

Press either icon 

to select desired 

program number

Press either icon to 

select desired size 

and shade settings

Press to set:

»

Delay timer

»

“Sweet Menus” time

Press [      ] to start
Press [      ] to cancel setting 

or to stop program

Time display

»

Program time remaining 

»

Time remaining until 

a manual procedure is 

required

LED Indicator

Loaf size

Medium–Large–XL

Manual operation

Menu + Program #

Crust shade

Light–Medium–Dark

Summary of Contents for SD-R2550

Page 1: ...Quick Start Guide with Recipes SD R2550...

Page 2: ...poon yeast Measuring spoon dry Tablespoon Teaspoon IMPORTANT Please read the Operating Instructions before using the bread maker During operation only relevant symbols and words will be displayed Ligh...

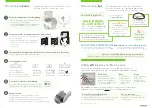
Page 3: ...gredients into raisin nut dispenser if needed Select baking processes Baking complete 1 2 3 4 6 Use fresh ingredients Ensure all parts are clean and dry No peeking Keep lid closed until done Always se...

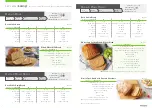
Page 4: ...in 20 30 min 1 hr 50 min 2 hr 20 min 50 55 min We ve selected 27 delicious recipes for you to make and enjoy Loaf size Crust option Delay timer Time Required See recipe Yes 4 hr Rest Knead Rise Bake 3...

Page 5: ...read 1 hr 55 min Parmesan cheese grated 50g 2 oz 3 Tbsp Sundried tomatoes in oil drained chopped 50g 2 oz 3 Tbsp Carrot Sourdough Bread with Seeds Menu 6 Sourdough starter 1 cup use provided sourdough...

Page 6: ...Butter 50g 2 oz 3 Tbsp Sugar 2 tsp Skimmed milk powder 2 Tbsp Salt 1 tsp Egg 2 Water 200ml cup 2 Tbsp Topping Butter 30g 2 Tbsp Mixed dried fruits 200g 7 1 oz 1 cup Soft brown sugar 100g 3 5 oz cup Ci...

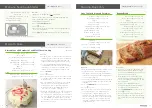
Page 7: ...until it is light and fluffy add beaten eggs then the flour and baking powder a little at a time until it is all incorporated 2 Mash bananas until smooth and stir into mixture with yogurt Add nutmeg...

Page 8: ...15 14 Troubleshooting Please refer to the Operating Instructions and Recipes booklet for full instructions how to operate additional recipes and detailed troubleshooting remedies...

Page 9: ...Panasonic North America Two Riverfront Plaza Newark NJ 07102 www panasonic com Panasonic Canada 5770 Ambler Drive Mississauga ON L4W 2T3 2211_120921...

Reviews: