background image

INT

R

O

18

RQT

7

0

6

2

Other speaker setup options

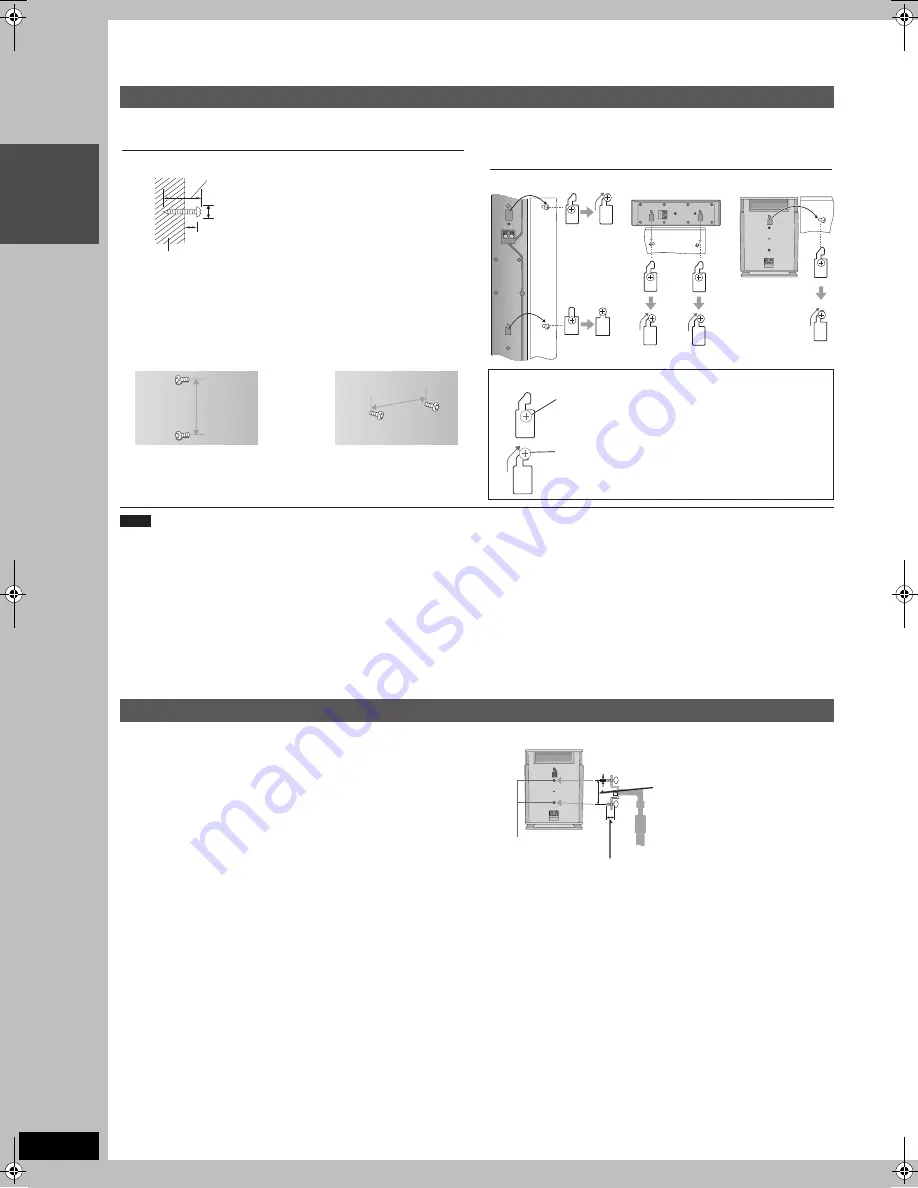
Attaching to a wall

Preparation

Ensure the stands meet these conditions before purchasing them.

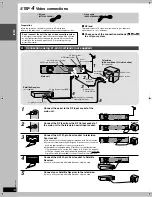
– Observe the diameter and length of the screws and the distance 

between screws as shown in the diagram.

– The stands must be able to support over 10 k

g

.

– The stands must be stable even if the speakers are in a high

position.

Fitting speaker stands (not supplied)

The wall or pillar on which the speakers are to be attached should be 
capable of supporting 10 k

g

per screw.

Consult a qualified  building contractor when attaching the speakers to
wall. Improper attachment may result in damage to the wall and 
speakers.

When mounting the front speaker to a wall, we recommend using a
string (not supplied) to prevent it from a fall (

➜ 

page 11).

Use of optional speaker cables are recommended for wall mounted
front speakers. (You can also remove the speaker cables from the
pipes supplied with this system).

5 mm, pitch 0.8 mm

60 mm

Plate thickness plus 7 to 10 mm

Speaker stand 
(not supplied)

Attach the stands
with these holes.

Two screws are needed per speaker when attaching the front
and center speakers to the wall.

Center speaker

Vertical
230 mm 

Horizontal
150 mm 

You can also attach to the center speaker in the same way.

e.g., Surround speaker

Front speakers

30–35 mm

Wall or pillar

7.5–9.4 mm

8–11 mm

1

Drive a screw (not supplied) into the wall.

2

Fit the speaker securely onto the
screw(s) with the hole(s).

Surround speakers

Center speaker

Front speakers

In this position, the speaker will likely fall if moved to
the left or right.

Move the speaker so the screw is in this position.

For your reference

Note

7062en.book  18 ページ  2003年8月27日 水曜日 午後2時56分

Summary of Contents for SC-HT1000

Page 1: ...p www panasonic co uk Before connecting operating or adjusting this product please read these instructions completely Please keep this manual for future reference Note EB on the outer packaging indicates the United Kingdom Region number supported by this unit Region numbers are allocated to DVD players and software according to where they are sold The region number of this unit is 2 The unit will ...

Page 2: ...TION DO NOT INSTALL OR PLACE THIS UNIT IN A BOOKCASE BUILT IN CABINET OR IN ANOTHER CONFINED SPACE ENSURE THE UNIT IS WELL VENTILATED TO PREVENT RISK OF ELECTRIC SHOCK OR FIRE HAZARD DUE TO OVERHEATING ENSURE THAT CURTAINS AND ANY OTHER MATERIALS DO NOT OBSTRUCT THE VENTILATION VENTS DO NOT OBSTRUCT THE UNIT S VENTILATION OPENINGS WITH NEWSPAPERS TABLECLOTHS CURTAINS AND SIMILAR ITEMS DO NOT PLACE...

Page 3: ...evision 32 Starting play from a selected item 33 Position Memory 33 Changing audio 33 Selecting an amount of time to skip Time Slip 34 Quick View 34 Skipping 30 seconds forward Manual Skip 34 Using menus to play MP3 discs 35 ON SCREEN DISPLAYS Using DISPLAY menus 36 Common procedures 36 Disc menu 36 Play menu 37 Picture menu 37 Sound menu 37 On screen messages 38 Changing the information displayed...

Page 4: ...ms the fluid contacts and may cause a fire Remove if the remote control is not going to be used for a long period of time Store in a cool dark place Note If you cannot operate the unit or television using the remote control after changing the batteries please re enter the codes television page 23 main unit page 56 Use Aim at the sensor avoiding obstacles at a maximum range of 7 m directly in front...

Page 5: ...o perform Watch a programme while you are recording it page 29 RAM Chasing Play You can watch a programme from the start while you are still recording it Simultaneous rec and play While recording you can play a programme previously recorded Time Slip You can jump back to review a piece of action you missed while recording by pressing the time slip button During playback you can specify a length of...

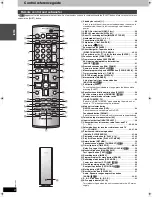
Page 6: ...6 A STATUS display button STATUS 38 B Marker button MARKER 31 Virtual rear multi rear surround button MULTI REAR SHIFT 51 C Shift button SHIFT To use the functions labeled in orange press the button while pressing SHIFT D Equalizer sound field control button EQ SFC 50 Position memory button P MEMORY SHIFT 33 E Remote control mode selector switch HOME THEATER TV 23 Switch to HOME THEATER when opera...

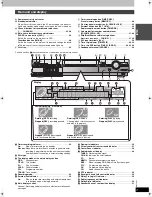
Page 7: ...ding Stopped REC recording paused Rotating REC PLAY Chasing play or simultaneous rec and play is in progress Rotating PLAY playing Stopped PLAY play paused Display Circle display e g DVD RAM Stopped STOP play stopped with the resume function Stopped STOP play stopped without the resume function Controls such as 1 function the same as the buttons on the remote control A Timer recording indicator 26...

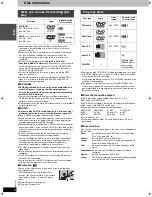
Page 8: ...ignal input Play may not be possible in some cases due the condition of the recording A DVD R recorded on this unit may not be recordable on other Panasonic DVD recorders You cannot record or edit DVD R with this unit if it was recorded with another unit whether it is finalized or not Protection RAM You can protect the contents of your discs in the following ways Cartridge protect With the write p...

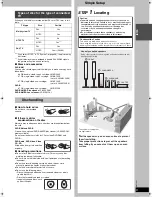
Page 9: ...r static electricity prevention liquids or any other solvent Do not use scratch proof protectors or covers Do not use the following discs Discs with exposed adhesive from removed stickers or labels rented discs etc Discs that are badly warped or cracked Irregularly shaped discs such as heart shapes Types of disc for the type of connected TV TV type Disc Yes No Multi system TV PAL Yes NTSC Yes NTSC...

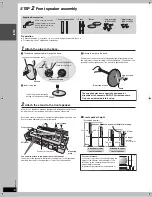
Page 10: ...he diagram on the right when attaching the stand to the upper rear or lower rear of the speaker Small screws Front speaker height Assembled diagram Mounting plate Thread the speaker cable through here Groove Lessen excess speaker cable 2 Insert the pipe Insert the pipe while slightly pulling on the speaker cable Large screws 968 mm 796 mm 625 mm Attached to upper rear of speaker Cable Rear side of...

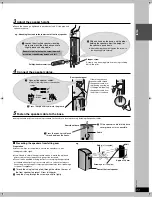
Page 11: ...nd 2 if the pipe and speaker are loose 1 Loosen the attached speaker mounting plate screw until the attached speaker is slightly loose and adjustable 2 With one hand on the base and the other holding the speaker adjust the height of the speaker up and down After adjusting the height tighten the screw on the mounting plate securely 4 Connect the speaker cables Push 1 Press the speaker cable and thr...

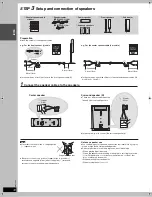
Page 12: ...turning the unit on or off Speaker cables REE1203C J 10 m REE1203A J 4 m Subwoofer _ About 10 cm About 10 cm About 10 cm _ Copper Copper Silver Silver Center speaker Surround speaker R There is no difference between the left and right surround speakers 1Connect the speaker cables to the speakers e g For the center speaker cable 4 m cable In the same way attach the sticker to the front speaker cabl...

Page 13: ...over walls and windows with a thick curtain There are no differences between the left and right front speakers and surround speakers Place each of the speakers in accordance with the stickers you just attached Subwoofer Place to the right or left of the television on the floor or a sturdy shelf so that it won t cause vibration Leave 10 cm on the right for the woofer to be effective Leave 10 cm at ...

Page 14: ...1 output to S Video page 53 so that you can play back with high picture quality and use a fully wired 21 pin Scart lead not supllied to connect the unit to the television If you wish to view pictures by RGB signals from this socket connect this unit to the appropriate Scart socket on your television Connect the AV2 21 pin Scart socket to Satellite Receiver If you are not connecting a Satellite Rec...

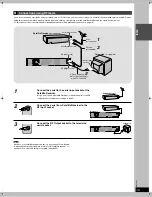
Page 15: ... the television aerial socket RF IN A AC IN RF OUT RF IN EXT LOOP 75 OUT AV4 IN R AUDIO L R AUDIO L VIDEO OPTICAL IN AM ANT FM ANT S VIDEO LOOP ANT GND VIDEO S VIDEO AV1 TV AV2 DECODER EXT Main unit RF OUT A AC IN RF OUT RF IN EXT LOOP 75 OUT AV4 IN R AUDIO L R AUDIO L VIDEO OPTICAL IN AM ANT FM ANT S VIDEO LOOP ANT GND VIDEO S VIDEO AV1 TV AV2 DECODER EXT Television If you do not have any scart l...

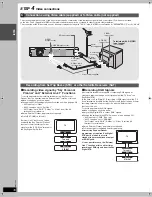
Page 16: ...f outputting RGB signals for viewing on television through a scart terminal called TV Scart on a Sky Digital STB In the case of a Sky Digital STB recording of RGB signals from the TV Scart terminals is possible but the Sky Personal Planner function for timer recording cannot be used in conjunction with the External Link1 function of this unit To record programmes by RGB signals Make connections as...

Page 17: ...both AC mains leads to enjoy all the features of this system The leads are the same Plug the Television Satellite Receiver into the household mains socket Push up Insert the aerial cables as far as possible Pull down To disconnect Press the catch and pull out Catch Tighten the terminal screw again Subwoofer Click 2Connect the system cable AM loop aerial AC IN 1 L 3 L 2 R 4 5 R A AC IN System cable...

Page 18: ... string not supplied to prevent it from a fall page 11 Use of optional speaker cables are recommended for wall mounted front speakers You can also remove the speaker cables from the pipes supplied with this system 5 mm pitch 0 8 mm 60 mm Plate thickness plus 7 to 10 mm Speaker stand not supplied Attach the stands with these holes Two screws are needed per speaker when attaching the front and cente...

Page 19: ...he screen for the Owner ID setting menu appears Press 1 and the numbered buttons to enter a 4 digit PIN number Make sure that you will remember the PIN number make a note of it 1 2 3 4 5 6 7 8 9 0 RETURN Owner ID RETURN leave Name House No Postcode PIN number 3 Press ENTER twice The cursor moves to Name ENTER 4 Press 1 5 Press 3 4 2 1 to enter your name and then press Press 4 1 enter House No and ...

Page 20: ...tions have been tuned correctly page 54 When no stations have been set confirm all connections and restart Auto Setup page 55 You can restart the Auto Setup if the screen of the unit s tuner is displayed in the stop mode Press and hold X CHANNEL and W CHANNEL on the main unit simultaneously for about 5 seconds When station names or channel numbers have not been set correctly page 55 CH VOLUME SKIP...

Page 21: ...indicating that the unit does not know which channel position to set Once you have set the channel AV input once the unit will remember it whenever you use a Video Plus Code for the station again Preparation Turn on the television and the unit Select video playback channel on the TV Switch HOME THEATER TV to HOME THEATER 1 Press VIDEO Plus 2 Enter a Video Plus number from a Satellite TV Guide for ...

Page 22: ...age 53 The aspect settings on your television may also affect the appearance Depending on the disc the aspect setting for play may already be defined CH VOLUME SKIP STOP PAUSE PLAY x1 3 SLOW SEARCH CANCEL 1 2 3 4 5 6 7 8 9 0 HOME THEATER TV STATUS MULTI REAR MARKER S POSITION F Rec C FOCUS REC MODE CHSELECT RETURN P MEMORY EQ SFC ERASE TIMER PROG CHECK AV2 OPT FUNCTIONS TOP MENU ENTER DIRECTNAVIGA...

Page 23: ...ed on the TV screen to select the desired AV input from the displayed color bars for the AV input by pressing A B C or D on the remote control C for the remote control code No 01 1 Switch HOME THEATER TV to TV 2 Press AV The last previously selected AV input indication appears on the TV screen The indications for selecting another AV input also appear but they disappear a few seconds later 3 Befor...

Page 24: ...during recording When using a DVD RAM for the first time with this unit format it to ensure accurate recording page 47 There are limitations when recording to DVD R page 8 It is not possible to record CPRM page 66 protected material onto DVD R or 2 8 GB DVD RAM discs When recording a bilingual TV broadcast onto DVD R or recording using LPCM only one of either the main channel or the sub channel ca...

Page 25: ...w the remaining time Press STATUS To cancel During recording press REC until the counter appears Recording continues For your reference This does not work during timer recordings page 26 or while using Flexible Recording left Recording stops and the set time is cleared if you press The set time is cleared if you change the recording mode or channel while recording is paused This function allows yo...

Page 26: ...tivated If appears under Name press 3 4 to select desired programme position After you have entered the information of a TV station it is kept in the unit s memory CH VOLUME SKIP STOP PAUSE PLAY x1 3 SLOW SEARCH CANCEL 1 2 3 4 5 6 7 8 9 0 HOME THEATER TV STATUS MULTI REAR MARKER S POSITION F Rec C FOCUS REC MODE CHSELECT RETURN P MEMORY EQ SFC ERASE TIMER PROG CHECK AV2 OPT FUNCTIONS TOP MENU ENTE...

Page 27: ...he unit turns on and F goes out Be sure to press F TIMER before the programme start time to put the unit on recording standby Timer recording will work only if F is displayed To cancel recording when recording has already begun Press F TIMER Recording stops Note The built in clock employs 24 hour system If the unit is not put in the timer recording standby mode at the latest 10 minutes before the ...

Page 28: ...ched so the programme failed to record The material was copy protected so it was not recorded X The programme did not complete recording because the disc is dirty or some other reason CH VOLUME SKIP STOP PAUSE PLAY x1 3 SLOW SEARCH CANCEL 1 2 3 4 5 6 7 8 9 0 HOME THEATER TV STATUS MULTI REAR MARKER S POSITION F Rec C FOCUS REC MODE CHSELECT RETURN P MEMORY EQ SFC ERASE TIMER PROG CHECK AV2 OPT FUN...

Page 29: ...ing stops To stop timer recording press F TIMER Playing from the beginning of the programme while you are recording Chasing Play CH VOLUME SKIP STOP PAUSE PLAY x1 3 SLOW SEARCH CANCEL 1 2 3 4 5 6 7 8 9 0 HOME THEATER TV STATUS MULTI REAR MARKER S POSITION F Rec C FOCUS REC MODE CHSELECT RETURN P MEMORY EQ SFC ERASE TIMER PROG CHECK AV2 OPT FUNCTIONS TOP MENU ENTER DIRECTNAVIGATOR MENU PLAY LIST MI...

Page 30: ...INK on the main unit to switch the unit over to the timer recording standby mode As long as a video picture is being transmitted by the Satellite or Digital Receiver the unit will record it The notice is displayed on the TV screen Only when Ext Link 2 is selected To delete it press ENTER To cancel the external control Press EXT LINK to stop recording or to cancel timer recording standby For your r...

Page 31: ...CTTVREC DISPLAY DVD VIDEO Plus PRO LOGIC TIME SLIP SHIFT SHIFT MANUALSKIP F A B C D 1 9 3 4 2 1 ENTER MARKER HOME THEATER TV 5 2 4 6 5 ERASE DOWN TIME SLIP REC ERASE TIMER REC FM AM DVD REC MODE EXT LINK MEMORY FM MODE RDS UP VOLUME OPEN CLOSE TUNING TIME SLIP CHANNEL PHONES 1 3 3 4 5 ERASE 4 5 2 DVD RAM PLAY e g DVD RAM Operations during play Stop Press Resume play function When this indicator on...

Page 32: ...n you have finished viewing to preserve the unit s motor and your television screen If appears on the television the operation is prohibited by the unit or disc Functions available vary from disc to disc CH VOLUME SKIP STOP PAUSE PLAY x1 3 SLOW SEARCH CANCEL 1 2 3 4 5 6 7 8 9 0 HOME THEATER TV STATUS MULTI REAR MARKER S POSITION F Rec C FOCUS REC MODE CHSELECT RETURN P MEMORY EQ SFC ERASE TIMER PR...

Page 33: ...open the disc tray RAM DVD A DVD V VCD To change the audio Press SHIFT r AUDIO While receiving a TV programme with Stereo When receiving a TV programme with the Stereo Bilingual or NICAM sound system the type of sound system in which it is broadcast is automatically indicated If NICAM OFF is selected during manual tuning page 55 MONO is always displayed While playing DVD RAM or Video CD LR L R For...

Page 34: ...R mode RAM DVD R Play restarts from approximately 30 seconds later Convenient when you want to skip commercials etc During play Press MANUAL SKIP Note If the start of the next programme is within 30 seconds of the point you skipped from play restarts from the beginning of that programme CH VOLUME SKIP STOP PAUSE PLAY x1 3 SLOW SEARCH CANCEL 1 2 3 4 5 6 7 8 9 0 HOME THEATER TV STATUS MULTI REAR MAR...

Page 35: ... all groups Using the tree screen to find a group Note Discs must conform to ISO9660 level 1 or 2 and Joliet except for extended formats This unit is compatible with multi session but if there are a lot of sessions it takes more time for play to start Keep the number of sessions to a minimum to avoid this If you play a MP3 track that includes still picture data it will take some time before the mu...

Page 36: ...ECTTVREC DISPLAY DVD VIDEO Plus PRO LOGIC TIME SLIP SHIFT SHIFT MANUALSKIP F A B C D DISPLAY CANCEL 3 4 2 1 ENTER Numbered buttons Disc Picture Sound Play Soundtrack Subtitle 1 Audio channel OFF L R Î Digital 2 0 ch Menu Item Setting Disc menu Item Content Soundtrack Soundtrack language DVD A DVD V See A below Audio attribute RAM DVD R DVD A DVD V See B below Karaoke vocals on and off Karaoke DVD ...

Page 37: ...tray To mark a position Press 2 1 to select an asterisk and press ENTER To recall a marker Press 2 1 to select a marker number and press ENTER To clear markers Press 2 1 to select a marker number and press CANCEL RAM DVD R When marking positions 11 and above 1 Press 2 1 to highlight 1 10 2 Press 3 4 to select 11 20 Note You cannot use this feature if you are using a play list RAM protection cartri...

Page 38: ...ding PAUSE Recording paused PLAY Playing Playing paused 6 Rewinding 5 Fast forwarding E Reverse slow motion D Slow motion c TV audio type being received The broadcasted programme sound system NICAM MONO is displayed automatically d Selected audio type e The current date and time f Elapsed recording time recording mode g Elapsed play time of a programme playing mode at the time of recording h Avail...

Page 39: ...ed there is nothing recorded on the disc CH VOLUME SKIP STOP PAUSE PLAY x1 3 SLOW SEARCH CANCEL 1 2 3 4 5 6 7 8 9 0 HOME THEATER TV STATUS MULTI REAR MARKER S POSITION F Rec C FOCUS REC MODE CHSELECT RETURN P MEMORY EQ SFC ERASE TIMER PROG CHECK AV2 OPT FUNCTIONS TOP MENU ENTER DIRECTNAVIGATOR MENU PLAY LIST MIX 2CH FRAME REC TEST MUTING AUDIO SW LEVEL FM AM AV INPUTSELECT DIRECTTVREC DISPLAY DVD ...

Page 40: ...ce Press and press ENTER To erase a character 1 Press 3 4 2 1 to select the character you want to erase in the title field 2 Press You can also erase characters by selecting ERASE and pressing ENTER Note The full title is shown in the Properties screen pages 42 and 44 but if you enter a long title only part of it is shown in the programme list or play list screen If you enter a long title only par...

Page 41: ...ng the actual number of play lists that can be recorded may be less than that specified in this manual 1 While stopped Press PLAY LIST 2 Press 3 4 to select the play list and press ENTER You can also select play lists with the numbered buttons e g 5 0 5 15 1 5 To stop play list play Press Creating play list CH VOLUME SKIP STOP PAUSE PLAY x1 3 SLOW SEARCH CANCEL 1 2 3 4 5 6 7 8 9 0 HOME THEATER TV ...

Page 42: ...to the previous screen Press RETURN CH VOLUME SKIP STOP PAUSE PLAY x1 3 SLOW SEARCH CANCEL 1 2 3 4 5 6 7 8 9 0 HOME THEATER TV STATUS MULTI REAR MARKER S POSITION F Rec C FOCUS REC MODE CHSELECT RETURN P MEMORY EQ SFC ERASE TIMER PROG CHECK AV2 OPT FUNCTIONS TOP MENU ENTER DIRECTNAVIGATOR MENU PLAY LIST MIX 2CH FRAME REC TEST MUTING AUDIO SW LEVEL FM AM AV INPUTSELECT DIRECTTVREC DISPLAY DVD VIDEO...

Page 43: ...elect Exit and press ENTER The re edited scene replaces the old one 6 Press 3 4 2 1 to select the scene and press ENTER 7 Press 2 to select Yes and press ENTER The selected scene is erased from the play list To erase other scenes Repeat steps 6 and 7 Note The play list itself is erased if you erase all the scenes in it Note You can use basic functions like search and slow motion page 31 You can us...

Page 44: ...H VOLUME SKIP STOP PAUSE PLAY x1 3 SLOW SEARCH CANCEL 1 2 3 4 5 6 7 8 9 0 HOME THEATER TV STATUS MULTI REAR MARKER S POSITION F Rec C FOCUS REC MODE CHSELECT RETURN P MEMORY EQ SFC ERASE TIMER PROG CHECK AV2 OPT FUNCTIONS TOP MENU ENTER DIRECTNAVIGATOR MENU PLAY LIST MIX 2CH FRAME REC TEST MUTING AUDIO SW LEVEL FM AM AV INPUTSELECT DIRECTTVREC DISPLAY DVD VIDEO Plus PRO LOGIC TIME SLIP SHIFT SHIFT...

Page 45: ...e point you want to divide the programme To confirm the division point Press 3 4 to select Preview and press ENTER Play will begin from a point 10 seconds prior to and after the division point To change the division point Restart play and press 3 4 to select Divide then press ENTER at the point you want to change 6 Press 3 4 to select Exit and press ENTER 7 Press 2 to select Divide and press ENTER...

Page 46: ...et up process Press RETURN CH VOLUME SKIP STOP PAUSE PLAY x1 3 SLOW SEARCH CANCEL 1 2 3 4 5 6 7 8 9 0 HOME THEATER TV STATUS MULTI REAR MARKER S POSITION F Rec C FOCUS REC MODE CHSELECT RETURN P MEMORY EQ SFC ERASE TIMER PROG CHECK AV2 OPT FUNCTIONS TOP MENU ENTER DIRECTNAVIGATOR MENU PLAY LIST MIX 2CH FRAME REC TEST MUTING AUDIO SW LEVEL FM AM AV INPUTSELECT DIRECTTVREC DISPLAY DVD VIDEO Plus PRO...

Page 47: ...ts on the disc including computer data DVD R DVD R recorded on this unit only You can play DVD R on compatible DVD players by finalizing them on this unit effectively making them into DVD Video that complies with DVD Video standards 4 Press 2 to select Yes and press ENTER 5 Press 2 to select Start and press ENTER Finalizing starts A message appears when finalizing is finished 6 Press ENTER to comp...

Page 48: ... 2 for AM automatic presetting ERROR is displayed Presetting was unsuccessful Preset manually Main unit only 1 Tune to the station left 2 Press MEMORY 3 While MEMO is flashing Press X W CHANNEL to select a channel and press MEMORY The station occupying a channel is erased if another station is preset in that channel 1 Press FM AM to select FM or AM 2 Press the numbered buttons or W X CH to select ...

Page 49: ...ers and the television To mute sound from this unit s speakers above To cancel Press and hold MUTING and select A1 MUTE ON 1 Reduce the volume and connect the headphones not included Headphone plug type 3 5 mm stereo 2 Adjust the headphone volume with VOLUME DOWN UP Audio is automatically switched to stereo 2 channel Note Do not play your headphones at a high volume Hearing experts advise against ...

Page 50: ... Note This does not work when playing multi channel Dolby Digital Press EQ SFC to select a setting Each time you press the button FLAT Canceled no effect is added factory preset HEAVY Adds punch to rock CLEAR Clarifies higher sounds SOFT For background music DISCO Reverberates sound to make you feel like you were in a disco LIVE Makes vocals more alive HALL Expands sound to make you feel like you ...

Page 51: ...utton SUB W 1 SUB W 2 SUB W 3 SUB W 4 factory preset Adjust the level of the speakers so they are the same apparent level as the front speakers where you would normally be sitting and listening Preparation Press DVD to select DVD CD as the source 1 Press SHIFT r TEST to output a test signal Lch Front left Cch Center Rch Front right RSch Right surround LSch Left surround 2 Press VOLUME r or s to se...

Page 52: ...d to show the rating is locked 3 Press ENTER to confirm the 4 digits Setting ratings When level 8 is selected 8 No Limit All DVD Video can be played 1 to 7 Prohibits play of DVD Video with corresponding ratings recorded on them 0 Lock All Prohibits play of all DVD Video Changing ratings When level 0 7 is selected Unlock Recorder Change Password Change Level Temporary Unlock If you insert a DVD Vid...

Page 53: ... time the channel is changed with W X CH Off The Channel Guide will not appear FL Display Changes the brightness of the unit s display and the volume dial LED goes on or off Bright Dim Connection TV Aspect page 22 Norm 4 3 Wide 16 9 TV System page 58 PAL NTSC Norm 4 3 TV Settings DVD Video Select how DVD Video widescreen picture is shown on a 4 3 standard aspect television Pan Scan page 66 Video r...

Page 54: ...programme position Press C and then press 3 4 to select the new programme position to which you want to assign the TV station Press ENTER Note Setting can take up to 3 minutes approximately If downloading of the setup data has been performed only Delete appears For your reference If you have performed Manual Tuning to enter TV stations the indication may appear under Name on the display when progr...

Page 55: ... number of the desired programme position and press ENTER Name To enter or change the name of a TV station Press 3 4 2 1 to enter station name and press ENTER If the station name needs a blank space select the blank between Z and Channel To enter newly available TV stations or change the channel number of an already tuned TV station Press the numbered buttons to enter the channel number of the des...

Page 56: ...s 3 4 to select Settings and press 1 2 Press 3 4 to select Shipping Condition and press ENTER 3 Press 2 1 to select Yes and press ENTER 4 Press 2 1 to select Yes and press ENTER Changing the remote control code CH VOLUME SKIP STOP PAUSE PLAY x1 3 SLOW SEARCH CANCEL 1 2 3 4 5 6 7 8 9 0 HOME THEATER TV STATUS MULTI REAR MARKER S POSITION F Rec C FOCUS REC MODE CHSELECT RETURN P MEMORY EQ SFC ERASE T...

Page 57: ...ly ENTER store RETURN leave SELECT 0 9 No Auto Clock Setting Clock Automatic On Time Date 15 45 39 1 8 2003 ENTER RETURN CHANGE Automatic clock setting completed ENTER access RETURN leave Language code list Input the code with numbered buttons Abkhazian 6566 Afar 6565 Afrikaans 6570 Albanian 8381 Ameharic 6577 Arabic 6582 Armenian 7289 Assamese 6583 Aymara 6588 Azerbaijani 6590 Bashkir 6665 Basque...

Page 58: ...ing to a NTSC television Select to record NTSC input from other equipment Television programmes cannot be recorded properly The confirmation screen appears 4 Press 2 to select Yes and press ENTER To change the setting all at once PAL NTSC While stopped keep pressing and OPEN CLOSE on the main unit for 5 or more seconds If the playback picture on the TV screen from a Video CD isn t shown correctly ...

Page 59: ...al use a stereo monaural conversion cable not included By using the S video cable instead of the yellow video cable you may make recordings of higher picture quality CH VOLUME SKIP STOP PAUSE PLAY x1 3 SLOW SEARCH CANCEL 1 2 3 4 5 6 7 8 9 0 HOME THEATER TV STATUS MULTI REAR MARKER S POSITION F Rec C FOCUS REC MODE CHSELECT RETURN P MEMORY EQ SFC ERASE TIMER PROG CHECK AV2 OPT FUNCTIONS TOP MENU EN...

Page 60: ...not record when using the optical digital audio cable but you can record in analog when using the 21 pin Scart cable Make certain to also connect to the AV2 Scart terminal when using the OPTICAL IN terminal connection Make the following connections in combination with connections on the left Connecting a satellite receiver or digital receiver CH VOLUME SKIP STOP PAUSE PLAY x1 3 SLOW SEARCH CANCEL ...

Page 61: ...larity It reduces the peak level in loud scenes without affecting the sound field Press and hold for about 2 seconds SHIFT r AUDIO Each time you do this A DR COMP OFF factory preset The original dynamic range l l DR COMP STD The level recommended for household viewing l a DR COMP MAX The maximum allowable compression recommended for night viewing The precision parts in this unit are readily affect...

Page 62: ...unit s region number This unit can only play discs with the region numbers compatible with this unit 2 ALL or including the number 2 Cover page This is a non recordable disc Cannot record This disc is not properly formatted Formatting is necessary using DISC INFORMATION The unit cannot record on the disc you inserted Insert a DVD RAM or unfinalized DVD R You inserted an unformatted DVD RAM Format ...

Page 63: ...it Remove obstacles from between the remote control and main unit The unit is on standby to make a timer recording F on the unit s display is on If appears on the television the operation is prohibited by the unit or disc If the unit is not operating at all press F TIMER to switch the unit to standby then press F TIMER again to turn the unit on The unit may not be operating correctly due to lightn...

Page 64: ...gramming 47 9 A part or whole of a recorded programme has been lost If there is a power failure or the plug is disconnected from the household mains socket while recording or editing the programme may be lost or the disc may become unusable We cannot offer any guarantee regarding lost programmes or discs You will have to format the disc or use a new disc The REC button does not work The selector i...

Page 65: ...pe You cannot change the DVD Audio audio type if the software producer has restricted play in stereo 33 Cannot switch audio during stereo or NICAM broadcasts You cannot change the audio type when a DVD R is in the disc tray It is not possible to switch the audio when the recording mode is XP and LPCM has been selected in the Sound menu Audio Mode for XP Recording Select M1 or M2 from Bilingual Aud...

Page 66: ...ears in an aspect ratio of 16 9 PDC PDC Programme Delivery Control Programme Delivery Control adjusts the start and stop time of a timer recording automatically to ensure the recording starts and finishes in line with the programme broadcast This is useful when a programme over runs the published times The station must be transmitting PDC and the exact time must be set for PDC to work The unit det...

Page 67: ...P only Number of channels Recording 2 channels Playback 5 1 channels FL FR Center SL SR Subwoofer SPEAKER SECTION Front speakers SB PF1000 Type 2 way 2 speaker system Bass ref Woofer 6 5 cm CONE type Tweeter 6 cm RING SHAPED DOME type Impedance 6 Input power IEC 60 W Max Output sound pressure level 82 dB W 1 0 m Frequency range 90 Hz 50 kHz j16 dB 100 Hz 45 kHz j10 dB Dimensions WtHtD 240k1138 Max...

Page 68: ...on 31 RGB 66 Seat Position 51 SETUP menu 52 58 Shipping Condition 52 Simultaneous rec and play 29 Sound Field Control 50 Soundtrack 36 Speaker delay time 58 Speaker level adjustment 51 Subtitle 36 Subwoofer level 51 Television operation 23 Time Slip 29 34 Timer recording 26 28 Tuning Auto Setup 20 55 Download 19 55 Manual 54 TV Aspect 22 TV System 58 VIDEO Plus 26 Virtual Rear Surround 51 Manufact...

Reviews: