


28
VQT2S28
Other devices
Using the iPod/iPhone
Preparation
≥
Before connecting/disconnecting the iPod/iPhone, turn the
main unit off or reduce the volume of the main unit to its
minimum.
≥
Make sure that the video cable connection is made to view
photos/videos from the iPod/iPhone.
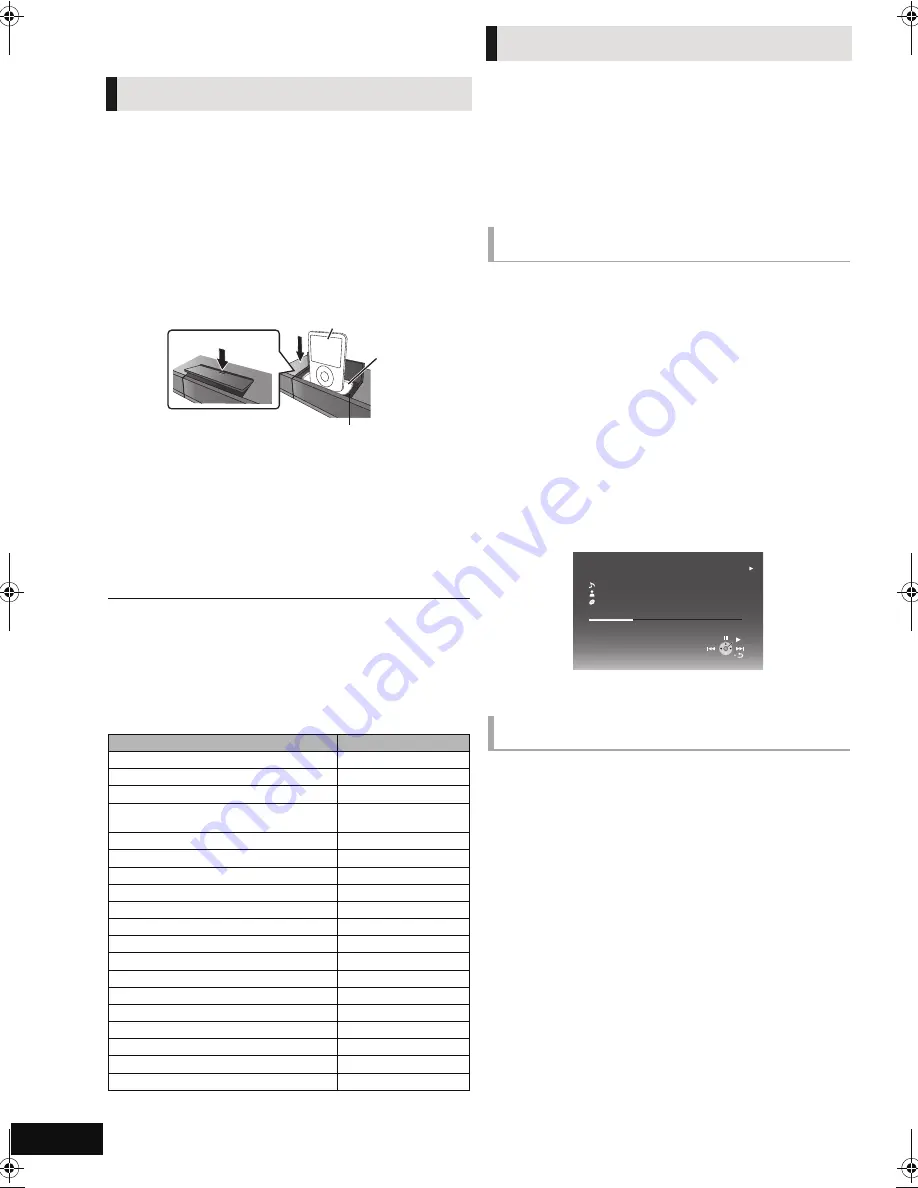
1
Push
#
to open the iPod/iPhone lid.
2
Connect the iPod/iPhone (not included)
firmly.
About recharging the battery
≥
iPod/iPhone will start recharging regardless of whether this unit is on or off.
≥
“IPOD
¢
” will be shown on the main unit’s display during iPod/iPhone
charging in main unit standby mode.
≥
Once fully recharged, additional recharging will not occur.
Compatible iPod/iPhone (as of December 2009)
≥
Compatibility depends on the software version of your iPod/iPhone.
Preparation
≥
Make sure that the “IPOD” source is selected. Press [iPod] to
select the source.
≥
To view photos/videos from the iPod/iPhone
Operate the iPod/iPhone menu to make the appropriate
photo/video output settings for your TV.
≥
To display the picture, turn on the TV and select the
appropriate video input mode.
To use the iPod touch/iPhone features
1
Press the Home button on the iPod touch/iPhone.
2
Select the iPod touch/iPhone features on the touch screen
to operate.
1
Press [iPod] to select “IPOD”.
2
Press [STATUS] several times to select the
music menu or videos menu.
3
Press [
3
,
4
] to select an item and press
[OK].
≥
Repeat this step until the selected title starts playback.
≥
Press [
2
,
1
] to display the previous or next page.
e.g., music playback screen
To exit, press [TOP MENU/DIRECT NAVIGATOR].
1
Press [iPod] to select “IPOD”.
2
Press [STATUS] several times to select
“ALL” on the unit’s display.
3
Switch the TV input to video in.
4
Play a slideshow on your iPod/iPhone.
The picture will be displayed on your TV.
You can use the remote control to operate the iPod/iPhone
menu.
The operation may vary among iPod/iPhone models.
≥
[
3
,
4
]: To navigate menu items
≥
[OK]: To go to the next menu.
≥
[RETURN]: To return to the previous menu.
iPod/iPhone Connection
A
Dock adapter (not included)
≥
Attach the dock adapter until firmly fitting into the
dock. The adapter should be supplied with your
iPod/iPhone for the stable use.
If you need an adapter, consult your iPod/iPhone
dealer.
B
Dock for iPod/iPhone
Name
Memory size
iPhone 3GS
16 GB, 32 GB
iPhone 3G
8 GB, 16 GB
iPod nano 5th generation (video camera)
8 GB, 16 GB
iPod touch 2nd generation
8 GB, 16 GB, 32 GB,
64 GB
iPod classic
120 GB, 160 GB (2009)
iPod nano 4th generation (video)
8 GB, 16 GB
iPod classic
160 GB (2007)
iPod touch 1st generation
8 GB, 16 GB, 32 GB
iPod nano 3rd generation (video)
4 GB, 8 GB
iPod classic
80 GB
iPod nano 2nd generation (aluminum)
2 GB, 4 GB, 8 GB
iPod 5th generation (video)
60 GB, 80 GB
iPod 5th generation (video)
30 GB
iPod nano 1st generation
1 GB, 2 GB, 4 GB
iPod 4th generation (colour display)
40 GB, 60 GB
iPod 4th generation (colour display)
20 GB, 30 GB
iPod 4th generation
40 GB
iPod 4th generation
20 GB
iPod mini
4 GB, 6 GB
Main unit
iPod/iPhone
1
2
iPod/iPhone Playback
Enjoy music/video
Enjoy photos
iPod
Ronaldo
-2:30
Good morning
45 of 1230
Happy days
Shuffle (Albums)
Repeat (All)
1:00
SCBT222EBEG_VQT2S28-B.book 28 ページ 2010年2月12日 金曜日 午後1時4分
Summary of Contents for SC-BT222
Page 47: ...Reference 47 VQT2S28 ...


