


10
Change the order of the Channel
positions and the names of the
TV station
Press
|MENU|
Select [Tuning]
Access by pressing
|ENTER|
Access [Manual] by pressing
|ENTER|
Select the Channel to be changed
Access by pressing
|ENTER|
Select the input field for [POS]
Input the Channel position
Store the setting by pressing
|ENTER|
Select [Name]
Select the input field
Input the name of the TV station
selecting the first letter
Select the next letter
Select the next letter
.
To input an empty character, select the
blank character between Z and * .
Store the setting by pressing
|ENTER|
Press
|EXIT|
VCR Tuning
Setting the sound system
This system can receive transmissions which
are broadcast with
NICAM sound
.
This is a sound system with two sound channels
which broadcasts either stereo sound
or two separate mono channels
(M1 and M2).
Press
|MENU|
Select [Tuning]
Access by pressing
|ENTER|
Access [Manual] by pressing
|ENTER|
Select the channel
Access by pressing
|ENTER|
Setting a new Channel
Add / Delete / Move
a Channel on the list
Press
|MENU|
Select [Tuning]
Access by pressing
|ENTER|
Access [Manual] by pressing
|ENTER|
Search for a Channel position
(for rapid search, keep the cursor button
pressed down), [Add] between Channels
using the
button
and add by pressing
|ENTER|
Access by pressing
|ENTER|
Select the
new Channel
Store by pressing
|ENTER|
Select [Tuning] menu by pressing
|MENU|
Select the
Channel to be deleted
Select [Delete] by pressing the
button
Delete by pressing
|ENTER|
Select the
Channel to be moved
Select [Move] by pressing the
button
Move the Channel to the new position
Store this new position
by pressing
|ENTER|
Press
|EXIT|
Restart Automatic settings
Press
|MENU|
Select [Tuning]
Access by pressing
|ENTER|
Select [Auto - Setup Restart]
Press
|ENTER|
Confirm by pressing
|ENTER|
Restoring the original settings
of the VCR (Shipping condition)
Press
|MENU|
Select [Tuning]
Access by pressing
|ENTER|
Select [Shipping condition]
Press
|ENTER|
Confirm by pressing
|ENTER|
Disconnect the unit from AC mains
for one minute.
Note
(Audio mode only for NV-VHD1EE): If there is no sound or if it is
distorted, you can try to adjust the [Audio mode] by selecting [ I ], [DK] or [BG]
To set generally the RFC system the same as TV system of the connected TV.
|MENU|,
[Other settings]
,
|ENTER|
, [RFC system]
, select the input field
,
select the setting
,
|ENTER|, |EXIT|
Select [Mono]
Select the input field
Select the sound setting [ON] or [OFF]
Store by pressing
|ENTER|
Press
|EXIT|
Select the setting [Mono] to [ON] if you want
to record a normal mono sound on the
Hi-Fi tracks of the VCR, for example, if the
stereo sound is distorted through the reception
conditions.
Note:
Distorted pictures, you can adjust with
[Fine tuning] and [Video system].
RQTD0035-A
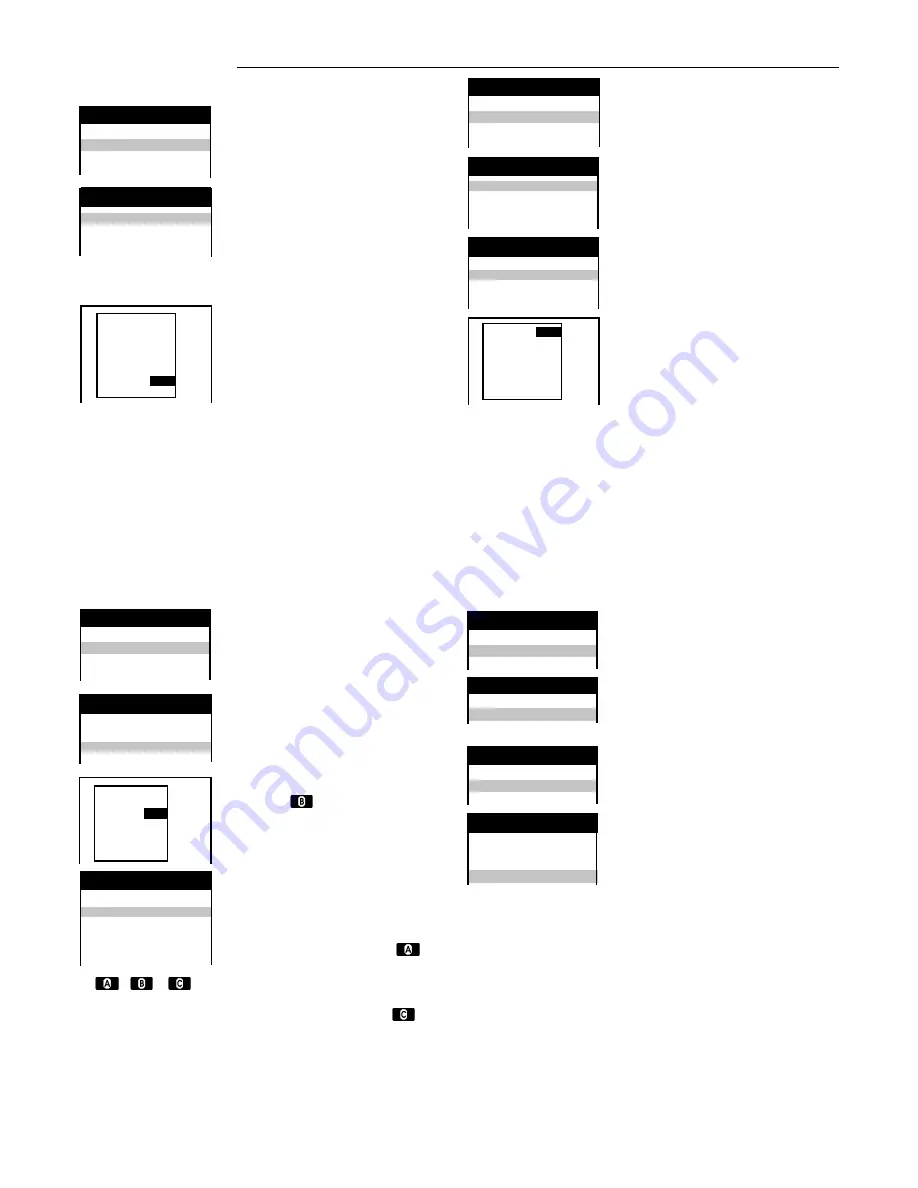
Panasonic VCR
Main menu
Panasonic VCR
Tuning
Pos.
Name
Ch
33
***33
37
34
- - - - -
- - -
35
***35
23
Delete Add Move
Timer recording
Tuning
Clock setting
Other settings
Panasonic VCR
Main menu
Panasonic VCR
Tuning
Manual
Auto - Setup Restart
Download
Shipping condition
Panasonic VCR
Tuning
Pos.
Name
Ch
33
***33
37
34
- - - - -
- - -
35
***35
23
Panasonic VCR
Main menu
Timer recording
Tuning
Clock setting
Other settings
Panasonic VCR
Tuning
Manual
Auto - Setup Restart
Download
Shipping condition
Panasonic VCR
Tuning
Manual
Auto - Setup Restart
Panasonic VCR
Tuning
Manual
Auto - Setup Restart
Download
Shipping condition
Panasonic VCR
Main menu
Timer recording
Tuning
Clock setting
Panasonic VCR
Main menu
Timer recording
Tuning
Clock setting
Pos
: 33
Name
: ***33
Channel
: 124
Fine tuning
: AUTO
Decoder
: OFF
Video system : PAL
Mono
:
ON
Audio mode : BG
Pos
:
34
Name
: - - - - -
Channel
:
2
Fine tuning : AUTO
Decoder
: OFF
Video system: PAL
Mono
: OFF
Panasonic VCR
Tuning
Pos.
Name
Ch
1
ARD
2
2
ZDF
3
3
N3
8
Pos
:
1
Name
: ARD
Channel
:
2
Fine tuning : AUTO
Decoder
: OFF
Video system: PAL
Mono
: OFF
Timer recording
Tuning
Clock setting
Other settings


