background image

199

DVQP1285

Using Menu Functions

Menu list

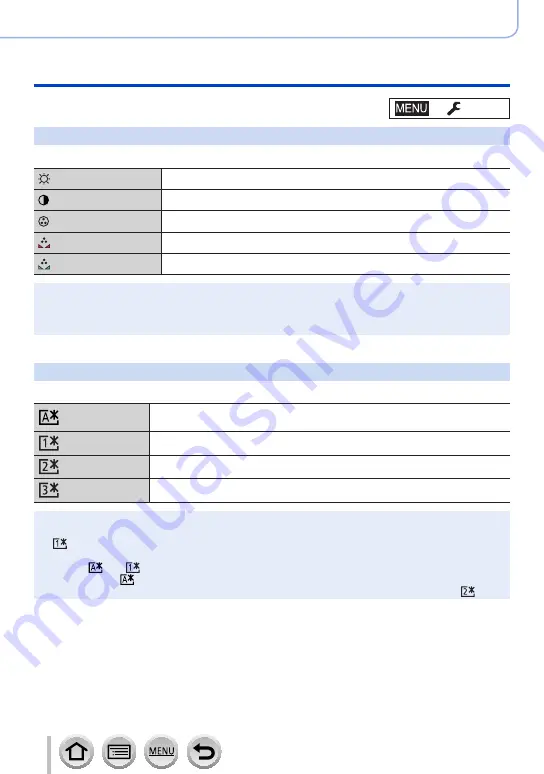
[Monitor Display] / [Viewfinder]

Adjust brightness and color of the monitor or viewfinder.

[Brightness]

Adjusts the brightness.

[Contrast]

Adjusts the contrast.

[Saturation]

Adjusts the vividness of colors.

[Red Tint]

Adjusts red hues.

[Blue Tint]

Adjusts blue hues.


It will adjust the monitor when the monitor is in use, and the viewfinder when the viewfinder is in 

use.


Some subjects may look different from their actual appearance, but the recorded picture will not 

be affected.

[Monitor Luminance]

Sets the monitor brightness according to the ambient light level.

(Auto)

The brightness is adjusted automatically depending on how bright it is 

around the camera.

(Mode 1) 

The brightness is increased.

(Mode 2) 

The brightness is standard.

(Mode 3)

The brightness is decreased.


Some subjects may look different from their actual appearance, but the recorded picture will not 

be affected.


[   ] returns to ordinary brightness if there is no operation for 30 seconds when recording. (Press 

any button or touch the screen to make the screen brighter again.)


Setting [   ] or [   ] reduces the operating time.


Cannot select [   ] during playback.


When the AC adaptor (optional) and DC coupler (optional) are used, the initial setting is [   ].

 → 

 [Setup]

Summary of Contents for Lumix DC-ZS70K

Page 1: ...e displays 283 Please read these instructions carefully before using this product and save this manual for future use Q A Troubleshooting 285 Finding the information you need 2 Contents 5 Contents by...

Page 2: ...m Contents 5 Search from the list of function names Contents by Function 11 Search from Names and Functions of Main Parts 17 Search from List of monitor viewfinder displays 277 Search from the list of...

Page 3: ...u list Click this icon to return to the previously displayed page Recording mode icons Recording mode In Recording modes that show icons in black you can select and execute indicated menus and functio...

Page 4: ...00 Indicates the reference page Click to go to the corresponding page Click to view the description on the next page Steps for setting a menu item are described as follows Example To change the Qualit...

Page 5: ...VF button Recording pictures using the viewfinder 34 Zoom Lever Use Zoom 35 Shutter button Taking pictures 36 Motion picture button Recording motion pictures 37 Mode dial Select the recording mode 37...

Page 6: ...7 Taking pictures by setting the shutter speed Shutter Priority AE Mode 68 Taking pictures by setting the aperture value and shutter speed Manual Exposure Mode 69 Checking the effects of the aperture...

Page 7: ...e White Balance 110 4K Photo and Drive Settings Recording with the 4K Photo function and selecting pictures to save 114 Recording with the 4K Photo function 114 Selecting pictures from 4K burst file a...

Page 8: ...cus while recording motion pictures Continuous AF 153 Pan or zoom while recording with the camera in a fixed position 4K Live Cropping 154 Taking still pictures while a motion picture is being recorde...

Page 9: ...s recorded with Snap Movie according to your preference on a smartphone 237 Displaying still pictures on a TV 238 Sending pictures 239 Sending pictures to a smartphone 242 Wireless printing 243 Sendin...

Page 10: ...l pictures and motion pictures on your PC 267 Downloading software 268 Copying still pictures and motion pictures 270 Storing recorded still pictures and motion pictures in the recorder 272 Printing 2...

Page 11: ...osure Compensation 107 ISO sensitivity 108 Exposure Bracket 134 Metering Mode 174 Picture Quality and Color Tone White Balance 110 Photo Style 169 Filter Settings 171 Picture Size 173 Quality 173 i Dy...

Page 12: ...AW Processing 210 4K PHOTO Bulk Saving 212 Light Composition 213 Clear Retouch 214 Resize 218 Cropping 219 Playback Adding information Location Logging 207 Title Edit 215 Text Stamp 216 Image settings...

Page 13: ...App 228 WPS Push Button 256 258 Direct connection 258 Image App Remote recording 233 Saving images 234 Sending images 235 242 Sending and adding location information 235 Combining motion pictures rec...

Page 14: ...come into contact with the camera Avoid using the camera under the following conditions which present a risk that sand water or foreign material may enter the camera through the lens or openings aroun...

Page 15: ...e camera or card prevent recording Carefully observe copyright laws Unauthorized use of recordings that contain works with copyright for purposes other than personal use is prohibited under copyright...

Page 16: ...re the camera was purchased For details on the accessories refer to Basic Owner s Manual Battery Pack is indicated as battery pack or battery in the text SD Memory Card SDHC Memory Card and SDXC Memor...

Page 17: ...tereo microphone 32 185 Be careful not to cover the microphone with your finger Doing so may make sound difficult to record 7 Viewfinder 34 277 8 Diopter adjustment dial 34 9 Eye sensor 34 10 Strap ey...

Page 18: ...ISP button 39 27 HDMI socket 264 28 USB CHARGE socket 22 270 273 29 Card Battery door 21 26 30 Release lever 21 26 31 DC coupler cover 276 When using an AC adaptor ensure that the Panasonic DC coupler...

Page 19: ...19 DVQP1285 Preparations Attaching the Hand Strap We recommend attaching the hand strap when using the camera to prevent it from dropping Strap eyelet...

Page 20: ...counterfeit battery packs which look very similar to the genuine products are made available to purchase in some markets Some of these battery packs are not adequately protected with internal protecti...

Page 21: ...t the battery in the correct orientation Lever To remove battery Move the lever in the card battery compartment in the direction of the arrow Always use genuine Panasonic batteries If you use other ba...

Page 22: ...d AC adaptor supplied To the electrical outlet Computer Getting ready Turn on the computer When charging the camera connect the USB connection cable supplied to the USB CHARGE socket USB CHARGE socket...

Page 23: ...ra and notebook connected for a long period of time Always connect the USB connection cable to the USB connector on your computer Do not connect the USB connection cable to the USB connector of the mo...

Page 24: ...malfunction of the camera Do not use any other AC adaptors except the supplied one Do not use a USB extension cable The AC adaptor supplied and the USB connection cable supplied are dedicated accessor...

Page 25: ...28M 60p 4K 100M 30p Available recording time Approx 100 min Approx 100 min Approx 90 min Actual available recording time Approx 50 min Approx 50 min Approx 45 min The time you can actually record whe...

Page 26: ...tion of a card Insert the card all the way firmly until it clicks 3 Close the card battery door and slide the release lever to the LOCK position OPEN LOCK To remove card Press the center of the card P...

Page 27: ...eed class Label example AVCHD All Class 4 or higher MP4 FHD HD MP4 4K High Speed Video 86 UHS Speed Class 3 When recording in 4K Photo Post Focus UHS Speed Class 3 Latest information http panasonic jp...

Page 28: ...formatted with a computer or another device Estimated recording capacity number of pictures recording time The number of pictures you can take and the recording time vary in proportion to card capaci...

Page 29: ...60i Recording stops when the continuous recording time exceeds 29 minutes and 59 seconds MP4 motion pictures with a Rec Quality size of FHD or HD Files are split into smaller motion picture files for...

Page 30: ...displayed 3 Press to select the language and press MENU SET The Please set the clock message appears 4 Press MENU SET 5 Press to select the items year month day hour minute and press to set Home time...

Page 31: ...Time If the clock is not set the correct date cannot be printed when you order a photo studio to print the picture or when you stamp the date on the pictures with Text Stamp Changing time settings 1 S...

Page 32: ...re your footing is stable and there is no danger of colliding with another person or object in the vicinity while taking pictures Flash AF Assist Lamp Microphone Hand strap Speaker About the direction...

Page 33: ...ction Open and close with your finger on point When not using this camera close the monitor completely back to the original position Recording from a variety of angles The monitor can be rotated to su...

Page 34: ...ns to monitor display When Eye Sensor AF in the Custom menu is set to ON the camera adjusts the focus automatically as the eye sensor is activated Even when Eye Sensor AF is set and the camera automat...

Page 35: ...adjust the area of a picture to be taken using the zoom or control ring You can also use the zoom function from the touch panel 145 For details about zoom types and use refer to 142 Zoom lever Control...

Page 36: ...flash 2 Press the shutter button fully push the button all the way and take the picture Pictures can be taken only when the image is correctly focused as long as the Focus Release Priority 188 is set...

Page 37: ...the motion picture button again to end recording Mode dial Select the recording mode 1 Set to the desired recording mode Rotate the mode dial slowly to select the desired mode Intelligent Auto Mode 5...

Page 38: ...ent 3 Picture effects change Aperture adjustment 4 Shutter speed adjustment 5 Picture effects change 79 1 When Manual Focus is set the control ring is assigned to focus adjustment 104 2 Press to switc...

Page 39: ...ion on the screen is not displayed any longer because no operation was performed for some time press the DISP button or touch the screen to display the information again During recording You can switc...

Page 40: ...uge indication as a reference The yellow line indicates the current angle Correct the angle of the camera so that it matches the white line Tilting up or down In this case it is facing upward Tilting...

Page 41: ...display Histogram display Without information Highlight 100 0001 AM10 00 DEC 1 2017 100 0001 1 98 R G B Y Without information This screen is displayed only when Highlight 191 in the Custom menu is set...

Page 42: ...the touch screen spread pinch out your 2 fingers to zoom in and pinch pinch in your 2 fingers to zoom out Touch the screen with the clean and dry finger If you use a commercially available monitor pro...

Page 43: ...u to focus and record still pictures simply by touching the subjects that appear on the screen 1 Touch 2 Touch The icon changes to and you can now proceed with touch shutter recording 3 Touch the subj...

Page 44: ...zation position is displayed Metering Mode is set to which is used exclusively for the Touch AE 3 Touch the subject you want to optimize the brightness for Touching Reset will bring the brightness opt...

Page 45: ...d picture quality and other settings Custom 186 Operation of the unit such as displaying of the screen and button operations can be set up according to your preferences Setup 196 You can perform setti...

Page 46: ...ress to select the setting and press MENU SET Selected setting Settings The setting methods vary depending on the menu item With touch screen operations Touch the setting to set 4 Press Q MENU button...

Page 47: ...ttings cannot be selected depending on the mode or display style the camera is in 1 Press Q MENU button 2 Rotate the control dial to select a menu item and press or The menu item can also be selected...

Page 48: ...Setting in PLAY mode 2 Press to select the function button you want to assign a function to and press MENU SET 3 Press to select the function you want to assign and press MENU SET For details on the f...

Page 49: ...AE 71 Touch AE 44 Level Gauge 40 Fn6 Focus Area Set Photo Style 169 Filter Effect 171 Aspect Ratio 172 Picture Size 173 Quality 173 Sensitivity 108 White Balance 110 AF Mode 92 AFS AFF AFC 91 Meterin...

Page 50: ...ns during playback You can directly set an assigned function to a selected image by pressing the function button during playback Example When Fn2 is set to Favorite 1 Press to select the picture 2 Pre...

Page 51: ...e 169 Step Zoom 194 Filter Effect 171 Exposure Comp 107 Aspect Ratio 172 Sensitivity 108 i Dynamic 175 White Balance 110 i Resolution 175 AF Mode 92 Flash Mode 146 Focus Mode 90 103 104 Flash Adjust 1...

Page 52: ...ial clockwise To edit text Use to select and press MENU SET Then move the cursor to the text to edit You can also use the zoom lever or control dial to reposition the cursor Use to select Delete and p...

Page 53: ...for each scene turns blue for 2 seconds and then changes to the normal red indication Automatic Scene Detection 60p Switching between Intelligent Auto Plus Mode and Intelligent Auto Mode Select the o...

Page 54: ...he and icons Flash When is pressed and auto selected the camera will automatically be set to Auto Red Eye Reduction or depending on the type of subject and brightness When or is displayed the Red Eye...

Page 55: ...e subject appears darker and the camera will automatically attempt to correct it by increasing the brightness of the picture Taking pictures using a handheld camera iHandheld Night Shot Recording mode...

Page 56: ...ded it will be a few moments before you can record another picture In the case of composition from a burst afterimages may appear if the subject was moving This function will not work for still pictur...

Page 57: ...set Press MENU SET to return to the recording screen When setting the brightness exposure Press to set the exposure bracket 134 OFF When setting the background defocusing Pressing Q MENU button will...

Page 58: ...ecause recording is performed while looking at the screen Pictures with different poses and facial expressions can be taken at once by increasing the number of pictures to be recorded Automatically en...

Page 59: ...aces and the background with clarity Slimming Mode Makes people look slimmer Shutter Sets the way the shutter is released Countdown Shots Set the number of seconds before recording Countdown and the n...

Page 60: ...with the current Recording Mode an available focus setting for each Recording Mode will be used 6 Press the shutter button halfway to focus and then press it fully to take the picture Look at the lens...

Page 61: ...Detection frames When Buddy is selected even if several subjects are present Face Eye Detection detects only a maximum of two faces The shutter is released when the two frames come within a certain d...

Page 62: ...is displayed 4 Point the camera at the front and strike a pose while look at the monitor The AF area is displayed around the subject s face by the Face Detection function 5 Press the shutter button ha...

Page 63: ...ls Tips Swivel the camera around its center when moving it in the recording direction Hold the camera with both hands taking care not to shake it If the camera shakes too much it may not be able to ta...

Page 64: ...of yourself in 4K Photo Mode you can easily select your favorites from among self portraits taken with high speed burst recording 1 Touch For details on how to record refer to steps 2 3 of Recording w...

Page 65: ...insufficient when Background Control is set to Clear you may not be able to take pictures as desired This function is not available in the following cases During motion picture recording When using T...

Page 66: ...erture value Shutter speed 250 125 60 30 15 8 0 5 6 4 0 60p The operation can also be performed by rotating the control ring 38 To cancel Program Shift either turn off the camera or rotate the control...

Page 67: ...of the aperture and shutter speed are displayed in flashing red Taking pictures by setting the aperture value Aperture Priority AE Mode When you set the aperture value the camera automatically optimiz...

Page 68: ...e for the brightness of the subject 1 Set mode dial to 2 Rotate the control dial to set the shutter speed The operation can also be performed by rotating the control ring 38 Shutter speed Exposure met...

Page 69: ...00 When the electronic shutter is used 1 You may not be able to select some values depending on zoom position 2 Varies depending on the setting of ISO sensitivity 108 8 15 30 60 125 8 0 4 0 5 6 Optimi...

Page 70: ...sed for the actual recording Preparations Assign Preview to the function button 48 The following step is an example of assigning Preview to the Fn3 button 1 Press the Fn3 button to switch the confirma...

Page 71: ...achieve a suitable exposure setting How to tell if the exposure is not adequate Blinks red If the aperture values and shutter speed blink red when the shutter button is pressed halfway If the Manual E...

Page 72: ...ical guide line Recording direction and progress status approximate Taking pictures from left to right Image size STANDARD Image size WIDE Pan the camera at a constant speed You may not be able to tak...

Page 73: ...and number of stitched pictures The maximum number of recording pixels is as follows Image size Recording direction Horizontal Resolution Vertical Resolution STANDARD Horizontal 8176 pixels 1920 pixe...

Page 74: ...first picture are significantly different from those of the first picture the panorama picture as a whole when all pictures are stitched together may not have consistent focus and brightness Since sev...

Page 75: ...pending on the scene the recording screen may seem as if frames are missed To change the Scene Guide Mode select the tab on the menu screen select Scene Switch and then press MENU SET You can return t...

Page 76: ...anations and tips for each scene are displayed Normal display Guide display List display 1 Clear Portrait 2 Silky Skin If a part of the background etc is a color close to skin color this part is also...

Page 77: ...ght Sky 14 Warm Glowing Nightscape 15 Artistic Nightscape 16 Glittering Illuminations 17 Handheld Night Shot After the shutter button has been pressed do not move the camera during the burst operation...

Page 78: ...ide Mode 20 Appetizing Food For close up recording we recommend that you avoid using the flash 21 Cute Dessert For close up recording we recommend that you avoid using the flash 22 Freeze Animal Motio...

Page 79: ...select the picture effects filters by touching the example images 3 Press MENU SET It is also possible to display the selection screen by touching the Recording mode icon in recording screen 60 Depen...

Page 80: ...o set the recording orientation defocus orientation Rotate the control dial to select the size of the focusing area frame On the touch screen spread pinch out your 2 fingers to zoom in and pinch pinch...

Page 81: ...and size of the light source Sunshine After touching touch Press to move the center of the light source to a different position The position of the light source can also be moved by touching the scree...

Page 82: ...can be set Expressive Vividness Subdued coloring Gaudy coloring Retro Coloring Yellowish coloring Reddish coloring Old Days Contrast Low contrast High contrast High Key Coloring Pinkish coloring Light...

Page 83: ...Subdued coloring Gaudy coloring For details about Miniature Effect 80 Soft Focus Degree of defocusing Slight defocusing Strong defocusing Fantasy Vividness Subdued coloring Gaudy coloring Star Filter...

Page 84: ...o set Press MENU SET to return to the recording screen When setting the brightness exposure Press to set the exposure bracket 134 OFF When setting the background defocusing Pressing Q MENU button will...

Page 85: ...nging the aperture value shutter speed or ISO sensitivity is the same as the operation for setting the mode dial to or It is also possible to display the selection screen by touching the Recording mod...

Page 86: ...th HD in MP4 3 Press the motion picture button or shutter button to start recording 4 Press the motion picture button or shutter button to stop recording When recording the angle of view becomes narro...

Page 87: ...perated during the recording of a motion picture Using touch icons allows silent operation while recording motion pictures Motion Picture Silent Operation ON 1 Start recording 2 Touch 3 Touch icon Zoo...

Page 88: ...tered as the custom settings initially Preparations Set in advance the recording mode and menu settings so that the camera can be in the state with the settings to be saved Custom Cust Set Mem Custom...

Page 89: ...ant to use and press MENU SET The settings are switched to those settings you selected for the custom set 60p It is also possible to display the selection screen by touching the Recording mode icon in...

Page 90: ...button halfway Focus display When focus is aligned illuminated When focus is not aligned flashing AF area When focus is aligned green Two beep sounds are heard and Auto Focus is activated Four beep so...

Page 91: ...atically AFC Subject is moving Sport trains etc AFC is an abbreviation of Auto Focus Continuous In this mode while the shutter button is pressed halfway focusing is constantly performed to match the m...

Page 92: ...npoint focusing 93 97 In Intelligent Auto Mode and Intelligent Auto Plus Mode or can be set The AF Mode is fixed to in the following case In Self Shot Mode If is not available with the current recordi...

Page 93: ...e turns green White Displayed when more than one face is detected Other faces that are the same distance away as faces within the yellow AF area are also focused Changing the eye to be in focus Touch...

Page 94: ...tion released The AF Tracking area turns yellow while the subject is locked To release AF Tracking Touch If AF Lock fails a red frame flashes for a while and then turns off When you set Metering Mode...

Page 95: ...AF area by selecting 49 points in the AF area based on the subject Rec Motion Picture AF Mode 1 Select a Custom Multi icon etc and press Current AF area shape 2 Use to select the setting item Horizon...

Page 96: ...F area and press MENU SET to set repeat If you press MENU SET again the setting will be canceled To cancel all the settings press the DISP button With touch screen operations Touch the parts you want...

Page 97: ...ssing the shutter button halfway move the camera to the composition you want with the shutter button pressed halfway and then take the picture Only when AFS AFF AFC in Rec menu is set to AFS Pinpoint...

Page 98: ...F area The position and size of the AF area cannot be changed in the Digital Zoom range When selecting You can change the position and size of the AF area Rec Motion Picture AF Mode Select or and pres...

Page 99: ...is divided into groups consisting of 9 points each 6 points or 4 points for the groups located at the edges of the screen Rec Motion Picture AF Mode Select and press The AF area setting screen appears...

Page 100: ...ill appear for setting the focus position Move to the focus position Operation Touch operation Description Touch Moves Pinch in Pinch out Enlarges reduces the screen in small steps Enlarges reduces th...

Page 101: ...the viewfinder according to the distance you drag the touch pad 42 OFF Press the shutter button halfway to determine the focus position If you press the DISP button before determining the focus positi...

Page 102: ...the brightness optimization position and the AF area to the center Set Set Reset Reset 2 Touch Set The AF area with the same function as is displayed on the touched position If you touch touch when is...

Page 103: ...range will be displayed in blue digital zoom range When recording a subject close to the camera we recommend taking a picture without using the flash A picture may be out of focus when the subject is...

Page 104: ...Turn the control ring to adjust focus Turning the control ring to the right Focusing on a nearby subject Turning the control ring to the left Focusing on a distant subject MF Assist Enlarged screen MF...

Page 105: ...3 to 6 times The image of the entire screen can be enlarged or reduced approximately 3 to 10 times 4 Press the shutter button halfway The recording screen will be displayed The same operation can be...

Page 106: ...function button When you release the function button the focus and or exposure lock is canceled 3 While you press and hold the function button move the camera to compose the picture you want to take a...

Page 107: ...to set You can also press the shutter button halfway to set You can set the exposure compensation value in the range between 5 EV and 5 EV Settings can be made within a range of 3 EV to 3 EV while rec...

Page 108: ...Intelligent ISO ISO sensitivity is automatically set in a range up to 3200 with the flash on 1600 depending on the movement and brightness of a subject 1 The shutter speed is not fixed when the shutt...

Page 109: ...speed Slow Fast Interference Low High Subject blur High Low For details on the available flash range used when the ISO sensitivity is set to AUTO refer to 148 Cannot select in the following cases Shu...

Page 110: ...andescent lights Adjust to the color that is optimal for taking pictures using the flash Use the White Balance value that was set manually Press Point the camera at a white object such as a piece of p...

Page 111: ...nce settings including the White Balance fine adjustment setting back to AWB Auto White Balance When AWB Automatic White Balance is set the coloring is adjusted in accordance with the light source How...

Page 112: ...agenta reddish colors You can also make fine adjustments by touching the White Balance graph Pressing DISP button resets the position back to the center 3 Press MENU SET 4 Press MENU SET to finalize t...

Page 113: ...tting You can also set the bracket by touching BKT BKT 2 Press MENU SET 3 Press MENU SET to finalize the setting You can also press the shutter button halfway to set the White Balance You can also set...

Page 114: ...n and pressing 2 Press to select the recording method and press MENU SET The recording method can also be set from 4K PHOTO in the Rec menu 4K Burst For capturing the best shot of a fast moving subjec...

Page 115: ...s the shutter button fully Therefore press the button fully slightly in advance Press and hold Recording is performed 4K Burst S S S S is an abbreviation of Start Stop Press the shutter button fully R...

Page 116: ...ll be displayed automatically To continue recording press the shutter button halfway to display the recording screen For information on how to select and save pictures from 4K burst files refer to 117...

Page 117: ...to perform rough scene selection For information on how to operate the slide view screen refer to 118 If you touch or press the Fn2 button you can choose a scene in the 4K burst playback screen 119 Sl...

Page 118: ...previous ones Touch Drag Selects the frames to be displayed Frames preceding and following the selected frame will be displayed Pinch out Pinch in Enlarges reduces the display Drag Moves the enlarged...

Page 119: ...wind playback Single frame rewind while paused Touch Drag Selects the frames to be displayed while paused Pinch out Pinch in Enlarges reduces the display while paused Drag Moves the enlarged area duri...

Page 120: ...oes not support 4K motion picture select AUTO Set VIERA Link of TV Connection in the Setup menu to OFF If you connect the camera to a TV and display 4K burst files on the TV they will be displayed onl...

Page 121: ...ivity becomes higher which may increase the noise on the screen Shutter sound for 4K photo recording When using 4K Burst or 4K Pre Burst you can change the electronic shutter sound settings in Shutter...

Page 122: ...not applied to 4K burst files recorded with the 4K Photo function The following limitations apply to the recording functions indicated below 4K Burst 4K Burst S S 4K Pre Burst Program Shift Disabled...

Page 123: ...Travel Date cannot be recorded Simultaneous record w o filter is not available When recording using the 4K Pre Burst function Step Zoom does not operate Scene Detection in Intelligent Auto Mode works...

Page 124: ...esired focus point To record pictures use a UHS Speed Class 3 card 27 We recommend using a tripod to perform Focus Stacking Recording using Post Focus 1 Press button 2 Press to select ON and press MEN...

Page 125: ...ly ends The data will be saved as a single file in the MP4 format If Auto Review is set a screen will automatically appear that lets you select the focus point 126 Canceling Post Focus Select OFF in s...

Page 126: ...edge of the screen cannot be selected Operation Touch operation Description Touch Selects focus point No selection can be made while display is enlarged Enlarges the display Reduces the display when i...

Page 127: ...and save the picture Range Merging Combine the pictures with the selected focus position into one picture When selecting Range Merging 3 Touch the focus point Select positions at two or more points F...

Page 128: ...r The Post Focus function is disabled when using the following settings Clear in Backlight Glistening Water Artistic Nightscape Glittering Illuminations Handheld Night Shot Clear Night Portrait Soft I...

Page 129: ...The pictures are recorded in succession while the shutter button is pressed 4K PHOTO 114 When the shutter button is pressed a picture is recorded with the 4K Photo function Post Focus 124 When the shu...

Page 130: ...full However the burst speed will become slower halfway through the recording The exact time when the slower burst speed will start depends on the settings of the aspect ratio picture size and quality...

Page 131: ...lly for each still picture It may take a while to store still pictures that were taken using the burst function If you continue to record while storing the number of burst pictures that can be taken w...

Page 132: ...lso effective for preventing jitter when pressing the shutter button After the self timer indicator flashes recording will start The focus and exposure are fixed when the shutter button is pressed hal...

Page 133: ...t the menu 3 Focus on the subject and take a picture When Exposure Bracket is selected the bracket display flashes until all of the pictures you have set are taken If you change the bracket settings o...

Page 134: ...re taken Single Shot Setting Takes one picture each time you press the shutter button Takes all the pictures set to be taken when you press the shutter button once Not available for burst recording Wh...

Page 135: ...Image Count The recording interval and the number of pictures can be set Select the item minute second number of pictures Setting MENU SET Set The camera may not be able to record using the preset int...

Page 136: ...off If this occurs during Time Lapse Shot recording you can restart the operation by turning off the camera replacing the battery or card in the pause state and then turning the camera on Note however...

Page 137: ...Press to select Start and press MENU SET 3 Press to select New and press MENU SET 4 Press the shutter button fully Up to 9 999 frames can be recorded 5 Move the subject to decide on the composition Re...

Page 138: ...ity of the motion picture Frame Rate Set the number of frames per second The higher the number is the smoother the motion picture will be Sequence NORMAL Stitches the still pictures in the recording s...

Page 139: ...able to create motion pictures with a file size greater than 4 GB With an SDXC memory card you can create motion pictures with a file size greater than 4 GB When creating a motion picture with a pictu...

Page 140: ...specific direction OFF Stabilizer does not work To prevent jitter If a warning is displayed about jitter use Stabilizer a tripod or Self Timer Using a slower shutter speed can cause motion blur Shutte...

Page 141: ...may become narrower The 5 axis Hybrid Image Stabilizer function is not available when recording motion pictures with Rec Quality set to 4K 100M 30p or recording using 4K Live Cropping Cases where the...

Page 142: ...al zoom allows you to zoom in using a higher zoom ratio than Optical Zoom without degrading the picture quality The maximum zoom ratio varies depending on the picture size Maximum magnification 59 2x...

Page 143: ...ngs ON OFF When Picture Size is set to S the zoom ratio can be increased to up to 1 5x the original zoom ratio i Zoom works automatically in Intelligent Auto Mode or Intelligent Auto Plus Mode This fu...

Page 144: ...largely displayed at the center in the Digital Zoom range This function is not available in the following cases When Live View Mode is set to ECO 30fps setting at the time of purchase Handheld Night...

Page 145: ...is displayed 3 Perform zoom operations by dragging the slide bar The zoom speed varies depending on the touched position Slow zooming Fast zooming Touch again to end touch zoom operations This functi...

Page 146: ...ightscape by decreasing the shutter speed when firing a flash Ideal for taking pictures of people against a nightscape Using a slower speed can cause motion blur We recommend using a tripod Forced Fla...

Page 147: ...de or refer to 54 2 Cannot be set to 3 Default setting is 4 Default setting is The flash is fixed to Forced Flash Off in the following cases Backlit Softness Relaxing Tone Distinct Scenery Bright Blue...

Page 148: ...feet Approx 2 0 m 2 9 m 6 6 feet 9 5 feet These ranges are obtained the ISO sensitivity is set to AUTO and ISO Limit Set is set to OFF Avoid doing the following as the heat or light could cause defor...

Page 149: ...ease the motion picture button after pressing it While you are recording motion pictures the recording status indicator red will flash 2 Press the motion picture button again to end recording With rec...

Page 150: ...played The zoom speed will be slower than normal during motion picture recording Depending on the type of the card the card access indication may appear for a while after recording motion pictures Thi...

Page 151: ...Use to select Rec Quality and press MENU SET When AVCHD is selected Rec Quality Picture size Recording frame rate Sensor output Bit rate FHD 28M 60p 1 1920 1080 60p 60 fps 28 Mbps FHD 17M 60i 1920 10...

Page 152: ...tion pictures are recorded at reduced Auto Focus speeds It may be difficult to focus on the subject with Auto Focus but this is not a malfunction Limitations on continuous recording 29 About the compa...

Page 153: ...recording MF 104 ON OFF Allow the focus to be adjusted manually When the focus setting is set to AFS AFF or AFC the camera will refocus if the shutter button is pressed halfway while recording motion...

Page 154: ...n out while leaving the camera in a fixed position Hold the camera firmly in place while recording A motion picture will be recorded at FHD 20M 30p under MP4 Pan Zoom in When you want to zoom in out s...

Page 155: ...rame Pinch out Pinch in Enlarges reduces the frame The range of settings allowed is from 1920 1080 to 3840 2160 DISP Reset Returns the position of the frame to the center and its size to the default s...

Page 156: ...rame Press Fn1 button while the recording screen is displayed and perform steps 3 and 4 To cancel 4K Live Cropping recording Set OFF in step 2 The angle of view narrows 4K Live Cropping recording cann...

Page 157: ...s Recording with the Touch Shutter function 43 is also available The aspect ratio of a still picture is fixed to 16 9 Takes a still picture using Picture Size S 2M The picture quality may be different...

Page 158: ...otion pictures recorded with the camera Music can be added and various editing operations can be performed when you combine them In addition you can send the combined motion picture to a web service 2...

Page 159: ...ffect that fades in from black and white to color or an effect that fades out from color to black and white Audio will be recorded normally OFF Motion pictures recorded with WHITE IN or BLACK IN are d...

Page 160: ...To cancel the frame settings press MENU SET A greater effect can be achieved by creating a striking contrast of focus between the start and end positions for example by shifting focus from the backgro...

Page 161: ...Playback Press Playback button again or press the motion picture button The Playback can also be ended by pressing the shutter button halfway By holding down Playback button while the camera is off yo...

Page 162: ...ctures recorded in AVCHD Operations during motion picture playback Operation Touch operation Description Play pause Fast rewind 1 Single frame rewind 2 while paused Fast forward 1 Single frame forward...

Page 163: ...SET The same operation can be performed by touching The still picture is saved with aspect ratio of 16 9 and Quality of The picture size varies depending on the motion picture being played back Rec Q...

Page 164: ...orward or rewind a picture while maintaining the same zoom magnification and zoom position by rotating the control dial during Playback Zoom Viewing a list of pictures Multi Playback 1 Move the zoom l...

Page 165: ...d date Pictures are displayed in a 12 picture screen Turn the zoom lever toward the W side to return to the Calendar screen display MON SUN TUEWEDTHU FRI SAT You can display the calendar between Janua...

Page 166: ...ttings are displayed After you select Burst Play or Sequential Play select one of the following playback methods From the first picture Play back the group pictures consecutively from the first pictur...

Page 167: ...p 166 is handled as 1 picture All the pictures in the selected picture group are deleted 1 Press button while viewing a picture 2 Use to select Delete Multi Delete All and press MENU SET Picture selec...

Page 168: ...enu will also be changed automatically Photo Style 169 Filter Settings 171 Aspect Ratio 172 Picture Size 173 Quality 173 Sensitivity 108 White Balance 110 AF Mode 92 AFS AFF AFC 91 Metering Mode 174 B...

Page 169: ...nochrome shades of gray only such as black and white Scenery Setting that creates a picture using vivid colors for the blue sky and green Portrait Setting that produces the look of a healthy complexio...

Page 170: ...ne 1 Bluish coloring Yellowish coloring Filter Effect 2 Yellow Enhances the contrast of a subject Effect Low Records a blue sky clearly Orange Enhances the contrast of a subject Effect Medium Records...

Page 171: ...s Creative Video Mode Toy Effect Toy Pop and Miniature Effect also cannot be used when 4K Live Cropping is set During motion picture recording The following functions are not available in Panorama Sho...

Page 172: ...display only the still picture with the effects applied This function is not available in the following cases Panorama Shot Mode When using Burst When recording 4K photos When recording using Post Fo...

Page 173: ...2 S 2M 1920 1080 S 3 5M 1968 1968 The picture size will be fixed to 4K when recording 4K photos or recording in Post Focus Quality Recording mode Set the compression rate used for storing pictures Rec...

Page 174: ...leted When you play back a picture recorded with the gray area is displayed according to the aspect ratio of the picture during recording The setting is fixed to when recording 4K photos or recording...

Page 175: ...When HDR is set to ON When Sensitivity is set to H 6400 i Resolution Recording mode You can use the camera s Intelligent Resolution technology to record still pictures with sharper outlines and clear...

Page 176: ...move the camera during the burst operation Since a burst of still pictures are combined after they have been recorded it will be a few moments before you will be able to record another picture A subje...

Page 177: ...hutter mode automatically switches based on the recording conditions and shutter speed The mechanical shutter mode has higher priority over the electronic shutter mode because the mechanical shutter h...

Page 178: ...e to correct red eye ISO Limit Set Recording mode You can set the upper limit of ISO sensitivity when ISO sensitivity is set to AUTO or Rec ISO Limit Set Settings 200 400 800 1600 3200 OFF This functi...

Page 179: ...ON OFF The setting cannot be made during 4K photo recording or recording in Post Focus Diffraction Compensation Recording mode The camera raises the resolution by correcting the blurriness caused by...

Page 180: ...ace and adjusts focus and exposure When registered faces that have set names are recognized the names are displayed max 3 people During playback The name and age are displayed Face Recog functions onl...

Page 181: ...cord Faces of subjects other than people e g pets cannot be registered When is pressed or is touched an explanation is displayed Use to select the item for editing and press MENU SET Name Set the name...

Page 182: ...ssions or angles Register additional pictures at the place you are recording If a registered person is no longer recognized re register that person In some cases the camera cannot recognize or incorre...

Page 183: ...he Age Enter the Name For details on how to enter characters refer to Entering Text 52 Use to select Exit and press MENU SET to finish Canceling the display of the name and age in months years Set Pro...

Page 184: ...Wind Noise Canceller 185 Zoom Mic 185 Level Shot Recording mode Level Shot function automatically detects the camera s tilt while recording motion pictures and horizontally corrects the recording mot...

Page 185: ...inimizing the low pitched sound when a strong wind is detected STANDARD extracts and reduces only the wind noise without deteriorating the sound quality You may not see the full effect depending on th...

Page 186: ...9 Rec Area 193 Remaining Disp 193 Auto Review 194 Fn Button Set 48 Zoom lever 194 Lens Position Resume 194 Lens Retraction 194 Ring Dial Set 51 Eye Sensor 35 Self Shot 195 Touch Settings 195 Touch Scr...

Page 187: ...tely fire when the shutter button is pressed halfway Quick AF The focus is automatically adjusted when camera blurring is small even when the shutter button is not pressed Increases battery consumptio...

Page 188: ...t Glow Glistening Water Clear Nightscape Cool Night Sky Warm Glowing Nightscape Artistic Nightscape Handheld Night Shot Scene Guide Mode When Silent Mode is set to ON Direct Focus Area Moves the AF ar...

Page 189: ...ed screen during Manual Focus MF Assist is not displayed in the following cases During motion picture recording When recording with 4K Pre Burst of the 4K Photo function When using the Digital Zoom MF...

Page 190: ...This function is not available in the following case Rough Monochrome Creative Control Mode Histogram Enabling disabling the histogram display When set to ON you can move the display position of the...

Page 191: ...e recording screen This is useful for zooming while keeping the subject at the center of the screen Highlight You can set overexposed areas areas that are too bright and where there are no shades of g...

Page 192: ...ach zebra pattern will increase To reduce overexposed areas record a picture by setting negative exposure compensation 107 using the histogram display 190 and so on as a reference The displayed zebra...

Page 193: ...of the monitor The exposure meter will turn off if no operation is performed for approximately 4 seconds 15 30 60 125 250 8 0 4 0 5 6 Dial Guide Enabling disabling the operation guide display when swi...

Page 194: ...ing the zoom operation settings Zoom The zoom operates in the normal way Step Zoom Each time zoom is operated the zoom stops at the position for one of the preset focal lengths Focus range Current zoo...

Page 195: ...f tabs such as displayed on the right side of the screen Touch AF Operation to optimize the focus AF or both the focus and brightness AF AE for a touched subject Touch Pad AF Operation to move the AF...

Page 196: ...Timer Auto Off 202 No Reset 202 Reset 203 Reset Wi Fi Settings 203 Level Gauge Adjust 203 Demo Mode 203 Format 28 Online Manual Settings URL display QR Code display World Time Sets the times for the r...

Page 197: ...t you can set the location For details on how to enter characters refer to Entering Text 52 To print Location or the number of days that have passed either use Text Stamp 216 or print using the PHOTOf...

Page 198: ...wer consumption than in 30fps 30fps Power conservation is prioritized and the onscreen display is set to 30 fps 60fps Display speed has higher priority over picture quality and pictures are displayed...

Page 199: ...nitor Luminance Sets the monitor brightness according to the ambient light level Auto The brightness is adjusted automatically depending on how bright it is around the camera Mode 1 The brightness is...

Page 200: ...tton or touch the monitor This function is not available in the following cases During motion picture recording playback When recording with 4K Pre Burst of the 4K Photo function When connected to com...

Page 201: ...essive scan method for the number of effective scanning lines 720 lines 480p Outputs pictures using a progressive scan method for the number of effective scanning lines 480 lines If no image appears o...

Page 202: ...is displayed Exposure Comp Reset If the recording mode is changed or the camera is turned off the exposure compensation setting is reset Self Timer Auto Off The self timer is canceled if the unit is t...

Page 203: ...Time setting The Travel Date setting Departure date Return date Location The settings of Rotate Disp and Picture Sort in the Playback menu Folder numbers and clock settings will not be reset Reset Wi...

Page 204: ...tion Clear Retouch Text Stamp Time Lapse Video Stop Motion Video Resize Cropping It may not be possible to set or edit pictures taken with other cameras How to select an image s after selecting Single...

Page 205: ...screen Playback Slide Show 1 Use to select the item and press MENU SET If you select Video Only 4K burst files and pictures recorded using Post Focus will also be played back Only an in focus represen...

Page 206: ...ion pictures OFF Music and audio will not play back During slide shows of 4K burst files pictures recorded in Post Focus or group pictures effects will stay turned off even if Effect is set When you p...

Page 207: ...to it Abort writing location information Press MENU SET while location information is being written is displayed for the period of the abort operation If selected again while is displayed writing loca...

Page 208: ...educes blemishes and dullness in the skin while bringing out clearness Shine Removal Shiny areas of the skin are matted down Whitening Eyes and teeth are whitened and beautified Lift Up Face lines are...

Page 209: ...up picture of the face from the front Avoid taking a picture under very low lighting conditions Take a clear picture of the area that you want to retouch With certain image coloring such as that of bl...

Page 210: ...e You can select the Photo Style effects Standard Vivid Natural Monochrome Scenery or Portrait i Dynamic You can select the i Dynamic settings HIGH STANDARD LOW or OFF Contrast You can adjust the cont...

Page 211: ...n 110 Only when White Balance is set to Adjust Used to display the White Balance fine adjustment screen 112 Only when White Balance is set DISP DISP Used to display the comparison screen MENU SET Set...

Page 212: ...ording a RAW image recorded on this camera is always recorded with the aspect ratio set to 4 3 5184 3888 but if you perform RAW Processing from the Playback menu the picture will be processed with the...

Page 213: ...w screen Use to select items and press MENU SET to perform the following operations Next Lets you select more frames for combining Reselect Discards the frame selected immediately before and lets you...

Page 214: ...gers to zoom in and pinch in your two fingers to zoom out 42 Dragging the screen allows you to move the enlarged part Touch REMOVE This will bring you back to the operation of dragging your finger ove...

Page 215: ...ith texts already stamped 2 Enter characters For details on how to enter characters refer to Entering Text 52 To delete texts delete all the characters in the character input screen You can print out...

Page 216: ...s that have elapsed since the travel date set in Setup menu s Travel Date Title Stamp text registered in Title Edit 3 Press Q MENU button 4 Use to select OK and press MENU SET Do not request date prin...

Page 217: ...otion pictures that were created after the split During dividing do not turn off the camera or remove the card or battery If you do so the motion picture may be deleted Motion pictures cannot be divid...

Page 218: ...e size can be reduced to facilitate e mail attachment and use in web pages etc Playback Resize 1 Select a still picture and size Single Use to select a still picture and press MENU SET Use to select s...

Page 219: ...ormation will not be copied when still pictures are cropped Picture quality is reduced after cropping This function is not available in the following cases Motion pictures 4K burst files Pictures reco...

Page 220: ...ing information etc to be added It was established by JEITA Japan Electronics and Information Technology Industries Association Favorite You can label your favorite pictures with a star This lets you...

Page 221: ...ng release Press To clear all Select Print Set Cancel Yes and then press MENU SET When you have performed Print Set for pictures in a group the setting for how many prints to make applies to all pictu...

Page 222: ...sing other devices Face Rec Edit Edit or delete the recognition information for pictures with incorrect information Playback Face Rec Edit REPLACE or DELETE 1 Use to select picture and press MENU SET...

Page 223: ...cture on a card more easily DATE TIME Displays pictures according to the date and time that the pictures were taken in chronological order When the pictures are taken using several cameras and stored...

Page 224: ...one Connect easily You can easily set up a direct connection to your smartphone without entering a password Displaying still pictures on a TV 238 Wireless printing 243 Sending pictures to AV device 24...

Page 225: ...lamp when the Wi Fi function is in use Lit When the Wi Fi function is ON or connected by Wi Fi Blinking When sending picture data About the Wi Fi button In this Owner s Manual a function button to whi...

Page 226: ...i you can press Wi Fi button and perform the following operations Terminate the Connection Terminates the Wi Fi connection Change the Destination Terminates the Wi Fi connection and allows you to sele...

Page 227: ...to an area without any reception while sending images The camera cannot be used to connect to a public wireless LAN connection Use a IEEE802 11b IEEE802 11g or IEEE802 11n compatible device when usin...

Page 228: ...the type of smartphone being used For the latest information on the Image App refer to the support site below http panasonic jp support global cs dsc This site is available in English only When downl...

Page 229: ...phone 1 Turn on the Wi Fi function in the setting menu 2 Select the SSID displayed on the screen of the camera 3 Start Image App 228 When the connection confirmation screen appears on the camera selec...

Page 230: ...on by pressing Wi Fi button on the camera On your smartphone Start Image App 228 Select QR code When the smartphone is connected to a wireless access point it may take time to display QR code For iOS...

Page 231: ...ton on the camera On your smartphone Turn on the Wi Fi function in the setting menu On the Wi Fi setting screen select the SSID displayed on the camera Enter the password displayed on the camera For f...

Page 232: ...od 258 On your smartphone Start Image App 228 Closing the connection 1 Set the camera to Recording Mode Press the shutter button halfway to return to recording mode 2 Select the camera s menu items to...

Page 233: ...secure the camera in place with a tripod or by other means This function is not available in the following cases Panorama Shot Mode When using Time Lapse Shot Taking a picture while jumping When you h...

Page 234: ...ore the picture quality may be different from the actual motion picture that you have recorded Depending on your smartphone and its usage environment you may notice degradation in the picture quality...

Page 235: ...smartphone You can send the location information acquired from a smartphone to the camera After the information is sent you can write it on the pictures in the camera GPS Starts location information...

Page 236: ...t to send or write location information Follow the messages on the screen to perform the operation is displayed for pictures that have location information written to it The smartphone battery drains...

Page 237: ...a web service Combine the motion pictures and save the combined motion picture Combining motion pictures by operating a smartphone Connect to a smartphone 229 Operate the smartphone Select Select Sna...

Page 238: ...se the connection by pressing the Wi Fi button 226 When you display the pictures on a TV using the Wi Fi function they are not output using 4K resolution To output pictures using 4K resolution connect...

Page 239: ...th Rec Quality of 4K Some images may not be played back or sent depending on the device For more information about picture playback see the operating instructions of the destination device or check th...

Page 240: ...and send recorded images How to select an image s after selecting Single Select or Multi Select Single Select Select the picture Set Set Select Set Multi Select Select the picture repeat If selected...

Page 241: ...tion from images before sending them ON Delete the location information then send OFF Keep the location information and send This operation only deletes the location information from the images that a...

Page 242: ...tion that allows you to easily configure the settings related to the connection and security of wireless LAN devices To check if the smartphone you are using is compatible with WPS refer to the instru...

Page 243: ...mpatible printers Setup Wi Fi Wi Fi Function New Connection Send Images Stored in the Camera Printer 1 Select Via Network or Direct to connect 256 258 2 Select a printer you want to connect 3 Select t...

Page 244: ...r device for details Setup Wi Fi Wi Fi Function New Connection Send Images While Recording Send Images Stored in the Camera AV device 1 Select Via Network or Direct to connect 256 258 2 Select the dev...

Page 245: ...phanumeric characters When using PHOTOfunSTUDIO Install PHOTOfunSTUDIO on the PC 268 Create a folder that receives images with PHOTOfunSTUDIO For details refer to the operating instructions of PHOTOfu...

Page 246: ...press the DISP button 241 Send Images While Recording 5 Take a still picture 239 Send Images Stored in the Camera 5 Select the picture 240 Folders sorted by the sent date are created in the specified...

Page 247: ...service you need to register the WEB service 248 Panasonic assumes no responsibility for the damages resulting from the leakage loss etc of images uploaded on WEB services When uploading images to th...

Page 248: ...and log in to the service 3 If you have not registered your email address with LUMIX CLUB register the email address 4 Select the WEB service to be used for WEB service link settings and register it F...

Page 249: ...s are sent to the WEB service Step are not necessary when you continue to send another image To change the transmission setting for the picture press the DISP button 241 To terminate the connection pr...

Page 250: ...ferred images for 30 days up to 1 000 pictures Transferred images are deleted automatically 30 days after the transfer Furthermore when the number of stored images exceeds 1 000 some images may be del...

Page 251: ...when uploading pictures to WEB services You can set the same LUMIX CLUB login ID for this unit and a smartphone 253 Refer to the LUMIX CLUB site for details https lumixclub panasonic net eng c Please...

Page 252: ...tination Proceed to the next page by selecting Next 2 Read through the LUMIX CLUB terms of use and select Agree You can press to switch pages Turn the zoom lever to the T side to enlarge the page disp...

Page 253: ...or PC into the camera To set the same login ID for the camera and the smartphone Setting the same login ID on this unit and your smartphone is convenient for sending images on this unit to other devic...

Page 254: ...er actions to login IDs can only be made to the login ID acquired with the camera Setup Wi Fi Wi Fi Setup LUMIX CLUB Delete account The message is displayed Select Next 1 Select Yes in the login ID de...

Page 255: ...Favorite When a screen similar to the one below is displayed select a connection method Example of operation for displaying a screen Setup Wi Fi Wi Fi Function New Connection Send Images While Record...

Page 256: ...IN code Save PIN code type wireless access point that is compatible with Wi Fi Protected Setup with a WPS mark 1 On the camera screen select the wireless access point you are connecting to 2 Enter the...

Page 257: ...to Entering Text 52 Select the network authentication type For information on network authentication see the instruction manual of the wireless access point Select the encryption type The type of set...

Page 258: ...the device to WPS mode You can wait longer for a connection by pressing the DISP button on this unit WPS PIN code 1 On the camera screen select WPS PIN code 2 Enter the PIN code of the device into th...

Page 259: ...changed it may not be possible to connect to the device 1 Set the menu 45 Setup Wi Fi Wi Fi Function Select a destination from History Connects using the same settings as used previously Select a des...

Page 260: ...or Favorite items you can view connection details by pressing the DISP button Performing Reset Wi Fi Settings deletes content registered in History and Favorite If the device you want to connect to sm...

Page 261: ...e the name SSID of this unit Press DISP button Enter the desired device name Up to 32 characters can be entered For details on how to enter characters refer to Entering Text 52 Wi Fi Function Lock To...

Page 262: ...display the playback screen 264 When the VIERA Link setting on the camera is set to ON and the camera is connected to a VIERA Link HDMI compatible Panasonic television VIERA the television automatical...

Page 263: ...Rec Quality with 4K to a Blu ray disc or DVD using a Panasonic recorder Current as of May 2017 Storing 4K motion pictures on your PC For details refer to 267 You can use the software PHOTOfunSTUDIO 26...

Page 264: ...ction the plug could become deformed and cause faulty operation Also do not insert into the wrong socket Doing so may cause damage to this unit HDMI micro cable Use a High Speed HDMI micro cable with...

Page 265: ...eled if a USB connection cable supplied is connected simultaneously Read the operating instructions for the TV The recorded pictures can be played back on a TV with an SD Memory Card slot Proper playb...

Page 266: ...a to a VIERA Link HDMI compatible Panasonic television VIERA with an HDMI micro cable 264 2 Turn on the camera and press Playback button 3 Operate with the remote control for the TV Turning the unit O...

Page 267: ...uter that can detect a mass storage device device that stores a large volume of data Windows Windows 10 Windows 8 1 Windows 8 Windows 7 Mac OS X v10 5 v10 12 Some motion pictures recorded in AVCHD may...

Page 268: ...able for download until the end of May 2022 http panasonic jp support global cs soft download d_pfs99pe html Operating environment Supported OS Windows 10 32 bit 64 bit Windows 8 1 32 bit 64 bit Windo...

Page 269: ...X v10 6 v10 12 For details on the operating environment and how to use the SILKYPIX Developer Studio refer to the Help or the Ichikawa Soft Laboratory s support website LoiLoScope 30 day full trial v...

Page 270: ...the wrong socket Doing so may cause damage to this unit Do not use any other USB connection cables except the supplied one Access Do not disconnect the USB connection cable supplied while Access is d...

Page 271: ...DPOF files Favorite PRIVATE AVCHD Motion pictures in AVCHD Card 1 JPG Still pictures RW2 Still pictures recorded in RAW file MP4 MP4 Motion Pictures 2 New folders are created in the following cases Wh...

Page 272: ...recorded with this camera into a Panasonic recorder you can dub the content to a Blu ray Disc or DVD etc The method of importing still pictures and motion pictures recorded in this unit to other devi...

Page 273: ...ction the plug could become deformed and cause faulty operation Also do not insert into the wrong socket Doing so may cause damage to this unit Do not use any other USB connection cables except the su...

Page 274: ...sufficient battery power or the AC adaptor optional and DC coupler optional When the battery begins to run out during communication a warning beep sounds Cancel printing and disconnect USB connection...

Page 275: ...operating manual Even with completed Print Set settings dates may not be printed depending on the shop or printer used Printing with date and text Time and date can be set to be printed on the picture...

Page 276: ...ional and DC coupler DMW DCC11 optional you can record and play back without worrying about the remaining battery charge The optional DC coupler can only be used with the designated Panasonic AC adapt...

Page 277: ...e 37 Custom Set 88 Photo Style 169 Flash Mode 146 60p Rec Format Rec Quality 151 Snap Movie 158 Aspect Ratio 172 Picture Size 173 Image size Panorama Shot Mode 72 Picture effect Filter adjustment disp...

Page 278: ...Focus Lights green 36 Focus Under low illumination 90 Wi Fi connection status Histogram 190 Name 2 183 Travel elapsed days 3 197 Age in years months 2 183 Location 3 197 Current date time 3 Travel de...

Page 279: ...ity 87 Dial Guide 193 White Balance Bracket 113 White Balance Fine Adjustment 112 White Balance 110 Coloring 56 98 Number of recordable pictures 28 RXXmXXs Available recording time 1 29 Touch tab 195...

Page 280: ...of Time Lapse Shot picture group 166 Continuous playback of stop motion animation group 166 Text stamped display 216 XXhXXmXXs Elapsed playback time 1 Icon indicating the presence of a marker 118 119...

Page 281: ...re Group Display 166 Time Lapse Shot Picture Group Display 166 Display for the Stop Motion Animation Group 166 Submenu icon 249 Silent Mode 186 11 months 20 days Age in years months 181 183 Multi Play...

Page 282: ...R G B Y Recording information Stabilizer 140 i Dynamic 175 HDR 176 iHDR 56 i Resolution 175 Recording date time World time 196 Aspect Ratio 172 Picture Size 173 60p Rec Format Rec Quality 151 240fps...

Page 283: ...ng on Rec Format and Rec Quality of a motion picture 4K photo recording requires a card that meets a particular speed class rating Use a card that meets the rating Be sure to use a card of the recomme...

Page 284: ...the wireless access point connection may be automatically disconnected after specific time has passed Reconnect the connection again Connection failed Change the access point to connect to in the sma...

Page 285: ...ure is 10 C to 30 C 50 F to 86 F temperature conditions also apply to the battery itself Charging is not possible if the power supply capacity of the computer is low Camera does not work even if the c...

Page 286: ...AF is set to OFF 187 AF Lock 106 is set inappropriately If there are fingerprints or dirt on the lens the focus may be set to the lens and not the subject Recorded pictures are blurred The stabilizer...

Page 287: ...1 50 1 60 1 100 or 1 120 You can set the shutter speed manually in the Creative Video Mode 85 Brightness or coloring of recorded picture different from real life When recording under fluorescent or LE...

Page 288: ...Auto Focus speed in order to adjust the focus at high precision This is not a malfunction A noise such as a clicking or buzzing noise is recorded on a motion picture Audio is recorded at low volumes W...

Page 289: ...malfunction Cannot switch between the monitor and viewfinder when pressing LVF button When you open the monitor the display automatically switches to monitor display and the LVF button and eye sensor...

Page 290: ...erating state Check the radio wave condition of the wireless access point Perform the connection closer to the wireless access point Move the location or change the angle of the wireless access point...

Page 291: ...tches with time date and time zone in Windows PC or Mac computer When both settings do not match severely please match them Images cannot be transmitted to the WEB service Confirm that the login infor...

Page 292: ...ognize card When using an SDXC Memory Card Check whether your computer is compatible with SDXC Memory Cards A message prompting you to format the card may appear when you connect it Do not format the...

Page 293: ...g the Extended optical zoom the zooming action will stop temporarily This is not a malfunction Red lamp illuminated when pressing shutter button halfway in dark locations AF Assist Lamp is set to ON 1...

Page 294: ...nt and stops functioning properly turn this unit off and remove the battery or disconnect AC adaptor Then reinsert the battery or reconnect AC adaptor and turn this unit on Do not use this unit near r...

Page 295: ...etc Store batteries in cool 15 C to 25 C 59 F to 77 F places with low humidity 40 RH to 60 RH and no major temperature changes Charge battery once per year and use completely before storing again Chec...

Page 296: ...ects such as clips when carrying or storing it The time required for charging varies depending on conditions of battery usage Charging takes longer at high or low temperatures and when the battery has...

Page 297: ...orded data may be damaged or lost if the camera breaks down due to inappropriate handling Panasonic will not be liable for any damage caused due to loss of recorded data When disposing of transferring...

Page 298: ...ing personal information When ordering repairs or transferring disposing of the camera After you make a note of the personal information perform Reset Wi Fi Settings Delete account to delete data cont...

Page 299: ...radio waves may be intercepted by a third party We strongly recommend that you enable encryption in the settings of your wireless access point to ensure information security Do not use the camera in a...

Page 300: ...d in the U S and other countries iPad iPhone iPod and iPod touch are trademarks of Apple Inc registered in the U S and other countries App Store is a service mark of Apple Inc Android and Google Play...

Page 301: ...ive remuneration to i encode video in compliance with the AVC Standard AVC Video and or ii decode AVC Video that was encoded by a consumer engaged in a personal activity and or was obtained from a vid...

Page 302: ...d party and licensed to Panasonic Corporation and or 3 open source software The software categorized as 3 is distributed in the hope that it will be useful but WITHOUT ANY WARRANTY without even the im...

Reviews: