


40
Playing still pictures
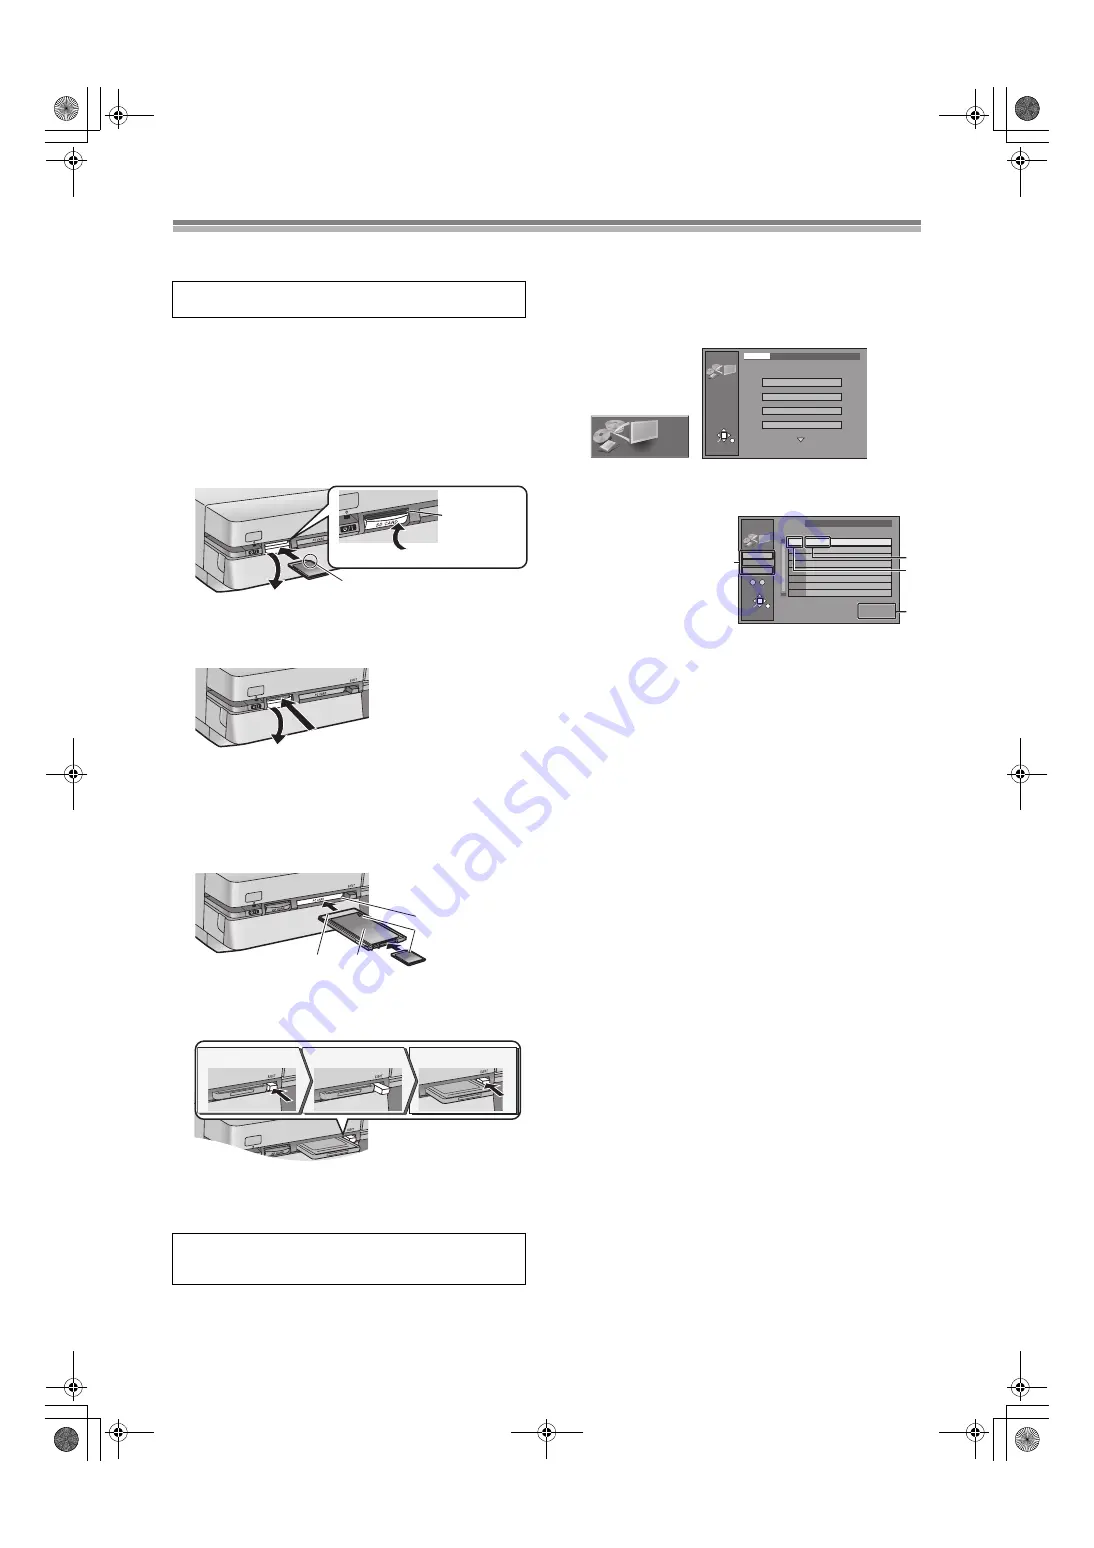
Inserting/Removing the SD/PC Card
[SD/CARD]
≥
When the card indicator (“SD” or “CARD”) on the unit display is
flashing, the card is being read from or written to.
Do not turn off
the power or remove the card. Such action may result in
malfunction or loss of the card’s contents.
ª
SD card slot
Inserting the card
(1) Press down.
(2) Turn the label up with the notch facing in.
(3) Insert the card straight-in until it fits into place.
(4) Lift the tab until it clicks into place flush with card.
Removing the card
(1) Press down.
(2) Press on the center of the card.
≥
Raise the guard after removing the card.
ª
PC card slot
Inserting the card
(a) Hold the edge of the card and insert until it fits into place.
≥
Do not press directly on the memory card.
(b)
2
Align to match the mark.
(c) Terminal connections facing into the unit.
(d) The labelled side facing upwards.
Removing the card
(1) Push.
(2) PC card eject button comes out.
(3) Push again.
≥
If using the adaptor, remove the adaptor and card together.
≥
If [PC card eject button]
on the unit does not come out,
to remove the PC card, press the card in once more and then
repeat steps (1)–(3).
Selecting the drive and the folder
[SD/CARD]
[RAM]
1) While stopped
Press [FUNCTIONS]
2) Use [
3
,
4
,
2
,
1
]
to select “JPEG” and press [ENTER]
3) Use [
3
,
4
to select “Input” and press [ENTER]
.
4) Use [
2
,
3
,
4
]
to select the drive (SD CARD/PC CARD/
DVD) and press [
1
.
≥
A list of the valid
folders in the drive
appears.
(a)drive
(b)Folder name
(c)Folder number
(d)Numbers of scenes
(still pictures) and
files that are in the
selected folder
5) Use [
3
,
4
to select the still picture folder.
≥
You can also select the still picture folder by entering a 3-digit
number with the numeric buttons
≥
It is possible to give the folder a title.
6) Press [ENTER]
For your reference
≥
“Scene” and “File” refer to numbers inside the folder selected.
Lower files are not included.
≥
If there is more than one upper folder, pressing [
:
] or [
9
]
will switch between them (See Note in “Folders that can be
displayed/saved”, page 10)
To give a folder a title
It is possible to enter up to 36 characters.
After selecting the still picture folder for display (step 5 of
“Selecting the drive and the folder”),
1) Use [
1
]
to select “Folder title” and press [ENTER]
.
2) Enter the title. (page 27)
Note
≥
Titles inputted using this unit will not be displayed on other
equipment.
≥
Folder titles entered using this unit will only be displayed using
this unit. Folders entered using this unit are written to the
TITLE.DVD file.
≥
If there is not enough space for the entry or if the limit for the
number of files has been exceeded (page 10), the title cannot be
entered.
[SD/CARD]
[RAM]
≥
When the card is protected (page 10) or the disc is protected
(page 28, 61), it is not possible to erase the still pictures.
Only insert or remove the SD/PC card after turning the
unit off.
Disc:
It is not possible to open the disc tray while the still pictures
screen is displayed.
(1)
(3)
(2)
(4)
card
(1) (2)
(a)
(b)
(c)
(d)
(1)
(2)
(3)
JPEG
RETURN
ENTER
SELECT
Input
PC CARD 100CDPFP
1/2
Album
Slide Show
Copy
Copy all of card
JPEG
JPEG
Input
RETURN
ENTER
PC CARD 100CDPFP
\DCIM\100CDPFP
Scene 0046
File 0046
001 100CDPFP
(c)
3
3
1
1
1
1
1
1
1
1
0
–
9
No.
(d)
(b)
DVD
PC CARD
SD CARD
(a)
E60TEG.book 40 ページ 2003年9月1日 月曜日 午後5時6分


