


19
Recording programmes
[RAM] [DVD-R]
Preparation
Switch [DVD, TV]
to “DVD”.
1
Press [
Í
, DVD]
to turn the unit on.
2
Press [
<
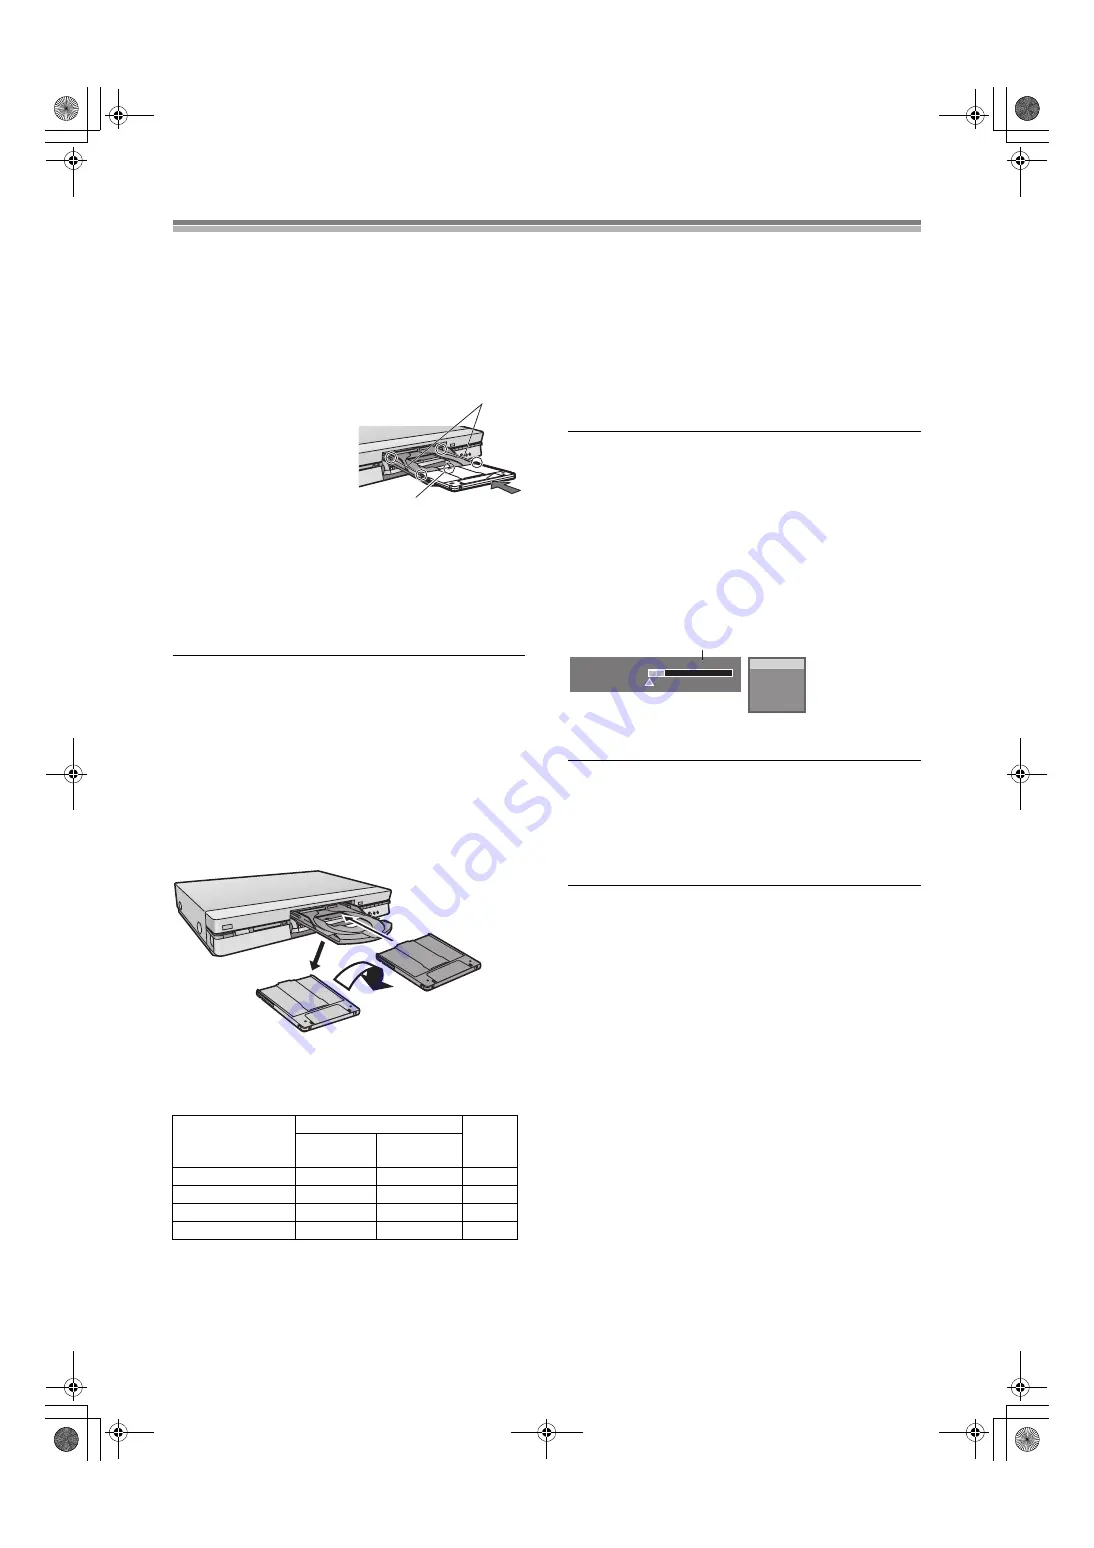
, OPEN/CLOSE]
to open the tray and
insert a disc.
≥
Insert one disc only within the tray’s guides.
≥
Press [
<
, OPEN/CLOSE]
to close the tray.
e.g.: DVD-RAM
(1) Arrow pointing inwards.
(2) Align correctly.
≥
Insert label-up with the
arrow facing in. (With
double-sided discs, load so
the label for the side you
want to record is facing up.)
3
Press [
W
,
X
,
CH]
to select the input.
4
Press [REC MODE]
to select the recording
mode.
≥
Select “XP”, “SP”, “LP” or “EP”.
5
Press [
¥
, REC]
to start recording.
≥
The programme which has already been recorded is not
overwritten.
To ensure recording
≥
Use a disc that can be recorded on and that has enough space
available.
≥
Ensure the write protect tab is not set to “PROTECT”. (page 61)
≥
Ensure the disc is not write-protected with DISC INFORMATION
(page 28).
ª
To pause recording
Press [
;
Press again to restart recording.
ª
To stop recording
Press [
∫
]
ª
Re-inserting double-sided discs
You can get up to 12 hours recording when you use double-sided
discs and use the “EP” mode.
ª
Recording modes and approximate recording times
in hours
When using DVD-R
≥
You can play DVD-R on compatible DVD players by finalizing
them on this unit, effectively making them into DVD-Video.
≥
The video is recorded in a 4:3 aspect irrespective of the video
signal input.
When using DVD-R or discs with LPCM recording
When recording bilingual audio with connecting to a decoder
or a digital receiver
Select the audio type either “M1” or “M2” on the connected
devices. (You cannot select the audio type on this unit.)
For your reference
[RAM]
≥
Select the audio type both “M1” and “M2” on the connected
devices. (You can also select the audio type on this unit.)
Note
[DVD-R]
≥
You cannot use [AUDIO]
or the DISPLAY menu to change
audio type when a DVD-R is in the disc tray.
ª
To check the remaining time and the current mode
during recording
Press [STATUS]
several times.
(1) Available recording time and recording mode
(e.g.: “0:50 XP” indicates 50 minutes in XP mode)
Note
≥
The message
“Cannot record. Maximum number of
programmes recorded.”
is displayed if you try to start recording
when there are already 99 programmes on a disc. Erase
unneeded programmes (DVD-RAM/DVD-R) or use a new disc to
continue recording.
≥
Check that disc can be recorded on (page 8).
For your reference
≥
You can record up to 99 programmes on one disc.
≥
You cannot change the input or the recording mode during
recording. You can change them while recording is paused, but
the material is recorded as a separate programme.
≥
An error message appears if you try to start recording when a
disc is full; the remaining time will be shown as “0:00”. To
continue recording, erase unneeded programmes [DVD-RAM
only (page 31), “Erasing programmes”] or use another disc.
≥
There are limitations when recording to DVD-R (page 9).
≥
Recording cannot be performed correctly if you try to record PAL
system to a disc that already contains recordings using NTSC.
DVD-RAM
DVD-R
(4.7 GB)
Single-sided
(4.7 GB)
Double-sided
(9.4 GB)
XP (High quality)
1
2
1
SP (Normal)
2
4
2
LP (Long play)
4
8
4
EP (Extra long play)
6
12
6
(1)
(2)
1
2
3
Reverse
Front
Turn over
π
Remain 0:50 XP
0:07:21 6.8.
π
PRG2 0:05.14 XP
π
PRG1 0:00.10 SP
REC
PLAY
DVD-RAM
(1)
LR
E60TEG.book 19 ページ 2003年9月1日 月曜日 午後5時6分


