


94
ENGLISH
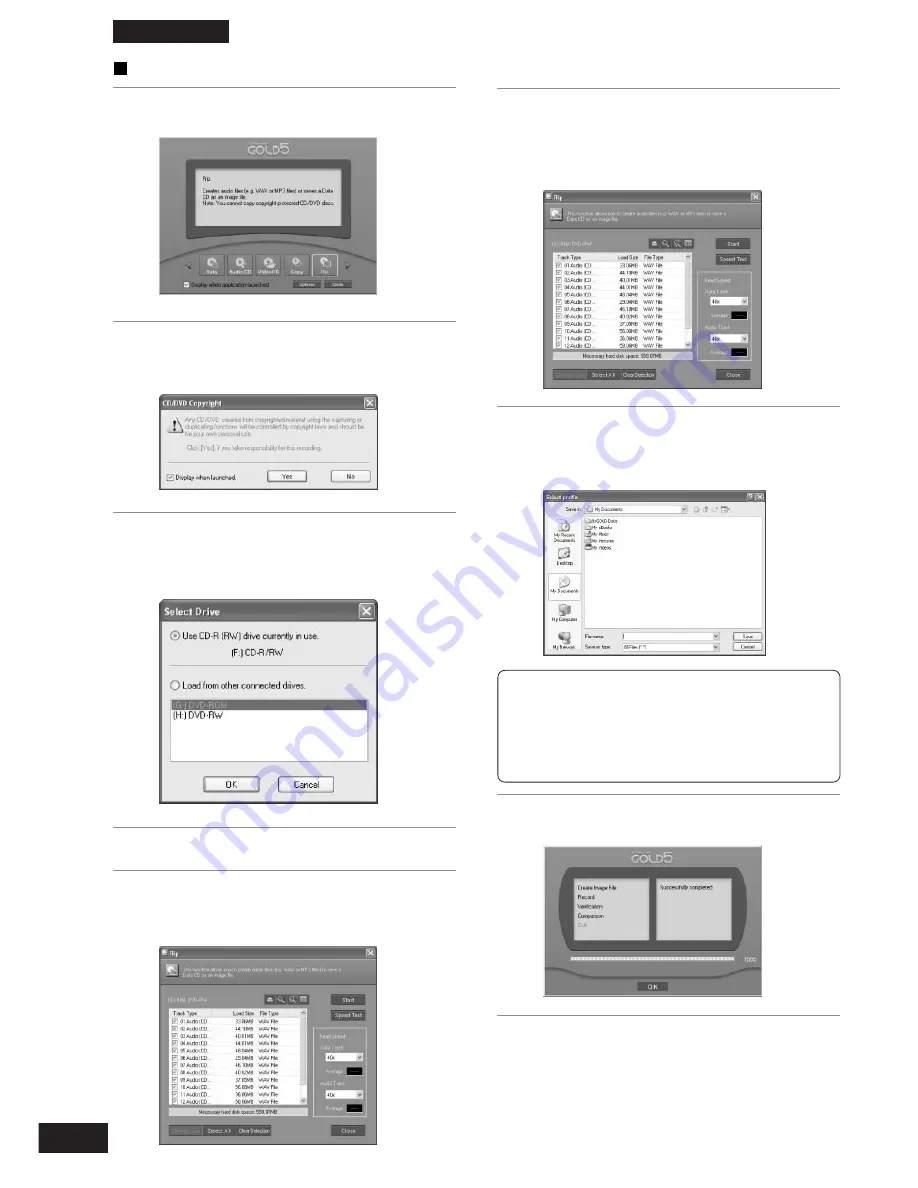
Ripping
1
Select [Rip] on the Wizard.
2
If the copyright prompt is displayed,
click [Yes].
6
Select the Read Speed and click
[Start].
A dialogue box for selection of the music
file storage location is displayed.
3
Select the source drive.
If you have more than one drive connected,
the drive selection screen will be displayed.
4
Place the disc in the drive.
5
By turning the check boxes ON/OFF,
select the tracks for ripping.
8
When ripping is finished click [OK].
9
If the Ripping Production Screen is
displayed, click [Close].
Note:
Audio files can be saved in various formats, such
as WAV, TwinVQ, by clicking the Options icon. You
can also search CDDB, specify CD TEXT infor-
mation for the files, or create a B’s Player play
list.
7
Enter the storage location and the file
name and click [Save].
Ripping begins.


