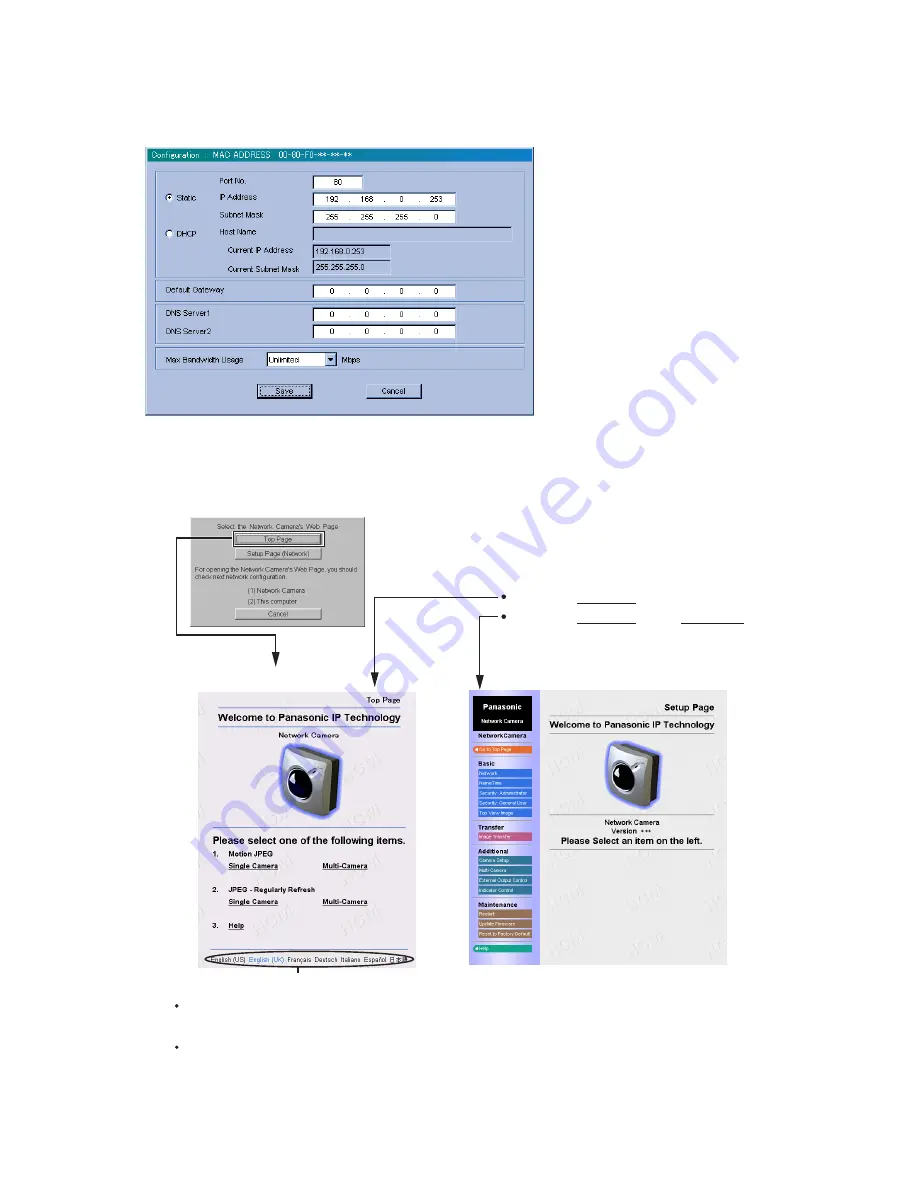
background image

4

5.


Click 

[Save]

 on the 

Configuration window

 when finishing. The "Successful!" message boxes appear 

and click 

[OK]

. The following message box appears and have the links to 

Top Page

 and 

Setup Page 

(Network window)

.  Click 

[Top Page]

 and Top Page appears.  Please refer to Operating Instructions for 

the details.

Enter "

http://IP address

:Port No."

(When port no. is 80 (default), you do not need 
to enter port no.)

in the address field and press 

[Enter]

.

Accessing from the web browser

Setup Page

Top Page

If you are configuring in 

[Type 3]

, Top Page may not appear at this point. After the Network Camera is directly connected 

with the modem, please check the Network Camera Access from the Internet on Page 32 in the Operating Instructions. 

Notes

First viewing the image on the Internet Explorer may display a pop up Security Warning window. The window requests 
your permission to download ActiveX

®

 Controls (OCX file) used to display Motion JPEG. Please refer to Page 38 in the 

Operating Instructions.

Enter "

http://IP address

:Port No.

/config.html

"

4.


Select your target Network Camera from the list as shown on example 

(A)

 on the 

Network Camera List 

window

 and click 

[Select]

. The 

Configuration window

 appears. Please refer to Page 2 in this Getting 

Started and enter the correct network parameters.

Click the language to change the display.

Summary of Contents for KX-HCM230

Page 1: ...h an Ethernet Switching Hub LAN Intranet Ethernet switching hub 1 1 Network traffic can be smooth by using the Ethernet switching hub Network Camera can be accessed from the Internet The broadband rou...

Page 2: ...168 0 250 IP address and 255 255 255 0 Subnet Mask Please refer to Page 24 in the Operating Instructions It can restrict the transmit bandwidth Select from 0 1 to Unlimited Mbit s Max Bandwidth Usage...

Page 3: ...exceeds 20 minutes please temporarily disconnect the power to restart this operation Do not connect the Network Camera over the broadband routers Setup programme cannot detect the Network Camera A Pr...

Page 4: ...After the Network Camera is directly connected with the modem please check the Network Camera Access from the Internet on Page 32 in the Operating Instructions Notes First viewing the image on the Int...

Page 5: ...on Notes External I O and Ground should be threaded through Connector Cover Once you putty the cables External I O and Ground cannot be connected till you take the putty off Note Be sure to thread the...

Page 6: ...PC Notes Please confirm Network Camera operation before puttying the cables Putties and Self Bonding tape cannot be used twice Note Network Camera needs Self Bonding tape to mount on the wall or the...

Page 7: ...165 mm away from the ceiling 2 Attach the Network Camera by screwing the threaded mount into the tripod mounting hole Mounting hole on the rear side is also available 3 Adjust the position of the Netw...

Page 8: ...cables buried in the wall CAUTION Please use proper screws fit for the material of the ceiling 1 3 4 2 Caulk around Flexible Stand if you need Self Bonding tape Please waterproof the rest of the cable...

Reviews: