


3
Simple Installation using the Setup CD-ROM
1.
2.
Turn on the Network Camera.
Insert the Setup CD-ROM in the CD-ROM
drive of the PC. (If the Network Camera
Setup window does not appear, please
click "Setup.exe" in the Setup CD-ROM.)
3.
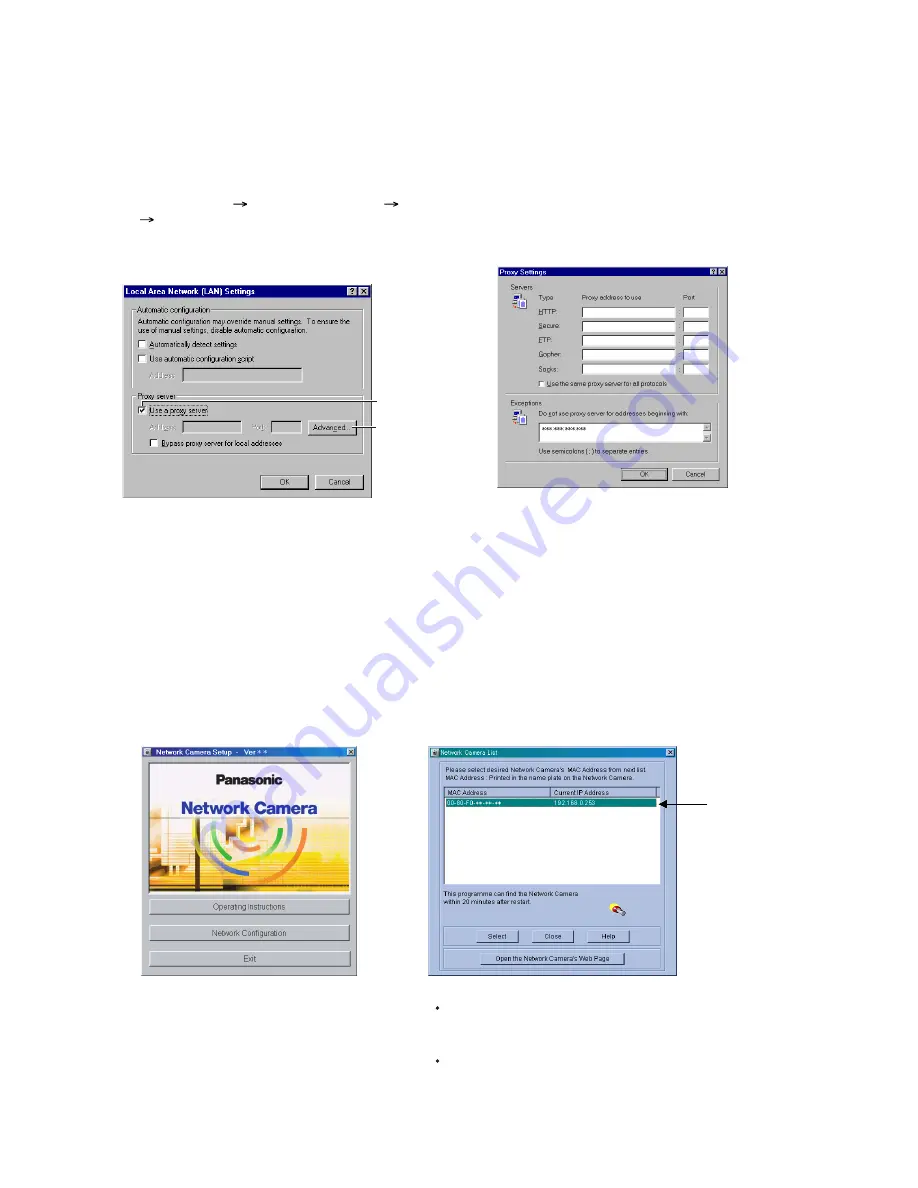
Click [Network Configuration]. The Network Camera
List window appears. The Network Camera List window
lists all of the MAC addresses and IP addresses of the
Network Camera on the network.
After finishing cabling, please turn on the Network Camera and insert the Setup CD-ROM in the CD-ROM
drive of the PC. Setup CD-ROM should start the application automatically. This programme automatically
finds the Network Cameras on the network.
Notes
Setup CD-ROM software identifies the Network Camera by listening for the
data sent out for the first 20 minutes after the Network Camera is powered
up. If it exceeds 20 minutes, please temporarily disconnect the power to
restart this operation.
Do not connect the Network Camera over the broadband routers. Setup
programme cannot detect the Network Camera.
(A)
Proxy Server Setting
1.
2.
Start up the Internet Explorer. (The window is Internet Explorer 5.50.)
4.
Click [OK] on all of the opening window.
Select [Tools] [Internet Options...]
[Connections] tab and click [LAN Settings].
Please confirm if the Use a proxy server
check box is checked or not in the next window.
When checked, click [Advanced...].
3.
Enter the IP address of Network Camera
assigned from the ISP or the network
administrator into the Do not use proxy server
for addresses beginning with data field.
The proxy server may prevent you from connecting directly to the Network Camera in some corporate
environments. The web browser can set up the IP address communication without the proxy server. Please
discuss the installation with the ISP or network administrator.
Confirm if the check
box is checked or not.
When checked, click
[Advanced...].


