background image

Operating Instructions

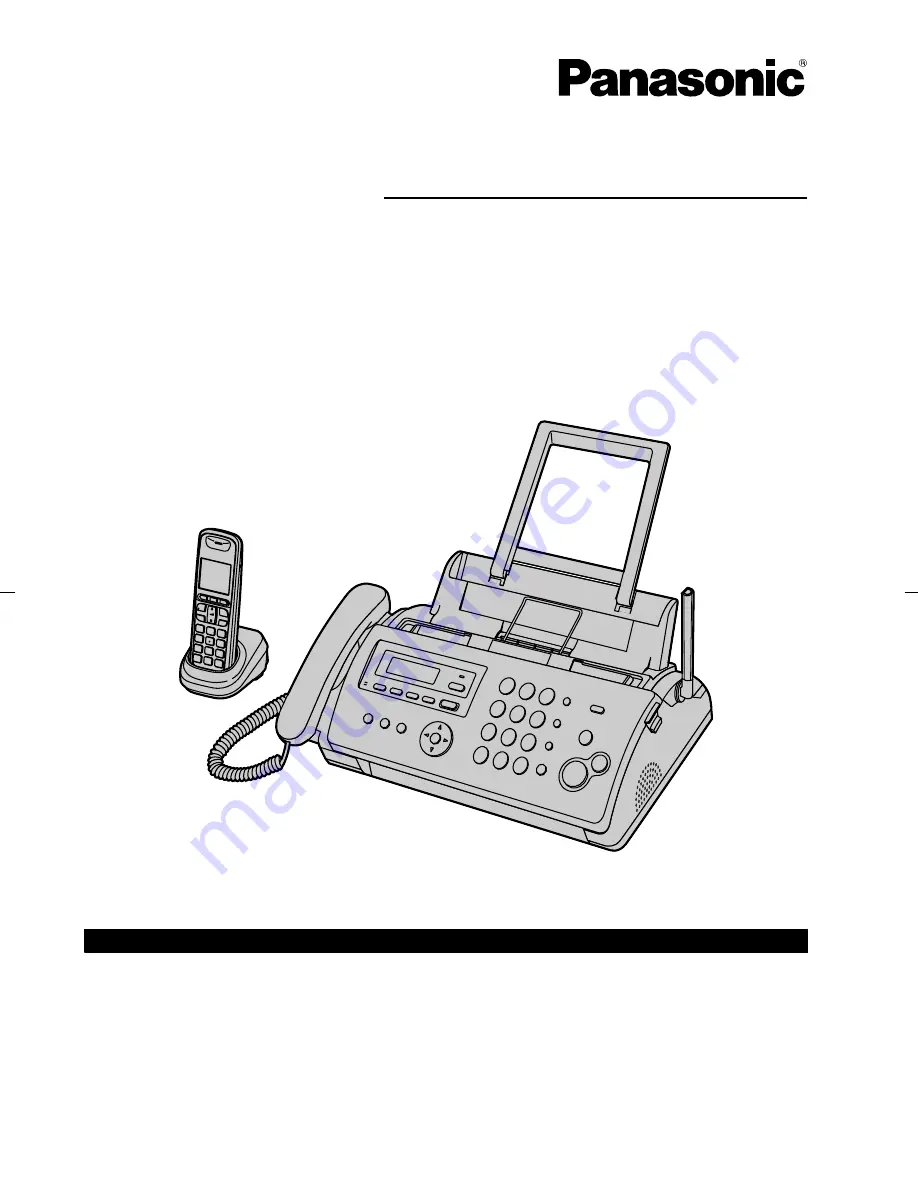
Compact Plain Paper Fax with DECT

Model No.


KX-FC268FX

KX-FC278FX

KX-FC278

Please read these operating instructions before using the unit and save for future reference.

Charge the battery for about 7 hours before initial use.

R

This unit is compatible with Caller ID. Subscription to the appropriate service through your
service provider/telephone company is required.

Summary of Contents for KX-FC268FX

Page 1: ...C278 Please read these operating instructions before using the unit and save for future reference Charge the battery for about 7 hours before initial use R This unit is compatible with Caller ID Subscription to the appropriate service through your service provider telephone company is required ...

Page 2: ...other relevant provisions of Radio Telecommunications Terminal Equipment R TTE Directive 1999 5 EC Declarations of Conformity for the relevant Panasonic products described in this manual are available for download by visiting http www doc panasonic de Contact to Authorised Representative Panasonic Testing Centre Panasonic Marketing Europe GmbH Winsbergring 15 22525 Hamburg Germany Notice for produ...

Page 3: ...ENERGY STAR R As an ENERGY STAR Partner Panasonic has determined that this product meets the ENERGY STAR guidelines for energy efficiency ENERGY STAR is a U S registered mark 3 ...

Page 4: ...d to be excessively pulled bent or placed under heavy objects Operating safeguards R Unplug this unit from power outlets before cleaning Do not use liquid or aerosol cleaners R Do not cover slots and openings on the unit They are provided for ventilation and protection against overheating Never place the unit near radiators or in a place where proper ventilation is not provided R Never push any ob...

Page 5: ...eat and cause burns R Charge the battery ies provided with or identified for use with this product only in accordance with the instructions and limitations specified in these operating instructions R Only use the compatible charger to charge the battery ies Do not tamper with the charger Failure to follow these instructions may cause the battery ies to swell or explode Important safety instruction...

Page 6: ...ing of these products and batteries correctly you will help to save valuable resources and prevent any potential negative effects on human health and the environment which could otherwise arise from inappropriate waste handling For more information about collection and recycling of old products and batteries please contact your local municipality your waste disposal service or the point of sale wh...

Page 7: ...the phonebook 26 4 Fax Sending Faxes 4 1 Sending a fax manually 27 4 2 Document requirements 27 4 3 Sending a fax using the phonebook and one touch dial 28 4 4 Broadcast transmission 28 Receiving Faxes 4 5 Selecting the way to use your fax machine 29 4 6 Receiving a fax manually Auto answer OFF 30 4 7 Receiving a fax automatically Auto answer ON 31 4 8 Receive polling retrieving a fax placed on an...

Page 8: ...aning 11 3 Document feeder recording paper feeder scanner glass cleaning 62 11 4 Thermal head cleaning 63 12 General Information Printed Reports 12 1 Reference lists and reports Base unit only 65 Specifications 12 2 Specifications 65 13 Index 13 1 Index 67 8 Table of Contents ...

Page 9: ...digital cordless handset Model No Part No KX TGA641FX DECT repeater Model No Part No KX A272 1 To ensure the unit operates properly we recommend using the Panasonic replacement film The ink film is not reusable Do not rewind and use the ink film again 2 Replacement batteries may have a different capacity from that of the supplied batteries 1 3 Button descriptions of the base unit A G H IJK F E D C...

Page 10: ...ion Press again to resume the conversation MSP PHONEN R For speakerphone operation MFAX STARTN R To send or receive a fax MCOPYN R To copy a document page 34 1 4 Button descriptions of the cordless handset A B C D E F Soft keys R To select the features or operations displayed directly above each key page 11 M N Talk R To make answer calls page 21 21 M N Speakerphone R For speakerphone operation M ...

Page 11: ...ey icons Soft key icon Action Return to the previous screen Display the menu Accept the current selection Display a previously dialled telephone number Open the cordless handset phonebook Display the character entry mode for phonebook search page 22 Turn the key lock feature OFF page 21 Select a character entry mode Soft key icon Action Stop recording or playback Insert a dialling pause Erase the ...

Page 12: ...r C Receiver D Microphone E Charge contacts 1 7 Ink film The included film roll is a starter ink film 1 Open the front cover 2 Release the back cover by pushing the green button A A 3 Open the back cover 4 Insert the blue gear of the ink film roll into the front left slot of the unit B and the white gear of the ink film roll into the rear left slot of the unit C R The ink film is safe to touch and...

Page 13: ... film is tight E and at least one layer of ink film is wrapped around the blue core F D E Correct F Tight 1 turn Incorrect No ink film is wrapped around the blue core Slack Crease Reverse 6 Close the back cover securely by pushing down on the dotted area at both ends G G 7 Close the front cover securely 13 1 Introduction and Installation ...

Page 14: ...materials may transfer onto the fusing roller and cause damage Moist paper R Some paper only accepts print on one side Try using the other side of the paper if you are not happy with the print quality or if misfeeding occurs R For proper paper feeding and best print quality we recommend using long grained paper R Do not use paper of different types or thickness at the same time This may cause a pa...

Page 15: ...ct the handset cord A A 1 11 Battery installation replacement Important R USE ONLY Ni MH batteries AAA R03 size Do NOT use alkaline Manganese Ni Cd batteries etc R Use the supplied rechargeable batteries For replacement we recommend using the Panasonic rechargeable batteries noted on page 5 9 R Wipe the battery ends with a dry cloth R Avoid touching the battery ends or the unit contacts R Confirm ...

Page 16: ...slide the cover R When replacing batteries remove the old batteries positive terminal first 2 Insert the batteries negative terminal first Close the cordless handset cover R When the language selection is displayed see page 46 16 1 Introduction and Installation ...

Page 17: ... may disturb the network condition of the device R If you use the unit with a computer and your internet provider instructs you to install a filter C please connect it as follows C 2 1 2 Charger unit KX FC278 only A AC adaptor R Connect to a power outlet 220 V 240 V 50 60 Hz B Hooks R Fasten the AC adaptor cord to prevent it from being disconnected C Screws not included R The charger can be mounte...

Page 18: ...arge Maximum battery performance is reached after a few complete cycles of charge discharge use R Actual battery performance depends on a combination of how often the cordless handset is in use and how often it is not in use standby R Even after the cordless handset is fully charged the cordless handset can be left on the base unit or charger without any ill effect on the batteries R The battery l...

Page 19: ...ress MJN or MKN 2 7 Date and time The date and time can be set using either the cordless handset or the base unit R The other party s fax machine will print the date and time on the top of each page you send according to your unit s date and time setting R If a power failure occurs the date and time setting may be lost If the correct date and time is not displayed after the power has been restored...

Page 20: ...ters see page 50 for character entry R To enter a hyphen press MRN R To enter a space press MMUTEN 3 MSETN 4 Press MMENUN to exit To correct a mistake Press MFN or MEN to move the cursor to the incorrect character and make the correction R To erase all of the characters press and hold MSTOPN 2 9 Your fax number You can program your fax number so that it appears on the top of each page sent With th...

Page 21: ... Pause for PBX long distance service users A pause is sometimes required when making calls using a PBX or long distance service When storing a calling card access number and or PIN in the phonebook a pause is also needed page 23 Example If you need to dial the line access number 0 when making outside calls with a PBX 1 M0N A 2 Dial the telephone number A M N Note R A 3 second pause is inserted eac...

Page 22: ...for a name by initial 1 R Change the character entry mode if necessary A Press MCN or MDN to select the character entry mode A 2 Press the dial key M0N to M9N which contains the character you are searching for page 50 R Press the same dial key repeatedly to display the first item corresponding to each character located on that dial key R If there is no item corresponding to the character you selec...

Page 23: ...item corresponding to each letter located on that dial key R If there is no item corresponding to the letter you selected press another dial key 4 Press MJN or MKN repeatedly to scroll through the phonebook if necessary 3 5 3 Editing a stored item 1 MPHONEBOOKN 2 Press MJN or MKN repeatedly to display the desired item A MMENUN A MGN 3 Edit the name if necessary A MSETN 4 Edit the telephone number ...

Page 24: ...nformation may not be received properly Consult your PBX supplier R If the unit cannot receive caller information the following is displayed OUT OF AREA Out of Area The caller dials from an area which does not provide a Caller ID service PRIVATE CALLER Private Caller The caller requests not to send caller information Missed calls If a call is not answered the unit treats the call as a missed call ...

Page 25: ...ordless handset 1 2 Caller List A 3 Press MDN or MCN repeatedly to display the desired item R If the other party s name is displayed on the screen you can switch the screen between the name and its telephone number by pressing repeatedly 4 A Edit Call A 5 Edit the number R Press dial key M0N to M9N to add to delete 6 M N or M N 3 9 2 With the base unit 1 MCALLER IDN 2 Press MJN or MKN repeatedly t...

Page 26: ... 5 If a name is required enter the name up to 16 characters see page 50 for character entry A 6 Enter the telephone number up to 24 digits A A A M N 3 11 2 Into the base unit 1 MCALLER IDN 2 Press MJN or MKN repeatedly to display the desired item A MMENUN 3 If a name is required enter up to 16 characters for the name see page 50 for character entry A MSETN A MSETN 26 3 Telephone ...

Page 27: ...Quick scan feature To use this feature activate feature 34 page 41 beforehand 1 Insert the document 2 Enter the fax number A MFAX STARTN R If the document exceeds the memory capacity transmission will be cancelled and this feature will be turned OFF automatically You must send the entire document manually R This feature cannot be used if the handset is being used KX FC278 only or if MSP PHONEN on ...

Page 28: ...TN Fax auto redial If the line is busy or if there is no answer the unit will automatically redial the number 2 or more times R To cancel redialling press MSTOPN 4 4 Broadcast transmission By storing the base unit s phonebook items page 23 into the broadcast memory you can send the same document to multiple parties up to 20 Your programmed items will remain in the broadcast memory allowing frequen...

Page 29: ... display Note R Make sure feature 77 is set to TAM FAX beforehand page 44 R Do not connect an answering machine to the same telephone line If connected set the automatic answer feature to OFF by pressing MAUTO ANSWERN repeatedly How phone calls and faxes are received If the call is a phone call the fax machine will record the caller s message automatically If a fax calling tone is detected the fax...

Page 30: ...to answer the call 2 When document reception is required a fax calling tone slow beep is heard or no sound is heard press MFAX STARTN How to receive calls and faxes with the cordless handset 1 Lift the cordless handset and press M N or M N to answer the call 2 When document reception is required a fax calling tone slow beep is heard or no sound is heard press 3 Select Fax Start then press R You ca...

Page 31: ...onnection code can be changed in feature 49 on page 43 4 7 Receiving a fax automatically Auto answer ON Note R By default the unit reduces the size of the received document to 92 when printing See feature 36 on page 42 for details 4 7 1 Activating TAM FAX mode Telephone Answering Machine Fax mode 1 Make sure feature 77 is set to TAM FAX page 44 beforehand 2 Press MAUTO ANSWERN repeatedly to displa...

Page 32: ...nswer all calls and only receive fax documents Note R The number of rings before a call is answered in FAX ONLY mode can be changed feature 06 on page 39 4 8 Receive polling retrieving a fax placed on another fax machine This feature allows you to retrieve a document from another compatible fax machine Therefore you pay for the call Make sure that no documents are fed into your unit and that the o...

Page 33: ...N repeatedly to display JUNK LIST PRINT A MSETN 3 Press MMENUN to exit To erase an item from the junk fax prohibitor list 1 Press MMENUN repeatedly to display JUNK FAX PROH 2 Press MEN repeatedly to display JUNK LIST DISP A MSETN 3 Press MJN or MKN repeatedly to display the desired item A MERASEN R To cancel erasing press MSTOPN then press MMENUN 4 MSETN A MMENUN 33 4 Fax ...

Page 34: ...STOPN 5 1 1 More copying features To enlarge a document 1 Insert the document 2 MCOPYN A MEN 3 Press MJN repeatedly to select 150 or 200 A MSTARTN R The unit will enlarge the centre of the upper part of the document To make an enlarged copy of the bottom of the document turn the document around and then make a copy Example 150 enlarged copy Original document Enlarged copy A B C D A B C D To reduce...

Page 35: ...asing your recorded greeting message 1 MGREETING CHECKN R To cancel erasing press MSTOPN 2 MERASEN Note R If you erase your TAM FAX greeting message the pre recorded greeting message will be played when a call is received 6 2 Listening to recorded messages When the unit has recorded new voice messages The MAUTO ANSWERN indicator will flash when auto answer is turned ON The total number of recorded...

Page 36: ... erase or do not record your own greeting message the unit plays a pre recorded greeting asking callers to leave a message If the message recording time page 37 is set to Greeting Only callers messages are not recorded and the unit plays a different pre recorded greeting message asking callers to call again 6 4 2 Listening to recorded messages When new messages have been recorded is displayed on t...

Page 37: ...ase unit feature 11 on page 39 To change the ring count in TAM FAX mode You can change the number of times the unit rings Number of Rings before the unit answers a call You can select 2 to 7 rings or Auto The default setting is 2 Rings Auto The unit answers after 2 or 3 rings when new messages have been recorded and after 5 or 6 rings when there are no new messages If you call your unit from a rem...

Page 38: ... playback M4N Play new messages M5N Play all messages M6N Play greeting message M7N Record greeting message M9N Stop current operation 2 M0N Turn OFF auto answer setting MGNM4N Erase currently playing message MGNM5N Erase all messages MGNM6N Erase greeting message during greeting message playback 3 Key Remote command MGNMBN End remote operation 1 If pressed within the first 5 seconds of a message ...

Page 39: ...ls Changing the ring count in FAX ONLY mode MBNM0NM6N M1N 1 M2N 2 default M3N 3 M4N 4 M5N 5 M6N 6 M7N 7 M8N 8 M9N 9 Note R Set feature 77 to FAX ONLY page 44 beforehand Changing the ring count in TAM FAX mode 1 MBNM0NM6N M0N AUTO M2N 2 default M3N 3 M4N 4 M5N 5 M6N 6 M7N 7 See page 32 for details Note R Set feature 77 to TAM FAX page 44 beforehand R You can also program this feature with the cordl...

Page 40: ...re Selection Setting the journal report to print automatically MBNM2NM2N M0N OFF The unit will not print a journal report but will keep a record of the last 30 fax transmissions and receptions M1N ON default The unit will print a journal report automatically after every 30 new fax transmissions and receptions page 27 Sending documents overseas MBNM2NM3N If you cannot send a fax overseas even if th...

Page 41: ...will not be printed automatically but the base unit will keep a record of the information for the last 50 callers M1N ON The Caller ID list will be printed automatically each time the base unit logs 50 callers page 24 Setting the time adjustment MBNM3NM3N Using this feature the unit s date and time setting will be automatically adjusted when caller information is received M1N AUTO The date and tim...

Page 42: ...RMAL default M2N DARKER Changing the fax activation code MBNM4NM1N If you wish to use an extension telephone page 30 to receive faxes activate this feature and program the activation code M0N OFF M1N ON default 1 MMENUN A MBNM4NM1N 2 Press M1N to select ON A MSETN 3 Enter your code from 2 to 4 digits using 0 9 MGN and MBN R The default code is H 9 4 MSETN A MMENUN Setting the memory reception aler...

Page 43: ...s feature The volume of your voices will be slightly decreased to reduce the echo M0N OFF default M1N ON Screening the incoming call MBNM6NM7N To hear an incoming call from the speaker when the answering machine is recording the message M0N OFF M1N ON default Setting the Error Correction Mode ECM MBNM6NM8N This feature is available when the transmitting receiving fax machines are ECM compatible M0...

Page 44: ...es the extension telephone rings before the unit answers the call M1N 1 M2N 2 default M3N 3 M4N 4 M5N 5 M6N 6 M7N 7 M8N 8 M9N 9 See page 31 for details Resetting advanced features to their default settings MBNM8NM0N M0N NO default M1N YES To reset the advanced features 1 MMENUN A MBNM8NM0N 2 Press M1N to select YES A MSETN A MSETN Note R The ECM selection feature 68 on page 43 will not be reset 1 ...

Page 45: ...volume see page 19 To set the base unit ringtone for outside calls see feature 17 on page 40 To set the base unit LCD display contrast see feature 39 on page 42 3 When the ringer volume is turned OFF is displayed and the cordless handset does not ring for outside calls However even when the ringer volume is set to OFF the cordless handset rings at the low level for alarm page 46 and intercom calls...

Page 46: ...sed for outside calls 8 M N R When the alarm is set is displayed Note R You can skip to step 4 by pressing M N in standby mode R To stop the alarm press any dial key or place the cordless handset on the base unit or charger R When the cordless handset is in use the alarm will not sound until the cordless handset is in standby mode R If you select Once the setting changes to Off after the alarm sou...

Page 47: ...cordless handset for about 7 hours before initial use R When you purchase an additional cordless handset refer to the additional cordless handset s installation manual for registration 8 2 1 Deregistering a cordless handset A cordless handset can cancel its own registration or the registration of another cordless handset that is stored to the base unit This allows the cordless handset to end its w...

Page 48: ...will flash rapidly The display will show the paging extension s number 1 Press M N or M N to answer the page 2 To end the intercom call press M N With the base unit When the base unit is being paged it will beep and display the paging extension s number KX FC278 1 Press MSP PHONEN MINTERCOMN or lift the handset to answer the page 2 To end the intercom call press MSP PHONEN MINTERCOMN or replace th...

Page 49: ... base unit or between 2 cordless handsets The destination unit will save the items in its phonebook 8 5 1 To the base unit or another cordless handset using the cordless handset Copying one phonebook item 1 Find the desired cordless handset phonebook item page 22 A 2 Copy A 3 To copy to the base unit press M0N To copy to another cordless handset enter the desired cordless handset number you wish t...

Page 50: ...se and lowercase To enter another character located on the same dial key press MEN of the base unit and MCN of the cordless handset to move the cursor to the next space then press the appropriate dial key If you do not press any dial key of the cordless handset within 5 seconds after entering a character the character is fixed and the cursor moves to the right 9 1 1 Character entry modes Several c...

Page 51: ...R The following are used for both uppercase and lowercase Extended 2 character table R The following are used for both uppercase and lowercase Cyrillic character table 51 9 Useful Information ...

Page 52: ...ilm or a recording paper jam Install paper page 14 install ink film page 12 or remove the jammed paper page 61 NO DOCUMENT R The document was not fed into the unit properly Re insert the document and try again OTHER FAX NOT RESPONDING R The other party s fax machine is busy or has run out of recording paper Try again R The other party s fax machine rang too many times Send the fax manually page 27...

Page 53: ... all faxes in memory if the power is removed Check with power connected R When performing memory transmission the document being stored exceeded the memory capacity of the unit Send the entire document manually FILM EMPTY R The ink film is empty Replace the ink film with a new one page 12 R The ink film is slack Tighten it see step 5 on page 13 and install again R The fax machine is positioned nea...

Page 54: ...ss handset s phonebook memory is full Erase unnecessary items page 22 Messages Full R There is no room left in the memory to record voice messages Erase unnecessary messages page 35 36 No link Reconnect AC adaptor R The cordless handset has lost communication with the base unit Move closer to the base unit and try again R Unplug the base unit s power cord to reset the unit Reconnect the power cord...

Page 55: ...er tray too strongly Remove all of the installed paper and re install it gently The unit displays CHECK PAPER even though paper is inserted R The paper is inserted halfway Insert it correctly page 62 and press MSETN to clear the message The other party complains they only hear a fax tone and cannot talk R FAX ONLY mode is set Tell the other party the number is only used for faxes R Change the rece...

Page 56: ...Incorrect time information from incoming Caller ID changes the time Set the time adjustment to MANUAL OFF feature 33 on page 41 10 3 3 Cordless handset Problem Cause Solution The cordless handset does not automatically turn ON after installing replacing batteries R The battery is empty or too weak to turn ON the power Place the cordless handset on the base unit or charger and let it charge The cor...

Page 57: ...e closer to the base unit R If you use a DSL ADSL service we recommend connecting a DSL ADSL filter between the base unit and the telephone line jack Contact your DSL ADSL provider for details The cordless handset beeps and or flashes R Battery charge is low Fully charge the batteries page 18 I fully charged the batteries but still flashes R Clean the charge contacts and charge again page 18 R It ...

Page 58: ...their received document R The scanner glass or rollers are dirty with correction fluid etc Clean them page 62 Please do not insert a document before correction fluid has dried completely Documents frequently misfeed R Clean the document feeder rollers recording paper feeder and rubber flap page 62 10 3 5 Fax receiving Problem Cause Solution I cannot receive documents R The ink film is empty Replac...

Page 59: ...on code from MGNMBNM9N default setting Verify the remote fax activation code feature 41 on page 42 R The memory is full of received documents due to a lack of recording paper a lack of ink film or a recording paper jam Install paper page 14 install ink film page 12 or remove the jammed paper page 61 The other party complains that they cannot send a document R The receiving mode is set to TEL mode ...

Page 60: ...ature 10 on page 39 R The memory is full Erase unnecessary messages page 35 36 R Make sure there is no other answering machine connected on the same line I cannot operate the answering machine with the cordless handset R Someone is operating the answering machine R You are too far from the base unit Move closer to the base unit The message indicator flashes slowly R This is normal New messages hav...

Page 61: ... may misfeed or jam 1 Open the front cover A push the green button B then open the back cover C A C B 2 Remove the jammed recording paper D D 3 Turn the blue gear E in the direction of the arrow until the ink film is tight F and at least one layer of ink film is wrapped around the blue core G F E Correct G Tight 1 turn Incorrect No ink film is wrapped around the blue core Slack Crease Reverse 61 1...

Page 62: ...essage MSETN 11 2 Document jams 1 Open the front cover Remove the jammed document carefully A A 2 Close the front cover securely Note R Do not pull out the jammed paper forcibly before opening the front cover 11 3 Document feeder recording paper feeder scanner glass cleaning Clean the document feeder recording paper feeder scanner glass when Documents or recording paper frequently misfeed Smudges ...

Page 63: ... F D E 4 Clean the recording paper feeder roller G with a cloth moistened with isopropyl rubbing alcohol and let all parts dry thoroughly G 5 Close the back cover securely by pushing down on the dotted area at both ends H then close the front cover securely I H I 6 Install the paper tray page 14 then insert the recording paper gently page 14 7 Connect the power cord and the telephone line cord 11 ...

Page 64: ...k film D D 4 Clean the thermal head E with a cloth moistened with isopropyl rubbing alcohol and let it dry thoroughly Caution R To prevent a malfunction due to static electricity do not use a dry cloth and do not touch the thermal head directly E 5 Re install the ink film and close the covers see step 4 to 7 on page 12 6 Install the paper tray page 14 then insert the recording paper gently page 14...

Page 65: ...Public Switched Telephone Network n Document size Max 216 mm in width Max 600 mm in length n Effective scanning width 208 mm n Effective printing width 202 mm n Transmission time 1 Approx 12 s page ECM MMR 2 n Scanning density Horizontal 8 pels mm Vertical 3 85 lines mm in standard resolution 7 7 lines mm in fine photo resolution 15 4 lines mm in super fine resolution n Photo resolution 64 level n...

Page 66: ...etained in memory 4 Recording time may be reduced by the calling party s background noise ITU T No 1 Test Chart Note R Design and specifications are subject to change without notice R The pictures and illustrations in these instructions may vary slightly from the actual product Recording paper specifications Recording paper size A4 210 mm 297 mm Recording paper weight 64 g m2 to 80 g m2 12 2 2 Cor...

Page 67: ... features 40 Alarm 46 Auto answer setting 44 Auto disconnection 43 Auto talk feature 22 B Base unit phonebook Copying 49 Editing 23 Erasing 23 Making a phone call 23 Sending faxes 28 Storing 23 Basic features 39 Battery Charge 18 Installation 15 Performance 18 Replacement 15 BROADCAST LIST 65 Broadcast transmission 28 Button description Base unit 9 Cordless handset 10 C Call screening 43 Call wait...

Page 68: ...andset programming 44 Q Quick scan 27 34 R Recall time 43 Receiving alert 42 Receiving faxes Automatically 31 Manually 30 Receiving reduction 42 Recording Greeting message 35 36 Memo message 36 Recording paper 14 66 Recording time Incoming message 37 39 TAM FAX greeting 43 Redial list 21 Redialling Base unit 21 27 28 Registration 47 Remote operation 37 Remote operation ID 37 39 Repeater 47 Reports...

Page 69: ...Phonebook 22 23 T TAM FAX mode 29 31 TEL mode 29 30 TEL FAX mode 29 30 Time adjustment 41 Transferring a call 48 V Voice time day stamp 35 Volume Base unit 19 Cordless handset 19 69 13 Index ...

Page 70: ...70 Notes ...

Page 71: ...71 Notes ...

Page 72: ...opyright R This material is copyrighted by Panasonic System Networks Co Ltd and may be reproduced for internal use only All other reproduction in whole or in part is prohibited without the written consent of Panasonic System Networks Co Ltd Panasonic System Networks Co Ltd 2010 FC268FX FC268FX PNQX3074ZA CM1010DA0 ...

Reviews: