33
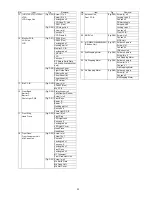
13 (HC-V750/V757/V750M/
V730)
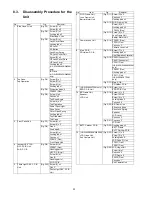
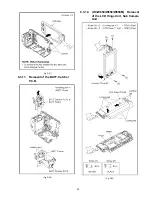
LCD Hinge Unit
(Fig. D25) Screw (Y) x 2
Screw (Z) x 2
Locking tab x 9
LCD Case (T) Unit
FP901 (Flex)
(Fig. D26) LCD Hinge Unit
Screw (a) x 1
Convex x 3
LCD Frame A
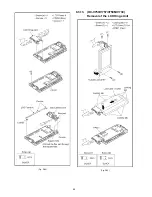
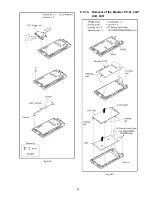
14 Monitor P.C.B.,
LGP Unit,
LCD
(Fig. D27) FP904 (Flex)
FP905 (Flex)
Locking tab x 1
Hooking part x 1
Monitor P.C.B.
Locking tab x 4
LGP Unit
LCD
Convex x 1
SC Rotate Earth Plate
(HC-W850/W858/W850M
only)
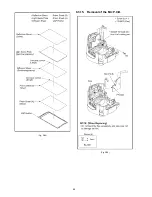
(Fig. D28) Reflection Sheet
Light Guide Plate
Diffusion Sheet
Prism Sheet (B)
Prism Sheet (A)
LGP Holder
15 Mic P.C.B.
(Fig. D29) Screw (b) x 1
FP4802 (Flex)
Mic P.C.B.
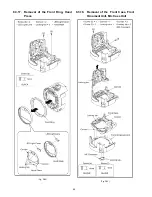
16 Front Base,
Barrier R,
Barrier F,
Photo Light P.C.B.
(Fig. D30) Projection part x 3
Lens Damper Rubber
Screw (c) x 5
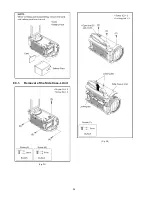
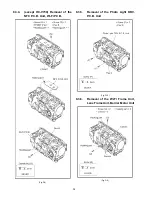
(Fig. D31) Front Base
Barrier R
Barrier F
Hooking part x 1
Convex x 2
Photo Light P.C.B.
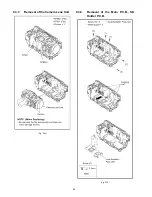
17 Front Ring,
Hood Piece
(Fig. D32) Screw (d) x 2
Front Ring
LED Light Lens
Convex x 2
Locking tab x 6
LED Light Cover
Hood Piece
Hood Mask
18 Front Case,
Front Ornament Unit
Mic Case Unit
(Fig. D33) Screw (e) x 1
Screw (f) x 1
Convex x 1
Locking tab x 1
Convex x 2
Locking tab x 1
Front Case
Locking tab x 2
MF Ornament
Front Ornament Unit
(Fig. D34) Screw (g) x 2
Mic Earth Plate
Mic Case Unit
Mic Net Cover
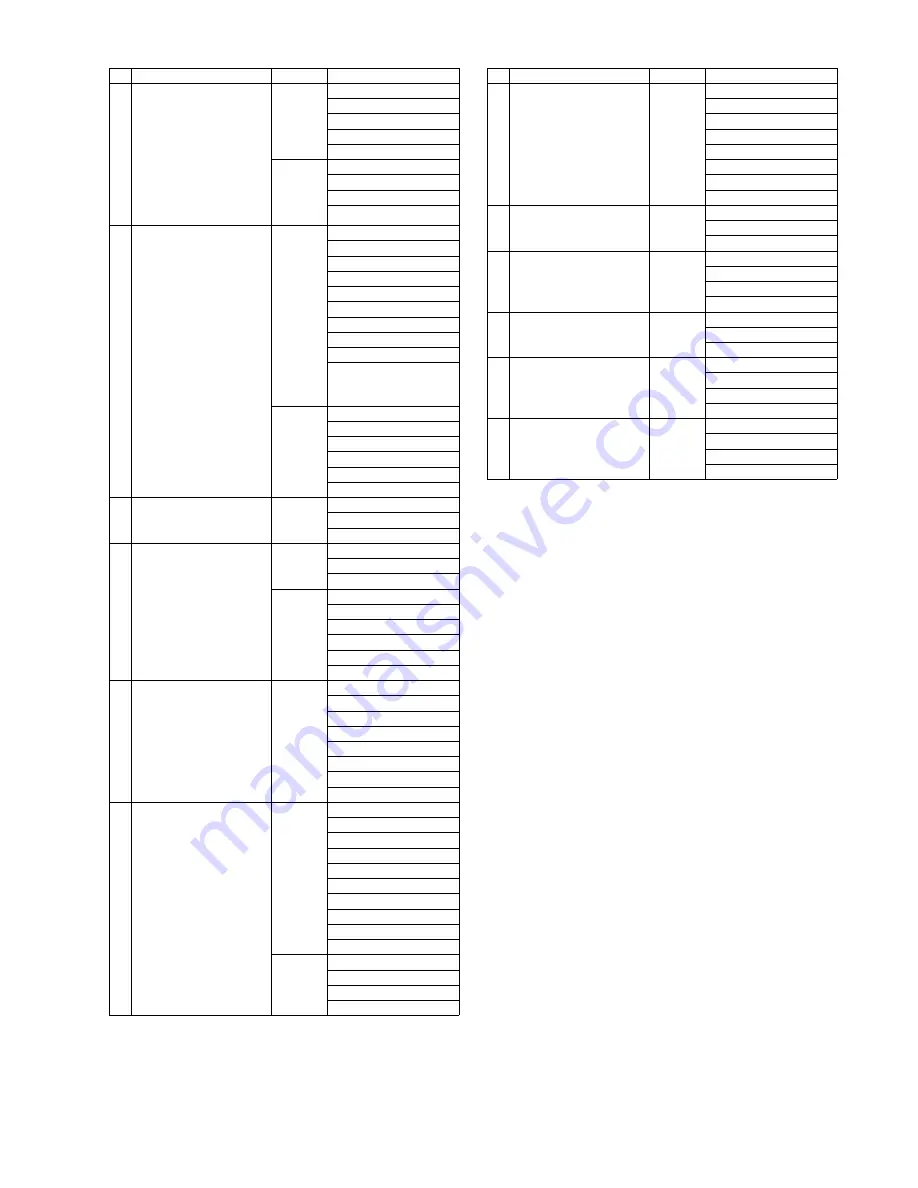
No.
Item
Fig.
Removal
19 Kurupon Unit,
Front P.C.B.
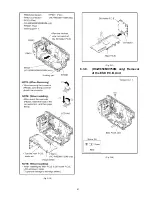
(Fig. D35) Screw (h) x 2
Locking tab x 2
Convex x 2
FR Earth Angle
Kurupon Unit
Locking tab x 1
Convex x 2
Front P.C.B.
20 MOS Unit
(Fig. D36) Screw (i) x 3
Convex x 2
MOS Unit
21 (HC-W850/W858/W850M )
IR Kudou Unit
(Fig. D37) Solder x 2 points
Screw (j) x 1
Convex x 2
IR Kudou Unit
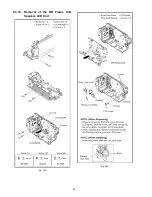
22 2nd Stepping Motor
(Fig. D38) Solder x 4 points
Screw (k) x 3
2nd Stepping Motor
23 3rd Stepping Motor
(Fig. D39) Solder x 4 points
Screw (m) x 3
Convex x 1
3rd Stepping Motor
24 4th Stepping Motor
(Fig. D40) Solder x 4 points
Screw (n) x 2
Convex x 2
4th Stepping Motor
No.
Item
Fig.
Removal
Summary of Contents for HC-V750EB
Page 12: ...12 ...
Page 13: ...13 ...
Page 14: ...14 ...
Page 15: ...15 ...
Page 16: ...16 ...
Page 18: ...18 ...
Page 19: ...19 ...
Page 20: ...20 ...
Page 21: ...21 ...
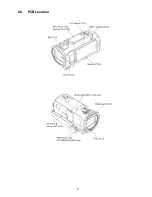
Page 31: ...31 8 2 PCB Location ...
Page 34: ...34 8 3 1 Removal of the Side Case L Unit Fig D1 Fig D2 ...
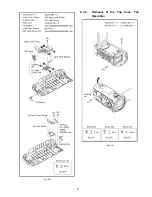
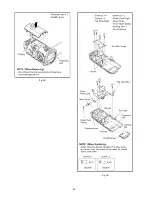
Page 35: ...35 Fig D3 8 3 2 Removal of the Top Case Top Operation Fig D4 ...
Page 36: ...36 Fig D5 Fig D6 ...
Page 37: ...37 8 3 3 Removal of the Front Case Unit Fig D7 Fig D8 ...
Page 39: ...39 Fig D12 Fig D13 ...
Page 41: ...41 Fig D16 Fig D17 8 3 9 HC W850M V750M only Removal of the ESD P C B Unit Fig D18 ...
Page 42: ...42 8 3 10 Removal of the BR Frame Unit Speaker LCD Unit Fig D19 Fig D20 ...
Page 44: ...44 Fig D24 8 3 13 HC V750 V757 V750M V730 Removal of the LCD Hinge Unit Fig D25 ...
Page 45: ...45 Fig D26 8 3 14 Removal of the Monitor P C B LGP Unit LCD Fig D27 ...
Page 46: ...46 Fig D28 8 3 15 Removal of the Mic P C B Fig D29 ...
Page 47: ...47 8 3 16 Removal of the Front Base Barrier R Barrier F Photo Light P C B Fig D30 Fig D31 ...
Page 49: ...49 Fig D34 8 3 19 Removal of the Kurupon Unit Front P C B Fig D35 ...
Page 54: ...54 Level Shot Adjutment Chart ...
Page 56: ...56 9 1 2 Adjustment Items Adjustment item as follows ...
Page 59: ...59 ...
Page 60: ...60 ...
Page 61: ...61 ...
Page 62: ...62 ...
Page 63: ...63 ...
Page 64: ...64 ...
Page 65: ...65 ...

