background image

- 116 -

About the PC display

When the unit is connected to a PC, it is recognized as an external drive.

Removable disk (Example: 

) is displayed in [Computer].

Example folder structure of an SD card:

The following data will be recorded.

1

Up to 999 still pictures in JPEG format 
([S1000001.JPG] etc.)

2

MP4 format (1080/60p) motion picture 
files ([S1000001.MP4] etc.)

3

MP4 format (720/30p) motion picture 
files ([S1000001.MP4] etc.)

4

MP4 format (360/30p) motion picture 
files ([S1000001.MP4] etc.)

5

iFrame format motion picture files 
([S1000001.MP4] etc.)

6

JPEG format still pictures created from 
the motion picture

7

The motion picture thumbnails

8

AVCHD format motion picture files 
([00000.MTS] etc.)

9

For management

Copying your still pictures to 
your PC

Card reader function (mass storage)

Still pictures recorded with this unit can be 
copied to the PC with Explorer or other 
programs.

1

Double-click the folder that contains the 
still pictures. ([DCIM] 

#

 [100CDPFQ] 

etc.)

2

Drag and drop the still pictures onto the 
destination folder (on the PC’s HDD).

Do not delete the SD card’s folders. Doing so 
may make the SD card unusable in this unit.

Do not delete or edit files on the SD card or 
USB HDD on the PC. If you do so, this unit 
may not be able to read these files or its 
functions may not operate correctly.

When data not supported by this unit has 
been recorded on a PC, it will not be 
recognized by this unit.

Always use this unit to format SD cards.

We recommend using HD Writer LE 3.0 to 
copy motion picture data.
Using Windows Explorer or other programs 
on the PC to copy, move or rename files and 
folders recorded with this unit will result in 
them being unusable with HD Writer LE 3.0.
It is impossible to write data to SD card on 
this unit from a PC.

AVCHDTN
BDMV

DCIM

CAM_SD

100CDPFQ

AVCHD

PRIVATE

103TCPBH

105CDPFS


PANA_EXT

101YAPHH

102XCPHH

104UCPBH

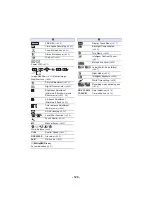
Summary of Contents for HC-V180

Page 1: ...n Video Camera Model No HC V180 Please read these instructions carefully before using this product and save this manual for future use SQW0490 until 2015 12 8 Register online at http shop panasonic co...

Page 2: ...if recording or editing does not work properly Likewise the above also applies in a case where any type of repair is made to the unit About Condensation When the lens or the LCD monitor is fogged up...

Page 3: ...for Still Picture Recording Mode Function that can be used for the Playback Mode Function that can be used for the Playback Mode motion pictures only Function that can be used for the Playback Mode s...

Page 4: ...to 40 Intelligent Auto Plus 42 Creative Control 42 Scene Mode 45 Endless Loop Recording 46 Manual recording 47 White Balance 48 Manual shutter speed iris adjustment 49 Manual Focus adjustment 50 Recor...

Page 5: ...iter LE 3 0 109 Operating environment 111 Installation 113 Connecting to a PC 114 About the PC display 116 Starting HD Writer LE 3 0 117 Reading the operating instructions of the software applications...

Page 6: ...ton l 14 7 HDMI mini connector HDMI l 90 8 USB terminal l 95 101 114 9 Lens cover opening closing switch When not using the unit close the lens cover to protect the lens Slide the opening closing swit...

Page 7: ...een l 16 It can open up to 90o It can rotate up to 180o A towards the lens or 90o B towards the opposite direction 17 Tripod receptacle Attaching a tripod with a screw length of 5 5 mm 0 22 q or more...

Page 8: ...m lever W T In Motion Picture Recording Mode or Still Picture Recording Mode l 37 Thumbnail display switch l 25 Volume lever sVOLr In Playback Mode l 26 24 Grip belt Adjust the length of the grip belt...

Page 9: ...Preparation Power supply It has been found that counterfeit battery packs which look very similar to the genuine product are made available to purchase in some markets Some of these battery packs are...

Page 10: ...ond off indicating that charging has begun It will turn off when the charging is completed Connecting to the AC outlet It is possible to use this unit with power supplied from the AC outlet by turning...

Page 11: ...he batteries heat up after use or charging This is not a malfunction Battery model number Voltage Capacity minimum Charging time Recording format Recording mode Maximum continuous recordable time Actu...

Page 12: ...nt is compatible with these Memory Cards An Eye Fi X2 series SD card is required to use functions related to Eye Fi l 104 We do not guarantee the operation of SD cards other than the ones above Furthe...

Page 13: ...ove the USB cable j Expose the unit to vibrations or shock Performing the above while the lamp is on may result in damage to data SD card or this unit Do not expose the terminals of the SD card to wat...

Page 14: ...eniently used to turn the unit on off The unit will not turn off while recording motion pictures even if the LCD monitor is closed In the following cases opening the LCD monitor does not turn on the u...

Page 15: ...witch this unit between Motion Picture Recording Mode and Still Picture Recording Mode 1 Press the recording playback button to switch this unit to Recording Mode The recording mode switching icon A i...

Page 16: ...mode may not be switched When you switch from Still Picture Recording Mode to Motion Picture Recording Mode or vice versa settings used in the original recording mode may not be maintained l 39 You c...

Page 17: ...t movie of the Creative Control Mode l 42 D Displayed only in Time Lapse Rec of the Creative Control Mode l 42 Scene Mode l 45 Endless Loop Recording Mode l 46 and Manual Mode l 47 To display the Touc...

Page 18: ...orld Time setting l 28 HOME DESTINATION The year can be set between 2000 and 2039 3 Touch ENTER Touch EXIT to complete the setting The date and time function is driven by a built in lithium battery If...

Page 19: ...with your hand etc Basic motion picture recording The unit should normally be held steady when recording If you move the unit when recording do so slowly maintaining a constant speed The zoom operati...

Page 20: ...ill be switched to Playback Mode To change the recording format change the REC FORMAT or REC MODE l 61 62 Still pictures can be recorded while recording the motion picture l 23 The images recorded bet...

Page 21: ...the unit l 6 1 Open the LCD monitor and set this unit to Still Picture Recording Mode l 15 2 Press the button halfway For Auto Focus only Focus indication 3 Press the button fully Maximum recordable s...

Page 22: ...tions or the menu settings About the screen indications in Still Picture Recording Mode About the focusing area When there is a contrasting object ahead or behind the subject in the focus area the sub...

Page 23: ...is different from ordinary still pictures so that motion picture recording takes preference over still picture recording If simultaneous recording is performed during motion picture recording the rema...

Page 24: ...ected When MP4 iFrame is selected The recording mode icon B is displayed in the thumbnail display when the item is touched and The following icons are displayed on thumbnails when ALL AVCHD or 1080 60...

Page 25: ...operated to side or side 20 scenes 9 scenes 1 scene Highlight Time Frame Index l 70 Highlight Time Frame Index can only set in Motion Picture Playback Mode If the recording playback button is pressed...

Page 26: ...ack of motion pictures recorded using another device is performed using this unit or when motion pictures recorded using this unit is played back in another device playback may not proceed normally or...

Page 27: ...by touching 4 Touch the desired item to enter the setting 5 Touch EXIT to exit the menu setting About guide display After touching touching the submenus and items will cause function descriptions and...

Page 28: ...etting is turned on the time difference between the current time and GMT will be set forward by 1 hour Touch DAYLIGHT SAVING again to return to the normal time setting If you set Link Clock to Dayligh...

Page 29: ...y touching EXIT appears and the time of the travel destination is indicated To return the display to the home setting Set the home region using Steps 1 to 3 and close the setting by touching EXIT If y...

Page 30: ...reen It is possible to change the date format You can set the display method of the zoom button icons and recording button icon Please refer to page 54 Please refer to page 92 DATE TIME SETUP DATE TIM...

Page 31: ...automatically turns off This unit will not automatically turn off even if ECONOMY AC is set to ON in following cases j Using the USB cable for PC etc j PRE REC is used j During slide show playback Tou...

Page 32: ...kes it easier to view the LCD monitor in bright places including outdoors These settings will not affect the images actually recorded When the AC adaptor is in use the LCD monitor is set to automatica...

Page 33: ...red character is confirmed in approx 1 second after character input and the cursor is moved to the right It makes the input easy without moving the cursor when characters on the same key are to be ent...

Page 34: ...shock The used space and remaining recordable time of the SD card can be checked The remaining recordable time in the currently set Recording Mode is displayed only in the Motion Picture Recording Mo...

Page 35: ...DE to OFF or insert an SD card This item is used to start the Optical Image Stabilizer demo Touch O I S DEMO the demonstration automatically starts When you touch EXIT the demonstration will be cancel...

Page 36: ...unit The authentication information cannot be displayed on external devices Check it on the LCD monitor of this unit You can check how to access the website where you can download the Owner s Manual P...

Page 37: ...g Mode Extra Optical Zoom Maximum zoom ratio in Still Picture Recording Mode varies depending on the setting of PICTURE SIZE l 67 If you take your finger off the zoom lever during zoom operation the o...

Page 38: ...unit on the tripod using LEVEL GAUGE l 63 and then set Level Shot Function to Normal or Strong before use When you switch the setting of the Level Shot Function the screen may become black momentaril...

Page 39: ...1 2 Intelligent Auto Plus You can add manually adjusted brightness and color balance settings to the Intelligent Auto Mode and record l 42 1 Creative Control You can record motion pictures with added...

Page 40: ...not be detected depending on the recording conditions such as when faces are of certain sizes or at certain tilts or when digital zoom is used Mode Effect Portrait Faces are detected and focused autom...

Page 41: ...ective range of Automatic White Balance adjustment on this unit 2 Blue sky 3 Cloudy sky rain 4 Sunlight 5 White fluorescent lamp 6 Halogen light bulb 7 Incandescent light bulb 8 Sunrise or sunset 9 Ca...

Page 42: ...of the adjustment bar disappear 3 Start recording Creative Control Set REC FORMAT to AVCHD l 61 Change the Recording Mode to l 39 Select the desired Creative Control Mode then touch Enter Still pictu...

Page 43: ...sition and SIZE is reset to the medium size 3 Touch ENTER 4 When adjusting the brightness Touch The level of brightness is switched every time you touch the icon Standard Bright Dark 5 When adjusting...

Page 44: ...ecording interval 30 frames will make up motion picture of 1 second h is an abbreviation for hour min for minute and s for second These times are approximations Maximum recordable time is 12 hours Aud...

Page 45: ...ot be clear j If you record a person in the distance the face may not be recorded clearly In this case cancel Soft Skin Mode or zoom in on the face close up to record Fireworks j The shutter speed is...

Page 46: ...recording time are not displayed l 20 Only when sound in loop recording is set to ON microphone input level meter is displayed To switch sound in loop recording The menu can be set to switch to sound...

Page 47: ...d Still Picture Recording Mode Touch the to switch to Manual Mode l 39 or display the Manual icon l 17 Some functions are disabled depending on settings such as the recording mode Advanced Recording M...

Page 48: ...unit with the lens cover closed the Auto White Balance will not be performed correctly Always open the lens cover before turning on the unit When the display flashes the Manual White Balance previous...

Page 49: ...et the iris gain value Manual shutter speed adjustment When the shutter speed is set lower than 1 15 in the Still Picture Recording Mode using a tripod is recommended The shutter speed will be set to...

Page 50: ...area is displayed in blue The normal screen returns approximately 2 seconds after you finish bringing the subject into focus Touch FOCUS to end the adjustment When MF ASSIST is OFF the blue area is n...

Page 51: ...ch Function icon e g AF AE tracking To cancel touch the Touch Function icon again Optical Image Stabilizer Lock is canceled by releasing the finger touching Touch function icons 1 In Motion Picture Re...

Page 52: ...etting is ON Setting O I S Image Stabilizer Function Motion Picture Recording Mode setting canceled When O I S is set to Standard is displayed when O I S is set to Active is displayed When HYBRID O I...

Page 53: ...on the object to lock onto it again When the button is pressed halfway in Still Picture Recording Mode the focus is set to the object that is locked The target frame turns green when it focuses and t...

Page 54: ...2 Touch and hold Icon is displayed in A while you are touching and holding Optical Image Stabilizer Lock is released when you remove your finger from the icon To make the display of disappear Display...

Page 55: ...displayed A 2 Touch the subject Focus area is displayed at the touched position and a still picture is recorded Depending on the recording conditions or recognition of the touched position it may not...

Page 56: ...s l 59 The icon is displayed when the operation icon is set Operation icons 1 Not displayed in Still Picture Recording Mode 2 Not displayed in Motion Picture Recording Mode 3 Available in Manual Mode...

Page 57: ...bnails of scenes recorded using fade in become black or white This brightens parts that are in shadow and difficult to see and suppresses white saturation in bright parts at the same time Both bright...

Page 58: ...l pictures using the timer Each time the icon is selected the indication changes by one setting in the following order 10 Records after 10 seconds 2 Records after 2 seconds setting canceled When you p...

Page 59: ...nd the zoom magnification before you set Tele Macro was 52k or lower j 51k when the picture size is set to 7 7M 2M and the zoom magnification before you set Tele Macro was 51k or lower Scale factor wh...

Page 60: ...g 5Sports To make fast moving scenes less shaky with slow playback and pause of playback Portrait To make people stand out against the background Soft Skin To makes skin colors appear softer for a mor...

Page 61: ...g Mode Switch the recording format of motion picture This function s default setting is AVCHD mode ZOOM MODE RECORD SETUP ZOOM MODE desired setting i Zoom OFF Up to 62k i Zoom 90k This zoom function a...

Page 62: ...on s default setting is HG mode Please refer to page 133 for details about approximate recordable time When the unit is moved a lot or moved quickly or when a fast moving subject is recorded mosaic ty...

Page 63: ...tal tilt display A and vertical tilt display B appear yellow when there is a tilt and appear green when there is almost no tilt The maximum tilt display angles are approximately 45 o in horizontal dir...

Page 64: ...motion pictures with more vivid colors using x v Color technology Switch to Manual Mode l 47 Set REC FORMAT to AVCHD l 61 For more realistic colors use an HDMI mini cable supplied with a TV that suppo...

Page 65: ...d You may not see the full effect depending on the recording conditions Recording setting of the built in microphone can be adjusted Set REC FORMAT to AVCHD l 61 MIC SETUP will become STEREO MIC when...

Page 66: ...etained when you change between Motion Picture Recording Mode and Still Picture Recording Mode Switch to Manual Mode l 47 1 Select the menu 2 Touch the desired setting items 3 Touch to adjust settings...

Page 67: ...tures When the picture size is 7 4M 0 3M 7 7M or 2M black bands may appear on the left and right of the screen The edges of still pictures recorded on this unit with a 16 9 aspect ratio may be cut at...

Page 68: ...ayback Frame by frame Slow motion Playback is performed continuously while the display is touched and held Normal playback is restored when you touch The intervals between frames and the display time...

Page 69: ...saved as a still picture during playback It is convenient to use Pause Slow motion Playback and Frame by frame Playback Date the motion picture was recorded will be registered as date of the still pic...

Page 70: ...Face Recognition was performed from the scenes judged to be clearly recorded This will then be displayed as a thumbnail A portion judged to be clearly recorded will be detected and displayed in thumbn...

Page 71: ...still picture playback It will display enlarged in order of normal display k1 k2 k4 Touch and hold the screen to zoom in from the normal display k1 to k2 Touch the screen to zoom in from k2 to k4 The...

Page 72: ...j When the number of scenes exceeds 99 j When the number of still pictures exceeds 999 j When REC MODE in AVCHD is changed j When recorded in Creative Control Mode j When recorded in Endless Loop Rec...

Page 73: ...ene To change the settings refer to page 75 3 Touch in the thumbnail view 4 Select the playback operation l 25 When the playback is finished or stopped the screen to select REPLAY SAVE l 78 SELECT AGA...

Page 74: ...LECT will be set the same as EFFECT SETUP To set EFFECT SETUP and MUSIC SELECT to different settings change MUSIC SELECT after setting EFFECT SETUP When MUSIC SELECT is selected Touch the desired soun...

Page 75: ...n touched the date is selected and surrounded by red Touch the date again to cancel the operation When SELECT SCENES is selected Touch the scenes to be played back Up to 99 scenes can be selected in s...

Page 76: ...thumbnail display screen and is displayed on the scenes added as favorite scenes 4 Touch Return All the scenes checked as favorite may not be played back depending on the playback time setting l 77 T...

Page 77: ...ters can be conveniently input without moving the cursor when the Auto Cursor Position is set to ON l 33 A maximum of 18 characters can be entered 4 Touch ENTER to end registration The date of the fir...

Page 78: ...Scenes recorded in 1080 60i are recorded in HA regardless of REC MODE PH HA HG HE of a scene 4 Touch YES 5 Touch EXIT is displayed on the thumbnail of the scenes saved by the Highlight Playback Saving...

Page 79: ...j Touch NO j Playback finishes j Stop playback You can also select combinations of scenes and parts of scenes You can select up to 99 scenes Each 3 second thumbnail of part of a scene is treated as a...

Page 80: ...e containing the selected part 4 To select thumbnails by specifying a range Touch Range To cancel the operation touch it again 5 To select thumbnails by specifying a range Touch the range start and fi...

Page 81: ...ity HA of REC MODE and saved Scenes recorded in 1080 60i are recorded in HA regardless of REC MODE PH HA HG HE of a scene 4 Touch YES If you are using the battery a message recommending that you use t...

Page 82: ...heck the Baby Calendar The name of the registered baby and its age in months are displayed You can switch the age in months display by touching Except for months with no recordings the age in months d...

Page 83: ...y whose details are to be changed When Baby 1 Baby 2 Baby 3 is displayed the birthday and name or name only are not registered 3 Touch the desired item The setting method is the same as when registeri...

Page 84: ...SLIDE INTERVAL cannot be set when EFFECT SETUP is set When MUSIC SELECT is selected Touch the desired sound Touch ENTER To test the music audio Touch START and start the audio testing Touch the other...

Page 85: ...e deleted Protected scenes still pictures cannot be deleted 3 When MULTI is selected in Step 2 Touch the scene still picture to be deleted When touched the scene still picture is selected and the indi...

Page 86: ...deleted The deleted scenes cannot be restored Press the recording playback button to switch this unit to the Playback Mode and touch the play mode select icon Then select the AVCHD scene l 24 1 Select...

Page 87: ...int Touch YES Touch YES to continue dividing the same scene To continue dividing other scenes touch NO and repeat Steps 2 3 4 Touch Return to complete dividing Unwanted parts can be deleted l 85 To de...

Page 88: ...op the playback A confirmation message appears 7 Touch YES To continue dividing and deleting other scenes repeat Steps 2 7 To complete editing Touch Return It may not be possible to divide scenes with...

Page 89: ...ter conversion are saved to the same media as the scenes before conversion 5 Touch YES To continue converting scenes to MP4 repeat steps 2 to 5 To stop converting to MP4 halfway Touch CANCEL during fo...

Page 90: ...asonic HDMI mini cable RP CDHM15 RP CDHM30 optional Advanced Playback Watching Video Pictures on your TV Confirm the terminals on your TV and use a cable compatible with the terminals Image quality ma...

Page 91: ...the following situations no image will be displayed on the TV Use LCD monitor of this unit j Recording motion pictures j When setting PRE REC j When saving the Highlight Playback scene or a manually...

Page 92: ...output resolution automatically based on information from the connected TV If the images are not output on the TV when the setting is AUTO switch to the method 1080p 1080i or 480p which enables the i...

Page 93: ...remote control for the Panasonic TV for easy operations when this unit has been connected to a VIERA Link compatible device using an HDMI mini cable supplied for automatic linked operations Not all op...

Page 94: ...on the HDMI terminal on the TV the input channel may not switch automatically In this case use the remote control for the TV to switch the input channel If you are unsure whether or not the TV and AV...

Page 95: ...s in a format other than FAT32 j When connected by using a USB hub A USB Connection Cable commercially available B USB HDD commercially available C Turn the side with the symbol up to connect the micr...

Page 96: ...before copying When using a USB HDD for the first time or using a USB HDD that has been used with other devices first run FORMAT MEDIA Before copying go to MEDIA STATUS to check the amount of free spa...

Page 97: ...ing media information The used space of the USB HDD can be checked Connect this unit to the USB HDD and touch Playback HDD If you touch CHANGE MEDIA you can switch the display between the SD card and...

Page 98: ...NES is selected When touched the scene still picture is selected and the indication appears on the thumbnail Touch the scene still picture again to cancel the operation When SELECT DATE is selected Wh...

Page 99: ...and then play it back The playback operation is performed the same as when playing back motion pictures or still pictures l 24 68 To terminate the connection between this unit and the USB HDD Touch on...

Page 100: ...for dubbing Dubbing picture quality To dub Equipment with SD card slot High definition picture quality Insert the SD card directly l 101 Equipment with USB terminal High definition picture quality Co...

Page 101: ...function selection screen will appear on the screen of the unit 2 Touch RECORDER on the screen of this unit When you select an option other than RECORDER reconnect the USB cable When using the batter...

Page 102: ...ay disc recorder or DVD recorder When you connect the unit to a Blu ray disc recorder a dubbing operations screen may appear on the television connected to the Blu ray disc recorder In this case as we...

Page 103: ...e displayed in reduced sizes on the TV If the date and time display and function indication are not wanted cancel them before dubbing l 30 92 Dubbing in standard picture quality Change the video input...

Page 104: ...smission are not guaranteed to work on this product In the case of a malfunction of the card please contact the card manufacturer To use the Eye Fi transfer feature a broadband wireless LAN environmen...

Page 105: ...ead the card operating instructions or consult the card manufacturer Install the software supplied with the Eye Fi card on your PC and configure the selection transfer settings Insert an Eye Fi card c...

Page 106: ...etting can be checked while pausing the recording If the Eye Fi card is removed and then reinserted into the unit set functions related to Eye Fi again from the menu When using the Eye Fi card please...

Page 107: ...download until the end of March 2019 http panasonic jp support global cs soft download f_le30 html What can be done with the HD Writer LE 3 0 Data type Copying data to a PC Motion picture and still pi...

Page 108: ...r than HD Writer LE 3 0 is used Do not start the HD Writer LE 3 0 and other software at the same time Important Notice When using an SDXC Memory Card check the following support site http panasonic ne...

Page 109: ...puter and may not use it on more than one computer Further Licensee may not use the Software for commercial software hosting services Article 5 Reverse Engineering Decompiling or Disassembly Licensee...

Page 110: ...al limitations in the MICROSOFT SQL SERVER COMPACT 3 5 2 Licensee shall not use copy distribute regrant for use or otherwise handle the Software in any way beyond the range of use granted under Articl...

Page 111: ...ore 2 Duo 2 16 GHz or higher or AMD Athlon 64 X2 Dual Core 5200 or higher is recommended when using playback function Intel Core 2 Quad 2 6 GHz or higher is recommended when using editing function Int...

Page 112: ...It may not properly play back or properly operate depending on the environment of the PC used Refer to the operating environment and notes Operation during the playback may become slow if the CPU or...

Page 113: ...Windows 7 Installing HD Writer LE 3 0 Uninstalling HD Writer LE 3 0 Follow the steps below to uninstall any software applications that you no longer require 1 Select Start Control Panel Uninstall a Pr...

Page 114: ...recognized as an external drive of the PC l 116 When you select an option other than PC reconnect the USB cable When using the battery the LCD monitor turns off after about 5 seconds Touch the screen...

Page 115: ...rge the battery by connecting the supplied DC cable Be sure to connect the unit directly to the PC Blu ray disc recorder or DVD recorder During charging the status indicator flashes You cannot charge...

Page 116: ...to the PC with Explorer or other programs 1 Double click the folder that contains the still pictures DCIM 100CDPFQ etc 2 Drag and drop the still pictures onto the destination folder on the PC s HDD D...

Page 117: ...E 3 0 HD Writer LE 3 0 For details on how to use the software applications read the PDF operating instructions of the software Reading the operating instructions of the software applications You will...

Page 118: ...ically recognized as an external drive of Mac When you select an option other than PC reconnect the USB cable When using the battery the LCD monitor turns off after about 5 seconds Touch the screen to...

Page 119: ...for second Eye Fi transfer l 106 Remaining battery power l 11 White Card recording possible status Green Recognizing the card Motion Picture Recording Mode l 62 MINI 8mm SILN INTV MNL R 1h20m Remainin...

Page 120: ...tment 8mm movie l 44 AF AE tracking l 53 Level Shot Function l 38 Touch Shutter l 55 MF Manual Focus l 50 White Balance l 48 1 100 Shutter Speed l 49 OPEN F2 0 Iris value l 49 0dB Gain value l 49 Whit...

Page 121: ...res l 88 105 Play mode selection display l 24 AVCHD 1080 60p scene l 24 AVCHD PH scene l 24 AVCHD HA scene l 24 AVCHD HG scene l 24 AVCHD HE scene l 24 MP4 1080 60p scene l 24 MP4 720 30p scene l 24 M...

Page 122: ...rded on the media will be erased If the thumbnail information is recovered displaying the thumbnails may become slower Others Messages CHECK CARD This card is not compatible or it cannot be recognized...

Page 123: ...y charged the battery has worn out and needs to be replaced This unit is turned off automatically If the unit turns off when you turn off the power to the TV using the TV remote control the VIERA Link...

Page 124: ...such as a gymnasium or a hall set the White Balance setting to Indoor mode 2 If you cannot record clearly with the Indoor mode 2 set it to Manual adjustment mode l 48 Color or brightness of the image...

Page 125: ...his unit when connected to a TV Sound levels cannot be adjusted using this unit so adjust the sound on the TV Even when this unit is connected to the TV by the HDMI mini cable images or sounds are not...

Page 126: ...and turning on this unit again When the USB cable is disconnected an error message will appear on the PC To disconnect the USB cable safely select the icon in task tray displayed on the PC and then s...

Page 127: ...g of motion picture data that exceeds 4 GB may momentarily stop at every 4 GB of data when played back with another device It may not play back smoothly when the editing of scenes was done with the HD...

Page 128: ...d the cords and the cables Do not spray insecticides or volatile chemicals onto the unit If the unit is sprayed with such chemicals its body may be marred and the surface finish may peel off Do not le...

Page 129: ...temperature 15 oC to 25 oC 59 oF to 77 oF Recommended humidity 40 RH to 60 RH Extremely high temperatures or low temperatures will shorten the life of the battery If the battery is kept in high tempe...

Page 130: ...high or low temperature Wait until the temperature has returned to an appropriate level and try charging again If you are still unable to charge there may be a fault in the unit battery or AC adaptor...

Page 131: ...r vanishing of information or personal information When requesting a repair transferring to another party or disposing To protect personal information delete the registered details of Baby Calendar un...

Page 132: ...States and or other countries Microsoft product screen shot s reprinted with permission from Microsoft Corporation Intel Pentium and Intel Core are trademarks of Intel Corporation in the U S and or o...

Page 133: ...time that can be copied onto one DVD disc 4 7 GB The maximum remaining recordable time that can be displayed for motion picture recording is 99 hours and 59 minutes Any remaining recordable time excee...

Page 134: ...rdable pictures is 9999 or less The memory capacity indicated on the label of an SD card is the total of the capacity for copyright protection and management and the capacity which can be used on the...

Page 135: ...up to connect the micro B end of the USB Cable to the USB terminal of this unit 3 Press the power button of the Remote Pan Tilt Cradle to turn it on The status indicator B lights on 4 Turn on this un...

Page 136: ...Remote Pan Tilt Cradle is not capable of supplying power to this unit When the Remote Pan Tilt Cradle detects a problem its status indicator flashes and both this unit and the Remote Pan Tilt Cradle t...

Page 137: ...you start recording after making changes to the setup of the Remote Pan Tilt Cradle such as switching the Remote Pan Tilt Cradle Mode or changing the location of the Remote Pan Tilt Cradle it may rota...

Page 138: ...ed to this unit the Remote Pan Tilt Cradle setup menu can be set Connecting the Remote Pan Tilt Cradle to this unit l 135 1 Touch SETUP in the Remote Pan Tilt Cradle Mode screen 2 Touch desired menu i...

Page 139: ...n Tilt Cradle may become unusable You can watch the demonstration of how the Remote Pan Tilt Cradle will operate when Party Scene is set Touch Party Scene Demo the demonstration automatically starts W...

Page 140: ...Panasonic Corporation Web site http www panasonic com...

Reviews: