


ESPA
Ñ
OL
RQT6263
27
;
POWER
Í
SLEEP
SLOW/SEARCH
SKIP
STOP
PLAY
MENU
TOPMENU
ENTER
DISPLAY
SUBTITLE
DISC
DISC1
DISC2
DISC3
PROGRAM
DISC4
DISC5
SEQUENTIAL
FL SELECT
AUDIO ONLY
PAGE
ZOOM
GROUP
CANCEL
AUDIO
ANGLE QUICK REPLAY
RETURN
SETUP
1
2
3
4
5
6
7
8
0
9
10
OPEN/CLOSE
PLAYLIST
DIRECT
NAVIGATOR
PAUSE
POWER
<
1
3
,
4
,
2
,
1
ENTER
DISC1
DISC2
DISC3
DISC4
DISC5
1
2
3
4
5
∫
DISC 1— DISC 5
SETUP
DISC
RETURN
Reproducción básica
[RAM] [DVD-A] [DVD-V]
[VCD]
[CD] [WMA] [MP3]
Preparación
Encienda el televisor y seleccione en él la entrada de vídeo apropiada
según las conexiones del reproductor.
1
Pulse [POWER
Í
Í
Í
Í
Í
] para encender el aparato.
Para salida progresiva
Pulse [PROGRESSIVE OUT] para que se enciendan los
indicadores.
2
Pulse [
<
] para abrir el cajón.
3
Ponga lo(s) disco(s) en la(s) bandeja(s) de
disco(s).
Puede cargar discos en las otras
bandejas pulsando [DISC SKIP]
en el aparato principal.
4
Pulse [
<
] para cerrar el cajón.
Si se muestra una pantalla de menú, consulte más abajo.
5
Pulse [
1
] (PLAY).
La reproducción empieza.
Para detener la reproducción
Pulse [
∫
] (consulte Función de reanudación indicada más abajo).
Para hacer una pausa
Pulse [
;
].
Pulse [
1
] (PLAY) para reanudar la reproducción.
Para iniciar la reproducción del disco preferido
1. Pulse [DISC].
2. Pulse el botón de discos ([DISC 1] - [DISC 5]).
[Nota]
≥
La salida progresiva no es posible si el ajuste “Salida progresiva” de
los menús PREPARACIÓN RÁPIDA se deja en “Desactivar”.
≥
Aunque se encienda el indicador de salida progresiva, si usted pulsa
[PROGRESSIVE OUT] después de cambiar el ajuste “Salida
progresiva” a “Activar”, la salida sólo seguirá intercalándose si usted
ha conectado la unidad a su televisor a través de los terminales
VIDEO OUT o S VIDEO OUT.
Cuando una pantalla de menús aparece en el
televisor
[DVD-A] [DVD-V]
[VCD]
Pulse los botones numerados para seleccionar un
elemento.
Función de reanudación
Parada-reanudación
El aparato memoriza la posición en la que usted detuvo la
reproducción hasta que usted abre la bandeja del disco o pone el
aparato en el modo de espera.
Para reanudar la reproducción
Pulse [
1
] (PLAY) mientras parpadea “
!
” en el visualizador del
aparato.
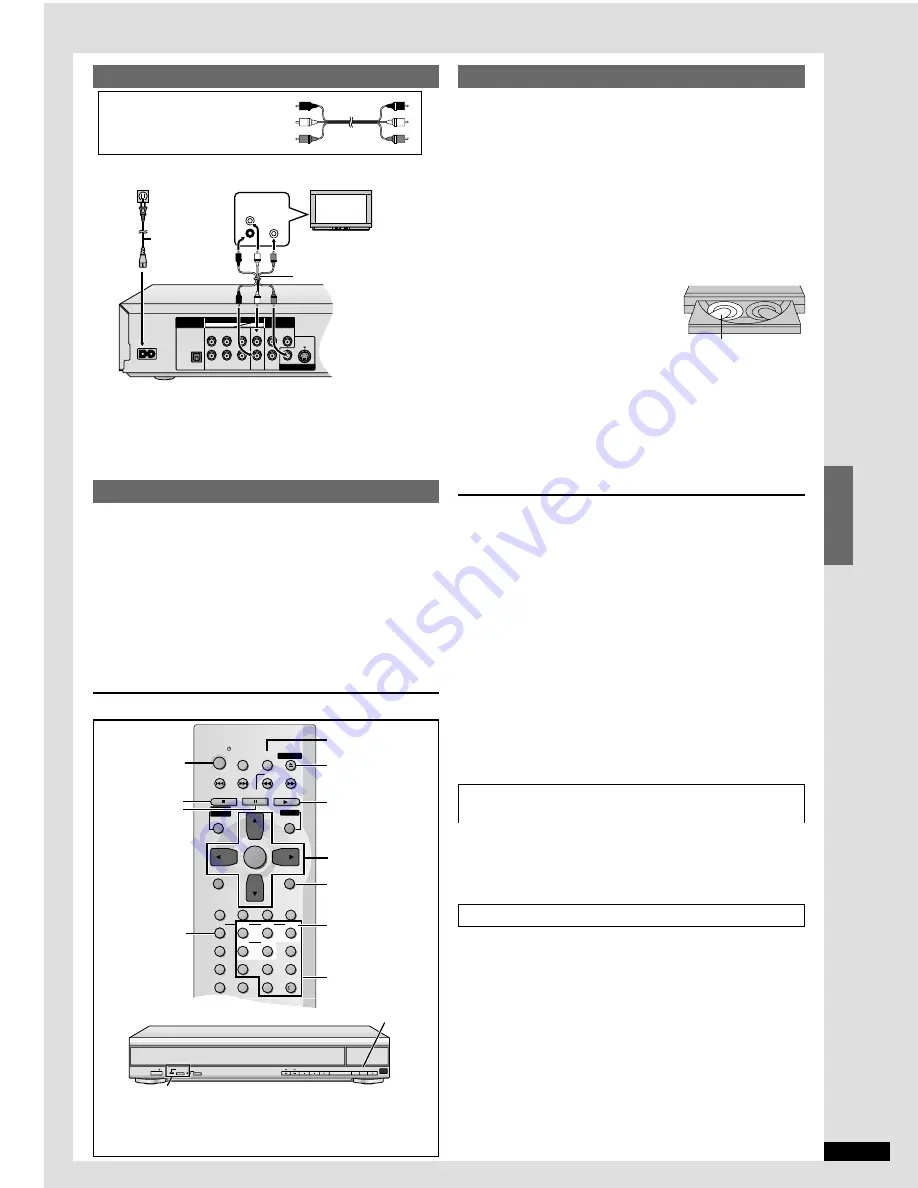
Conexión a un televisor
Para disfrutar de vídeo progresivo
Haga la conexión a los terminales de entrada de vídeo componente
(480P) de una televisión compatible con el sistema de protección
contra el copiado de esta unidad.
(La imagen no se verá correctamente si se hace la conexión a una
televisión incompatible.)
Preparación Rápida
La pantalla QUICK SETUP aparece cuando usted pulsa [SETUP] por
primera vez después de adquirir el aparato y le ayuda a efectuar los
ajustes necesarios.
1
Pulse [POWER
Í
Í
Í
Í
Í
] para encender el aparato.
2
Pulse [SETUP] para visualizar la pantalla “QUICK SETUP”.
3
Pulse [
3
,
4
] para seleccionar “Español” y pulse [ENTER].
4
Pulse [
3
,
4
] para seleccionar “Sí” y pulse [ENTER].
5
Pulse [
3
,
4
] para seleccionar el elemento y pulse [ENTER].
≥
Idioma de audio
≥
Idioma de los subtítulos
≥
Aspecto de su televisor
≥
Salida progresiva
≥
Altoparlantes
6
Pulse [ENTER] y luego [SETUP] para finalizar los ajustes.
≥
Para volver a la pantalla anterior, pulse [RETURN].
Guía de referencia rápida en español
Botones
numerados
Cable de audio/vídeo
Rojo(R)
Blanco(L)
Amarillo(Vídeo)
AC IN
OPTICAL
R
P
R
L
R
FRONT
SURROUND
FRONT
SURROUND
L
R
SUB-
WOOFER
L
CENTER
Y
P
B
DIGITAL AUDIO OUT
(PCM/BITSTREAM)
AUDIO OUT
COMPONENT
VIDEO OUT
(480P/480I)
VIDEO OUT S VIDEO OUT
~
5. 1ch
2ch
A la toma de CA del hogar
(CA 120 V, 60 Hz)
Cable de audio/vídeo
(suministrado)
Cable de
alimentación
de CA
(suministrado)
Televisor
AUDIO
IN
R
VIDEO
IN
L
Botón/indicador de PROGRESSIVE OUT
POWER / I
PROGRESSIVE
OUT
AUDIO
ONLY
DISC
EXCHANGE
DISC
SKIP
OPEN/
CLOSE
DISC SKIP
Las operaciones descritas en esta referencia rápida se llevan a cabo
con el mando a distancia, pero usted puede hacer también estas
operaciones en el aparato principal si los controles son los mismos.
1
5
1
5
La reproducción empieza
desde el disco que se
encuentra en la posición
delantera izquierda.


