


2. Preparation
17
For assistance, please contact an authorized Panasonic dealer.
2 Preparation
2For assistance, please contact an authorized Panasonic dealer.
Connections and Setup
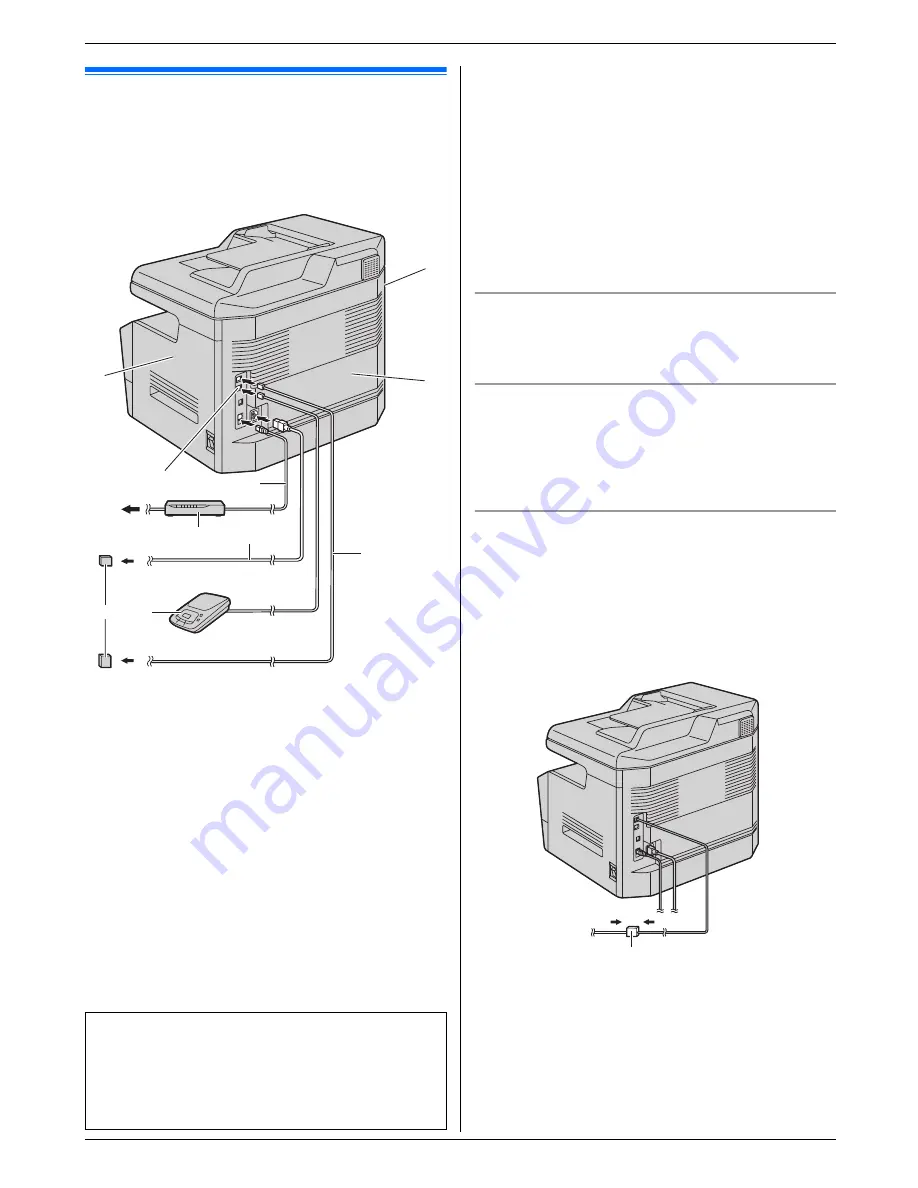
2.1 Connections
Caution:
L
When you operate this product, the power outlet
should be near the product and easily
accessible.
Note:
L
Do not place any objects within the following
distance:
–
Left side (
8
): 40 cm (15
3
/
4
inches)
–
Right side (
9
) and back side (
j
): 10 cm (4
inches)
L
If any other device is connected to the same
telephone line, this unit may disturb the network
condition of the device.
L
A telephone handset cannot be connected directly to
this unit. To talk to the other party, please connect an
extension telephone.
Using surge protectors
L
The warranty does not cover damage due to power
line surges or lightning. For additional protection, we
recommend using a surge protector (
k
).
Using network router/network hub
L
We recommend using network routers/network hubs
(
6
) under secure network environments. Consult
your network administrator for firewall settings, etc.
L
The warranty does not cover damage due to security
problems or any inconveniences relating to it.
If the unit shares a single telephone line with a DSL
service
Fax transmission/reception may be unreliable, noise
interference may be heard during telephone
conversations, or Caller ID (page 54) may not function
properly. Please attach a DSL filter (
l
) to the telephone
line cord of the unit to prevent this. A DSL filter may be
available from your DSL service provider.
1
Power cord
L
Connect to a power outlet
(120 V, 60 Hz).
2
Telephone line cord
L
Connect to a single telephone line jack (RJ11C).
3
[
EXT
]
jack
L
You can connect an answering machine or an
extension telephone. Remove the stopper if
attached.
4
Answering machine (not supplied)
5
To the Internet
6
Network router/Network hub (not supplied)
L
Also connect networked computers.
7
LAN cable (not supplied)
L
To assure continued emission limit compliance,
use only shielded LAN cable (category 5 straight
cable).
IMPORTANT NOTICE FOR THE USB
CONNECTION
L
DO NOT CONNECT THE UNIT TO A
COMPUTER WITH THE USB CABLE UNTIL
PROMPTED TO DO SO DURING THE SETUP
OF MULTI-FUNCTION STATION (page 24).
5
3
9
6
2
j
8
4
7
1
k
l
Summary of Contents for DP-MB350
Page 119: ...119 Notes ...
Page 120: ...PNQX2279ZA CM0709TM0 CD ...


