background image

TQBS0037

Getting started

Watching broadcasts

Recording

Playing back video

Editing video

Copying video

Photo and Music

Network

With Other Equipment

Other functions

Setup

Reference

Thank you for purchasing this product.
Please read these instructions carefully before using this 
product, and save this manual for future use.

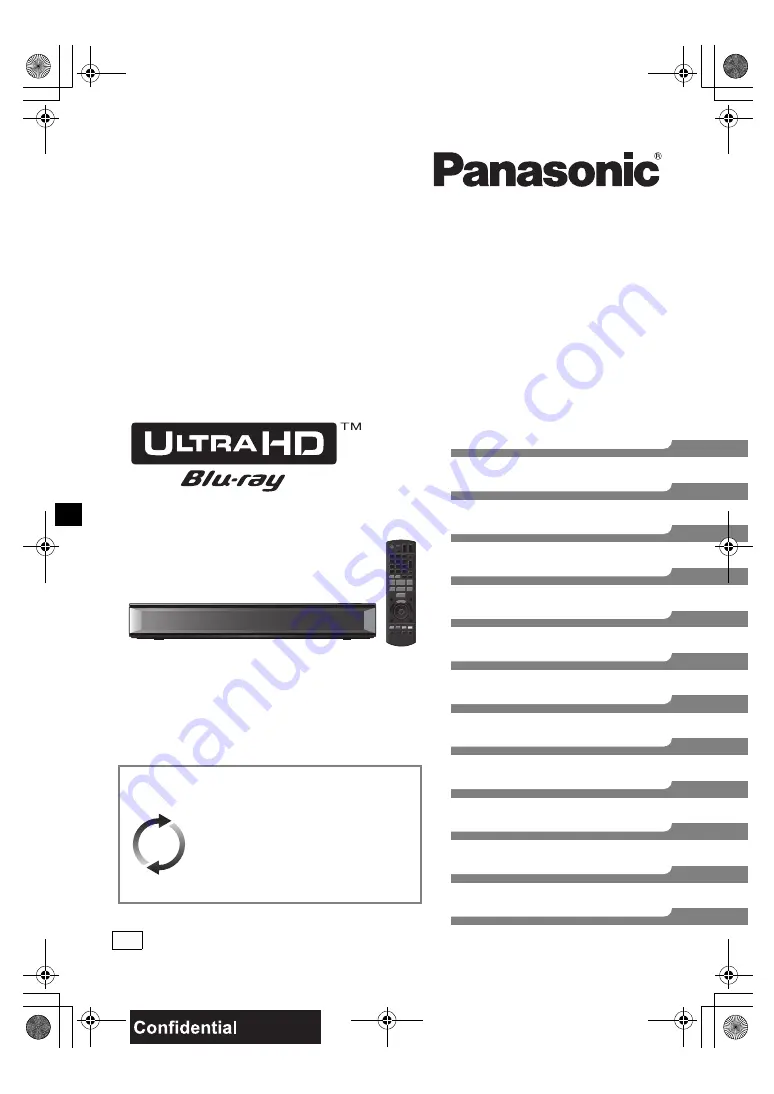
Operating Instructions

Blu-ray Disc™ Recorder

Model No. 

DMR-UBC80 DMR-UBS80

Software (Firmware) Update

To support the latest features, it’s very 
important you install the latest updates 
to maintain proper operation of your unit.
For details, refer to “Software 
(Firmware) Update” (

>

81) or

http://panasonic.jp/support/global/cs/ 
(This site is in English only.)

until 
2017/03/20

EG

DMR-UBC&UBS80EG_eng.book  1 ページ  2017年3月2日 木曜日 午後7時12分

Summary of Contents for DMR-UBC80

Page 1: ...using this product and save this manual for future use Operating Instructions Blu ray Disc Recorder Model No DMR UBC80 DMR UBS80 Software Firmware Update To support the latest features it s very important you install the latest updates to maintain proper operation of your unit For details refer to Software Firmware Update 81 or http panasonic jp support global cs This site is in English only until...

Page 2: ... Blu ray Discs Safety precautions WARNING Unit To reduce the risk of fire electric shock or product damage Do not expose this unit to rain moisture dripping or splashing Do not place objects filled with liquids such as vases on this unit Use only the recommended accessories Do not remove covers Do not repair this unit by yourself Refer servicing to qualified service personnel Do not let metal obje...

Page 3: ...ve the battery ies in a car exposed to direct sunlight for a long period of time with doors and windows closed Do not take apart or short circuit Do not recharge alkaline or manganese batteries Do not use batteries if the covering has been peeled off Remove batteries if you do not intend to use the remote control for a long period of time Store in a cool dark place When disposing of the batteries ...

Page 4: ...Playing programmes on the HDD 45 Playing contents on the media 49 Operation during play 50 4K Networking 54 Playback menu 54 Editing video Deleting Editing programmes 57 Copying video Copying programmes 61 Photo and Music Photo 68 Music 71 Network Network Service 73 TV Anywhere 73 DVB via IP Server Function TV IP 74 Home Networking DLNA 75 With Other Equipment Copying the HD Video AVCHD 79 Other f...

Page 5: ...le the unit is turned on especially during operation otherwise the HDD and the recorded content may be damaged Do not subject the unit to any vibration and shock Do not remove the AC mains lead from the household mains socket The HDD is a temporary storage device It is recommended to save the recorded content on a disc or to keep the original data or CDs that they were copied from If you notice a ...

Page 6: ... Connecting the USB HDD Front Pull to flip down the front panel 1 Disc tray 2 Display 7 3 USB port DC 5 V 900 mA This port supports USB 3 0 Super Speed 4 Remote control signal sensor Angle Approx 20 up and down 30 left and right Distance Within approx 7 m in front of the unit 5 CI slot 9 6 Open close disc tray 7 Standby on switch Í I Press to switch the unit from on to standby mode or vice versa I...

Page 7: ...ts 4 Playback indicator 5 USB port indicator 6 Disc indicator 7 Copying indicator 8 Remote control signal indicator 9 Timer recording indicator This indicator lights up when the timer recording standby or Keyword Recording standby is activated Rear 1 AC IN terminal 12 13 2 Cooling fan 3 LNB IN 1 2 terminal UBS80 13 4 RF IN OUT terminal UBC80 12 5 LAN port 6 HDMI AV OUT terminal 14 15 7 COAXIAL ter...

Page 8: ...ION menu 54 57 70 Colour buttons red green yellow blue Use in accordance with instruction on the screen Select audio 29 52 Select drive HDD Disc or USB TV operation buttons 16 Start recording 33 Channel select 28 Change pages in the Video Menu screen etc A Switching to the radio channel list 28 B Show the Timer Recording screen 38 C Show NETFLIX screen 73 D Show the Network Service screen 73 E Exi...

Page 9: ...epending on the broadcaster See Notes for recording of an encrypted broadcast 35 UBC80 DVB T2 To view freenet TV Germany only freenet TV provides pay television broadcasting services for DVB T2 Some freenet TV broadcasts and programmes may be encrypted A supported CAM and a separate subscription are required to view them Refer to the website of freenet TV for more details Turn off the unit before ...

Page 10: ...k restrictions Retention limit right Content License right There are some programmes for which the playback will be disabled after a predetermined time e g Permitted playback period is 90 minutes after recording When the programme does not have playback period icon will appear on the Video Menu screen after decrypting 46 When the programme has playback period or icon will appear on the Video Menu ...

Page 11: ...ot be utilized When the unit is not to be used for a long time To save power unplug it from the household mains socket This unit consumes a small amount of power even when the unit is in standby mode 108 To enjoy broadcasts programmes or Ultra HD Blu ray discs that support HDR High Dynamic Range If you see a message about compatibility with HDR during playback of a broadcast programme or Ultra HD ...

Page 12: ...levant announcements made by broadcast stations Germany only UBC80 Antenna connections VHF UHF RF IN This unit s rear panel Household mains socket AC 220 to 240 V 50 Hz AC mains lead supplied Connect only after all other connections are complete To the CATV terminal or the Aerial CATV coaxial cable or Aerial cable RF coaxial cable supplied DMR UBC UBS80EG_eng book 12 ページ 2017年3月2日 木曜日 午後7時12分 ...

Page 13: ...ellite dish B Using a single cable router You can record two programmes simultaneously Connect satellite cable to LNB IN 1 terminal C Connecting a satellite cable directly You can record only one programme at a time Connect LNB IN 1 terminal to the satellite dish This unit s rear panel Household mains socket AC 220 to 240 V 50 Hz AC mains lead supplied Connect only after all other connections are ...

Page 14: ... that does not display ARC on the HDMI terminal it is necessary to connect the TV and the amplifier receiver with a digital audio cable to enjoy the TV audio on the amplifier receiver HDMI This unit s rear panel HDMI cable 18 Gbps e g UBC80 HDMI IN ARC HDMI OUT ARC HDMI IN HDMI cable 18 Gbps e g UBC80 HDMI cable 18 Gbps Amplifier receiver 4K compatible DMR UBC UBS80EG_eng book 14 ページ 2017年3月2日 木曜日...

Page 15: ...be ARC compatible 14 About ARC Enjoying audio with an amplifier connected to the COAXIAL terminal To enjoy audio with an amplifier connected to the COAXIAL terminal Set Audio Output to Off in Advanced Settings 94 Connecting an amplifier to a 4K compatible TV COAXIAL IN Coaxial digital cable e g UBC80 Amplifier receiver HDMI IN ARC HDMI OUT ARC HDMI IN e g UBC80 Amplifier receiver HDMI cable 18 Gbp...

Page 16: ... is invalid for your TV this remote control is not compatible with your TV Network connection LAN cable connection Wireless LAN connection Broadband router etc Internet LAN ethernet cable TV operation buttons Manufacturer Code Manufacturer Code AIWA 35 BENQ 58 59 BRANDT 10 15 CENTREX 66 CURTIS 05 DESMET 05 ELEMIS 05 FINLUX 61 Panasonic 01 02 03 04 AKAI 27 30 BEKO 05 71 72 73 74 BUSH 05 DAEWOO 64 6...

Page 17: ... then press OK For Germany and Austria We recommend selecting Preset Channel Number For Switzerland We recommend selecting Operator s Channel Number LCN To change channel allocation restart Auto Setup in Basic Settings menu and change channel number allocation selection 86 If channel is not found restart Auto Setup in Basic Settings menu 86 Switchover from DVB T to DVB T2 is scheduled After switch...

Page 18: ...en press OK When Easy Setting has been completed appears Easy Setting is complete When connected to a 4K 50p or 60p compatible TV left To stop partway Press RETURN To restart setup 88 Auto Setup To confirm that channels have been tuned correctly 31 Using Channel List If tuning is cancelled partway through it may not be possible to receive the channels Restart setup again 4K 50p 60p Output Start co...

Page 19: ...s User Band PIN If the single cable router requires a PIN to access an user band enter the PIN For details read the manual of the single cable router etc 3 Select Start Auto Setup then press OK Set User Band as required Refer to the operating instructions for your single cable router for information about each item Confirm Select RETURN Single Cable 2 0 JESS Single Cable Single Cable Version Singl...

Page 20: ...g OK RETURN Easy Network Setting Select a connection mode Wired Wireless SSID XXXXXXXXXXXX KEY XXXXXXXXXXXX PIN XXXXXXXXX e g Search for wireless network The available wireless networks will be displayed Select your network name and press OK If your Network name is not displayed search again by pressing the red button on the remote control Stealth SSID 2 will not be displayed Enter manually by usi...

Page 21: ... which you do not have usage rights During automatic searches in a wireless network environment wireless networks SSID for which you do not have usage rights may be displayed however using these networks may be regarded as illegal access After performing network settings on this unit the settings encryption level etc of the Wireless router might change When you have trouble getting online on your ...

Page 22: ...AC MP3 WAV WMA External hard disk drive USB HDD 25 USB_HDD Video 1 AVCHD AVCHD 3D 2 3 MKV MP4 MPEG2 JPEG MPO 3D photo AAC ALAC DSD FLAC MP3 WAV WMA Ultra HD Blu ray BD V Video BD Video BD RE BD RE DL BD RE Video AVCHD AVCHD 3D JPEG MPO 3D photo BD R BD R DL BD R Video AVCHD AVCHD 3D 2 JPEG MPO 3D photo MKV DVD Video 4 DVD V Video DVD RAM RAM Video JPEG MPO 3D photo AVCHD 2 DVD R DVD R DL DVD R Vid...

Page 23: ...hoto AAC ALAC DSD FLAC MP3 WAV WMA RW RW Video AVCHD 2 Audio CD CD DA CD Music CD including CD R RW MKV JPEG MPO 3D photo AAC ALAC FLAC MP3 WAV WMA USB memory USB AVCHD AVCHD 3D 2 3 MKV MP4 MPEG2 JPEG MPO 3D photo AAC ALAC DSD FLAC MP3 WAV WMA 1 It cannot be recorded directly Only compatible with copying from the built in HDD 2 Recorded with AVCHD format compatible devices Panasonic video camera e...

Page 24: ...ontents with HEVC video codec The video file and subtitle text files are inside the same folder and the file names are the same except for the file extensions Some files may not be played back even if they have these extensions Information about contents Media Maximum programmes HDD 3000 BD RE BD R 200 DVD RAM DVD R DVD RW 99 R RW 49 Media Maximum programmes HDD 3000 BD RE BD R 200 Media Folders F...

Page 25: ...AT16 FAT32 or NTFS file system The USB device over 2 TB is not usable The USB port on the rear of the unit supports USB 2 0 High Speed and the USB port on the front supports to USB 3 0 Super Speed This unit does not recognise USB HDDs other than those in which the size of one sector is 512 bytes or 4096 bytes For details consult the dealer of your USB HDD This unit supports USB mass storage device...

Page 26: ...needed 83 RW If the disc failed to play on other equipment we recommend you create a Top Menu 84 DVD R The disc created in AVCHD format can only be played back on AVCHD compatible equipment Regarding 8 cm Disc This unit cannot record or edit the 8 cm disc Only playback or copy to the HDD is possible Discs that cannot be played DVD RAM in a cartridge 2 6 and 5 2 GB DVD RAM 12 cm DVD Audio Super Vid...

Page 27: ...t 76 Media Renderer 77 Wi Fi Direct 77 Setup Basic Settings 85 You can change the unit s settings of DVB Tuning Sound Display Connection Network etc HDMI Connection Settings 93 TV Anywhere 73 Wallpaper Personalize a background of the FUNCTION MENU To select from among Photo register photo in advance 68 BD Video Data Management 50 Media Disc USB device USB HDD Copy Video Copy Menu 63 Copy Video AVC...

Page 28: ...List Follow the on screen instructions to update the list After Update Channel List is performed check to see if your timer recordings are still set Timer recordings registered to deleted channels cannot be recorded In addition check the Favourites list 85 For details check the relevant announcements made by broadcast stations Preparation To watch HLG broadcasts in their original picture quality c...

Page 29: ...1 To switch to another channel Press 3 4 then press OK When appears in channel information Press STTL Press again to hide subtitle Some subtitle contents can be displayed using Teletext below When appears in channel information 2 Use 3 4 2 1 number buttons or colour buttons etc according to on screen instructions You can change the display mode 92 Teletext Press AUDIO Audio will switch according t...

Page 30: ...ke a note it in case you forgot it PIN except CAM s can be changed via PIN Entry 98 For CAM s PIN refer to your CAM s operating instructions To watch an encrypted broadcast insert the CI module into the CI slot 9 Set Common Interface 94 To use the data service function Catch Up Service network connection and settings are necessary 16 20 Set HbbTV Setting to On 87 To select the data service follow ...

Page 31: ...own Press CH W X To view a programme list for another day Press the green button Previous or the yellow button Next To see programme information Press STATUS To retrieve the programme data for the area where data have not been acquired Select the area then press STATUS To set a timer recording using the TV Guide System 37 To search the programmes 38 Using Channel List 1 Press OK Red Sort the chann...

Page 32: ...itching to other channels or other screen When the unit has started recording using all tuners When performing PAUSE LIVE TV or REWIND LIVE TV for more than 8 hours This may vary depending on the HDD free space These functions do not work in the following cases When the clock is not set When setting clock manually Contents protected programme Retention limit only 10 When all tuners are being used ...

Page 33: ...size If you keep recording UHD 4K programmes free space on the HDD may be used up quickly Before this happens however you can copy them to an external USB HDD You can save them to a disc 61 For details about recording times refer to Recording modes picture quality and approximate recording times 109 This unit can record two programmes being broadcasted at the same time About CI Plus restriction 10...

Page 34: ...nge function does not operate A recording mode picture quality change stops when this unit is turned on The process will start from the beginning again after the unit is switched to standby mode Even if you change the recording mode picture quality of a programme its audio subtitle and Audio Description settings will remain the same as those at the start of recording When the recording mode pictur...

Page 35: ...ng two programmes Following screen appears 1 Select the programme then press OK 2 Select Yes then press OK To pause recording To record two programmes simultaneously While recording perform steps 1 3 on page 33 Simultaneous rec and play 1 Press VIDEO MENU red is displayed on the recording programme 2 Select the programme then press OK Stop Recording 2 recordings are in progress Which recording wou...

Page 36: ...this unit The programme before decryption will be deleted once decryption is completed When the HDD does not have enough remaining space decryption will not start This function is stopped when this unit is turned on Decryption will start from the beginning again once the unit is turned off When a decryption fails decrypt the programme manually 59 if the screen icon changes from to the programme is...

Page 37: ... restriction 10 Notes for recording of an encrypted broadcast 35 Preparation You can change the recording mode picture quality 34 1 Press GUIDE TV Guide screen appears 2 Select the programme then press the red button The timer icon F red is displayed If on screen instructions are displayed follow them UBS80 The number of programmes that can be simultaneously recorded varies depending on the setup ...

Page 38: ...ch quicker by narrowing down the channels to be displayed To return to the previous TV Guide list Select All DVB Channels 3 Select the programme then press the red button for timer recording Category may not be assigned correctly depending on the programme information Keyword Search Programme Type Search and Category Selection search the First 250 channels on All DVB Channels 1 Press PROG CHECK 2 ...

Page 39: ...fer to Entering text 84 To use Signal Supported Recording You can choose whether or not to use the Signal Supported Recording function by pressing the blue button You can make timer recording of the current or next programme 1 While watching a programme Press STATUS 3 Press the yellow button 4 Go to step 3 on page 38 Manually programming timer recording Timer recording options Timer Recording TUE ...

Page 40: ...sic files formatting finalising creating Top Menu When Pure Sound mode is activated timer recording does not start during playback of BD Video DVD Video or music CD 90 When the recording mode picture quality of a programme recorded in DR mode is changed its new audio and subtitle language settings will be determined by the following settings Multi Audio and Subtitles in Preferred Language 87 89 Au...

Page 41: ...ate Daily or weekly timer programme is set The timer remains active until the date indicated below It may not be possible to record because there is not enough space left the number of possible programmes has reached its maximum 24 programmes are deactivated etc The unit can find programmes that include specified keywords from programme names and programme information on TV Guide and record the pr...

Page 42: ...rogramme you want to record Programme Type Select the programme type If for example you select Art Culture only the programmes related to arts and culture are searched Free Services Only Record Select whether to limit the search to free programmes or to include pay per view programmes in the search Video Format Select whether to include HD and or SD programmes in the search Remove Duplicates When ...

Page 43: ...tton 2 Select Yes then press OK Refer to Priority order of Keyword Recording 42 1 Press OPTION 2 Select Change Priority then press OK 3 Press 3 4 to shift the position then press OK Automatic deletion of Keyword Recording Keyword List operations Display the Keyword List 1 Press FUNCTION MENU 2 Select Keyword Recording then press OK To add edit the Keyword To deactivate the Keyword Recording Keywor...

Page 44: ...ting the USB HDD go to step 5 1 Press FUNCTION MENU 2 Select Basic Settings in Setup then press OK 3 Select Settings for USB HDD in HDD Disc USB HDD then press OK 4 Select USB HDD Registration then press OK 6 When the registering is complete message screen appears Press OK 7 The confirmation screen appears Press OK To cancel all USB HDD registrations 91 It is not possible to play back the content ...

Page 45: ... To play HD Video AVCHD Select Video AVCHD then press OK The AVCHD tab appears on the Video Menu screen right To play video files Select Video MP4 MKV then press OK The video list screen appears 48 4 Select the programme then press OK Playing back video Contents on HDD Recorded programmes can be played OK RETURN Video AVCHD Recorded Programmes Video MP4 MKV Photo Music Video Menu screen Playing ba...

Page 46: ...ence to play back If a certain time has elapsed after the recording the programme cannot be played back The number of times the programme can be played back may also be limited Encrypted programme Programme has failed to be decrypted Press STATUS to show the reason of the failure Grey Programme cannot be played back edited except deleting or copied Delete the programme 57 Grouped programmes Blue P...

Page 47: ...rammes screen Select the item marked with or 2 When playing all programmes Press 1 a1 3 This function cannot be used if the group includes any encrypted programme When playing the individual programme Press OK and select the programme then press OK Editing the grouped programmes 1 Select the programme or the group then press the yellow button A check mark is displayed Repeat this step Press the ye...

Page 48: ...e When Video Format is set to Automatic 93 When 24p 25p Conversion is set to Auto 56 This unit can not output 4K image when playing back in 3D Playing Keyword Recording programmes 1 Select Keyword Record tab 2 Select the Keyword then Press OK 3 Select the programme then press OK To protect Keyword Recording programmes To delete Keyword Recording programmes To remove Keyword Recording programmes fr...

Page 49: ...Display items differ depending on what is recorded in each media If the menu screen is not displayed display it by performing the following operation 1 While stopped Press FUNCTION MENU 2 Select Media then press OK 3 Select the media then press OK e g USB About screen icons 48 For data files 25 only 1 Insert the media AVCHD If the menu screen is not displayed Press 1 a1 3 2 When the Video Menu scr...

Page 50: ...n during play Discs continue to rotate while menus are displayed Press when you have finished playback to protect the unit s motor your TV screen etc Press STATUS Each time you press STATUS the display information may change or disappear from the screen e g Displayed when an HDR video signal is being output e g HDR HLG is indicated for HDR HLG programmes HDR PQ is indicated for HDR PQ programmes D...

Page 51: ...not effective BD V AVCHD DVD R Forward direction 5 only Slow motion cannot be used on encrypted programmes While paused press 2 2 or 1 1 Each press shows the next frame Press and hold to change in succession forward or backward Press 1 a1 3 to restart play MKV MP4 and MPEG2 Frame by frame is not effective BD V AVCHD DVD R Forward direction 1 1 only Frame by frame cannot be used on encrypted progra...

Page 52: ...g on the usage conditions of this unit this function is not available For details about the Audio Description refer to To listen to the Audio Description 30 HDD USB_HDD For recorded programmes 25 BD RE BD R 1 Press STTL 2 Press OK 3 Select On or Off then press OK If you want to switch the subtitle language select it in the Basic Operation menu 55 BD V DVD V MKV Display with Subtitle Settings or Su...

Page 53: ...ompatible TV to this unit 12 13 Perform the necessary preparations for the TV Play back following the instructions displayed on the screen 3D BD Video Playback It is also possible to play back 3D discs in 2D conventional video 89 3D AVCHD Output If 2D AVCHD video is recognised as 3D video and cannot be played back correctly you may be able to play it by changing the setting 93 3D Playback Message ...

Page 54: ...f playback operations and settings can be performed from this menu Available options differ depending on the playing contents and the condition of the unit 1 Display the Playback menu 1 Press OPTION 2 Select Playback Settings in Playback Menu or select Playback Settings then press OK 2 Select the menu then press OK 3 Select the item then press OK 4 Change the setting To clear the Playback menu Pre...

Page 55: ... media are registered separately The default settings for Set 1 Set 2 are the same as the settings for Standard You cannot change the Standard settings Picture Type Select the picture quality mode during play Sharpness Adjustment Noise Reduction Luminance Colour Adjustment Adjust the contrast brightness tone curve white black colour saturation and hue Bandwidth Limitation Adjusts the bandwidth lim...

Page 56: ...film content appear jagged or rough when Auto is selected However if the video content is distorted then select Auto Reset to Default Picture Settings Restores the default settings of the Picture Settings menu Sound Settings Sound Effects This function is effective when Digital Audio Output is set to PCM 92 Night Surround Enjoy a movie with powerful sound even when the volume is kept low at night ...

Page 57: ...her than deleting 10 1 On the Video Menu screen Select the programme Multiple selection left 2 Press OPTION 1 Select Enter Programme Name in Edit then press OK 2 Refer to Entering text 84 HDD USB_HDD BD RE BD R RAM R RW Protection setting prevents the programme from accidental deletion Deleting recorded programmes Editing video Time Remaining HD 154 04 UHD 77 02 DR HDD Page Select Copy Grouped Pro...

Page 58: ...Edit then press OK 2 Press OK at the point to divide the programme You can find the desired point by using play search etc 50 3 Select Continue then press OK 4 Select Divide then press OK HDD USB_HDD Divided programmes will become a group of programmes This function cannot be used on encrypted programmes Picture Quality Change 1 On the Video Menu screen 57 Select the programme in DR mode or the AV...

Page 59: ...tarts after the unit is switched to standby mode 5 Select the item below then press OK Delete The original programme will be deleted to save the storage capacity of the HDD after the picture quality is changed Keep The original programme is retained even after the picture quality is changed The original programme will be deleted after Picture Quality Change if the selected programme is indicated w...

Page 60: ...ting chapters Edit Chapter Mark Select the point where you want to start a new chapter while viewing the programme 1 Press the green button 2 Press OK at the point you want to divide Repeat this step 3 Press RETURN to go to Chapter View screen To delete the chapter 1 Select the chapter then press the red button Multiple selection 57 2 Select Delete then press OK To combine chapters Delete chapter ...

Page 61: ...orded programmes 25 only 2 The programme in the source media will be deleted 3 The recording mode picture quality cannot be changed 1 Insert or connect the media 2 Press FUNCTION MENU 3 Select Recorded Programmes or Video AVCHD in Contents on HDD then press OK 4 Select the programme Multiple selection Select the programme then press the yellow button A check mark is displayed Repeat this step Pres...

Page 62: ...ly 5 minutes after completing copy Subtitles Automatic Subtitles will be recorded if they are included in the programme If you wish to choose the subtitle select the language from Subtitles of Preferred Language before copying 87 89 Standby status can be changed if required Please press OK to start copying OK RETURN Automatic Standby after Copy Off Audio Description Automatic Audio Description wil...

Page 63: ...tination BD RE Copy restricted programmes can be copied on to disc 1 Copy Direction HDD Disc 4 Register programmes for copy 1 Select Create List then press 1 right 2 Select New item then press OK 3 Select the programme then press the yellow button Repeat this step to select programmes e g HDD To change the appearance of the list or show information of the programme The programmes will be copied in...

Page 64: ...N 1 Off Off Subtitles Finalise Off Audio Description OK Copy 1 2 3 Cancel All Copy Direction Picture Quality Create List 4 Other Settings Start Copying HDD Disc HG Create copy list 2 Page 01 01 Size Destination Capacity No Size New item Total 2 Programme 50 1 00 2 00 01 0 30 DR 25 0 30 DR 25 02 RETURN OK Delete All All programmes that you registered to copy are deleted Add Add new items to the cop...

Page 65: ...ep Picture Quality Original programme s picture quality Media DR HG HX HE HL HM XP SP LP FR DVD RAM only Copy Keep Picture Quality is not available in the following cases HDD BD RE BD R Copying original radio programmes HDD DVD R DVD RW R RW Programmes that contain many deleted segments HDD R RW Programmes recorded in FR mode with a recording time of 5 hours or longer or EP mode Programmes recorde...

Page 66: ...n press OK When the Top Menu is displayed Select the title you want to start copying then press OK After the last title on the disc has finished playing the Top Menu is recorded until the set time is reached 01 02 01 Mouse 03 02 04 Cattle Copying Programme Playing HDD BD RE BD R RAM DVD R DVD RW R RW 1 Play back the programme to copy Multiple audio subtitle and Teletext displayed during playback w...

Page 67: ... etc 3D video may not be copied correctly 2 Press the blue button 3 Select Yes then press OK To stop copying Press and hold RETURN for 3 seconds About screen icons Refer to Screen icons 48 All files in the folder will be copied The names of folders files cannot be changed after they are copied to the HDD We recommend that you create a folder with an easily identifiable name on a PC or other device...

Page 68: ...hen press OK Playing photos 1 HDD 1 Press FUNCTION MENU 2 Select Photo in Contents on HDD then press OK Except HDD 1 Insert or connect the media The menu screen appears 49 2 Select View Photos then press OK Photo and Music Photo play option Graphic Display Level You can change the 3D position of the screen display etc during the 3D photo playback Photo Menu Start Slideshow You can start a slidesho...

Page 69: ...show Delete Calendar 03 01 2012 29 10 2012 25 02 2013 15 03 2013 0002 0002 Copy OK RETURN 8 12 18 4 Photo Menu All 3D Page Up Page Down CH e g HDD Tab Slideshow settings Start Slideshow Interval Set up the time until the next photo is to display Transition Effect Effect for the next photo to display can be set Repeat Play Music Selection Select background music on either from HDD or USB or off Bac...

Page 70: ...tering text 84 Combine Folders HDD Delete Folder Move Photos HDD Select Move to new folder or Move to another folder then press OK If Move to another folder is selected set a destination folder Delete Photos Set up Protection BD RE BD R RAM appears Even if the protection is set the photo may be deleted by another unit Cancel Protection BD RE BD R RAM Selecting and copying the photos HDD BD RE BD R...

Page 71: ...nformation is contained in music file Copying automatically USB_HDD BD RE BD R RAM DVD R R CD USB HDD 1 Insert the media The menu screen appears 49 2 Select Copy New Photos then press OK e g USB 3 Select Yes then press OK Copying will start Yes No Start copying Copy New Photos OK RETURN HDD USB Playing music CD CD DA Playing music file on the media 2 Select Play Copy Music then press OK The music ...

Page 72: ... press the yellow button A check mark is displayed Repeat this step Press the yellow button again to cancel While copying no other operations can be performed Timer recordings will not proceed All files in the folder will be copied Up to 1000 files can be copied at once HDD 1 On the music list screen Select the file or folder Multiple selection above 2 Press the red button 3 Select Yes then press ...

Page 73: ... information about other disclaimers 111 Disclaimer TV Anywhere Operations such as the ones below can be performed from anywhere with a smartphone or tablet installed with Media Center App Setting a recording Watching TV with this unit s tuner Playing back programmes recorded on this unit Use the Media Center App to complete user registration to use these functions For details please check the fol...

Page 74: ...n the DVB via IP Server function is in use the following operations cannot be performed Playing back a programme while copying another programme in Copy Keep Picture Quality mode Copying video photos music files UBC80 It is not possible to use the DVB via IP Server function if you change the TV Signal Selection setting Step 5 on page 17 Easy Setting Change the setting of the DVB via IP Client devi...

Page 75: ...le type You can watch broadcasts received by this unit Multiroom TV Streaming videos and photos saved on HDD of this unit on DLNA Client compatible equipment For details regarding the connection and operation of equipment connected via a network refer to their respective operating instructions DLNA function compatible software should be installed Preparation Perform Home Network settings 95 2 Sele...

Page 76: ...Select the contents by repeating the operation Convenient functions can be used by pressing OPTION depending on the contents Control Panel Control Panel is displayed once the playback starts Press OK if the Control Panel is not displayed It may not be displayed depending on the conditions of use While playing video or photo Press RETURN to hide the Control Panel This unit Client DLNA compatible eq...

Page 77: ...of the network connection and settings of this unit 1 Press FUNCTION MENU 2 Select Wi Fi Direct in Home Network then press OK 3 Select the item then press OK Set up the device to be connected so that a Wi Fi Direct connection can be made For details refer to the operating instructions for the device to be connected 4 Select the device to be connected then press OK If the device you want to connect...

Page 78: ...ork then press OK 3 Operate the Miracast compatible equipment To exit from Miracast Press EXIT When no devices are found Wi Fi Direct Connection Device not found To connect with a Wi Fi Direct compatible device please check connection mode of pairing device and select Search again To connect with a Wi Fi Direct incompatible device please select Next OK Search again Next Wi Fi Direct Connection Ple...

Page 79: ...u ray Disc then press OK 5 Press OK To stop copying Press and hold RETURN for 3 seconds About other screen icons Refer to Screen icons 46 USB connection cable optional 4 Select a programme stored on the video camera then press the yellow button A check mark is displayed Repeat this step Press the yellow button again to cancel With Other Equipment video camera etc 6 Select Start then press OK It wi...

Page 80: ...fier receiver 1 While playing music Press OPTION 2 Select TV Power Off then press OK Sound may be discontinued for several seconds when the power to the TV is turned off You can operate this unit using the TV remote control Refer to the operating instructions of the TV about the buttons that you can use VIERA Link based on the control functions provided by HDMI which is an industry standard known ...

Page 81: ...ile upgrading the CAM If the timer recording is started CAM software upgrade is cancelled to start recording For details refer to your CAM s operating instructions or consult your dealer You cannot operate the unit until the update is complete Don t remove the AC mains lead during the update Removing the AC mains lead while the update is in progress may damage the unit Update software firmware of ...

Page 82: ... Top Menu Do not perform this operation before copying HD Video AVCHD to DVD R or DVD R DL 67 BD RE BD R RAM Select Yes then press OK e g BD RE BD R RAM Photo data JPEG MPO or computer data cannot be deleted Media management 3 Select the media then press OK 4 Select the item then press OK Selectable items will change depending on the selected item and inserted media Disc Name Disc Protection To re...

Page 83: ...ating Top Menu Select Top Menu or Title 1 then press OK Top Menu The Top Menu appears first Title 1 The disc content is played without displaying the Top Menu DVD R DVD RW R You can play the disc on compatible DVD players by finalising it on the unit BD R Finalising BD R prevents accidental recording or editing 1 Select Yes then press OK 2 Select Start then press OK 3 Press OK After finalising BD ...

Page 84: ...e Enter Programme Name screen etc To end partway Press RETURN Text is not added The maximum number of characters depends on the media Create Top Menu HOLD function Entering text 1 Select a character then press OK Repeat this step to enter other characters Red Enter Symbols Green Enter Alphanumeric characters Yellow Enter Other Characters such as umlaut mark or accent grave Delete a character 1 a1 ...

Page 85: ...button To add channels to the Favourites list Select the channel in the All DVB Channels column then press OK Repeat this step Red Change the sorting mode Yellow Add continuous block of channels to the list at once Press 3 4 to make the block then press OK Blue Select the Category To change the order of the channels list 1 Select the channel in the Favourites column to move then press the green bu...

Page 86: ...ammes are cancelled If the channel you are looking for is not found select Full for Scan Mode above DVB C Settings for DVB C Channels DVB T DVB T2 Settings for DVB T Channels Channel List You can edit the channel list To hide reveal channels 1 Select the channel 2 Press OK The check mark is removed displayed Red Change the sorting mode Yellow Reveal all channels Blue Change the Category To move th...

Page 87: ...e 30 Child Lock List 1 Select the channel or AV input to lock 2 Press OK is displayed Press OK again to cancel Green Lock all channels Yellow Unlock all channels Parental Rating Set a ratings level to limit broadcast viewing and playback Follow the on screen instructions Preferred Language Select the language for multi broadcast If the selected language is not available the original language will ...

Page 88: ... scan The set channel is displayed in the table Update Channel List You can update the channel list to the latest one 1 Select the method and settings Search Mode Free Channels All Channels Scan Mode Quick Scans the suitable frequency for the selected satellite Full Scans the whole frequency range 2 Press OK The unit starts searching for newly available satellite digital channels If the channel yo...

Page 89: ...will be searched in Auto Setup If you select User defined in Satellite set Test Transponder Frequency manually Preferred Language 87 Audio Preference 87 Audio Description 87 HbbTV Setting 87 HDD Disc USB HDD Settings for Playback 3D BD Video Playback Select the playback method of 3D compatible video software Soundtrack Select the audio language Enter a code with the number buttons when you select ...

Page 90: ...r CAM requires a PIN for timer recording it can be entered here in advance Aspect for Recording Sets the aspect ratio when recording or copying except in DR mode HG HX HE HL or HM mode If Automatic is selected the programme will be recorded with the original aspect ratio XP SP LP or FR mode If Automatic is selected the programme will be recorded with the original aspect ratio at the time when reco...

Page 91: ...fore operation perform USB HDD Disconnection above and remove the USB HDD Picture Still Mode Select the type of picture shown when you pause play Field Select if jittering occurs when Automatic is selected The picture is coarser Frame Select if small text or fine patterns cannot be seen clearly when Automatic is selected The picture is clearer and finer Sound Dynamic Range Compression To lower the...

Page 92: ...laying back a programme recorded in DR mode with this unit BD Video Secondary Audio Turn on off the clicking sound on the menu and audio with secondary video To enjoy BD Video that supports Dolby AtmosR or DTS XTM Connect this unit to an AV amplifier or similar device that supports it with an HDMI cable and select the following settings Dolby D Dolby D Dolby TrueHD Bitstream DTS DTS HD Bitstream B...

Page 93: ...Format is set to Automatic and 4K To connect to a TV that supports 4K 50p 60p 4 4 4 8 bit or 4K 50p 60p 4 2 2 12 bit select 4K 50p 60p 4 4 4 Images will not be output correctly with an HDMI cable that does not support 18 Gbps To connect to a TV that supports 4K 50p 60p 4 2 0 8 bit select 4K 50p 60p 4 2 0 24p Output When playing BD Video recorded in 24 frames this unit displays each frame at 1 24 s...

Page 94: ...card in some cases its use together with this unit may be limited or not possible Network Easy Network Setting Press OK to start Easy Network Setting 20 Network Settings LAN Connection Mode Select the LAN connection method When not using wireless LAN when turning it off select Wired Wireless Settings This allows to set and check the connection settings of the Wireless router Search for wireless ne...

Page 95: ...ize the device password you will not be able to use TV Anywhere To use the TV Anywhere again you must re register to the service Home Network Settings You can set the DLNA Server function 75 Home Network function You can switch between enable disable of the DLNA Server and DMR Media Renderer function If On is selected the setting for Quick Start is fixed to On 97 If Off is selected the setting for...

Page 96: ...ver Turn on off the DVB via IP Server function If On is selected the setting for Quick Start is fixed to On 97 Network Function Priority It is not possible to use the DVB via IP Server function and another network function Network Service Home Network simultaneously Priority can be given to either of these functions 74 DVB via IP Server Priority is given to the DVB via IP Server function When usin...

Page 97: ...n HDD with Video Menu 63 Copying programmes with copying list UBC80 DVB C RF OUT CATV Signal DVB T DVB T2 RF OUT Aerial Signal Set whether to output the broadcasting signal from RF OUT or not while in standby mode When Quick Start is not activated If On is selected the broadcasting signal is output from this unit Networked Standby This unit can be turn on using a wake up message sent from the netw...

Page 98: ... set change the PIN for parental control 1 Enter your 4 digit PIN with the number buttons 2 Enter the new 4 digit PIN with the number buttons Make a note of PIN in case you forget it e g 3 Press OK OK Remember the PIN PIN Entry 0 0 0 0 System Update Software Update in Standby When you set this unit to standby mode software firmware updates 81 are downloaded automatically at the time you have speci...

Page 99: ...ws 1 Press Í I on the main unit to switch the unit to standby If the unit does not switch to standby press Í I on the main unit for about 3 seconds The unit is forcibly switched to standby Alternatively disconnect the AC mains lead wait one minute then reconnect it 2 Press Í I on the main unit to switch it on If the unit still cannot be operated consult the dealer Reference Cannot eject a disc 1 P...

Page 100: ...system already has been switched over to DVB T2 perform Update Channel List to update the channel list TV screen and video The images do not appear on the TV The picture is distorted during play or video is not played correctly Check the connections 11 13 Check the settings of the connected TV etc An incorrect resolution is selected in Video Format 93 Reset the setting as follows 1 While the unit ...

Page 101: ... perform playback correctly 53 Video may not be output from your TV in HDR quality depending on the content Set HDR High Dynamic Range Output and HLG PQ Conversion to Automatic 94 3D video is not output correctly 3D video may be output correctly by changing the following settings Signal Format 53 3D settings during playback Check the settings of the connected TV When a non 3D compatible amplifier ...

Page 102: ... content Keyword Recording does not work properly The Keyword Recording function can search the First 250 channels listed on All DVB Channels or the First 50 channels registered for Favourites1 85 88 The unit may not record a Keyword Recording programme when part of its broadcast time overlaps with that of another timer recording programme When this occurs the Keyword Recording does not start even...

Page 103: ...create empty space 57 Photos do not play back normally The images that were edited on the PC such as Progressive JPEG etc may not play back 24 This unit does not recognize the USB device correctly If inserted during playback the USB device may not be recognized by this unit Disconnect and reconnect the USB device If it still does not recognize the connection switch the unit to standby mode and tur...

Page 104: ... IN 2 terminal A wrong single cable version is set Perform Easy Setting again 19 UBC80 Major channels and favourite channels are not displayed on the top part of the channel list DVB C To change channel allocation restart Auto Setup in Basic Settings menu and change channel number allocation selection 86 You can change channel number assignment 86 UBC80 DVB T DVB T2 UBS80 Picture very infrequently...

Page 105: ...rmed when this unit is in the following conditions While playing back a BD Video While simultaneously performing Copy Keep Picture Quality and recording While displaying the Basic Settings menu While executing functions using a network such as Network Service If the DLNA compatible equipment is not capable of outputting HE AAC audio format etc sound may not be played back When Automatic is set for...

Page 106: ...ammes 41 You are trying to divide a programme when the maximum possible number of programmes is already stored on the media The USB device is drawing too much power Remove the USB device The remote control and main unit are using different codes Change the code on the remote control 99 Update of the software firmware is started You cannot operate the unit until the update is complete 81 Software f...

Page 107: ...l that does not support copyright protection Due to the current disc not having authorised copyright information video output is not performed When a disc is inserted There was something unusual detected with the disc or the unit The unit is trying to restore to the normal operation Once the message disappears you can use the unit again If it remains displayed consult the dealer The unit fails to ...

Page 108: ...dio out coaxial 1 pc HDMI out 19 pin type A 1 pc Internal HDD capacity 1 TB TV system UBC80 Tuner System DVB C DVB T DVB T2 Country Germany Austria Switzerland Channel coverage VHF 5 12 UHF 21 69 CATV S1 S20 M1 U10 7 MHz Band D051 D073 D113 D858 UBS80 Tuner System DVB S DVB S2 Antenna receive frequency 950 MHz to 2150 MHz Input impedance Nominal 75 Demodulation QPSK 8PSK LNB input F shape terminal...

Page 109: ...ng on the bit rate of broadcasting UHD quality estimated bit rate is 28 Mbps High Definition HD quality estimated bit rate is 14 Mbps HEVC Standard Definition SD quality estimated bit rate is 5 Mbps Recording Mode picture quality HDD BD RE BD R 1 TB Single Layer 25 GB Dual Layer 50 GB HG 157 hours 4 hours 8 hours HX 235 hours 6 hours 12 hours HE 353 hours 9 hours 18 hours HL 472 hours 12 hours 24 ...

Page 110: ...n 7282 Czech 6783 Danish 6865 Dutch 7876 English 6978 Esperanto 6979 Estonian 6984 Faroese 7079 Fiji 7074 Finnish 7073 French 7082 Frisian 7089 Galician 7176 Georgian 7565 German 6869 Greek 6976 Greenlandic 7576 Guarani 7178 Gujarati 7185 Hausa 7265 Hebrew 7387 Hindi 7273 Hungarian 7285 Icelandic 7383 Indonesian 7378 Interlingua 7365 Irish 7165 Italian 7384 Japanese 7465 Javanese 7487 Kannada 7578...

Page 111: ...other device may require permission from the owner of the copyright or other such rights in that content Panasonic has no authority to and does not grant you that permission and explicitly disclaims any right ability or intention to obtain such permission on your behalf It is your responsibility to ensure that your use of this or any other device complies with applicable copyright legislation in y...

Page 112: ... decode AVC Video that was encoded by a consumer engaged in a personal activity and or was obtained from a video provider licensed to provide AVC Video No license is granted or shall be implied for any other use Additional information may be obtained from MPEG LA L L C See http www mpegla com This product is licensed under the VC 1 patent portfolio license for the personal and non commercial use o...

Page 113: ...s technology outside of this product is prohibited without the appropriate license s from Microsoft MS PlayReady End User Notices Content owners use Microsoft PlayReady content access technology to protect their intellectual property including copyrighted content This device uses PlayReady technology to access PlayReady protected content and or WMDRM protected content If the device fails to proper...

Page 114: ... 50 Disc Finalise 83 Format 83 Media information 22 Protection 82 DVB via IP Server 96 DVD Video 49 E Easy setting 17 18 Entering text 84 F Favourites 85 88 Finalise 83 Format Disc 83 HDD 91 USB HDD 91 freenet TV 9 FUNCTION MENU 27 H HDD Format 91 Media information 22 HDR 11 94 Home Networking DLNA 75 95 Client 76 Media Renderer 77 Server 75 K Keyword Recording 41 48 L Language code list 110 Lens ...

Page 115: ...op Menu 84 Create Top Menu 84 Troubleshooting guide 99 Messages 106 Tuning Channel List 86 88 Child Lock 87 Manual Tuning 86 88 Signal condition 87 89 TV Anywhere 73 TV Guide Operation 31 Timer recording 37 TV System 93 TV IP 96 U Ultra HD Blu ray 49 53 USB HDD External HDD Cancellation of all USB HDD Registrations 91 Disconnection 44 91 Format 91 Media information 22 25 Registration 44 91 USB mem...

Page 116: ...eting Europe GmbH Panasonic Testing Centre Winsbergring 15 22525 Hamburg Germany This product is in compliance with the radio standards of the following countries Austria Belgium Bulgaria Cyprus Czech Republic Denmark Finland France Germany Greece Hungary Ireland Italy Iceland Liechtenstein Luxembourg Malta Netherlands Norway Poland Portugal Romania Slovakia Slovenia Spain Sweden United Kingdom Sw...

Reviews: