82
VQT3G90
VQT3G90
83
Useful features for travel
For [Setup] menu setting procedures (
→
38)
[Travel Date]
If you set your travel schedule and record pictures, which day of your trip the picture was
recorded will be recorded.
■
Recording Mode:
∗
∗
Recording only. (Cannot set.)
Select [Travel Date] from the [Setup] menu
Use cursor button to select [Travel Setup] and press [MENU/
SET]
Use cursor button to select [SET] and press [MENU/SET]
Use cursor button to select the departure date and press
[MENU/SET]
Use cursor button to select the return date and press [MENU/
SET]
■
To record [Location]
Record your destination.
Once the [Travel Setup] is set, you can set the location.
Select [Location] in step
above
Use cursor button to select [SET] and press [MENU/SET]
Enter your location (Entering text
→
84)
●
The travel date is calculated from the set departure date and the date set in the
camera’s clock. When destination is set in [World Time], days elapsed are calculated
based on local destination time.
●
When [Travel Setup] is set to [OFF], the number of days elapsed is not recorded. It is
not displayed even if [Travel Setup] is set to [SET] after recording.
●
If settings are made before the departure date, the number of days to departure are
displayed in orange with a minus sign (but not recorded).
●
When [Travel Date] is displayed in white with a minus sign, the [Home] date is one day
ahead of the [Destination] date due to the difference in time zones (this is recorded).
●
[Location] is recorded separately from the location name information which is recorded
on the pictures by the GPS function.
●
To print [Location] or the number of days that have passed, either use [Text Stamp] or
print using the software on the supplied CD-ROM “PHOTOfunSTUDIO”.
●
[Travel Setup] and [Location] cannot be set for AVCHD motion pictures.
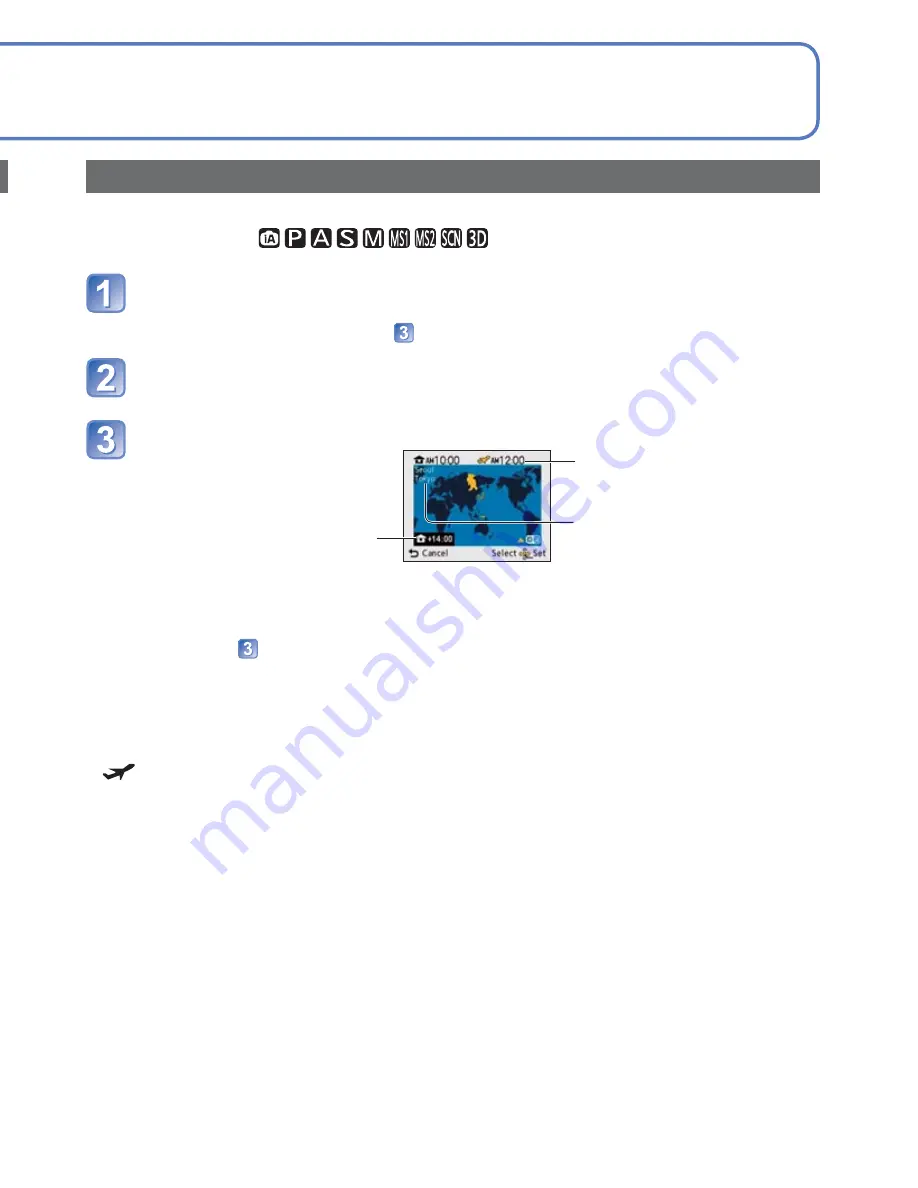
[World Time]
Set the recording date and time with the local time at your destination.
■
Recording Mode:
Select [World Time] from the [Setup] menu
• Message will be displayed when setting for the first time. In this case, press
[MENU/SET] and skip to step
.
Use cursor button to select [Home] or [Destination] and press
[MENU/SET]
Use cursor button to select area and press [MENU/SET]
Difference with home time
Current time at selected
destination
City/area name
When [Destination] has been selected
■
To set summer time
Press
▲
in step
. (Press again to release the setting)
• When summer time is set, the current time is advanced by 1 hour. If the setting is
canceled, the time automatically returns to the current time.
●
If you cannot find your destination in the area displayed on the screen, set based on
difference with home time.
●
is displayed on the screen for pictures recorded at the destination when they are
played back.
●
When [Auto Clock Set] is set to [ON], only the summer time setting of [Destination] can
be changed.


