Radio
English
17
16
Radio
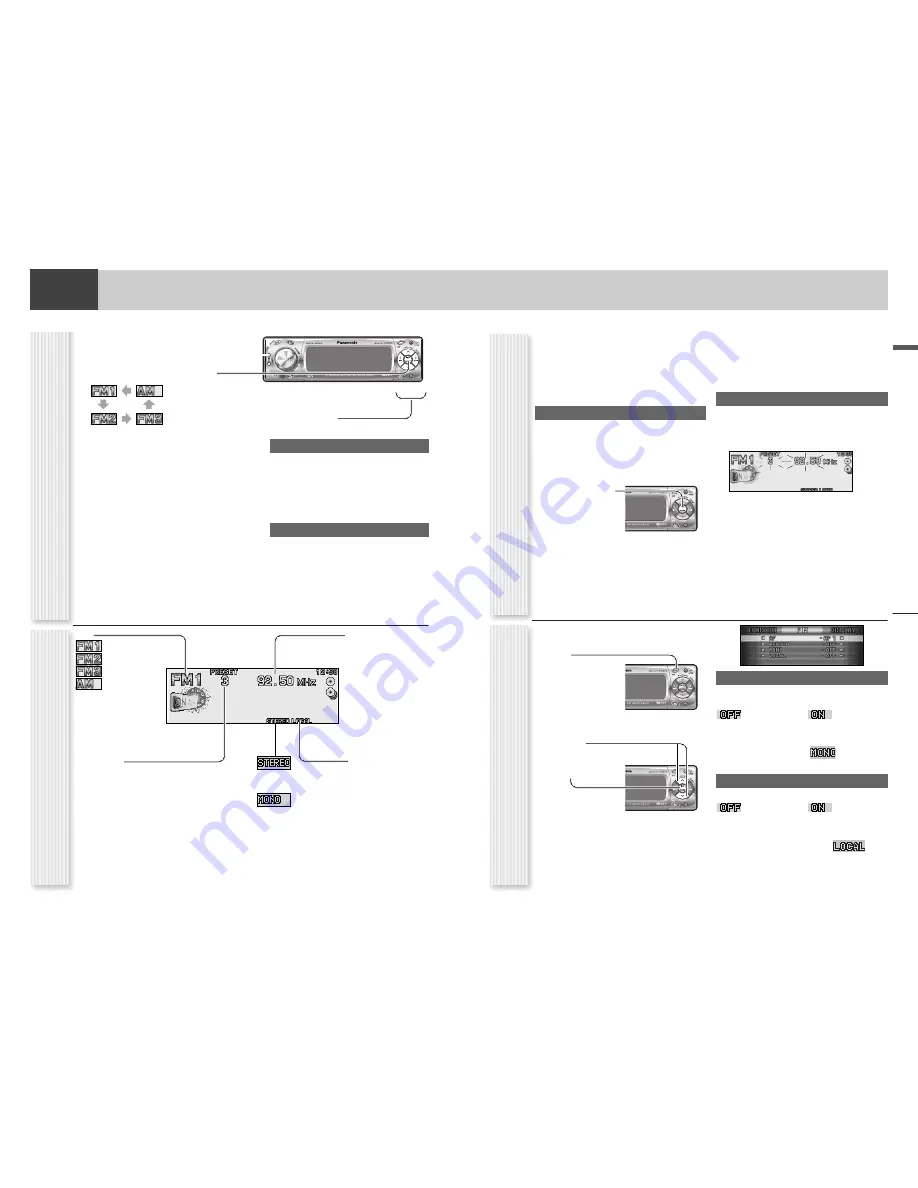
This chapter explains how to listen to the radio.
Up to 6 stations can be preset in AM, FM1, FM2, and FM3
respectively.
Preset stations can be simply called up by pressing
[
}
]
(
P·SET
) or
[
{
]
(
P·SET
).
Note:
Direct selection can be executed with
[1]
to
[6]
buttons on remote control.
Auto Preset Memory (APM)
Six stations with the first highest to the 6th highest in
signal strength will be preset to each band. When FM1 is
selected, 18 stations in total will be preset to FM1 to FM3.
1
Select a band.
2
Hold down
[BAND]
(
APM
)
for 2 sec. or
more.
The preset stations under best receiving conditions
are received for 5 sec. each after presetting the sta-
tions (SCAN). To stop scanning, press
[
}
]
or
[
{
]
.
Notes:
¡
New stations overwrite existing saved stations. (For
FM1, FM2 and FM3 at the same time, select FM1.)
¡
Only RDS stations will be saved at default setting (AF ON).
To select non RDS stations too, set AF OFF.(
a
page 19)
¡
If you would like to preset FM stations of different
areas in different bands, first, execute the APM opera-
tion when FM1 is selected, then execute the APM
operation in a different area when FM2 is selected and
another APM operation in another different area when
FM3 is selected.
Manual station preset
1
Tune in to a station.
2
Hold down
[
}
]
or
[
{
]
for 2 sec. or
more.
3
Select a
preset
number by pressing
[
}
]
or
[
{
]
.
4
Preset the station by holding down
[
}
]
or
[
{
]
for 2 sec. or more.
Frequency/preset number blinks once.
Notes:
¡
New stations overwrite existing saved stations.
¡
In step 2, a station can be registered by holding down
the numeric button
[1]
~
[6]
2 sec. or more.
¡
To stop presetting stations, press
[DISP]
(Display)
.
1
Press
[SOURCE]
to select the radio
mode.
2
Press
[BAND]
to select a band.
Notes:
¡
For tuning in on only stations whose receiving
conditions are good in the station search, set
LOCAL to ON. (
a
page 17)
¡
For reducing noise when a receiving FM stereo
wave is weak, set FM MONO to ON. (
a
page 17)
3
Select a station.
Frequency adjustment
[
]
]
(
TUNE
):
Lower
[
[
]
(
TUNE
):
Higher
Note:
Hold down more than 0.5 sec. or more and
release for station search.
Preset station selection
[
{
]
(
P·SET
: Preset):
Lower preset number
[
}
]
(
P·SET
: Preset):
Higher preset number
Note:
Direct selection can be executed with
[1]
to
[6]
buttons on remote control.
Band
Frequency
Lights when
LOCAL
is
activated.
(
a
page 17)
Preset Number
Station Preset
(APM: Auto Preset Memory, P·SET: Preset)
CQ-C8300N
BAND
BAND
Radio mode display
CQ-C8300N
BAND
BAND
Note:
In AM mode, only LOCAL can be selected.
1
Press
[MENU]
to display the menu dis-
play.
For using the remote
control, hold down
[MENU]
for 2 sec. or
more.
2
Press
[
}
]
or
[
{
]
to select a mode to be
adjusted.
3
Press
[BAND]
(
SET
) to adjust.
4
Press
[MENU]
to confirm the adjust-
ment.
For using the remote control, hold down
[MENU]
for 2 sec. or more.
MONO (Monaural)
Noise reduction when the signal strength decreases
LOCAL
Setting when searching for a station
Mono/Local Setting (Radio Menu Display)
MONO/LOCAL
CQ-C8300N
BAND
CQ-C8300N
BAND
BAND
Lights while receiving an
FM stereo signal.
Lights when
MONO
is
activated.
(
a
page 17)
Receiving in stereo
(Default)
Receiving in mono and
reducing the noise level
(
lights.)
Searching even for a
relatively low-intensity
radio wave station
(Default)
Searching only for a high-
intensity radio wave
station (
lights.)
Operation Flow


