5
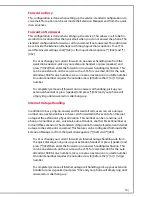
Assembling and Activating the Phone
1.
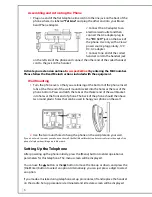
Plug one end of the flat telephone line cord into the line jack on the back of the
phone where it is labeled
"Tel Line"
and plug the other end into your Broad-
band Phone Adapter.
2.
Connect the AC adapter to an
electrical wall outlet and then
connect the AC adapter plug to
the
“DC 12V”
jack on the back of
the phone. Use only with a Class 2
power source plug polarity, 12V
DC, AC adapter.
3.
Connect one end of the coiled
handset cord to the handset jack
on the left side of the phone and connect the other end of the coiled handset
cord to the jack on the handset
Activate your extension online at
www.packet8.net
by entering the MAC number.
Please follow the Read Me instructions included with the equipment.
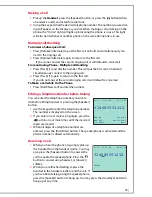
Wall Mounting
1.
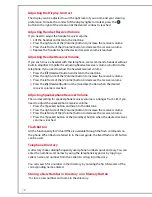
Turn the phone over so that you are looking at the bottom of the phone. Insert
tabs at the thin end of the wall mount bracket into the holes at the rear of the
phone bottom. Press and latch the tabs at the thicker end of the wall bracket
into holes at the front end of phone. The back of the phone should then have
two round plastic holes that can be used to hang your phone on the wall.
2.
Use the two round holes to hang the phone on the wall plate on your wall.
If you do not wish to mount your phone on the w
a
ll, the W
a
ll Mount Br
a
cket c
a
n be reversed to r
a
ise the
a
ngle of the
phone's displ
a
y when sitting on
a
t
a
ble or desk.
Setting Up the Telephone
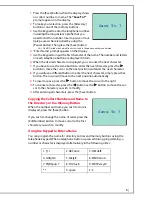
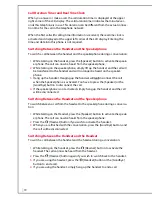
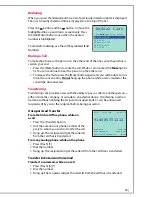
After powering up the phone initially, press the [Menu] button to enter operational
parameters for this telephone. The menu screen will be displayed.
You can use the
button or the
button to move the line up or down, and press the
[Dial/Enter] button to select an option. Alternatively, you can just press a digit to select
an option.
If you made a mistake during telephone set up procedures, lift and replace the handset
on the cradle. Set up procedure is terminated and idle state screen will be displayed.


