background image

COPYRIGHT NOTICE

Packard Bell Medi@ TV User’s Guide. Copyright © 2003 NEC Computers International B.V.
All Rights Reserved. No part of this manual may be reproduced or transmitted, in any form or
by any means, whether electronic, chemical, manual or otherwise, including but not limited to
photocopying, recording, or information storage and retrieval systems, for any purpose without
prior written permission of NEC Computers International B.V.

DISCLAIMER

NEC Computers International B.V. specifically disclaims all warranties, either express or implied,
including, but not limited to, implied warranties of merchantability and fitness for a particular
purpose with respect to this product and documentation.

Updates to software and hardware components are made regularly. Therefore some of the instruc-
tions, specifications and pictures in this documentation may differ slightly from your particular
situation.

All items described in this guide are for illustration purposes only and may

not apply to your particular situation. No legal rights or entitlements may be obtained
from descriptions made in this manual.

NEC Computers International B.V. reserves the right

to revise or make changes or improvements to this product or documentation at any time with-
out obligation to notify any person of such revisions or improvements.

In no event shall NEC Computers International B.V. be liable for any consequential or inciden-
tal damages, including but not limited to loss of business profits or any other commercial dam-
ages, arising out of the use of this product.

TRADEMARKS

Microsoft, Windows and Windows XP are registered trademarks of Microsoft Corporation.
Packard Bell is a registered trademark of NEC Computers International B.V.

All other company or product names are trademarks, registered trademarks or service marks  of
their respective owners.

T

T

ABLE

ABLE

OF

OF

C

C

ONTENTS

ONTENTS

PART 1 – INSTALLATION OF MEDI@ TV . . . . . . . . . . . . . . . . . . . . . . . . . . . . . . . . 1

Chapter 1 Introducing Medi@ TV

 . . . . . . . . . . . . . . . . . . . . . . . . . . . . . . . . . . . . . . . . . . . . . . . . .

2

Chapter 2 Installing Your Medi@ TV

 . . . . . . . . . . . . . . . . . . . . . . . . . . . . . . . . . . . . . . . . . . . . . . .

3

Chapter 3 Installing the Medi@ TV Software

 . . . . . . . . . . . . . . . . . . . . . . . . . . . . . . . . . . . . . . .

6

Chapter 4 Running Medi@ TV

 . . . . . . . . . . . . . . . . . . . . . . . . . . . . . . . . . . . . . . . . . . . . . . . . . . .

11

PART 2 – PACKARD BELL MEDIA ORGANIZER  . . . . . . . . . . . . . . . . . . . . . . . . . .12

Chapter 1 Before Starting

 . . . . . . . . . . . . . . . . . . . . . . . . . . . . . . . . . . . . . . . . . . . . . . . . . . . . . . . .

12

Chapter 2 Getting Started

 . . . . . . . . . . . . . . . . . . . . . . . . . . . . . . . . . . . . . . . . . . . . . . . . . . . . . . .

13

Chapter 3 Creating/Editing an Audio Album

 . . . . . . . . . . . . . . . . . . . . . . . . . . . . . . . . . . . . . .

19

Chapter 4 Adding/Editing Video

 . . . . . . . . . . . . . . . . . . . . . . . . . . . . . . . . . . . . . . . . . . . . . . . . .

24

Chapter 5 Creating/Editing a Photo Album

 . . . . . . . . . . . . . . . . . . . . . . . . . . . . . . . . . . . . . . .

27

Chapter 6 Media Management

 . . . . . . . . . . . . . . . . . . . . . . . . . . . . . . . . . . . . . . . . . . . . . . . . . . .

32

PART 3 – PACKARD BELL MEDI@ TV VIEWER  . . . . . . . . . . . . . . . . . . . . . . . . . .35

Chapter 1 Before Starting

 . . . . . . . . . . . . . . . . . . . . . . . . . . . . . . . . . . . . . . . . . . . . . . . . . . . . . . . .

35

Chapter 2 Getting Started

 . . . . . . . . . . . . . . . . . . . . . . . . . . . . . . . . . . . . . . . . . . . . . . . . . . . . . . .

36

Chapter 3 Listening to Music

 . . . . . . . . . . . . . . . . . . . . . . . . . . . . . . . . . . . . . . . . . . . . . . . . . . . .

41

Chapter 4 Viewing Video

 . . . . . . . . . . . . . . . . . . . . . . . . . . . . . . . . . . . . . . . . . . . . . . . . . . . . . . . .

43

Chapter 5 Viewing Photo

 . . . . . . . . . . . . . . . . . . . . . . . . . . . . . . . . . . . . . . . . . . . . . . . . . . . . . . . .

47

Chapter 6 Playback of Media File using the Browser

 . . . . . . . . . . . . . . . . . . . . . . . . . . . . . . .

49

PART 4 – ADVANCED SETUP AND FAQ  . . . . . . . . . . . . . . . . . . . . . . . . . . . . . . . .51

Chapter 1 Medi@ TV Server Configuration

 . . . . . . . . . . . . . . . . . . . . . . . . . . . . . . . . . . . . . . . .

51

Chapter 2 FAQ

 . . . . . . . . . . . . . . . . . . . . . . . . . . . . . . . . . . . . . . . . . . . . . . . . . . . . . . . . . . . . . . . . .

53

1

PA

RT

 1 – INST

ALLA

TION OF P

ACKARD BELL MEDI@ TV

Summary of Contents for Medi TV

Page 1: ...e with out obligation to notify any person of such revisions or improvements In no event shall NEC Computers International B V be liable for any consequential or inciden tal damages including but not limited to loss of business profits or any other commercial dam ages arising out of the use of this product TRADEMARKS Microsoft Windows and Windows XP are registered trademarks of Microsoft Corporati...

Page 2: ...t Forget crowding around a PC monitor now your whole family can enjoy digital media con tent from your PC on the TV in your living room The Medi TV remote control allows quick and easy access to your PC s digital media content Efficiently manage your PC s digital entertainment media The Packard Bell Media Organizer allows you to manage all of your digital music movies and photo files even your per...

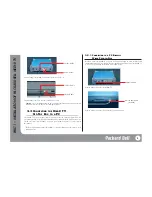
Page 3: ...need codecs installed on your PC that are appro priate for your content As an example popular codecs for digital video include MPEG1 MPEG2 and WMV C CHAPTER HAPTER 2 I 2 INST NSTALLING ALLING Y YOUR OUR M MEDI EDI TV TV 2 1 COMPONENT NAMES AND FUNCTIONS 2 1 1 THE CONNECTION PORTS ON THE REAR PANEL The connection ports on the rear panel allow connection of the Medi TV set top box to a PC TV and oth...

Page 4: ... THE COMPOSITE CABLE WITH THE RCA SCART ADAPTER Connect one end of the Composite Cable to the Medi TV set top box and connect the other end to the RCA SCART adapter Connect yellow to yellow white to white and red to red The Composite Cable is also called the A V Cable Audio Video Cable Plug the other end of the RCA Scart adapter into an available SCART connector on your TV set Composite Cable Conn...

Page 5: ... TV set top box to is sometimes referred to as a server later in this manual For the best performance from your Medi TV you must disable your PC s screen saver and power saver 2 3 1 CONNECTING TO A PC DIRECTLY WIRED PEER TO PEER In order to connect the Medi TV set top box to a PC directly using wire you must have a LAN card installed in your PC or your PC must have that function built in Connect t...

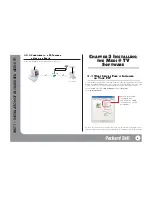
Page 6: ...ded For Windows XP Service Pack 1 or later is needed To see if your PC already has the necessary Service Pack installed 1 Click on Start right click on My Computer and select Properties 2 Select General System If your PC does not have the necessary Service Pack you should install it Windows Service Packs can be downloaded from Microsoft s home page http www microsoft com downloads Check if Service...

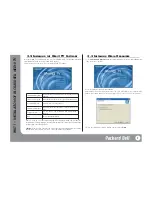
Page 7: ...tall Media Organizer from the initial installation screen and click on Next each time you wish to continue 2 Select a sharing method and click on Next Share database for all users allows all users who can log on to Windows to access all data in the database Use separate database for each user allows each user only to access his her own data 3 When the installation complete window appears click on ...

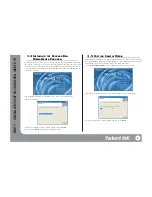
Page 8: ...disk drive Please do not interrupt 3 When the installation complete window appears click on Finish After you click on Finish you will need to restart you system 3 5 COPYING SAMPLE MEDIA After installation of Medi TV you may need media audio video and photo files for testing Insert your Medi TV Installation CD again and please copy the Sample Media files to the PC s hard disk drive for testing You ...

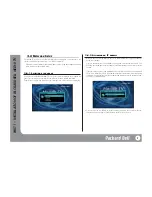
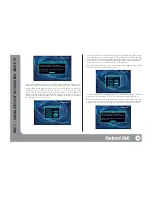
Page 9: ...NING AN IP ADDRESS 1 After you have selected the language the set top box will ask how to assign an IP address Automatic or manual If you are connecting the PC and Medi TV using a hub select Automatic DHCP This will allow the set top box to get its IP address automatically from a DHCP server built into the hub If you are connecting the PC and Medi TV using a crossed LAN cable we also recommed you ...

Page 10: ...k card from the TCP IP setting of your PC The IP address of the set top box and server PC should have the same first three numbers but a different last number For example if you entered 192 168 11 3 as the set top box s IP address you should set the IP address of the PC to 192 168 11 x where x is a number between 1 to 255 other than 3 4 After assigning the IP address you must enter the subnet mask...

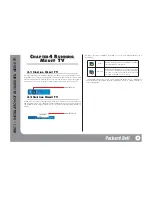
Page 11: ...will disappear from the system tray In order to run Medi TV again simply restart the PC or select Start Programs Startup Medi TV Starter According to the status of Medi TV the Medi TV icon on system tray will appear as one of the following Configuration from the above menu is used for advanced options such as Medi TV ver sion management video option For further explanation refer to 4 Chapter 1 Med...

Page 12: ...with digital camcorders Edits Albums Makes albums after categorising audio video and photo files Makes playlists with audio files Edits album information title caption genre category etc Extracts and changes album art and posters Other Plays audio video Views photos adjusts photo size Recovers manages media links Makes back ups of media Supported File Formats Audio MP3 WAV WMA Audio CD Video MPEG1...

Page 13: ...audio video and photo files from your hard disk easily and rapidly If you don t want the Wizard to start when you start Media Organizer please check the box Do not show wizard on start up When running Media Organizer for the first time there won t be any media so nothing will show on the media list Please remember that all examples in this manual are made after many audio video and photo albums ha...

Page 14: ...different type of music and creates edits My Album Genre Categorizes music albums you have according to genre Video Movie Adds or edits movie file My Video Adds or edits personal movie file Photo Album Opens new album or edits album Category Shows photo albums according to category Open new album Import audio movie or photo files from hard disk or CD Undo Redo Cut Copy Paste Show album list with b...

Page 15: ... list of audio files appears If you select a video album a video preview screen appears If you select a photo album a list of photo files appears Excluding Video mode in Audio Album and Photo Album mode you can put the cursor on the album content and right click on it to open a pop up menu where you can use add edit delete and sort functions easily 2 2 5 CONTROLLER The controller allows you to pla...

Page 16: ...data on the hard disk and adds them to the list If it is your first time using Media Organizer it is better to use this function to add data Later you can use them according to media type Please follow the directions below in order to add media after scanning from the hard disk If the Media Scan dialogue box does not appear simply open Media Organizer and select Tool Scan Media All media If you do...

Page 17: ...bum click on Next 3 Select the folder you want to add CD ROM when selecting Audio CD and click on Finish The selected folder will show on the Playlist of Media Organizer and all the music files in the folder will be added to this album as well The name of the folder will be used as the name of the audio album For further information on Playlists for Audio Albums please refer to 3 1 4 Creating a Pl...

Page 18: ... 4 4 ADDING PHOTO 1 From the Media Import Wizard if you select Photo a window where you can select a fold er of photo files appears 2 The selected folder will be added to photo album list of Media Organizer and all the pho to files in this folder will be added to this photo album The name of the folder is used as the name of the photo album For a more detailed explanation of adding photos please r...

Page 19: ... Select File Audio Album As shown on the screen a new album will be added to the Album List Since this album does not have any content nothing will be shown on the Playlist 2 Select File Import Audio File Note If you use the Media controller located below the Playlist you can listen to the music Select the music you want to play from the Playlist and click on Play You can control the music using S...

Page 20: ...tly only BladEnc BladeEnc dll is supported Caution You can not encode to MP3 with software that is incompatible with Medi TV You must first download BladeEnc dll from www bladeenc mp3 no to a folder and appoint the loca tion of the file If BladeEnc dll does not exist in the appointed folder you can not encode to MP3 Deleting BladeEnc dll can cause errors during the process of copying music from CD...

Page 21: ... Registration is done What is CDDB It is an audio information service provided by Gracenote It automatically sends information such as title artist genre etc to CD Players MP3 Players and other media programs through the Internet In Media Organizer when you import music from a CD it automatically imports title artist genre label and other information for the CD using CDDB For more information on C...

Page 22: ...s If you click the music pauses and if you click the music stops You can drag the slide bar to move the music back and forth Note You can also double click on the title on the Playlist If one music file ends the next one starts playing When it s not playing double clicking an Audio Album will play from the beginning of the album 3 3 MOVING AN ALBUM In Media Organizer music is grouped into Audio Al...

Page 23: ...the music simply press the Ctrl key while dragging 3 4 2 DELETING DUPLICATING ALBUM CONTENT 1 Select the titles you want to delete from the Album content Pressing the Ctrl key will let you select more than one 2 If you click on Duplicate on the Edit menu the selected music will be duplicated If you select Delete on the Edit menu or press the Del key after selecting music the selected music will be...

Page 24: ...lmed In Media Organizer Video is categorized as Movie or My Video Movie is a movie collection from the Internet Video CD or TV My Video is a personal movie collection filmed with a digital camcorder Adding Movie and My Video are the same the following example illustrates adding a Movie 4 1 1 ADDING WITH THE IMPORT VIDEO FILES MENU 1 Select the Movie icon from the video part of the Media Type menu ...

Page 25: ...s When the selected folder has an image file in it the image will be set as a poster When there is no image file name matched with the video file name the screen in the middle of the video will be set as a poster 4 2 VIDEO PREVIEW Play a video file If you click on the controller the Movie pauses and if you click the Movie stops You can use the slide bar to move back and forth However if the Movie ...

Page 26: ...an select more than one 3 Right click and then select Move to My Video on the pop up menu The selected Movie will be moved to My Video List 4 4 ENTERING EDITING MOVIE INFORMATION Once you add a new Movie you can enter movie data title director cast etc using Movie Information You can also edit the information The following shows how to enter Movie Information 4 5 CHANGING POSTER To change posters ...

Page 27: ...on if you click on Thumb no window will pop up and the scene will be set as the poster When the movie is paused you can not extract a poster image C CHAPTER HAPTER 5 5 C CREA REATING TING E EDITING DITING A A P PHOTO HOTO A ALBUM LBUM 5 1 CREATING A PHOTO ALBUM You can create a Photo Album with photos of your family friends and yourself using the fol lowing procedure 5 1 1 CREATING WITH PHOTO ALBU...

Page 28: ...egory according to types of photos It is also possible to enter BGM with a description of the album When you want to set the Album Art click on Change Album Art and then select the file you want Title Enter the name of the photo or memorable text Place Enter the place of the photo taken Category Categorizes into groups BGM Background music during the slide show Date Date of the photo Grade Restric...

Page 29: ...Explorer and drag it to an album or Playlist in Media Organizer 5 2 PHOTO ALBUM PREVIEW Follow these directions to preview a Photo Album This is an example of the screen that you will see when you click on Preview You can use the buttons below the photo to adjust the view Shows photos in the album like a slideshow Shows the previous photo Shows the next photo Zoom in Each click zooms in 1x 2x 3x 1...

Page 30: ...Contents window If you hold the Ctrl key you can select more than one photo 2 If you select Duplicate from the Edit menu the selected file will be duplicated After selecting one or more files if you select Delete from the Edit menu or press the Del key the selected file will be deleted from the list 5 4 ENTERING EDITING ALBUM INFORMATION Once you make a new Photo Album or select an old one you can...

Page 31: ...n directly select a music album or a file to use as the background music BGM for a slide show Press the Change button on the right side of the BGM item and a window where you can select BGM will appear After choosing an album that includes the file you want select the file as the background music and then click on OK If you want to select another file you can select a file from the hard disk direc...

Page 32: ...AGEMENT ANAGEMENT 6 1 CHANGING A FILE If you select a music video album or photo title you will see the title and location of the linked file on the status bar You can change this link status to link the title to another file Follow these directions to change the link status in Media Organizer 1 Select a linked file you want to change 2 On the Edit menu select Change Media File If a dialogue box w...

Page 33: ...ia Link on the pop up menu The Media Link Recover dialogue box will appear 3 Select the target for recovery on the list Holding the Ctrl key lets you select more than one target 4 Click on Recover When you want to recover every target on the list click on Recover All Targets you don t need can be removed by clicking on Delete 6 3 IMPORTING EXPORTING MEDIA You can move albums in Media Organizer and...

Page 34: ...ckup 6 4 2 BACKUP SELECTED MEDIA FILES You can select media files and data in Media Organizer for backup Select Media DB Backup from the Tool menu If the Media DB Backup screen appears drag the selected Audio Album or Photo Album and click on Backup When the screen where you can set the location of back up files appears select the location and click on Save If a message saying Completed Backup suc...

Page 35: ... music by index keyword Video View Plays all movie formats supported by Windows Media Player such as MPEG1 MPEG2 AVI DiVX and WMV Play Stop End Jump backward and forward Bookmark function Video Information Supports captions of SMI file format Supports wide screen Searches video by index Photo View Supports JPEG BMP View Photo View Thumbnail View Previous Next photo View Album and Photo Information...

Page 36: ...ect to another server by pressing the key of the remote control at Medi TV s Home screen It will restart scanning for available servers 2 1 2 HOME After searching and connecting Medi TV Server you will see Medi TV Viewer Home on the initial screen Depending on your PC s performance and network conditions this may take 10 to 20 seconds On this screen you can move to Music Video and Photo view modes...

Page 37: ...he General submenu of the Option screen For option settings refer to 2 3 2 Option Settings Thumbnail View List View 2 2 USING YOUR REMOTE CONTROL Every function of the Medi TV Viewer can be controlled with your remote control These are the names and functions of each button Note All buttons of the remote control may not always work Different buttons are used accord ing to Viewer s status and scree...

Page 38: ...list moves to left right item While playing video skips Backward Forward Select Play When music album photo album is selected plays music album views photo Plays selected music song Playlist and Video When selecting genre moves to list of the select ed genre When scanning keyword confirms text entered When viewing photo moves to next photo Power Starts and stops Viewer Sound on off Used when you w...

Page 39: ... up Up one level Number Key Used to enter or select numbers Play Mode Music play mode Play all music Play all album Repeat music Repeat all Random Play Caption Lyric Shows hides caption while playing a movie Shows hides lyrics while playing music When it has lyrics Search Searches album or music by Hangeul and alphabet index Slide show Start Stops slideshow Rotate to left Rotates photo to the left...

Page 40: ...ou change this setting to Off you have to enter a password so you need to enter the password to view all lists Note If you forget your password on the option exit menu select Load Factory Default The default password 0000 will be set up After this set a new password following the directions above 40 PART 3 PACKARD BELL MEDI TV VIEWER Delete Confirm Only used on Music Play list Sets whether warning...

Page 41: ... Default Loads factory default settings Cancel Goes back to the option screen C CHAPTER HAPTER 3 3 L LISTENING ISTENING TO TO M MUSIC USIC 3 1 VIEWING ALBUM LIST If you press the MUSIC button on the remote control it will move to the Music screen Generally you will see a list of audio albums sorted by title Using the modification buttons red green blue and yellow you can move to View Album View Pl...

Page 42: ...e Play Pause indi cator Playmode Position slider Play time and length of the music playing 3 3 1 PLAY ALL PLAY SELECTED Pressing will play all tracks in the album If you want to select specific tracks follow these directions 1 Select an album you want to listen to and press the OK button 2 Select tracks you want to listen to and press the button 3 If you press the button while music is playing the...

Page 43: ...nitial screen will show a list of movies Using View Mode buttons red green blue and yellow you can move to My Video PVR and ETC Each view mode shows the following list 43 PART 3 PACKARD BELL MEDI TV VIEWER Movie Shows movies added to Media Organizer My Video Shows a list of personal videos added to Media Organizer These are home videos taken with a digital camcorder PVR Shows a video list of PVR a...

Page 44: ...osition of the slider Based on notches on the position slide if you press 3 the slider will move to the third notch and if you press 9 the slider will move to the ninth notch After setting the position you want press the OK button If you press the button the position slider will disappear and the original play screen will reappear 4 4 VIEWING VIDEO INFORMATION PLAY INFORMATION 4 4 1 VIEWING VIDEO ...

Page 45: ...gle the shadow of the caption 4 5 2 ADJUSTING CAPTION SYNC Caption files include the sync information of each caption When the caption does not fit well with the video when the caption is faster or slower than the audio you can adjust the sync information on the Viewer Adjusting Caption Sync When there is a big difference between caption and audio you can apply the correct caption by looking at th...

Page 46: ...title If you want to bookmark the current position while a movie is playing select Add Bookmark Current Position on the list and press the OK button You can add up to six bookmarks If you want to delete a bookmark select a video from the list and press the button on the remote control 4 7 2 PLAYING FROM BOOKMARK LIST On the bookmark list if you select a movie using the and buttons and press the OK...

Page 47: ...lect an album If you press the OK button after selecting an album you will see photos of the album 5 3 VIEWING PHOTO 5 3 1 VIEWING LARGE IMAGE If you select an album from the album list and press OK the photo in the album will be displayed in full screen mode You can use the and buttons to view the next or previous photo 5 3 2 THUMBNAIL VIEW If you press the yellow button on the album list or phot...

Page 48: ... remote control At the stage of picture enlargement the picture goes back to its original size by pressing the but ton on the remote control 5 3 4 ROTATE If you press the or button on the remote control you can rotate a photo to the right or left by 90 degrees The following is an example of a photo rotated to the right by 90 degrees 5 3 5 SLIDESHOW After selecting an album on the album list pressi...

Page 49: ...or press button on media screen to start browser However this does not apply while playing video 2 Using the direction buttons and the OK button on the remote con trol you can search media files you want to play With music and picture once you select a file in a folder and press OK all files in the folder will play 3 If you press the Blue button you can change view mode to thumbnail mode or text m...

Page 50: ...Video Thumbnail mode Text mode 50 PART 3 PACKARD BELL MEDI TV VIEWER ...

Page 51: ...der tab you can select folders for PVR and ETC video files Selecting a Folder for PVR videos Select the folder that you want to use as the PVR folder The video files in this folder can be viewed in Medi TV Viewer by selecting PVR view If you have a TV tuner card and recording software in your PC you may specify this folder as the location where the TV recording software stores record ed TV program...

Page 52: ... Buffering Size and Seek Delay Initial Buffering 0 5MB This is the size of video data buffered in the set top box when you first play a video Setting this size to a large value can reduce frame drops during video playback but buffering data takes some time and you have to wait for about three seconds per 1 MB Buffer Size 2 5MB This is the maximum size of video data buffered in the set top box duri...

Page 53: ... want 3 In the Maximum Log Size option enter the maximum size of the log file When the log file exceeds this value it will delete text from the first part of the file 4 If you want to change the name of the log file click on the Save as button C CHAPTER HAPTER 2 F 2 FAQ AQ 2 1 CONFIGURATION AND NETWORK 2 1 1 HOW CAN I KNOW IF MY PC IS USING DHCP OR NOT Open Start Control Panel Network Right click ...

Page 54: ...m to mal function It might show an error message and not work when you add or edit media in Media Organizer It might not show media you added when you want to enjoy media on Viewer In order to prevent these problems it is recommended that you back up the database periodically Select Tool Back up All Media DB or Tool Back up selected media DB in Media Organizer to back up the database For more info...

Page 55: ...E SCREEN APPEARS EVEN THOUGH I DIDN T PRESS ANYTHING This happens when a network cable is disconnected when the hub router or Access Point is turned off or the wireless network connection fails Check the connections or network settings 2 3 8 I WANT TO KNOW MORE ABOUT ETC VIDEO The basic concept of Medi TV is allowing you to watch media on TV through Media Organizer but you don t have to keep in th...

Reviews: