


4 - Packard Bell Easy Repair
Your digital playground
Packard Bell Easy Repair - 5
Your digital playground
5.
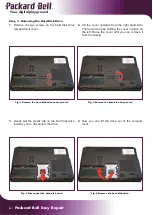
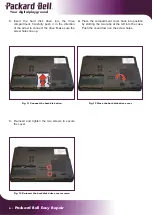
Remove the four screws on the metal bracket
holding the hard disk drive.
Note:
These screws are different from the screws
securing the hard disk drive cover and not
interchangeable. Place them separately!
6.
Carefully slide the hard disk drive out of the
bracket.
Fig. 7 Remove the screws holding the hard disk drive.
Fig. 8 Separate the drive from the bracket.
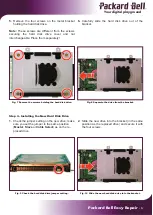
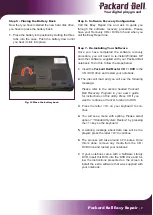
Step 4 - Installing the New Hard Disk Drive
2.
Slide the new drive into the bracket (in the same
position as the replaced drive) and secure it with
the four screws.
1.
Check the jumper setting on the new drive; make
sure you set the jumper to the same position
(
Master
,
Slave
or
Cable Select
) as on the re-
placed drive.
Fig. 10 Slide the new hard disk drive into the bracket.
Fig. 9 Check the hard disk drive jumper setting.