


4 - Packard Bell Easy Repair
Your digital playground
Packard Bell Easy Repair - 5
Your digital playground
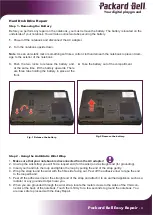
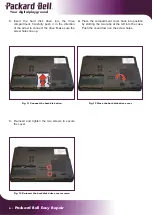
Step 3 - Removing the Hard Disk Drive
1.
Remove the two screws on the hard disk drive
compartment cover.
2.
Lift the cover upwards from the right hand side.
There are two tabs holding the cover in place on
the left. Raise the cover until you can remove it
from the casing.
Fig. 3 Remove the hard disk drive cover screws.
Fig. 4 Remove the hard disk drive cover.
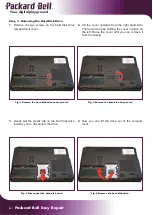
3.
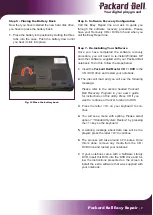
Gently pull the plastic tab on the hard disk drive
towards you to disconnect the drive.
4.
Now you can lift the drive out of the compart-
ment.
Fig. 5 Disconnect the hard disk drive.
Fig. 6 Remove the hard disk drive.