background image


- 3 - 

2


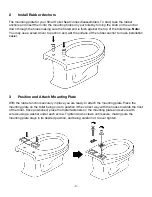
Install Rubber Anchors 


The mounting plate for your Smart Toilet Seat comes disassembled. To start, take the rubber 
anchors and insert them into the mounting holes on your toilet by forcing the knob on the anchor 
down through the holes making sure the flared end is flush against the top of the toilet base. 

Note:


You may use a screw driver to push on and wet the surface of the rubber anchor to make installation 
easier. 


3


Position and Attach Mounting Plate    

With the rubber anchors securely in place you are ready to attach the mounting plate. Place the 
mounting plate on the toilet being sure to position it the correct way with the hooks towards the front 
of the toilet. Once positioned, place the metal fasteners on the mounting plate and secure with 
screws using a washer under each screw. Tighten down screws until secure, making sure the 
mounting plate stays in its desired position, and being careful not to over tighten.   


Summary of Contents for CASCADIA

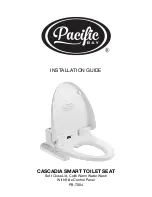
Page 1: ...INSTALLATION GUIDE CASCADIA SMART TOILET SEAT Soft Close Lid Cold Warm Water Wash With Side Control Panel PB TS04...

Page 2: ...tions section making sure you have read it thoroughly before you use the product so that you can safely operate everything After reading please keep this installation guide for use in the event that a...

Page 3: ...ing Power to Your Smart Toilet Seat 9 Product Model and Parameters 10 Safety Precautions 12 Cautions Before Installation 15 Necessary Tools 15 Parts and Features 16 Function of Side Switches 17 Prepar...

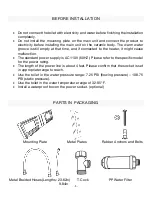
Page 4: ...unction The standard power supply is AC 110V 60HZ Please refer to the specific model for the power rating The length of the power line is about 4 feet Please confirm that the socket is set in appropri...

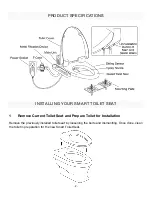
Page 5: ...R SMART TOILET SEAT 1 Remove Current Toilet Seat and Prepare Toilet for Installation Remove the previously installed toilet seat by loosening the bolts and dismantling Once done clean the toilet in pr...

Page 6: ...he surface of the rubber anchor to make installation easier 3 Position and Attach Mounting Plate With the rubber anchors securely in place you are ready to attach the mounting plate Place the mounting...

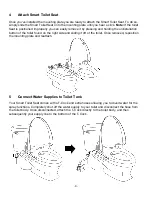
Page 7: ...ation button of the toilet found on the right side and sliding it off of the toilet Once removed reposition the mounting plate and reattach 5 Connect Water Supplies to Toilet Tank Your Smart Toilet Se...

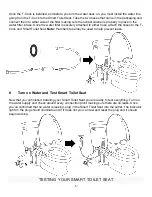
Page 8: ...the hoses to the T Cock and Smart Toilet Seat Note Plumbers tape may be used to help prevent leaks 6 Turn on Water and Test Smart Toilet Seat Now that you ve finished installing your Smart Toilet Sea...

Page 9: ...a Cover the sensor with a wet cloth or sit on the toilet b Confirm that deodorizer activates i Check that the air blows is blowing out correctly c Verify cleaning functions i Press the SPRAY button ch...

Page 10: ...press the button again 3 Remove the water filter and wipe off any visible dirt a You may use a cotton swab to clean any visible dirt on the water filter 4 Reinstall the water filter without connecting...

Page 11: ...lush or change the filter if you find that the water pressure has fallen significantly Filter can be easily damaged and so it is therefore not guaranteed as part of the warranty GETTING POWER TO YOUR...

Page 12: ...r toilet in the bathroom This will enable you to power your Smart Toilet Seat without using an extension cord or other method If you have a GFCI outlet already in your bathroom you may connect your ne...

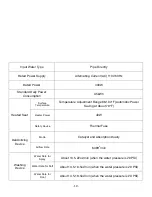
Page 13: ...04 F Automatic Power Saving at About 79 F Heater Power 40W Safety Device Thermal Fuse Deodorizing Device Mode Catalyst and Absorption Dually Airflow Rate 6 36ft3 min Washing Device Water Rate for Spra...

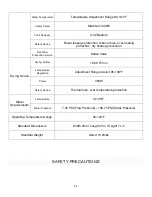
Page 14: ...Device Reflux Valve Drying Device Drying Airflow 18 36 ft3 min Temperature Regulation Adjustment Range Around 95 138 F Power 350W Safety Device Thermal fuse over temperature protection Water Requireme...

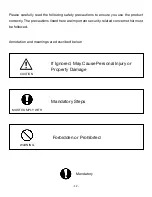
Page 15: ...ct correctly The precautions listed here are important security related concerns that must be followed Annotation and meanings are described below Mandatory CAUTION MUST COMPLY WITH WARNING If Ignored...

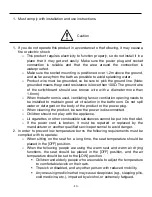
Page 16: ...hroom Do not spill water or detergent on the body of the product or the power plug o When cleaning the product be sure the power is disconnected o Children should not play with the appliance o Lit cig...

Page 17: ...s it may cause skin irritation and or other issues 3 Do not carry the product by the seat or top cover only carry the toilet s body during transport 4 Do not place heavy objects on the seat or stand o...

Page 18: ...NS BEFORE INSTALLATION Do not plug your Smart Toilet Seat into an electrical outlet before completing installation Otherwise it may cause the toilet seat to malfunction Pressure range 7 25 PSI flowing...

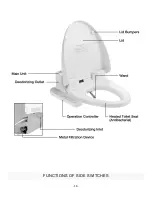
Page 19: ...16 FUNCTIONS OF SIDE SWITCHES...

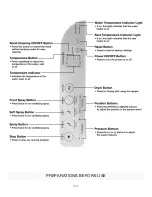
Page 20: ...17 PREPARATIONS BEFORE USE...

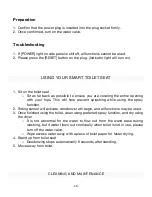
Page 21: ...hips This will help prevent splashing while using the spray function 2 Sitting sensor will activate deodorizer will begin and all functions may be used 3 Once finished using the toilet clean using pr...

Page 22: ...he plastic parts e g toilet chemicals household detergents bleach benzene paint thinner decontamination powder or cresol Turn off the power and make sure the power light is off before cleaning or doin...

Page 23: ...s Strong Alkaline Detergents Detergents that Contain Abradants Metal Brush or Nylon Brush Water Valve Brush Nylon Brush Cleansers Abrasive Powders Detergents that Contain Coarse Particles Chlorine Det...

Page 24: ...2 Once out wipe with a soft cloth o Please do not forcibly push or pull the wand and do not shake the nozzle from side to side or it may cause it to break 3 Retract the nozzle by pressing the WAND CL...

Page 25: ...op inflowing water o Turn off the water valve o Press Nozzle Cleaning button o When the nozzle extends out press the button again Release the pressure in the water hose 2 Remove the metal filtration d...

Page 26: ...ter pressing the stop button BeepBeep The temperature adjustment button is set on the highest level How to disable the indicator noises Press the STOP button on the side panel for 10 seconds or longer...

Page 27: ...upply filter for blockages Low Water Temperature Water Temperature is set to OFF or is too low Push the ON or HIGH buttons on the main unit controls Cold water sprays out first Due to low temperature...

Page 28: ...nstructions The Deodorizer Turns on Automatically Under the following conditions the seat sensor will detect something and activate the deodorizer This is not a malfunction 1 When cleaning the toilet...

Page 29: ...Open Close Auto Flush do not Work Even when Someone is Sitting on the Toilet The sitting sensor detects nothing When seated sit back as far as possible to ensure your hips cover the toilet seat fully...

Page 30: ...loss resulting from any accident unreasonable use misuse abuse negligence or improper care cleaning or maintenance of the smart toilet seat Damage or loss resulting from sediments or foreign matter c...

Page 31: ...28...
Reviews: