- 8 -
Device Settings continued…
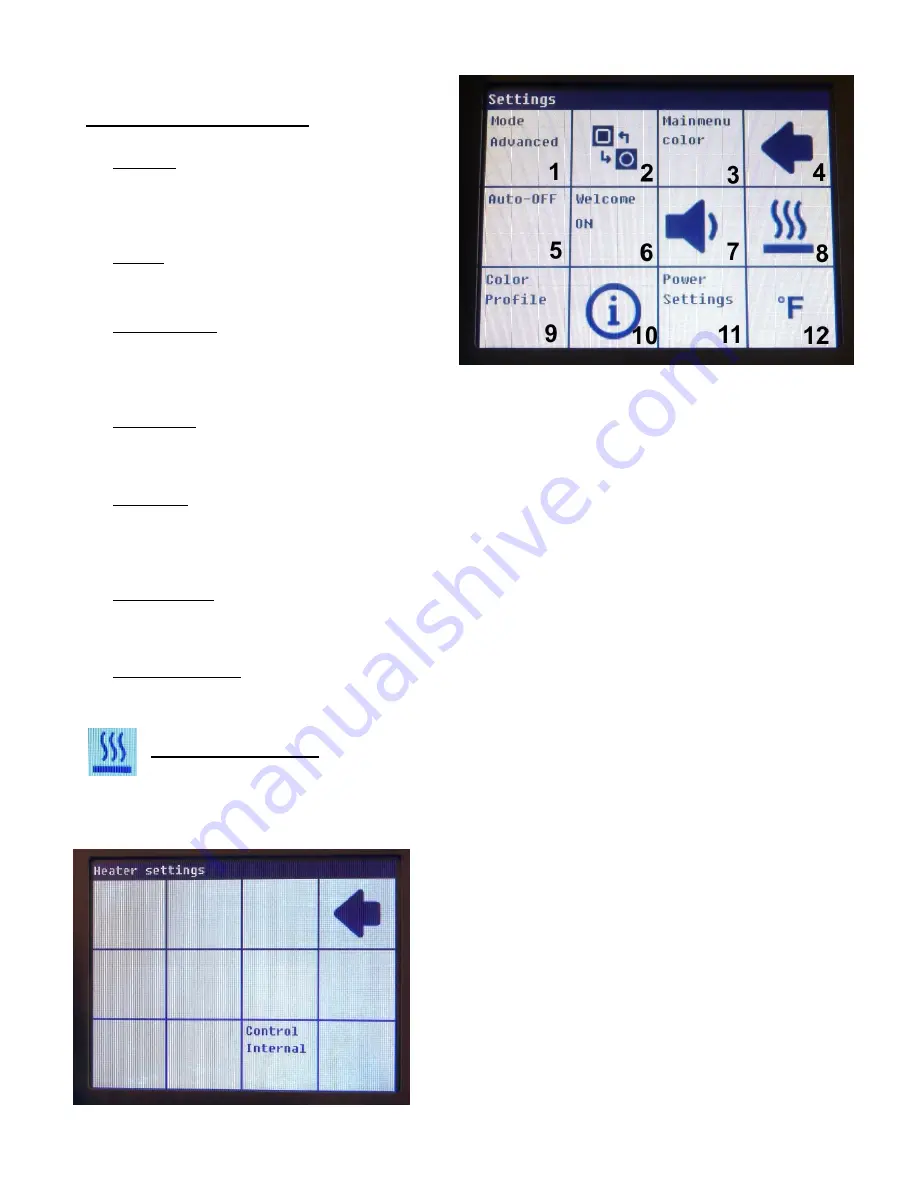
6. Welcome -- Tapping this button will toggle on/off
the PACE splash screen and safety precautions
that come up when the unit is first turned on.
7. Volume
– This square is used to cycle through the
three sound levels; low, high, or off.
8. Heater Settings
– This button opens the heater
settings menu. See the following section for more
information. This button is also present on the main menu screen and appears again here for convenience.
9. Color Profile -- The PH 100 has 9 preset color profiles to choose from. Each profile is fully adjustable and
will also remember any specific changes made to the Main Menu using the Main Menu Color option.
10. Information -- This is where you can find out which version of software is currently installed on your PH 100.
This screen also provides a reset button which will restore the factory default settings for the currenttly
installed software version.
11. Power Settings
– This square provides the same function as tapping the power meter on the Main Menu, it
provides access to the power limiting function. Options are 1600 watts or 800 watts.
12. Temperature Scale
– Tapping here will switch the PH 100 between Celsius and Fahrenheit.
Heater Settings Menu
There are two heater settings menus, selectable in the Device Settings as Mode: User and Mode: Advanced.
User mode is very straight forward and only allows selection of input sensor for the closed loop temperature
monitoring.
To the left is the Heater Settings Menu with the PH 100 set to
User Mode. Tapping the arrow goes back to the previous
screen. Tapping the Control button will cycle through the
three available settings; Internal, External Top Sensor and
External Bottom Sensor.
The PH 100 will actively monitor the selected sensor and will
continuously adjust power to the heaters, bringing the
temperature at the sensor location up to the Set
Temperature.
Sensor selection and placement are important for safe and
accurate heating!


