ITALIANO
ENGLISH
FRANÇAIS
DEUTSCH
25
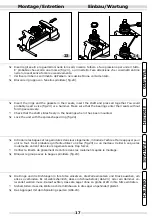
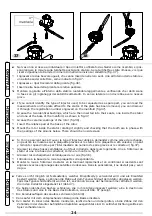
Ingrassare gli anelli OR del collettore e po si zio nar li nelle rispettive sedi: l’anel lo OR gran de sulla
gola del collettore, e i tre anel li pic co li nelle rispettive sedi sem pre sotto il col let to re (fi g.39).
Ora è possibile montare il collettore sullo statore, serrando le 6 viti con una chiave esagonale ma-
schio di 6 mm ad una cop pia di 17 Nm (fi g.40).
Accertarsi che le viti imbocchino il fi let to in modo preciso, ed uti liz za re uno schema di serraggio “a
croce”, cioè strin gen do prima una vite e poi la sua op po sta, in modo pro gres si vo.
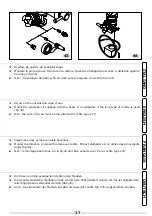
Pulire
il
fi ltro accertandosi che non vi siano impurità ad ostruire le maglie e in gras sa re l’anel lo OR
di te nu ta tra col let to re e giun zio ne (fi g.41).
Inserire
il
fi ltro nella sua sede al l’in ter no del collettore.
Grease the O-rings of the manifold and position them in their respective seats: the large O-ring on
the groove of the manifold and the three small rings in the respective seats, also under the manifold
(fi g.39).
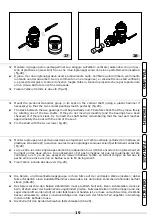
It is now possible to mount the manifold onto the stator, tightening the 6 screws with a 6 mm
hexagonal male wrench at a torque of 17 Nm (fi g.40).
Make sure that the screws enter the thread with precision, and use the “cross” tightening scheme,
that is fi rst tightening one screw and then that opposite it, in succession.
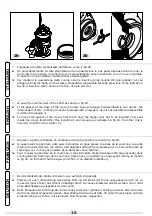
Clean the fi lter making sure that there are no impurities to obstruct the mesh and grease the O-ring
between the manifold and the joint (fi g.41).
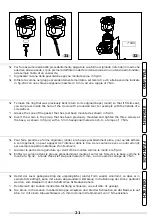
Insert the fi lter in its seat inside the manifold.
Graisser les bagues OR du collecteur et les positionner dans les logements respectifs : la grande
bague OR sur le col du collecteur, et les trois petites bagues dans les logements respectifs sous le
collecteur (fi g.39).
Il est maintenant possible de monter le collecteur sur le stator, en serrant les 6 vis à l’aide d’une
clef six-pans mâle de 6 mm à un couple de serrage de 17 Nm (fi g.40).
S’assurer que les vis s’encastrent avec précision dans le fi letage, et utiliser un schéma de serrage
“croisé”, c’est-à-dire en serrant d’abord une vis puis son opposée, et ainsi de suite.
Nettoyer
le
fi ltre en s’assurant qu’il n’y a pas d’impuretés pouvant boucher les maille et graisser la
bague OR d’étanchéité entre le collecteur et le joint (fi g.41).
Introduire
le
fi ltre dans son logement à l’intérieur du collecteur.
Die O-Ringe des Kollektors schmieren und in die entsprechenden Sitze einsetzen: Der große O-Ring
in die Kehle des Kollektors und die drei kleinen in die entsprechenden Sitze unter dem Kollektor
(Abb.39).
Nun kann der Kollektor auf dem Stator montiert werden; dazu die 6 Schrauben mit einem Inbus-
schlüssel zu 6 mm mit einem Drehmoment von 17 Nm anziehen (Abb.40).
Sicherstellen, dass die Schrauben präzise in das Gewinde eingreifen und über Kreuz anziehen, das
heißt zuerst eine anziehen und dann die gegenüber liegende, und so weiter.
Den Filter reinigen, sicherstellen, dass keine Verunreinigungen vorhanden sind, die die Maschen
verstopfen, und die O-Ringdichtung zwischen Kollektor und Verbindung schmieren (Abb.41).
Den Filter in seinen Sitz im Innern des Kollektors einsetzen.
39
40
17 Nm
Summary of Contents for A80R
Page 28: ...28 NOTE NOTES ...
Page 29: ...29 NOTES ANMERKUNGEN ...
Page 30: ...30 NOTE NOTES ...
Page 31: ...31 NOTES ANMERKUNGEN ...


