EN
OwandyCam – User Manual
Page 12/25
3.4 Configuration in the Owandy imaging software
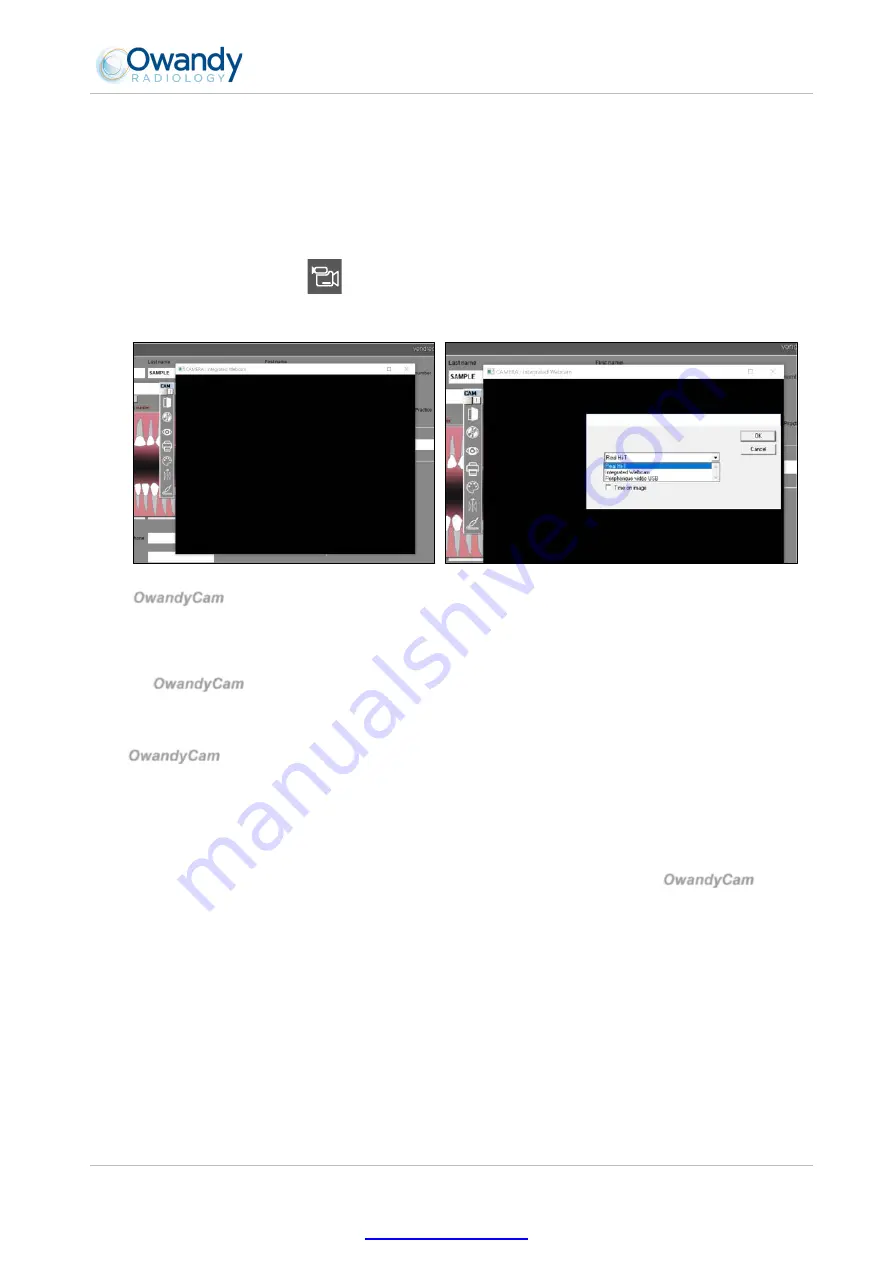
In order to use correctly your set, you must configure your equipment in the following manner, after starting
up it, in case of the use under
Quickvision:
1. Start up the imaging software (double click on the desk icon or use the link under ”
Start/All
programs/Owandy/QuickVision
”).
2. In the main menu bar, click on the “
Mouth or Imaging
” button.
3. Click on “
Camera
” icon
from the dental regime module.
4. Right-Click on the window opened and select the “
Périphérique vidéo USB
” model by the drop-
down menu.
Your
OwandyCam
set is now ready to be used (see 4.3.2 “Use of Owandy software”).
3.5 Sharing handpiece between different workstations
Sharing
OwandyCam
enables one or more handpieces to be used in turn in a practice equipped with more
than one seat. It is recommended to link the various workstations in a network in order to allow the central
storage and sharing of images.
The
OwandyCam
set can be shared between different workstations, by moving only the handpiece from
station to station. A USB cable must be provided at each computer workstation.
Windows will automatically recognise the equipment when it is connected and i
t will be available immediately for image capture.
In order to allow sharing of one set between different workstations, it is necessary first to install the imaging
software that enables image capture, the drivers on all the computers on which the
OwandyCam
is to be
used.
https://stomshop.pro


