


10401076-001
©2020-21 Overland-Tandberg
15
RDX QuikStor Internal SATA III Device Reference Guide
2 Drive Specifications
Functional Specifications
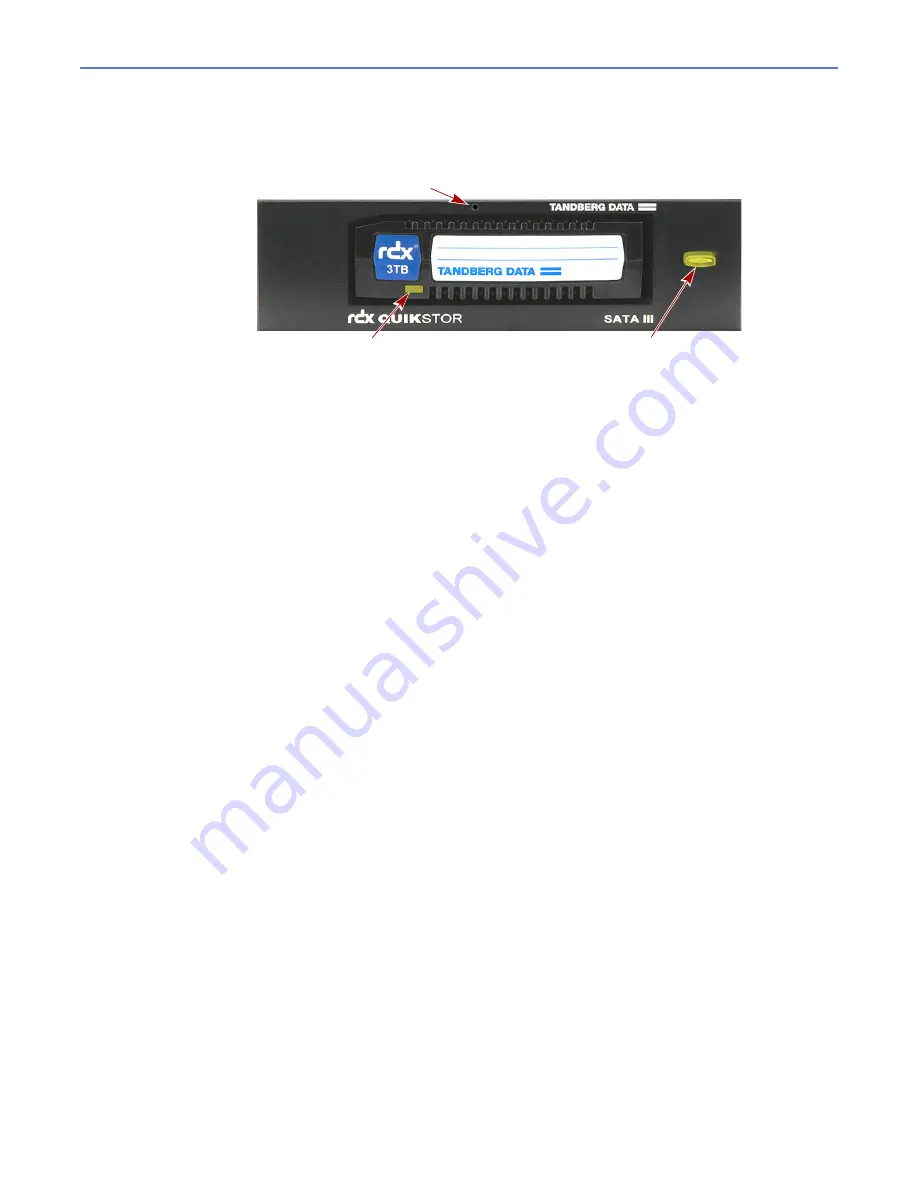
The front of the internal RDX
QuikStor SATA III has the following features.
Figure 2:
Front View of RDX
QuikStor SATA III Drive and Features
•
Eject Button and Emergency Eject Hole
•
•
Eject Button and Emergency Eject Hole
The eject button is used to initiate normal media eject functions. It is also used to initiate an
unconditional eject or service menu options as described below.
Normal ejects
Press the Eject Button/Power LED to eject the RDX media. An eject cycle may also be initiated by
an eject command from the host. If the media does not eject, make sure all write operations to the
RDX system are complete before proceeding.
NOTE: The time from Eject Button press until the media is ejected may vary. Eject may be prevented by
the host OS or Host Software. Refer to the RDX SCSI specification for more detail.
When removing the media, wait until the soft-eject function has terminated its operation. Then
pull the media straight out.
When inserting and removing the media, to prevent damage:
•
DO NOT use excessive force.
•
BE SURE to insert the media in correct orientation. Note that the media has a beveled
corner to prevent upside-down insertion.
Unconditional Eject
If the media does not eject with a normal eject cycle, it may be in the PREVENT state described in
the media LED state table below. This can be overridden using an unconditional eject.
To initiate an unconditional eject by the RDX Drive, press and hold the eject button until the eject
cycle begins (approximately five seconds; varies with OEM firmware versions).
Emergency Eject
If the media still will not eject after trying the steps above, use the emergency method to recover
the media by inserting the RDX Emergency Media Eject Pin into the Emergency Eject Hole to
eject the media.
Emergency Eject Hole
Activity LED
Eject Button / Power LED


