Service work
490E75=0_C
Ottobock | 99
4.14.12 Replacing/adjusting the back upholstery (standard seat)
f
Prerequisites:
Switch off the control unit and deactivate the main fuse (see Page 15).
Remove the seat cushion and back padding.
f
Tools: Allen wrench size 4
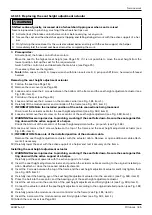
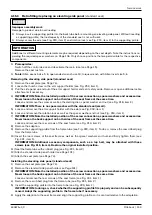
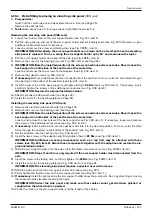
1) Loosen and remove the 3 screws on the upper 3 hook and loop straps on both sides (see Fig. 207, item 1).
2) Open all the hook and loop straps on the back upholstery and replace if necessary (see Fig. 208).
3) From the bottom to the top, adjust the tension of the hook and loop straps to the weight and anatomical condition
of the user and fasten the straps one after the other.
INFORMATION: The two ends of the hook and loop strap have to overlap by at least 100 mm in each
case.
INFORMATION: Adjust the respective lower hook and loop straps somewhat tighter. Deviating adjust-
H@IONH<T=@M@LPDM@?DINK@>Du>><N@NyOCDNDNOC@M@NKJIND=DGDOTJAOC@<OO@I?DIBOC@M<KDNO{
4) IN@MO<I?uMHGTODBCO@IOC@ÀN>M@RNJIOC@PKK@MÀCJJF<I?GJJKNOM<KNJI=JOCND?@NN@@DB{¿½ÄxDO@H¾{
207
208
4.14.13 Replacing/adjusting the back upholstery (VAS seat)
f
Prerequisites:
Switch off the control unit and deactivate the main fuse (see Page 15).
Remove the seat cushion and back padding.
f
Tools: Allen wrench size 4
Removing the back straps
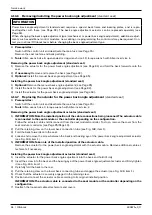
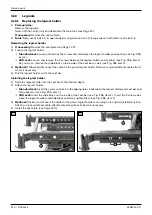
1) Open the hook-and-loop closures on both ends of the back straps (see Fig. 209/210, item 1).
2) Open and remove the Y hook-and-loop buckles on both ends of the back straps (see Fig. 211).
3) Pull the free ends of the back straps out of the plastic clamps (see Fig. 209/210, item 2).
4) If necessary: Remove upper eyelets (see Fig. 209, item 3). To do so, loosen and remove the 2 screws on the top
hook-and-loop strap on both sides (see Fig. 209, item 4).
5) CAUTION! Pinching, crushing due to falling frame components. Actively secure the back frame and
associated components against falling.
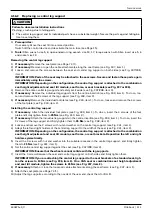
If necessary: Remove the lower eyelets (see Fig. 210, item 3). To do so, loosen and remove the 3 screws of the
grip bars on both sides (see Fig. 210, item 4).
Attaching and adjusting the back straps
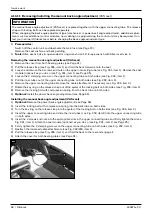
1) If necessary: Attach the bottom eyelets (see Fig. 210xDO@HÀ{C@IM@DIN@MO<I?uMHGTODBCO@IOC@ÀN>M@RNJA
the grip bars on both sides (see Fig. 210, item 4).
2) If necessary: Attach the top eyelets (see Fig. 209xDO@HÀ{J?JNJxDIN@MO<I?uMHGTODBCO@IOC@¿N>M@RNJIOC@
top hook-and-loop strap on both sides (see Fig. 209, item 4).
3) Pull the free ends of the back straps through the eyelets and plastic clamps (see Fig. 209/210, item 2).
INFORMATION: In the area of the grip bars, the strap is passed directly around the back tube.
4) Place the Y hook-and-loop buckles around both ends of the back straps and fasten them (see Fig. 211).
5) Fasten one end of each of the back straps (see Fig. 212, item 1).
6) Pre-tension the back straps according to the needs of the user and fasten the loose end of the back straps (see
Fig. 212, item 2).
Summary of Contents for 490E75 Series
Page 1: ...490E75 0_C Service manual...
Page 38: ...Service work 490E75 0_C 38 Ottobock 57 58 59 60 61 62 63...
Page 41: ...Service work 490E75 0_C Ottobock 41 70 71 72 73 74 tt 75 76...
Page 55: ...Service work 490E75 0_C Ottobock 55 103 104 105 106 107 108 109 110...
Page 108: ...Service work 490E75 0_C 108 Ottobock 227 228 229 t 230 231 232...
Page 112: ...Service work 490E75 0_C 112 Ottobock 237 238 239 240 241...
Page 143: ...R Net wheelchair control 490E75 0_C Ottobock 143 Seat module pin assignment 287...
Page 161: ...490E75 0_C Ottobock 161...
Page 162: ...490E75 0_C 162 Ottobock...

