background image


22

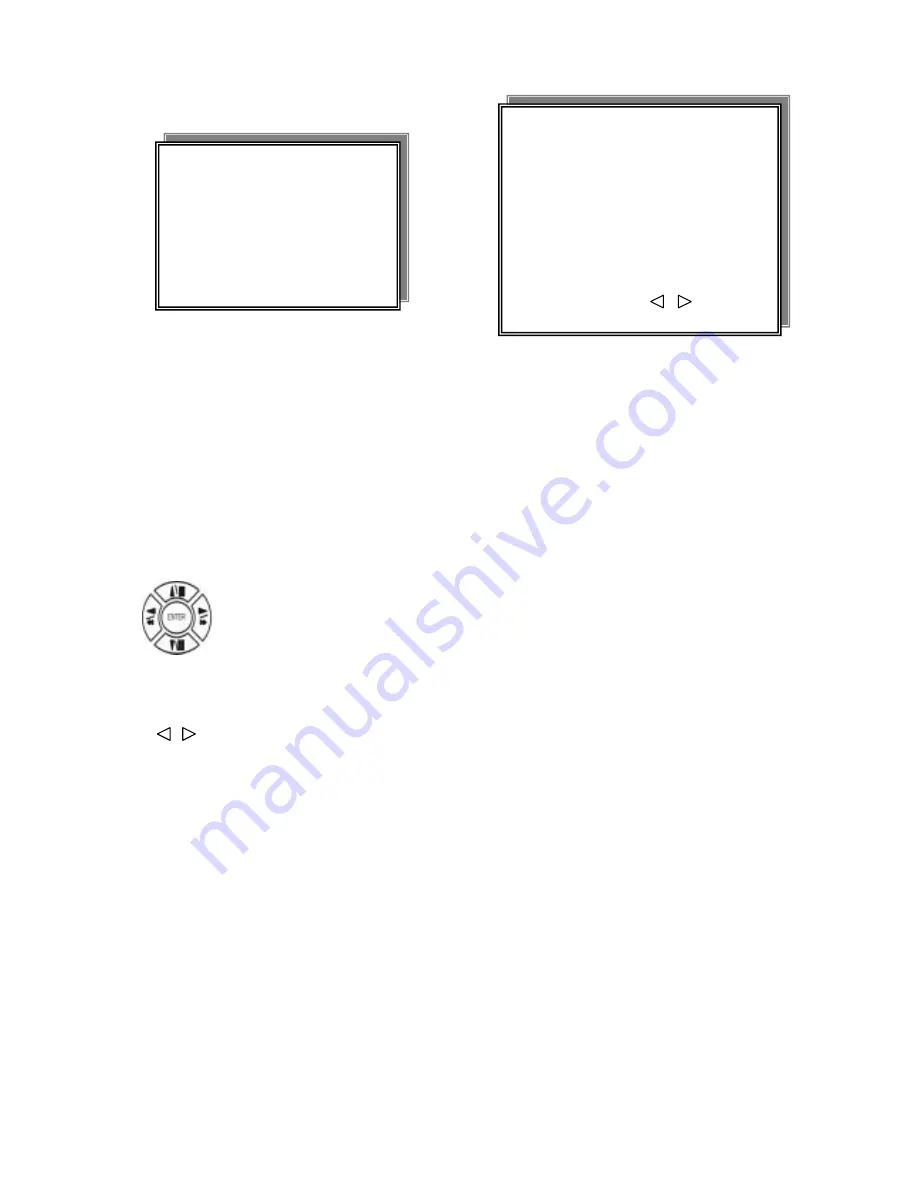
(5.) VIDEO MASK SETUP


CH1 VIDEO MASK: ON / OFF     

CH2 VIDEO MASK: ON / OFF 

CH3 VIDEO MASK: ON / OFF   

CH4 VIDEO MASK: ON / OFF


MASK means this channel would not display on the live screen, but it still recording.


CAMERA SETUP 

1. COLOR SETUP 

2. TITLE SETUP 

3. SCREEN POSITION SETUP 

4. V-LOSS DISPLAY SETUP


5. VIDEO MASK SETUP


VIDEO MASK SETUP PAGE 


CH1 VIDEO MASK    

CH2 VIDEO MASK   

CH3 VIDEO MASK    

CH4 VIDEO MASK    


MENU, ESC: EXIT:   


 : MODIFY

Press direction buttons up/down/left/right to choose items.

Press values change button to change values.


Summary of Contents for DVR-0420TF

Page 1: ...1 Thank you for purchasing our product Please read this User s Manual before using the product Change without Notice 4 Channel Digital Video Recorder User s Manual...

Page 2: ...ance WARNING TO PREVENT FIRE OR SHOCK HAZARD DO NOT EXPOSE UNITS NOT SPECIFICALLY DESIGNED FOR Attention installation should be performed by qualified service Personnel only in accordance with the Nat...

Page 3: ...s product contact your local dealer Strong recommendation on installation of the DVR unit 1 Check electricity at the place you want to install the DVR unit is stable and meets our electricity requirem...

Page 4: ...W Reverse playback choose button Still playback 12 DOWN PAUSE Direction button down Playback pause 13 FF Forward playback choose button Still playback 14 ENTER AUDIO Sub menu enter button Audio on or...

Page 5: ...Camera 1 4 in and looping out Audio channel input x 1 and output x 1 75 Ohm ON OFF high low adjust Monitor out S Video Y C monitor RS 485 control keyboard connector RS 232 connector ISP Firmware upgr...

Page 6: ...ar Panel of the system 13 12 11 10 9 8 7 6 5 4 3 2 1 25 24 23 22 21 20 19 18 17 16 15 14 Relay output COM NC COM NO Alarm input Short circuit between Alarm0 Alarm1 Alarm2 or Alarm3 and GND is recogniz...

Page 7: ...d Model Capacity Notice Seagate Barracuda 80 GB IBM DeskStar 80 GB WD2000 Caviar 200 GB Hitachi DeskStar 80 GB Maxtor MaxLineII 300 GB Internal Circuit 1 Make sure the HDD is MASTER 2 Make sure the ca...

Page 8: ...ode then press ZOOM button to display screen Enlargement Use button to move position 3 Auto Mode Press AUTO button to start screen auto sequencing and press it again to cancel auto mode 4 W MARK Water...

Page 9: ...R would not detect correct CF card format Any brand of CF card is acceptable Additional During playback CF card is full or user press BACKUP button screen display a PAUSE caption User takes out the CF...

Page 10: ...e press lock Only numeric freeze auto pip and zoom buttons could work Press lock key again to enter the login in window Enter admin or user password to unlock Key lock function only accept password co...

Page 11: ...rding time Y M D H M End of recording time Every playback data list displays by an hour No page display limit 10 items display on each page Playback PLAY MAIN PLAY PAGE 1 MASTER TIME LIST 2 SLAVE TIME...

Page 12: ...V Loss Record Special time search playback Go TO DATE Choose year month day Press direction button Left Right to choose items press values change button to change value GOTO TIME Choose hour and minu...

Page 13: ...word enter window pop up 3 Press numeric 1 4 button or remote controller 0 9 to choose password 4 Remote controller function buttons are same as DVR panel function buttons LOGIN Default password Accou...

Page 14: ...ht button And change the value with values change button or turn inner shuttle 4 Press ESC to go back to main sub menu or exit menu Notice 1 ADMIN level can setup all DVR menu functions 2 USER level c...

Page 15: ...is 999MB USED 00 100 Hard disk overwrites always on 100 BRAND DVR auto detect hard disk brand LAST TIME The last record time display POSITION SIZE USED BRAND MASTER LAST TIME SLAVE LAST TIME MENU ESC...

Page 16: ...sets to ON On the first Sunday in April the time increments from 1 59 59 AM to 3 00 00 AM On the last Sunday in October when the time first reaches 1 59 59 AM it changes to 1 00 00 AM Press direction...

Page 17: ...STATUS DVR system record playback audio caption display mode on or off setup ON OFF 6 BORDER SET Border color WHITE DARK BLACK GRAY Press direction button up down to choose the desired item Press valu...

Page 18: ...r cameras and monitor to be connected to the DVR unit CAMERA SETUP PAGE 1 COLOR SETUP 2 TITLE SETUP 3 SCREEN POSITION SETUP 4 V LOSS DISPLAY SETUP 5 VIDEO MASK SETUP MENU ESC EXIT ENTER RUN CAMERA SET...

Page 19: ...H I J K L M N O P Q R S T U V W X Y Z Press direction button up down left right to choose items and position Press values change button to change values CAMERA SETUP 1 COLOR SETUP 2 TITLE SETUP 3 SCR...

Page 20: ...Press ESC button to quit SCREEN POSITION UP ENTER for Default ESC to QUIT DOWN LEFT RIGHT Press direction buttons up down left right to move screen position CAMERA SETUP 1 COLOR SETUP 2 TITLE SETUP 3...

Page 21: ...ON OFF VLOSS SETUP PAGE VLOSS FUNCTION CH1 VLOSS DISPLAY CH2 VLOSS DISPLAY CH3 VLOSS DISPLAY CH4 VLOSS DISPLAY MENU ESC EXIT MODIFY CAMERA SETUP 1 COLOR SETUP 2 TITLE SETUP 3 SCREEN POSITION SETUP 4 V...

Page 22: ...n the live screen but it still recording CAMERA SETUP 1 COLOR SETUP 2 TITLE SETUP 3 SCREEN POSITION SETUP 4 V LOSS DISPLAY SETUP 5 VIDEO MASK SETUP VIDEO MASK SETUP PAGE CH1 VIDEO MASK CH2 VIDEO MASK...

Page 23: ...AGE SYSTEM BUZZER ON BUTTON BUZZER ON ALARM BUZZER ON MOTION BUZZER ON VLOSS BUZZER ON MENU ESC EXIT MODIFY Press direction buttons up down to BUZZER SETUP items Press values change button to change v...

Page 24: ...rotocol is the command for system control keyboard If user has no keyboard to control then does not have to care SYSTEM SETUP 1 DWELL INTERVAL 2 LANGUAGE 3 VIDEO INPUT 4 WATERMARK CHECK 5 RS 485 ID 6...

Page 25: ...4 ALARM POLARITY SETUP MENU ESC EXIT MODIFY ALARM POLARITY SETUP PAGE ALARM01 NO NC OFF ALARM02 NO NC OFF ALARM03 NO NC OFF ALARM04 NO NC OFF MAIN SETUP PAGE 1 HDD INFORMATION 2 DATE TIME SETUP 3 DISP...

Page 26: ...annel ON OFF The function only for channel motion detect active not for motion record per each 4 MOTION RELAY ON OFF 5 MOTION AREA SETUP MOTION SETUP PAGE MOTION FUNCTION ON MOTION DURATION CHANNEL NU...

Page 27: ...ss to reduce all area Icon Press Up Down Left Right direction key to move press to increase lattices press to reduce lattices Icon Press Up Down Left Right direction key to move and increase area Icon...

Page 28: ...setup ALWAYS SCHEDULE EVENT EVENT ON SCHEDULE EVENT SCHEDULE 4 RECORD AUDIO Audio record setup ON OFF 5 QUALITY Record image quality setup SUPER HIGH FINE NORMAL LOW 6 SCHEDULE SETUP RECORD SETUP 1 H...

Page 29: ...nnel on 4 split screen 3 RECORD MODE ALWAYS SCHEDULE EVENT EVENT ON SCHEDULE EVENT SCHEDULE Always 24 hours recording Manual record or stop Schedule Date and time schedule recording mode Event Alarm M...

Page 30: ...s values change button to change values Press direction buttons up down left right to see date and time difference Press values change left right button to change 30MIN or 6 MIN Increase Reduce Every...

Page 31: ...3 00 00 30 01 30 02 30 03 30 04 30 05 30 06 30 07 30 08 30 09 30 10 30 11 30 12 30 13 30 14 30 15 30 16 30 17 30 18 30 19 30 20 30 21 30 22 30 23 30 THU 00 00 01 00 02 00 03 00 04 00 05 00 06 00 07 00...

Page 32: ...d can login menu but can not go advance menu PASSWORD SETUP PAGE 1 LEVEL 2 ADMIN 3 USER Press values change button to change values Press direction buttons up down left right to Choose items position...

Page 33: ...disk Press ESC button to cancel hard disk format ADVANCED SETUP PAGE 1 ALARM SETUP 2 MOTION SETUP 3 RECORD SETUP 4 EVENT 5 PASSWORD SETUP 6 HDD FORMAT 7 FACTORY DEFAULT Press direction buttons up down...

Page 34: ...34 1 CD folder save setup exe to PC hard disk or double click it CF card data read on PC 2 Install Shield Wizard processing...

Page 35: ...35 3 Click Next 4 Choose folder...

Page 36: ...36 5 After choose folder click OK 6 Click install to start...

Page 37: ...37 7 Installing 8 Click Finish...

Page 38: ...38 Start Program Video Viewer Video Viewer Click Local Search Left key of mouse click Local Search...

Page 39: ...39 Choose folder Choose new removable hard disk BACKUP DVR file OPEN Click folder...

Page 40: ...40 Start to playback Icon Left key of mouse click play Folder Play Stop First End Forward Reverse Still playback...

Page 41: ...Only camera full channel save no quad pictures save For example Channel 1 jpg save Mouse click 1 channel once then click mouse right button Choose save as choose the folder you want to save Type any...

Page 42: ...42 Or choose save all Save all cameras full channel picture Choose folder and type file name...

Page 43: ...eft button blue bar display Click mouse right button to choose 1 4 cameras to change position Icon function Setting Video Format NTSC or PAL Choose Codec AVI encode format Show Watermark Water mark fu...

Page 44: ...deo Format Chose NTSC or PAL Choose Codec File format We strongly recommend user to choose Microsoft Windows Media Video 9 Confirm Cancel Information Half and Full screen choose and Record frame rate...

Page 45: ...45 Show Watermark Water mark function or off To check file has been modify or not AVI file save Choose folder and type file name AVI button AVI file save...

Page 46: ...46 Click save Click OK and then AVI red light on Choose 1 4 and then click OK Click play button to start record Click AVI button to stop AVI red light on start to record...

Page 47: ...47 JPG file save Choose folder and type file name Choose camera 1 4 or save all Help...

Page 48: ...jumper to Master or Slave 2 Computer power on do not need to BIOS setup just login Windows system 3 Start Program Video Viewer Video Viewer 4 Click HDD Scan Hard Disk Data Read Left key of mouse click...

Page 49: ...on Click correct hard disk model after function on user can start to data read Function access is same as prior pages Click here hard disk list on Click the correct DVR hard disk data will not loose i...

Page 50: ...Quality Fine KB Range Lowest 15 Highest 28 Average 22 REC FPS 120 60 30 15 10 REC Hour 16 8 16 8 33 6 67 3 101 REC FPS 5 3 2 1 1 2 REC Hour 202 336 7 505 1010 1 2020 2 REC FPS 1 3 1 5 1 10 1 15 1 30...

Reviews: