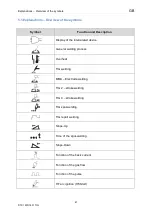


Use of the remote control/Up-Down-Torch
GB
61
DTX 1800/1801 TIG
TIG repair welding/double parameter with LIFT-Start (without HF)
Start welding:
1. Make sure that the LED for "HF" is turned off. If this isn’t the case, please press the button
“HF" for about 2 seconds until the LED is off.
2. Touch the workpiece with the tip of the electrode
3. Press the button of the torch: After the set time for the gas pre-flow the arc ignites and the
welding process begins and the current adepts itself to the basic value.
4. As soon as you release the trigger of the torch, the welding current adepts itself to the set
value.
Stop welding:
1. By re-pressing the trigger of the torch the welding current will drop gradually to the basic
value.
2. As soon as you release the trigger of the torch the arc is extinguished and the adjusted
post flow begins.
9. Use of the remote control / Up-Down-Torch
The remote control or the up-down-torch allows you to operate with the device without you
have to make the settings directly at the power source. The welding machines DTX 1800 and
1801 are equipped with a special plug with which a remote control or up-down-torch can be
connected. As soon as you connect the remote control or the up-down-torch, the welding
machine adjusts itself to the remote controller automatically. The right LED on the Display is
flashing and with the potentiometer you can set the desired welding current.
Function of the up-down-torch
With the two buttons on the up-down-torch, you can set the desired welding current directly
on the handle of torch. By pressing the top button, the current increases to the pre-set value
on the potentiometer. By pressing lower button in the torch, the power decreases gradually to
the basic current value.