1270447_3
EN | Installation
13
3.3
Charging the wireless IQC display
Preparations :
No preparations are required.
1.
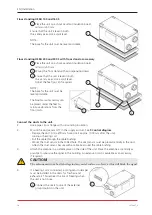
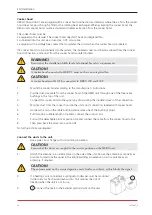
Connect the charger’s mini USB connector to the wireless IQC display.
2.
Connect the charger to the wall socket.
3.4 HERU
S
3.4.1
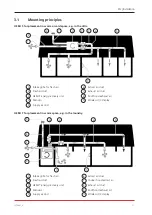
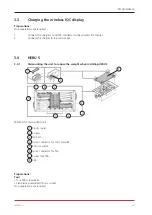
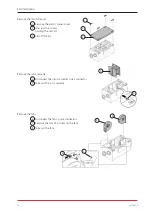
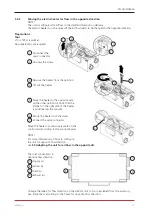
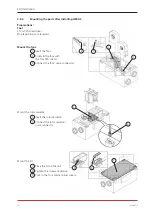
Dismounting the unit to reduce the weight when installing HERU S.
Method for dismounting unit
1 Plastic cover
2 Screws
3 Unit lid
4 Quick connector for rotor cassette
5 Rotor cassette
6 Quick connector for fan
7 Screw Torx T25
8 Fan
Preparations:
Tool
• Torx T25 screwdriver
• Flat-blade screwdriver/13 mm socket
No preparations are required.
8
5
6
7
8
4
6
7
2
1
3
Summary of Contents for HERU 100 S EC
Page 2: ......
Page 3: ...1270447_3 3 INSTALLATION EN 5 INSTALLATION SE 47 INSTALLASJON NO 91 ...
Page 42: ...1270447_3 42 EN Connections main board 9 Connections main board ...
Page 86: ...1270447_3 86 SE Anlutningar huvudkort 9 Anlutningar huvudkort ...
Page 130: ...1270447_3 130 NO Tilkoplinger hovedkortet 9 Tilkoplingar hovedkortet ...
Page 134: ......
Page 135: ......


