
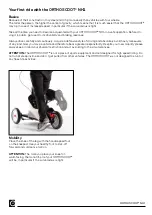


ORTHOSCOOT
®
NH1
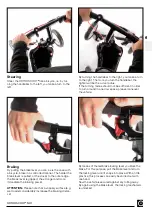
Please note that the crutch holder can be attached on both the right and left side.
The illustrations in this manual are for attachment on the right side.
Figure 3
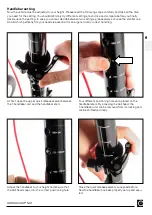
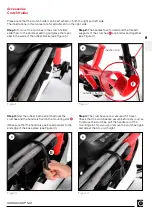
Step 3:
Now the rubber belt is stretched over the
crutches and the handle is fixed in the mounting slot
.
(Make sure that the handle is positioned parallel to the
end edge of the base plate (see Figure 3).)
Step 4:
The crutches are now secured for travel.
Check that the crutches are secure before any journey.
To remove the crutches, pull the handle out of the
mounting slot. Now you can remove the crutches again
and adjust them to your height.
Figure 1
Step 2:
The handles face forward and the forearm
supports of the crutches are interlocked together
(see Figure 2).
Step 1:
To mount the crutches in the crutch holder,
slide them to the shortest setting and place them par-
allel in the wells of the rubber blocks (see Figure 1).
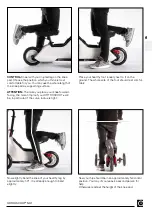
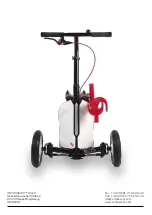
Accessories
Crutch Holder
EN
1
3
Figure 2
2
inside = top
outside = bottom
4
Figure 4
51
Summary of Contents for NH1
Page 3: ...ORTHOSCOOT NH1 DE 01 ...
Page 9: ...22 03 08 09 02 01 10 04 05 06 07 17 18 16 15 12 13 14 21 19 20 ORTHOSCOOT NH1 DE 07 ...
Page 29: ...ORTHOSCOOT NH1 EN 27 ...
Page 35: ...22 03 08 09 02 01 10 04 05 06 07 17 18 16 15 12 13 14 21 19 20 ORTHOSCOOT NH1 EN 33 ...
Page 54: ...ORTHOSCOOT NH1 52 ...
Page 56: ......


