background image

15

The Auto clock function will automatically set the built-
in clock (Month, Day, Year and Time) when the unit is
connected to an Antenna or Cable system and it is
turned off. As the unit searches for a receivable station
in your area and it receives a broadcast signal for Auto
clock, the Auto clock needs several minutes to set
itself.

 Auto clock setting

1

Connect the Antenna or Cable system.
• If you use a cable box, turn it on.

2

Plug the AC Power cord to the AC outlet.

3

Make sure the unit is turned off.
• If you press POWER, the Auto Clock set is not effective.

4

Wait at least three minutes and press POWER.

5

Press DISPLAY to check the clock on the screen.

6

If the clock is not set, check the Antenna condition. The
Auto Clock may not function properly if the reception con-
dition is not good.

The Auto clock Adjustment will be performed at 12:00 PM
everyday if you turn off the unit.
• If you use a cable box and you want Auto clock adjustment

to be performed, the cable box must be left on.

• The Auto clock Adjustment is not effective when there is a

difference of more than 5 minutes exists between the
built-in clock time and the actual time.

Auto clock adjustment

When shipped from factory the “AUTO CLOCK” option is set
to ON.
But if you do not want Auto clock set (Adjustment):

1

Turn on the unit.

2

Press VCR MENU.

3

Press SET + or  to select the “SYSTEM SETUP”
option, then press ENTER.

4

Press SET + or  to select the “AUTO CLOCK” option.

5

Press ENTER to select “OFF”.

6

Press VCR MENU repeatedly to return to the normal
screen.
• When the “AUTO CLOCK” is set to “OFF”, the Auto clock

adjustment does not function.

• Set the clock manually (see page 16).

To set auto clock to off

In the rare event that you live within broadcast range of two
stations in two different time zones, the unit may recognize
the wrong station for the Auto clock set.
To correct the situation:

1

Press VCR MENU.

2

Press SET + or  to select the “SYSTEM SETUP” option,
then press ENTER.

3

Press SET + or  to select the “STANDARD TIME” option,
then press ENTER.

To set standard time

4

Press  SET + or   to select your time zone, then press
ENTER.

ATLANTIC

:

GMT –  4   hours
(GMT: Greenwich Mean Time)

EASTERN

:

GMT –  5   hours

CENTRAL

:

GMT –  6   hours

MOUNTAIN

:

GMT –  7   hours

PACIFIC

:

GMT –  8   hours

ALASKA

:

GMT –  9   hours

HAWAII

:

GMT – 10  hours

AUTO

:

AUTO SET

5

Press VCR MENU twice to return to the normal screen.

NOTE:
To be able to select the standard time, the clock must first
be set by “AUTO CLOCK” once.

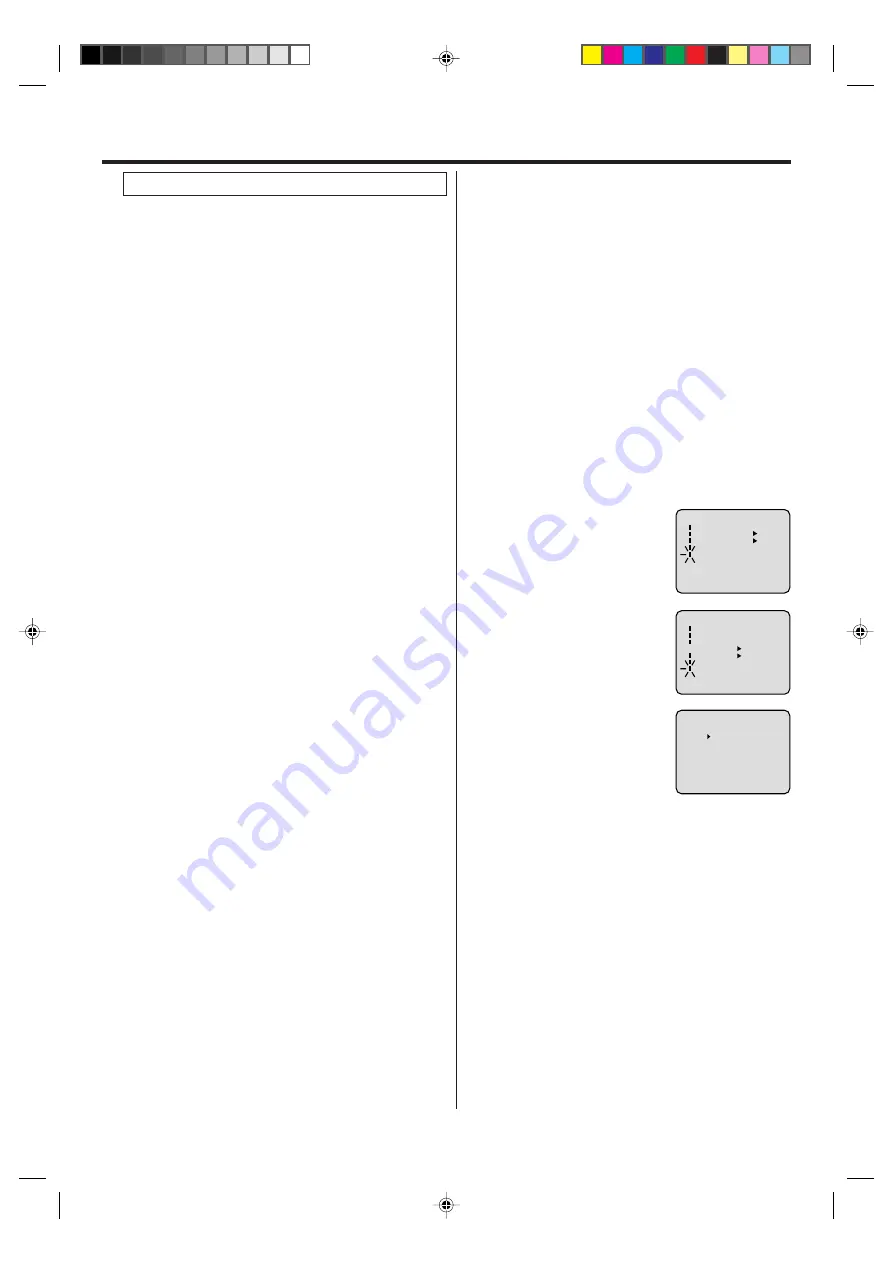
1

Press VCR MENU. Press SET +
or – to select the “SYSTEM
SETUP” option, then press
ENTER.

2

Press SET + or  to select the
“DAYLIGHT SAVING TIME”
option, then press ENTER.

3

Press SET + or  to select one of
the options, then press ENTER.
Press VCR MENU until the
MENU screen is cleared.
ON:

for manual setting
(forward one hour)

OFF:

for manual setting
(back one hour)

AUTO: for automatic setting

(read XDS in the signal)

NOTES:
• 
When shipped from factory, the “DAYLIGHT SAVING TIME”

option is set to “AUTO” position.

• When the clock is not set, Daylight Saving Time setting is

not available.

• When there is no Daylight Saving Time in your area, always

select “OFF” position in step 3.

When you want to set the Daylight Saving Time manually, on
the first Sunday in April you set to “ON”, and on the last Sun-
day in October you set to “OFF”.

You can set the Daylight saving time automatically or
manually.

á+/-/ENTER/MENUñ

ON

OFF

AUTO

DAYLIGHT SAVING TIME

Daylight saving time setting

+/-/ENTER/MENU

MENU

TIMER REC SET
AUTO REPEAT

ON

OFF

ON

OFF

SAP
CH SETUP
SYSTEM SETUP

+/-/ENTER/MENU

SYSTEM SETUP

CLOCK SET
LANGUAGE/IDIOMA/LANGUE
NO NOISE BACKGROUND

AUTO CLOCK
STANDARD TIME
DAYLIGHT SAVING TIME

ON

OFF

ON

OFF

Setting up the VCR section

 2E50401A[E](10-17)

9/1/04, 10:05

15

Summary of Contents for SANSUI VRDVD4001AC

Page 1: ...ase contact the remote manufacturer for the required programming code TV CABLE MODE SELECTION When shipped from the factory the TV CABLE menu option is set to the CABLE Cable Television mode If not us...

Page 2: ...ION TO REDUCE THE RISK OF ELECTRIC SHOCK DO NOT REMOVE COVER OR BACK NO USER SERVICEABLE PARTS INSIDE REFER SERVICING TO QUALIFIED SERVICE PERSONNEL WARNING This equipment has been tested and found to...

Page 3: ...ct your electrician to replace your obsolete outlet Do not defeat the safety purpose of the polarized plug if your unit is equipped with a 3 wire grounding type plug a plug having a third grounding pi...

Page 4: ...al part Unauthorized substitutions may result in fire electric shock or other hazards 21 SAFETY CHECK Upon completion of any service or repairs to this unit ask the service technician to perform safet...

Page 5: ...The Linear PCM sound of a 48 kHz 16 bit through 96 kHz 24 bit exceeds audio CD sound Progressive scan Progressive scan displays all the horizontal lines of a picture at one time as a single frame This...

Page 6: ...ced function of VCR section 22 Stereo recording and playback 22 Second audio program SAP 22 Duplicating a video tape 22 Disc playback operation 23 Disc 23 Setting setup language 23 Playback procedure...

Page 7: ...Track playing time or other information Progressive scanning indicator Pause indicator Play indicator VCR indicator REC indicator TRK indicator Video tape indicator Timer recording indicator NOTE Som...

Page 8: ...UDIO SELECT 22 SUBTITLE 25 ATR 18 REC OTR 19 JUMP 25 ZERO RETURN 18 OPEN CLOSE 24 VCR DVD 9 TIMER REC 20 INPUT SELECT 22 PROGRESSIVE 30 DISPLAY 15 25 RETURN 23 TOP MENU 26 ENTER 14 CANCEL 21 PLAY 17 2...

Page 9: ...not try to recharge batteries not intended to be recharged they can overheat and rupture Follow battery manufactur er s directions Press POWER to turn the DVD VCR on or off Press CH or CH to move thr...

Page 10: ...th 75 ohm coaxial cable Example 2 Combination VHF UHF antenna with 300 ohm twin lead flat wire Example 3 Separate VHF and UHF antennas NOTE If both VHF and UHF antennas have 300 ohm twin lead flat wir...

Page 11: ...rding of one channel while watching another ALLOWS Recording of channels through the converter box scrambled and unscrambled Using the programmable timer to record only the channel selected at the con...

Page 12: ...ith each component for the location of video and audio inputs and outputs S VIDEO COMPONENT Video selector switch To S Video Input Connect to a TV with Component Video Output for DVD CD playback You c...

Page 13: ...ut connector which does not contain a Dolby Digital or DTS decoder Otherwise any attempt to play DVDs may cause such a high level of noise that it may be harmful to your ears and damage your speakers...

Page 14: ...for details NOTES When shipped from factory the video channel is set to CH 3 If the unit does not operate properly or No key opera tion by the unit and or the remote control Static elec tricity etc ma...

Page 15: ...ge of two stations in two different time zones the unit may recognize the wrong station for the Auto clock set To correct the situation 1 Press VCR MENU 2 Press SET or to select the SYSTEM SETUP optio...

Page 16: ...ETE 5 Press VCR MENU until the MENU screen is cleared To add delete channels 1 In the CH SETUP menu press SET or to select AUTO CH MEMORY then press ENTER 2 The unit will begin memorizing all the chan...

Page 17: ...on the screen Load a prerecorded tape When loading a cassette tape without the erase prevention tab playback will start auto matically To start playback Press PLAY to begin playback will appear on the...

Page 18: ...EX mark at the very beginning of the tape the mark may not be found During INDEX search the tape may stop and begin to play at a slightly different location INDEX may not function properly with old or...

Page 19: ...in order Example Press 110 for 110 Recording a TV program 00 15 12 SP HI FI 8 30AM MON CH 125 8 47AM MON 00 00 00 SP STEREO SAP Press STOP to stop recording will appear on screen for about 4 seconds T...

Page 20: ...sor backward for correction To record from external source set the channel to L L will appear next to CH 125 or 69 5 To enter other programs repeat step 2 through 4 To return to the normal screen pres...

Page 21: ...e screen To cancel Timer program 4 Press VCR MENU repeatedly until the TV picture appears 3 The current day Friday SU SA Sunday to Saturday MO SA Monday to Saturday MO FR Monday to Friday WKL WE WKL T...

Page 22: ...ages through the SAP broadcast system Second Audio Program SAP Press VCR MENU Then press SET or to select SAP 1 2 Then press ENTER to select ON Then press VCR MENU until the menu screen is cleared Whe...

Page 23: ...abel or adhesive tape on the disc Do not drop or bend the disc Storing Disc Store the disc in the case to avoid risk of scratches dirt or damage Do not leave disc exposed to di rect sunlight or in hot...

Page 24: ...audio system the consumer should take proper precautions when the analog stereo outputs of the DVD VCR are connected to an amplification system There may be a slight delay between pressing the button...

Page 25: ...ted The on screen display will disappear after a few seconds You can select the language when you play a multilingual disc 1 8 Eng DolbyDigital Changing soundtrack language Turning the subtitles on an...

Page 26: ...hapter Repeat Enter Play Mode NOTES Some discs may not work with the repeat operation In A B repeat mode subtitles near pointA or B may not appear During the A B Repeat Playback the ANGLE feature will...

Page 27: ...MP3 CD in the recorded order 1 Use MP3 software that records data alphabetically or numerically 2 Name each file including two digit or three digit number e g 01 02 or 001 002 3 Refrain from making to...

Page 28: ...d with specific rating level information though its disc jacket says adult For those discs the age restriction will not work Do not forget the password If you forget the password contact customer serv...

Page 29: ...language of each disc NOTE If the selected language is not recorded on the disc the first priority language is selected Press or ENTER Press or to select your desired screen type then press ENTER 1 P...

Page 30: ...uts as the progressive signal NOTES Some discs may not be played back with the progressive scan ning mode correctly because of the disc characteristics or re cording condition There are some progressi...

Page 31: ...019 Bulgarian 1217 Indonesian 1924 Pashto Pushto 2629 Tonga 3025 Burmese 2335 Interlingua 1911 Persian 1611 Turkish 3028 Byelorussian 1215 Irish 1711 Polish 2622 Turkmen 3021 Cambodian 2123 Italian 19...

Page 32: ...is connected correctly Check the input selector of the amplifier is set properly The unit is in the Special playback mode 10 11 14 10 13 10 13 18 24 Select proper language in the menu options Display...

Page 33: ...DVD disc The function is prohibited with the unit or the disc appears on the screen 25 29 26 SYMPTOMS POSSIBLE SOLUTIONS PAGE Problems and troubleshooting Video head cleaning No 4 3 16 9 picture The s...

Page 34: ...dBm 1k ohm UHF VHF IN OUT 75 ohm coaxial 20Hz to 20 000Hz More than 90dB 4 Rotary Heads Hi Fi Sound 2 Tracks MONO Sound 1 Track 181 Channel Freq Synthesized VHF 2 13 UHF 14 69 CABLE TV 14 36 A W 37 59...

Page 35: ...ORION Factory Service Center d Damaged because it is improperly connected to the equipment of other manufacturers This warranty does not cover a Damage to tape cartridge b Cleaning of video heads c Da...

Page 36: ...Printed in Thailand 04 09 U 2E50401A E 28 BACK 9 1 04 10 06 36...

Reviews: