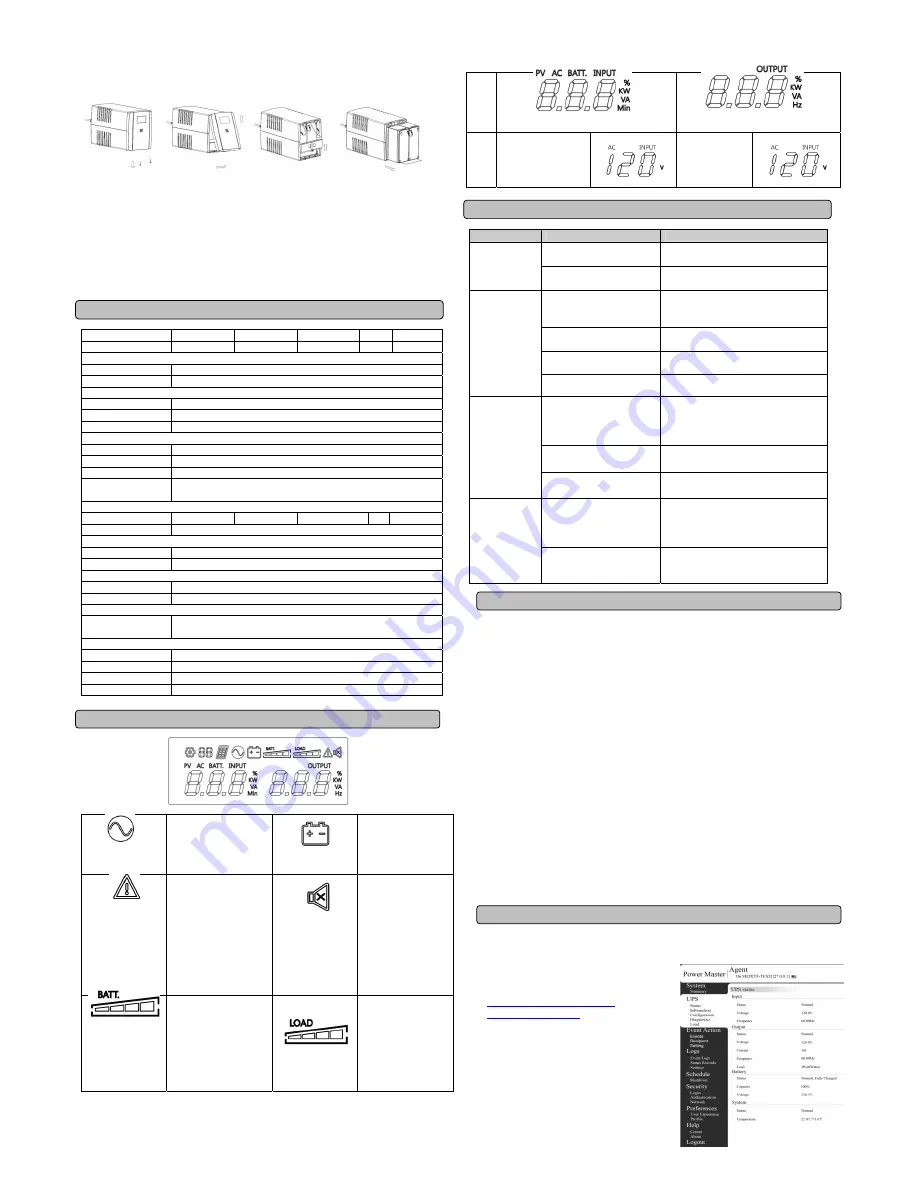
11. Take in the battery compartment cover.
12. Fit the front panel on and tighten the retaining screws.
13. Recharge the UPS for 8-16 hours to fully charge the battery.
REMINDER:
Batteries are considered HAZARDOUS WASTE and must be disposed of properly.
Most retailers that sell lead-acid batteries collect used batteries for recycling, as required by local
regulations.
TECHNICAL SPECIFICATIONS
Model
OP1000U-G2
OP1500U-G2 OP2000U-G2
Capacity (VA/W)
1000/600
1500/900
2000/1200
Input
Voltage Range
82~148Vac
Frequency
50/60Hz(Auto Sensing)
Output
Voltage (Batt. Mode)
Simulated Sine Wave at /-10%
Frequency(Batt. mode
50/60 Hz +/-1Hz
Overload Protection
Breaker/Internal Current Limiting
Physical
Outlets-total
8
Bat.&Surge Protected
4
SurgeOnly Protected
4
Dimensions(W X H X
D)mm
148 X 178 X 298
Battery
Type & Quantity
12V/7AH*2
12V/7.2AH*2
12V/9AH*2
Recharge Time
4 Hours to 90% capacity
Warning Diagnostics
Indicators
Power On, UPS Status Display, Capacity Display, Digital Value Display
Audible Alarms
On Battery, Low Battery, Overload
Environmental
Operating Temp.
0
C to 40
C
Operating Humidity
0 to 90%
Communication
Power Master
software
Windows 10, Windows 8, Windows 7, Windows Server 2012 R2,
Windows Server 2008 R2, Linux, Mac
Management
Auto-Charger
Yes
Auto-Restart
Yes
USB
Yes
RJ-11/45 Protected
Yes
DEFINITIONS FOR ILLUMINATED LCD INDICATORS
LCD Indication
Line mode
UPS is running from an
input line power source.
Battery Mode
UPS is running on
battery mode due to
power failure or severe
input voltage fluctuation.
Fault
UPS detected a fault
Mute/Silent
Press the display key
2 times to disable and
enable the alarm
beeping sound.
Mute function only for
Sounding every 30
seconds on battery
mode.
Bat mode: battery capacity
Line mode:
1. Battery charging: cycle
lighting
2. Battery full charged:
lighting
3. Line mode without
charger: battery capacity
Load Capacity
Reports load-level of the
UPS supported outlets.
Line Mode & BATT. Mode
Initial
AC INPUT(Voltage)
V
OUTPUT(Voltage)
V
TROUBLE SHOOTING
Problem
Possible Cause
Solution
Batteries are not fully charged.
Recharge the battery by leaving the UPS
plugged in.
The UPS does
not perform
expected
runtime.
Battery is slightly worn out.
Contact Technical Support.
The on/off switch is designed
to prevent damage by rapidly
turning it off and on.
Turn the UPS off. Wait 10 seconds and then
turn the UPS on.
The unit is not connected to an
AC outlet.
The unit must be connected to a 120Vac
50/60Hz outlet.
The battery is worn out.
Contact Technical Support.
The UPS will not
turn on.
Mechanical problem.
Contact Technical Support.
Circuit breaker is tripped due
to overload
Turn the UPS off and unplug at least one
piece connected equipment. Unplug the
power cord of the UPS then press the circuit
breaker knob.
Batteries are discharged
Allow the unit to recharge for at least 4
hours.
Outlets do not
provide power to
equipment
Unit has been damaged by a
surge or spike.
Contact Technical Support.
The serial/USB cable is not
connected.
Connect the serial/USB cable to the UPS
unit and an open serial port on the back of
the computer. You must use the cable that
came with the unit.
Power Master is
inactive
The unit is not providing
battery power.
Shutdown your computer and turn the UPS
off. Wait 10 seconds and turn the UPS back
on. This should reset the unit.
FCC COMPLIANCE STATEMENT
FCC Compliance Statement
This device complies with part 15 of the FCC rules. Operation is subject to the following two conditions:
(1) this device may not cause harmful interference, and (2) this device must accept any interference
received, including interference that may cause undesired operation.
Note
: This equipment has been tested and found to comply with part 15 of the FCC Rules. These limits
are designed to provide reasonable protection against harmful interference in a residential installation.
This equipment generates, uses, and can radiate radio frequency energy and, if not installed and used in
accordance with the instructions, may cause harmful interference to radio communications. However,
there is no guarantee that interference will not occur in a particular installation. If this equipment does
cause harmful interference to radio or television reception, which can be determined by turning the
equipment off and on, the user is encouraged to try to correct the interference by one or more of the
following measures:
- Reorient or relocate the receiving antenna.
- Increase the separation between the equipment and receiver.
- Connect the equipment to an outlet on a circuit different from that to which the receiver is connected.
- Consult the dealer or an experienced radio/TV technician for help.
Important
: Changes or modifications not expressly approved by the party responsible for compliance
could void the user's authority to operate the equipment.
Canadian Compliance
CAN ICES-3 (B)/NMB-3(B)
SOFTWARE DOWNLOAD
Power Master management software provides a user-friendly interface for your power systems.
The graphic user-interface is intuitive and displays essential power information at a glance.
Please follow procedure below to install the software.
Installation procedure:
1.
Download the software from
http://www.orionpowersystems.com/
software-downloads.html./
2.
Double-click the file and follow the installation steps.
3.
When your computer restarts, the Power Master
software will appear as a blue icon located in the
system tray.
All rights reserved. Reproduction without permission is
prohibited.


