20
Transparency
Transparency is the clarity of the atmosphere, which is affect-
ed by clouds, moisture, and other airborne particles. Thick
cumulus clouds are completely opaque while cirrus can be
thin, allowing the light from the brightest stars through. Hazy
skies absorb more light than clear skies, making fainter objects
harder to see and reducing contrast on brighter objects. Aero-
sols ejected into the upper atmosphere from volcanic erup-
tions also affect transparency. Ideal conditions are when the
night sky is inky black.
Sky Illumination
General sky brightening caused by the Moon, aurorae, natural
airglow, and light pollution greatly affect transparency. While
not a problem for the brighter stars and planets, bright skies
reduce the contrast of extended nebulae making them dif-
ficult, if not impossible, to see. To maximize your observing,
limit deep-sky viewing to moonless nights far from the light
polluted skies found around major urban areas. LPR filters
enhance deep-sky viewing from light polluted areas by block-
ing unwanted light while transmitting light from certain deep-
sky objects. You can, on the other hand, observe planets and
stars from light polluted areas or when the Moon is out, due to
their strong brightness.
Seeing
Seeing conditions refer to the stability of the atmosphere.
“Seeing” directly affects the amount of fine detail seen in
extended objects. The air in our atmosphere acts as a lens that
bends and distorts incoming light rays. The amount of bend-
ing depends on air density. Varying temperature layers have
different densities and, therefore, bend light differently. Light
rays from the same object arrive slightly displaced creating an
imperfect or smeared image. These atmospheric disturbanc-
es vary from time-to-time and place-to-place. The size of the
air parcels compared to your aperture determines the “see-
ing” quality. Under good seeing conditions, fine detail is visible
on the brighter planets like Jupiter and Mars, and stars are
pinpoint images. Under poor seeing conditions, images are
blurred and stars appear as blobs.
The conditions described here apply to both visual and photo-
graphic observations.
Telescope Maintenance
While your StarSeeker telescope requires little maintenance,
there are a few things to remember that will ensure your tele-
scope performs at its best.
Care and Cleaning of the Optics
In general, your telescope’s mirrors will only need to be cleaned
very infrequently, if ever. Covering the front opening of the tele-
scope with the dust cover when it is not in use will prevent dust
from accumulating on the mirrors. Keeping the dust cap on the
focuser’s 1.25" opening is also a good idea. Improper cleaning
can scratch the mirror coatings, so the fewer times you have
to clean the mirrors, the better. A little dust or small specks of
paint from the scope’s interior have virtually no effect on the
visual or imaging performance of the telescope. So avoid the
urge to clean the optics unless it is absolutely necessary!
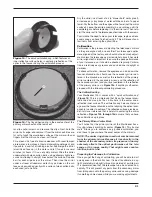
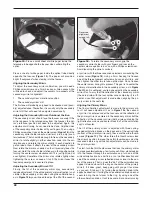
To clean the primary mirror, carefully remove the mirror cell
from the telescope. To do this, you must remove the screws
that attach the mirror cell to the steel tube. These screws are
located on the outer edge of the mirror cell. Then pull the cell
away from the tube. You will notice the primary mirror is held
in the mirror cell with three clips, each held by two mirror clip
anchor screws. Using a Phillips screwdriver, unthread the mir-
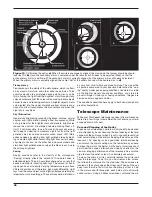
Primary mirror
center mark
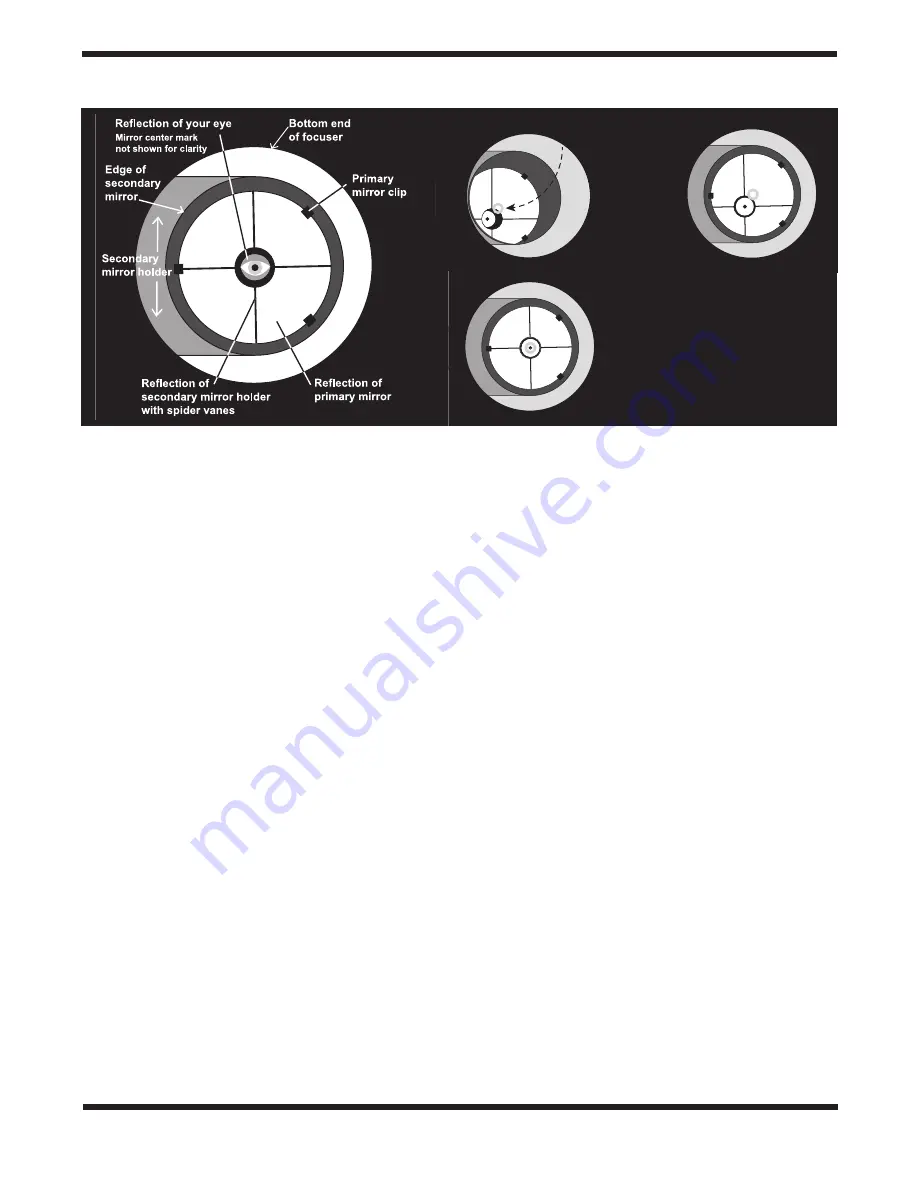
Figure 12.
Collimating the optics.
a)
When the mirrors are properly aligned, the view down the focuser drawtube should
look like this.
b)
Here, the secondary mirror is centered under the focuser, but it needs to be adjusted (tilted) so that the
entire primary mirror is visible.
c)
The secondary mirror is correctly aligned, but the primary mirror still needs adjustment.
When the primary mirror is correctly aligned, the center “dot” of the collimation cap will be centered, as in
d)
.
a.
b.
c.
d.
Summary of Contents for 8993
Page 27: ...27 Appendix C Time Zones ...

