Oregon Scientific MP810 User Manual Download Page 14

11

EN

REINSTALLING FIRMWARE

If your player is not operating properly, you may reinstall the firmware
at any time. Reinstalling your MP810 MP3 player with the latest
firmware ensures the device provides optimal playback performance.

1. Connect your player to the computer.

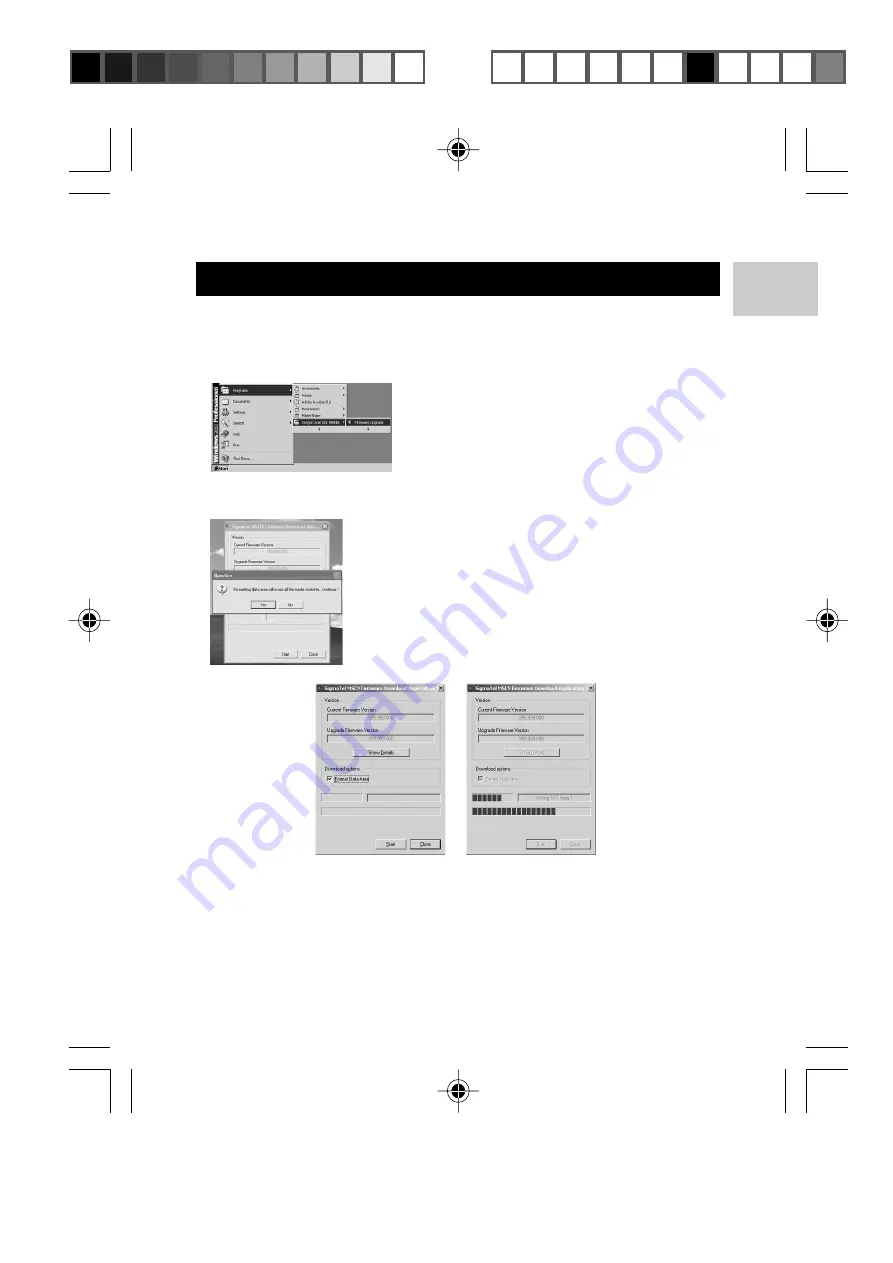
2. From  your  computer,  go  to 

Start>

P r o g r a m s > O r e g o n   S c i e n t i f i c
MP810 Firmware Upgrade.

3. The current and updated firmware version is displayed in a window.

Click the 

Start

 button to begin the firmware install process.

NOTE:

 A  window  pops  up  with  the  prompt,

"Formatting  data  area  will  erase  the  media
contents. Continue?". Check the "Format Data
Area". Cancel the process if you need to back
up the data stored on player onto your computer
first. Then restart the process again.

4. Click the 

Start

 button. All data stored in the MP3 player is erased

(if you chose to "Format Data Area") and the firmware upgrade
process begins.

5. Click the Close button to close the software once the process is

completed.

6. Unplug the MP3 player from the computer.

MP810 Eng R5 a OP

10/5/04, 11:51 AM

11

¶´ƒ

All manuals and user guides at all-guides.com

Summary of Contents for MP810

Page 1: ...Model MP810 User Manual MP810 Eng Cover R5 a OP 10 5 04 11 48 AM 1 All manuals and user guides at all guides com a l l g u i d e s c o m...

Page 2: ...necting to a Computer 5 Transferring Files 6 Disconnecting the Player from PC 6 Windows 98SE 7 Windows ME 2000 XP 7 Using the Audio Player 7 On Off 7 Music Voice Free Memory 7 Adjusting Volume Level 0...

Page 3: ...re 14 Safety 14 General Warnings 14 About Noise 15 Cleaning Your Audio Player 16 Storage 16 Caution 16 Technical Specifications 16 About Oregon Scientific 17 FCC Statement 17 MP810 Eng contents R5 a O...

Page 4: ...LCD display Firmware upgradeable reinstallation Mobile storage function USB thumb drive design for direct connection to PC Built in 128MB 256MB or 512MB flash memory refer to indication on the packing...

Page 5: ...message or track 9 FF V Press to increase volume fast forward to next track or choose next selection 10 REW V Press to decrease volume rewind to previous track or choose previous selection 11 MENU Pre...

Page 6: ...e 4 Dynamic display 5 Track number Storage capacity 6 Recording mode 7 Equalizer 8 Playback Pause 9 Stop 10 REW FF 11 Button lock 12 Battery power 13 Free space 14 Volume 16 Elapsed time display 17 De...

Page 7: ...is disconnected from the computer 2 Insert the MP810 CD ROM into your computer If the installer does not automatically begin please refer to the troubleshooting section for help 3 Follow the onscreen...

Page 8: ...ovable Disk H 1 Detach the player s storage body with USB connector and attach to the computer s available USB port directly OR connect the other part of the player with battery compartment to the PC...

Page 9: ...will not be able to view or play any of the stored data unless it is one of the supported audio formats MP3 Layer 3 MPEG 1 MPEG 2 and MPEG 2 5 WMA Windows Media Audio WAV IMA ADPCM format NOTE During...

Page 10: ...ed to prevent any data loss that may occur USING THE AUDIO PLAYER ON OFF 1 Press once to turn the player on The player enters MUSIC mode Stop status The icon is displayed 2 In Stop status press contin...

Page 11: ...iles are saved in WAV format and located in the VOICE folder of your player PLAYBACK PAUSE STOP TURN OFF 1 Press to start playing the current track or voice recording 2 Press to pause playback 3 Press...

Page 12: ...and repeat all When choosing non repeat no indicators are shown on the LCD display ICON REP PATTERN DESCRIPTION 1 REP ALL REP Play and repeat the current single voice recording or track Play and repea...

Page 13: ...ecordings 2 Press to delete either the current track or voice recording or all tracks or voice recordings depending on your selection TIP If you decide not to delete any tracks press any button other...

Page 14: ...tton to begin the firmware install process NOTE A window pops up with the prompt Formatting data area will erase the media contents Continue Check the Format Data Area Cancel the process if you need t...

Page 15: ...eck the Oregon Scientific website for the latest firmware updates FORMATTING THE AUDIO PLAYER 1 In Windows Explorer select the drive letter of your player assigned by the computer 2 Ensure you have se...

Page 16: ...o run slowly Format the unit from time to time to ensure that it maintains smooth operation Refer to the section FORMATTING THE AUDIO PLAYER for more information My player is unable to start or the di...

Page 17: ...use your audio player correctly read these Safety Notes and your User Manual carefully The warnings given here provide important safety information and should be observed at all times GENERAL WARNINGS...

Page 18: ...o drop the unit when using it Remove the battery if the player is not to be used for a long time Remove dead battery immediately to avoid damage from corrosion Unauthorized changes may void your right...

Page 19: ...YOUR AUDIO PLAYER Use a soft dry cloth to clean the LCD display Use a damp cloth and mild detergent to wipe the unit Dry immediately STORAGE Remove the battery and keep it in a well ventilated place t...

Page 20: ...tact information for our customer care department in case you need to reach us as well as frequently asked questions and customer downloads We hope you will find all the information you need on our we...

Page 21: ...o correct the interference by one or more of the following measures Reorient or relocate the receiving antenna Increase the separation between the equipment and receiver Connect the equipment into an...

Page 22: ...2004 Oregon Scientific All rights reserved MP810 Eng Back R5 a OP 10 5 04 11 48 AM 1 All manuals and user guides at all guides com...

Reviews: