11
Installation
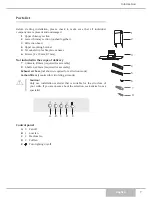
Installing the extraction hood
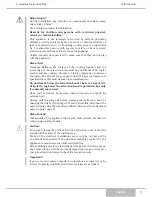
Caution!
Make sure that when drilling the holes no lines are damaged.
Important!
Please observe your cooker’s instruction manual! If a greater
clearance than 65 cm is specified, this must be taken into
consideration.
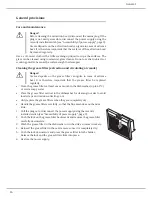
1. In order to position the appliance exactly above the cooker in the centre,
make a guide line on the wall (vertical line, with the aid of a spirit level or
plumb-line, from the centre of the cooker to the ceiling).
Please ensure that you do not draw on sections of the wall that will be visible
after the installation.
2. Position the extraction hood 3 on the wall in such a way that the clearance to
the cooker (min. 65 cm) is maintained and the centre of the extraction hood is
flush with the vertical line.
Check the alignment with a spirit level.
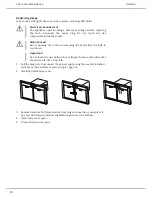
3. Mark the four holes.
4. Drill four holes with a diameter of 8 mm on the marked points.
5. Push the wall plugs (not supplied) into the holes.
6. Install the extraction hood 3 on the wall using four fixing screws (not
supplied).
7. Hang extraction hood into both of the upper bolts. Once it hangs, screw it to
wall from inside.
8. Alternatively, you can use the supplied drilling template.
Preparation
English
Plumb-line
M
in
. 6
5
cm


