background image

28

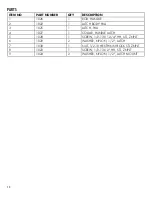
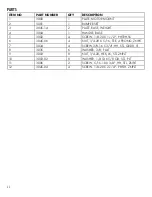
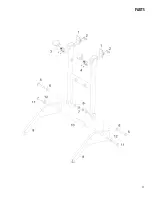
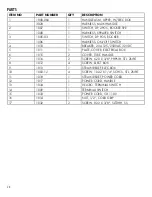
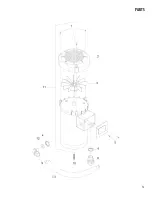
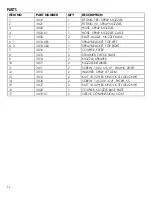
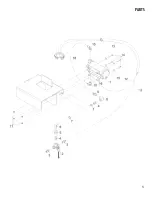
PARTS

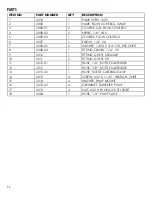
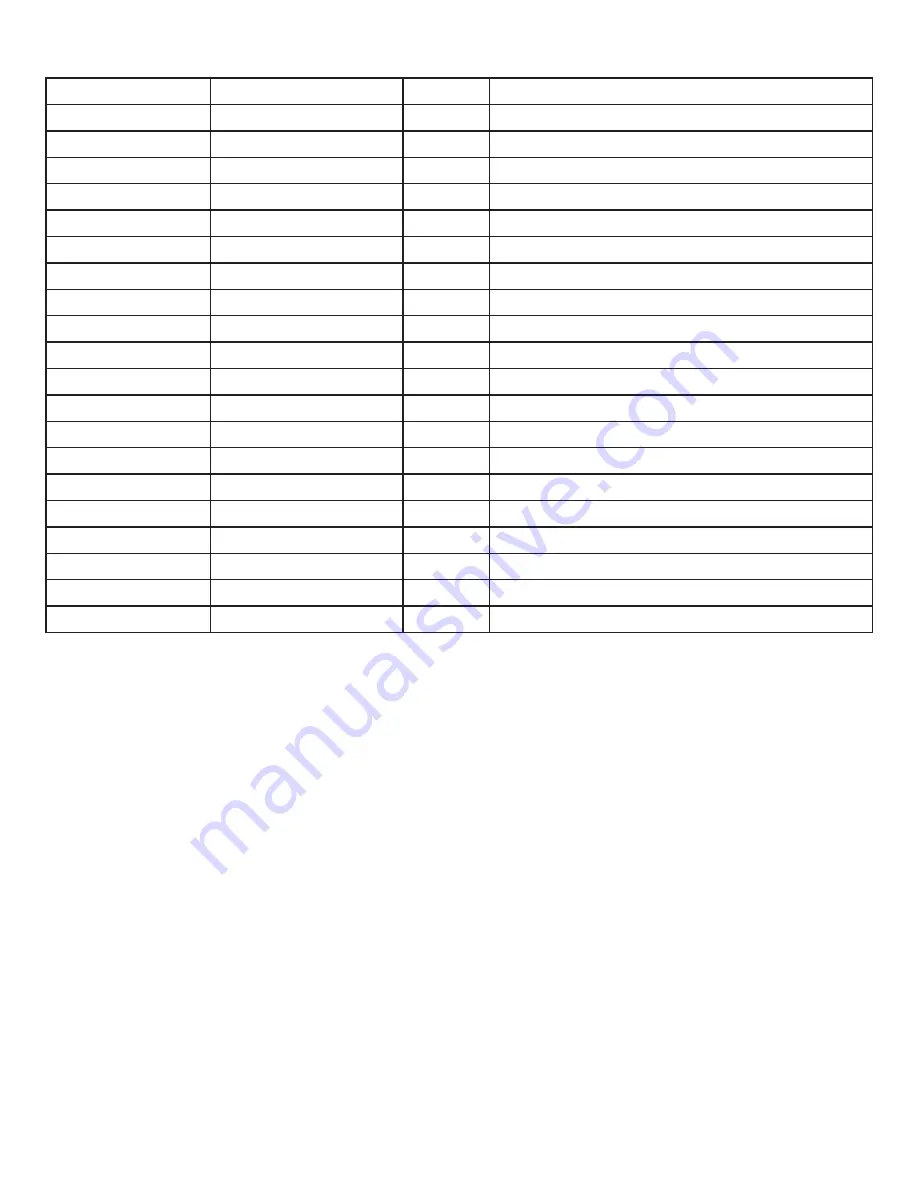
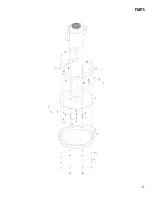
ITEM NO

PART NUMBER

QTY

DESCRIPTION

1

1000-06U

1

HANDLE ASM, UPPER, W/ELEC BOX

-

3028

1

HARNESS, MAIN HANDLE

2

1007

1

SWITCH, DP, 2POS, ROCKER SPR

-

1008

1

HARNESS, SPRAYER SWITCH

3

1005-03

1

SWITCH, DP POS, ROCKER

-

1006

1

HARNESS, ON/OFF SWITCH

4

1010

1

BREAKER, 20A 125/250VAC 32VDC

5

1011

1

PLATE, COVER, ELECTRICAL BOX

6

1015

2

COVER, TUBE, HANDLE

7

1016

2

SCREW, 6-20 X 3/8",PHPNH, STL, ZNPLT

8

1012

4

SCREW, ELECT BOX

9

1013

1

STRAIN RELIEF, ELEC BOX

10

1003-12

4

SCREW, 10-32 X 1/4",SCHCS, STL, ZNPLT

11

1018

1

STRAIN RELIEF, POWER CORD

12

1017

1

POWER CORD, HANDLE

13

1034

1

VELCRO, TERMINAL SWITCH

14

1009

1

TERMINAL SWITCH

15

1033

1

POWER CORD, 50’ 110V

16

1014

1

NUT, 1/2”, CORD GRIP

17

1032

2

SCREW, 8-32 X 3/8", SLTDHH, SS

Summary of Contents for SPRAYBORG

Page 1: ...OPERATING MANUAL ENG V052015 ...

Page 2: ...nce repair or replacement of parts due to normal wear and tear Damage caused by accident misuse or neglect fire or the fitting of other than genuine Orbot parts Defects in other than genuine Orbot parts repairs modifications or adjustments made by other than a Orbot service engineer or authorized service dealer Costs and risks of transport relating directly or indirectly to the guarantee of this p...

Page 3: ...age Lifting and Carrying Weight Kit Installation Brush Installation Attaching and Removing the Driver Plates Accessories and Applications Driver Plates Standard Driver Plates Carpet Pads Melamine Pads AkwaStrip Pads StoneFlash Pads Scrub Brush Concrete Brush Operation Maintenance Application on Different Floor Types Cleaning the Machine Changing the driver grip face Parts Diagram and Parts List No...

Page 4: ...ts in good working condition They are listed in this general order Storage Maintenance Troubleshooting The PARTS LIST section contains assembled parts illustrations and corresponding parts list The parts lists include a number of columns of information REF column refers to the reference number on the parts illustration PART NO column lists the part number for the part PRV NO reference number QTY c...

Page 5: ...g operation use caution around other persons especially children The machine shall only be operated by instructed and authorized persons When leaving unattended unplug the machine Do not handle the plug or machine with wet hands Do not unplug machine by pulling on cord To unplug grasp the plug and not the cord Do not use with damaged cord or plug Follow all instructions in this manual concerning g...

Page 6: ...ent Report machine damage or faulty operation immediately Do not use the machine if it is not in proper operating condition The following is information that signals some potentially dangerous conditions to the operator or the equipment Read this information carefully Know when these conditions can exist Locate all safety devices on the machine Please take the necessary steps to train the machine ...

Page 7: ...plug in Fig A A temporary adaptor that looks like the adaptor in Fig C may be used to connect this plug to a 2 pole receptacle as shown in Fig B if a properly grounded outlet is not available The temporary adaptor should be used only until a properly grounded outlet Fig A can be installed by a qualified electrician The green colored rigid ear lug or similar that extends from the adaptor must be co...

Page 8: ...z 6 amps 50Hz 11amp 60Hz RPM 1725 60Hz 1400 50Hz Base Diameter 17 43 cm Orbital Diameter 3 8 9 5 mm Weight 102 Lbs 46 7 kg Height 48 122 cm Length 29 75 cm Wheels 10 25 cm Diameter resistant to chemicals Decibel Rating 59 dB TECHNICAL DETAILS ...

Page 9: ...n and push slowly forward until the machine base tilts towards the ground CAUTION Make sure to put the wheels back on the ground in time to avoid the base from falling on the ground This might cause damage Check to make sure the power switch is in the off position Power Cable Quick Disconnect Take provided power cable and connect to machine quick disconnect located on machine Push and twist to loc...

Page 10: ...our right hand To fix the handle frame into place release the black knob so that it locks firmly into one of the holes provided Position 0 is off and position I is on CAUTION Make sure a suitable pad or brush is mounted before starting the machine The immediate contact of the floor and driver plate without a pad can lead to serious damage of the floor and or the machine Process of Cleaning For eff...

Page 11: ...ck knob with the left hand and move the handle frame upwards with the right hand The black knob should lock firmly in the top hole CAUTION To allow an easy transportation of the machine remove the weight kit if used To easily roll the machine push your foot on the back wheel axle to create leverage and pull the handle towards your body The machine can be moved similar to a dolly now Always store w...

Page 12: ...least 5 full turns tighten the wing nuts by turning them clockwise until the weights fit securely to the base CAUTION Make sure that the weights are securely attached to the base Loose weights can cause serious damage For storage and transport we recommend removing the weight kit The machine can be transported more easily without the weights Brush Installation Put the machine base in an upright po...

Page 13: ...late to the machine base by lining up the holes of the driver plate with the appropriate threads of the bearing retainer ring It is recommended to align the threads of the bearing horizontally to the ground Put the four countersink screws through the holes of the driver plate and first screw them into the bearing retainer ring threads manually Then tighten the screws with an electric screwdriver N...

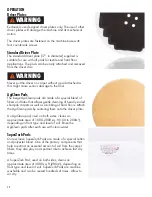
Page 14: ...rs and latex that allows gentle cleaning of heavily soiled short pile carpets as well as scrubbing of hard floors Attach the AgiClean pads by centering them onto the driver plate An AgiClean pad used on both sides cleans an approximate area of 1000 2000 sq ft 100 to 200m depending on floor type and level of soil Rinse the AgiClean pads after each use with clean water SuperZorb Pads Our exclusive S...

Page 15: ...oleum wood safety tiles and more An AkwaStrip Pad used on both sides cleans an approximate area of 1000 2000 sq ft 100 to 200m depending on floor type and the level of wax and soil Make sure to thoroughly rinse with clean water after each use StoneFlash Pads Our newly redesigned StoneFlash pads are part of a 6 step system for grinding honing and polishing Marble terrazzo travertine limestone and m...

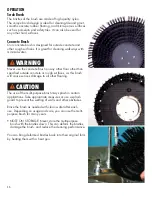
Page 16: ...r other than specified outside concrete or rough surfaces as this brush will cause serious damage to all other flooring CAUTION The use of the multi purpose brush may splash in certain applications Take appropriate measures or use a splash guard to prevent the wetting of walls and other obstacles Rinse the brush as needed with clean water after each use Depending on usage and care you can use the ...

Page 17: ...r type this process can be shortened or extended OPERATION MAINTENANCE MAINTENANCE Cleaning the Machine Clean the machine and bearing with a soft cloth and a neutral pH cleaner Regular cleaning of the bearing is required to prevent build up that will cause it to seize up Changing the driver grip face Remove the ten outer screws that fasten the grip face disc on the driver plate To save time use an...

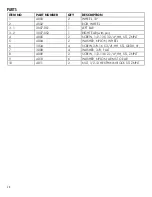
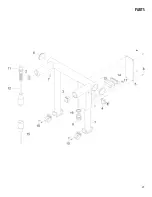
Page 18: ...1022 1 LATCH BODY PULL 3 1025 1 LATCH PULL 4 1027 1 COLLAR HANDLE LATCH 5 1028 1 SCREW 1 2 13 X 1 3 4 HH STL ZNPLT 6 1029 2 WASHER NYLON 1 2 LATCH 7 1030 1 NUT 1 2 13 HEXTHIN NYLOCK STL ZNPLT 8 1023 1 SCREW 1 2 13 X 2 HH STL ZNPLT 9 1024 2 WASHER NYLON 1 2 LATCH MOUNT ...

Page 19: ...19 PARTS ...

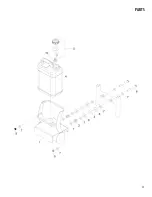
Page 20: ...ING BOTTLE HOLDER 3 2023 2 DAMPNER RUBBER 4 2019 1 BOTTLE CARTRIDGE 3 GAL 5 2018 1 BOTTLE CAP ASSY 6 2020 2 SCREW 1 2 13 X 4 3 8 HH STL ZNPLT 7 2022 10 WASHER NYLON CAGE 8 2021 4 WASHER 5 8ID X 1 3 4OD X 134L FLT 9 2025 2 NUT 1 2 13 HEXTHIN NYLOCK STL ZNPLT 10 2017 1 STRAINER SOLUTION BOTTLE ...

Page 21: ...21 PARTS ...

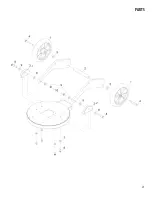
Page 22: ...NDLE BASE 5 3002 4 SCREW 1 4 20 X 1 1 2 PHTRH SS 6 3045 06 4 NUT 1 4 20 X 5 16 TEE 4 PRONG ZNPLT 7 3034 4 SCREW 3 8 16 X 3 4 HH STL GRD8 YL 8 3035 6 WASHER 3 8 FLAT 9 3003 8 NUT 1 4 20 HEX LK STL ZNPLT 10 3003 02 8 WASHER 1 4 ID X 5 8 OD STL PLT 11 3006 2 SCREW 5 16 18 X 3 4 HH STL ZNPLT 12 3045 04 4 SCREW 1 4 20 X 2 1 4 PHFLH ZNPLT ...

Page 23: ...23 PARTS ...

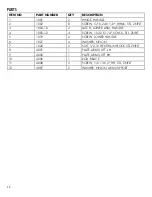
Page 24: ...T EAR 3 2 3007 052 1 RIGHT EAR with pin 4 4005 2 SCREW 1 2 13 X 3 3 4 HH STL ZNPLT 5 4004 2 WASHER NYLON WHEEL 6 3034 4 SCREW 3 8 16 X 3 4 HH STL GRD8 YL 7 3008 4 WASHER 3 8 FLAT 8 4009 2 SCREW 1 2 13 X 2 1 4 HH STL ZNPLT 9 4010 6 WASHER NYLON ARMS TO EAR 10 4011 2 NUT 1 2 13 HEXTHIN NYLOCK STL ZNPLT ...

Page 25: ...25 PARTS 1 2 ...

Page 26: ...10 2 LATCH LOWER ASM HANDLE 4 1003 12 4 SCREW 10 32 X 1 4 SCHCS STL ZNPLT 5 1019 2 SCREW LOWER HANDLE 6 1021 4 WASHER NYLON 7 1020 2 NUT 1 2 13 HEXTHIN NYLOCK STL ZNPLT 8 4001 1 PLATE ARMS LIFT LH 9 4000 1 PLATE ARMS LIFT RH 10 4006 1 ROD BRACE 11 4008 2 SCREW 1 2 13 X 2 HH STL ZNPLT 12 4007 2 WASHER NYLON ARM SUPPORT ...

Page 27: ...27 PARTS ...

Page 28: ...REAKER 20A 125 250VAC 32VDC 5 1011 1 PLATE COVER ELECTRICAL BOX 6 1015 2 COVER TUBE HANDLE 7 1016 2 SCREW 6 20 X 3 8 PHPNH STL ZNPLT 8 1012 4 SCREW ELECT BOX 9 1013 1 STRAIN RELIEF ELEC BOX 10 1003 12 4 SCREW 10 32 X 1 4 SCHCS STL ZNPLT 11 1018 1 STRAIN RELIEF POWER CORD 12 1017 1 POWER CORD HANDLE 13 1034 1 VELCRO TERMINAL SWITCH 14 1009 1 TERMINAL SWITCH 15 1033 1 POWER CORD 50 110V 16 1014 1 NU...

Page 29: ...29 PARTS ...

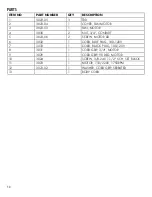
Page 30: ...4 3030 2 NUT 3 4 CONDUIT 5 3023 06 2 SCREW MOTOR LID 6 3032 1 CORD BLUE PLUG 100 120V 7 3033 1 CORD BLACK PLUG 100 120V 8 3031 1 CORD GRIP 3 4 MOTOR 9 3029 1 CORD GRIP 90 DEG MOTOR 10 3024 1 SCREW 3 8 24 X 1 1 2 SCH SET BLKOX 11 3023 1 MOTOR 110 220V 1750RPM 12 3023 02 1 WASHER CORD GRIP SERRATED 13 1 BODY CORD ...

Page 31: ...31 PARTS 13 ...

Page 32: ...Y BRACKET TOP LEFT 6 2 3010 002 1 SPRAY BRACKET TOP RIGHT 7 3016 1 COUPLER FILTER 8 3015 2 STRAINER CHECK VALVE 9 3014 2 NOZZLE SPRAYER 10 3017 2 NOZZLE RETAINER 11 3011 2 SCREW 10 32 X 3 4 HXUNS ZNPLT 12 3013 2 WASHER SPRAY JET ARM 13 3012 2 NUT 10 32 HEX NYLOCK STL GR2 ZNPLT 14 3036 2 SCREW 1 4 20 X 3 4 PHTRH SS 15 3037 2 NUT 10 32 HEX NYLOCK STL GR2 ZNPLT 16 3020 1 COUPLER NOZZLE BASE PLATE 17 ...

Page 33: ...33 PARTS 2 1 ...

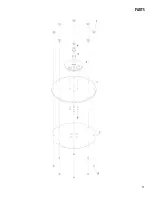
Page 34: ...ER DISK 15 2 3040 1 DRIVER VELCRO PLATE 15 3 3026 1 ASSY COUNTERWEIGHT 17 DISK 4 3025 1 SHAFT SUPPORT 5 3026 17 2 SCREW 1 4 20 X 3 4 PHFLHMS SS 6 3047 4 SCREW 1 4 20 X 1 PHFLH SS 7 3043 8 NUT 1 4 20 X 5 16 TEE 4 PRONG ZNPLT 8 3042 8 SCREW 1 4 20 X 3 8 PHTRH SS ...

Page 35: ...35 PARTS ...

Page 36: ...7 2000 05 2 WASHER 1 2ID X 3 4 OD DSP ZNPLT 8 2008 04 1 FITTING ELBOW 1 4 90 9 2016 1 FITTING GUEST STRAIGHT 10 2011 2 FITTING GUEST 90 11 2015 01 1 HOSE 1 4 BOTTLE CARTRIDGE 12 2015 1 HOSE 3 8 BOTTLE CARTRIDGE 13 2015 02 1 HOSE BOTTLE CARTRIDGE ASSY 14 2012 4 SCREW 6 32 X 1 1 4 HEXFLGH ZNPLT 15 2014 4 WASHER PUMP MOUNT 16 2010 02 4 GROMMET DAMPNER PUMP 17 2013 4 NUT 6 32 HEX NYLOCK STL ZNPLT 18 2...

Page 37: ...37 PARTS ...

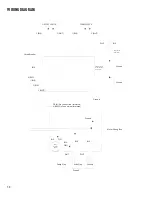
Page 38: ...U 2 WHT WHT WHT BLK YLW Ground Ground Ground Ground Ground Ground Motor Housing Wires Pump Plug Extra Plug Motor Wiring Box SPRAY SWITCH ON OFF SWITCH Circuit Breaker Power Cord from Wall Terminal Strip inside handle wiring box 5 YLW No Connection Insulated 6 BRN No Connection Insulated ...

Page 39: ...39 NOTES ...
Reviews: