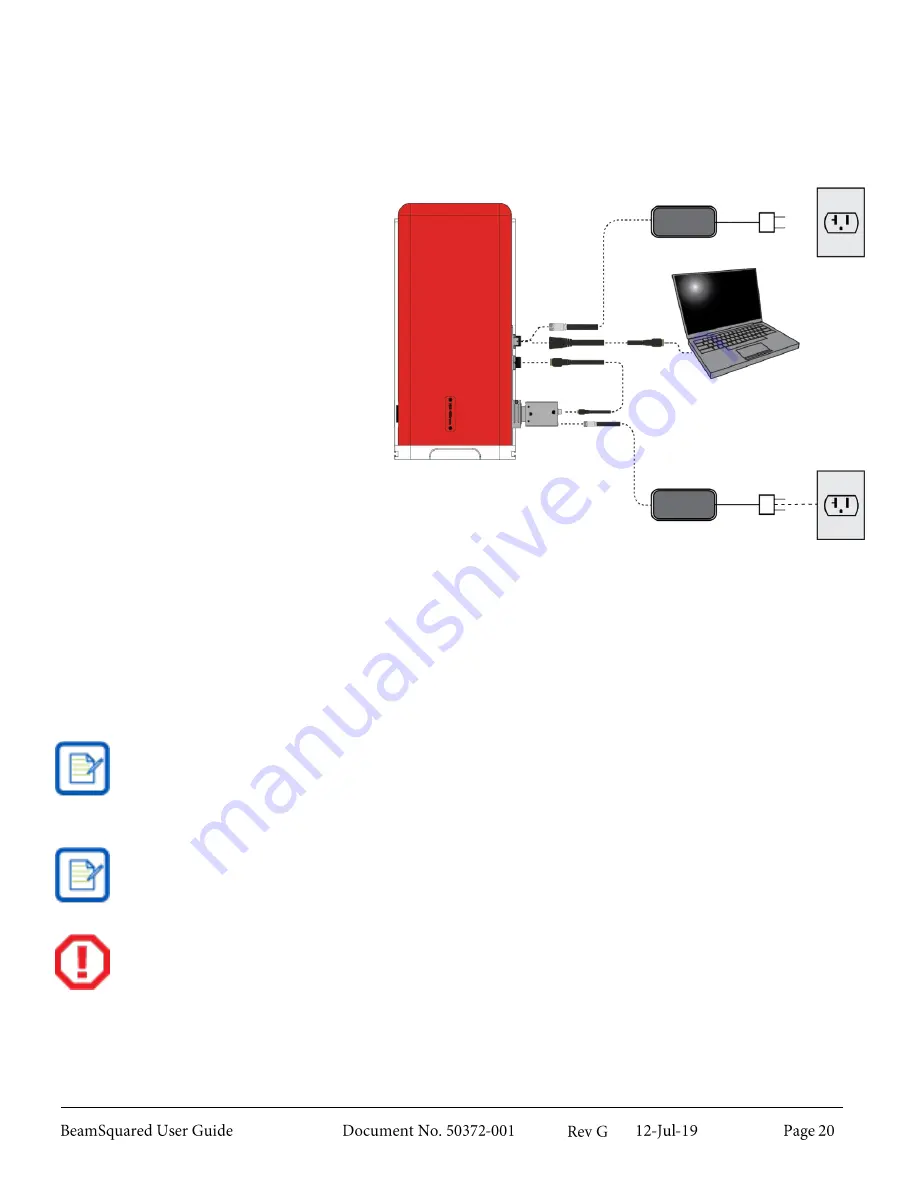
Connect BeamSquared
2.3.3
1.
Connect the USB cable on the
BeamSquared to an available USB
3.0 port on your PC.
2.
Connect the short USB cable from
the Camera directly to the
BeamSquared Unit. (Connect the
Camera Power Supply if applicable.)
3.
Plug the BeamSquared power supply
into a grounded A/C outlet.
4.
When BeamSquared is connected for
the first time, a Found New
Hardware message appears. Wait
for
a
notice
of
successful
completion. If Windows reports a
failure to install a driver, see Chapter
7.
5.
Launch the BeamSquared software
by double-clicking the BeamSquared
icon or launch from the Windows
Start button.
6.
When the optical train initializes, the
translation table and attenuator
cycle the entire range of motion,
confirming the table and attenuator
are fully operational, and then sets
them to the home locations.
Only connect one Ophir-Spiricon device at a time. If multiple devices are connected to a single PC,
the camera or other components may not connect correctly.
The M
2
-200 and M
2
-200s required loading a configuration file specific to the wavelength, lens, and
camera in use. This data is now preprogrammed into each unit and the system employs the stored
calibration information as needed.
Do not align the laser through the BeamSquared until the beam has been properly attenuated per
section 2.4. Setting an unattenuated beam through the BeamSquared may damage the optics.
Summary of Contents for BeamSquared
Page 10: ......
Page 15: ...BeamSquared Optical Train Dimensions 1 4 ...
Page 75: ...400mm Focal Length Lens M2 1 500mm Focal Length Lens M2 1 ...
Page 87: ......


