background image

92

Instruments and controls

Uplevel-Display

The vehicle messages are displayed

as text. Follow the instructions given

in the messages.
The system displays messages

regarding the following topics:

■ Fluid levels
■ Anti-theft alarm system
■ Brakes
■ Drive systems
■ Ride control systems
■ Cruise control
■ Object detection systems

■ Lighting, bulb replacement
■ Wiper/washer system
■ Doors, windows
■ Radio remote control
■ Seat belts
■ Airbag systems
■ Engine and transmission
■ Tyre pressure

Warning chimes

When starting the engine or

whilst driving

■ If seat belt is not fastened.
■ If a door or the tailgate is not fully

closed when starting off.

■ If a certain speed is exceeded with

parking brake applied.

■ If a programmed speed is

exceeded.

■ If a warning message or a warning

code appears in the Driver

Information Center.

■ If the parking assist detects an

object.

When the vehicle is parked and/

or the driver's door is opened

■ When the key is in the ignition

switch.

■ With exterior lights on.
■ If the trailer hitch is not engaged.

Traffic sign detection

Functionality

The traffic sign detection system

detects designated traffic signs via

a front camera and displays them in

the Driver Information Center.
Traffic signs, which will be detected,

are

■ speed limit signs
■ no overtake signs
■ end of speed limit signs
■ end of no overtake signs

Speed limit signs are displayed in the

Driver Information Center as long as

the next speed limit or end of speed

limit sign is detected.

Summary of Contents for 2011 Insignia

Page 1: ...9 Seats restraints 39 Storage 58 Instruments and controls 71 Lighting 100 Infotainment system 110 Climate control 113 Driving and operating 121 Vehicle care 149 Service and maintenance 187 Technical data 199 Customer information 248 Index 250 Contents ...

Page 2: ...2 Introduction Introduction ...

Page 3: ...perienced mechanics trained by Opel work according to specific Opel instructions The customer literature pack should always be kept ready to hand in the vehicle Using this manual The In brief section will give you an initial overview The table of contents at the beginning of this manual and within each chapter shows where the information is located The index will enable you to search for specific ...

Page 4: ...arding this information may lead to injury Caution Text marked Caution provides information on possible damage to the vehicle Disregarding this information may lead to vehicle damage Symbols Page references are indicated with 3 3 means see page We wish you many hours of pleasurable driving Adam Opel GmbH ...

Page 5: ...Introduction 5 ...

Page 6: ...by pulling the handles To open the tailgate pull the button under the tailgate moulding Press button x only the load compartment is unlocked and opens Radio remote control 3 19 Central locking system 3 21 Load compartment 3 24 Seat adjustment Seat positioning Pull handle slide seat release handle Seat position 3 40 Seat adjustment 3 41 ...

Page 7: ...dibly Do not lean on backrest when adjusting Seat position 3 40 Seat adjustment 3 41 Seat height Press switch top seat higher bottom seat lower Seat position 3 40 Seat adjustment 3 41 Seat inclination Lever pumping motion up front end higher down front end lower Seat position 3 40 Seat adjustment 3 41 ...

Page 8: ... forwards backwards Head restraint adjustment Press release button adjust height engage Head restraints 3 39 Seat belt Pull out the seat belt and engage in belt buckle The seat belt must not be twisted and must fit close against the body The backrest must not be tilted back too far maximum approx 25 To release belt press red button on belt buckle Seat position 3 40 Seat belts 3 46 Airbag system 3 ...

Page 9: ...nt exterior mirror and adjust Convex exterior mirrors 3 31 Electric adjustment 3 31 Folding exterior mirrors 3 31 Heated exterior mirrors 3 32 Steering wheel adjustment Unlock lever adjust steering wheel then engage lever and ensure it is fully locked Do not adjust steering wheel unless vehicle is stationary and steering wheel lock has been released Airbag system 3 49 Ignition positions 3 122 ...

Page 10: ...10 In brief ...

Page 11: ...tainment system 110 12 Info Display 88 13 Anti theft alarm system status LED 28 14 Central locking system 21 Hazard warning flashers 104 Control indicator for airbag deactivation 83 Control indicator for front passenger seat belt 82 15 Sport mode 134 Tour mode 134 Traction Control system 133 Electronic stability control 133 Universal parking assist 137 Advanced parking aid 137 Lane departure warni...

Page 12: ...12 In brief ...

Page 13: ...rol 8 sidelights 9 headlights Press front fog lights r rear fog light Lighting 3 100 Headlight flash high beam and low beam headlight flash pull lever high beam push lever low beam push or pull lever Automatic light control 3 101 High beam 3 103 Headlight flash 3 103 Turn and lane change signals right lever up left lever down Turn and lane change signals 3 104 Parking lights 3 105 ...

Page 14: ...g flashers 3 104 Horn Press j Washer and wiper systems Windscreen wiper 2 fast 1 slow P timed interval wiping or automatic wiping with rain sensor off For a single swipe when the windscreen wiper is off press the lever down Windscreen wiper 3 72 Wiper blade replacement 3 154 ...

Page 15: ...ight washer system 3 72 Washer fluid 3 153 Rear window wiper and washer systems Push the rocker switch to activate the rear window wiper top continuous operation bottom intermittent operation Push lever Washer fluid is sprayed on the rear window and the wiper swipes for a few strokes ...

Page 16: ...mperature control to warmest level Cooling n on Heated rear window Ü on Climate control system 3 113 Transmission Manual transmission Reverse with the vehicle stationary depress clutch pedal pull up the button on the selector lever and engage the gear If the gear does not engage set the lever in neutral release the clutch pedal and depress again then repeat gear selection Manual transmission 3 129...

Page 17: ...il level and fluid levels 3 151 All windows mirrors exterior lighting and number plates are free from dirt snow and ice and are operational Proper position of mirrors seats and seat belts 3 31 3 40 3 47 Brake function at low speed particularly if the brakes are wet Starting the engine Turn key to position 1 move the steering wheel slightly to release the steering wheel lock operate clutch and brak...

Page 18: ...re switching off the ignition On an uphill slope turn the front wheels away from the kerb If the vehicle is on a downhill slope engage reverse gear or set the selector lever to P before switching off the ignition Turn the front wheels towards the kerb Lock the vehicle with button e on the radio remote control Activate the anti theft alarm system 3 28 Do not park the vehicle on an easily ignitable ...

Page 19: ...tag The key number must be quoted when ordering replacement keys as it is a component of the immobiliser system Locks 3 184 Key with foldaway key section Press button to extend To fold the key first press the button Car Pass The Car Pass contains security related vehicle data and should therefore be kept in a safe place When the vehicle is taken to a workshop this vehicle data is needed in order t...

Page 20: ... Overload of the central locking system by operating at frequent intervals the power supply is interrupted for a short time Interference from higher power radio waves from other sources Unlocking 3 21 Basic settings Some settings can be changed in the menu Settings in the Info Display Vehicle personalisation 3 96 Radio remote control battery replacement Replace the battery as soon as the range red...

Page 21: ...e door Note In the event of an accident of a certain severity the vehicle unlocks automatically Unlocking Press button c Two settings are possible To unlock only the driver s door press button c once and to unlock all doors load compartment and fuel filler flap press button c twice Settings can be changed in the menu Settings in the Info Display Vehicle personalisation 3 96 The settings can be sav...

Page 22: ...the e button to lock Press the c button to unlock When the key is in the ignition switch locking is only possible if all doors are closed Fault in radio remote control system Unlocking Manually unlock the driver s door by turning the key in the lock Switch on the ignition and press the central locking button c to open all doors load compartment and fuel filler flap To deactivate the anti theft loc...

Page 23: ...ent and fuel filler flap as soon as the vehicle is driven Settings can be changed in the menu Settings in the Info Display Vehicle personalisation 3 96 The settings can be saved for the key being used 3 21 Automatic locking when leaving the vehicle This security feature can be configured to automatically lock all doors load compartment and fuel filler flap a short time after the doors are closed w...

Page 24: ...9 Warning Take care when operating the power tailgate Risk of injury particularly to children Keep a close watch on the movable tailgate when operating Ensure that nothing becomes trapped during operating and no one is standing within the moving area The power tailgate is operated by Radio remote control Switch in the door panel of the driver s door Touchpad switch and button in the tailgate It ca...

Page 25: ...g Central locking system 3 21 Operation with radio remote control Press and hold button x until tailgate starts to open or close Operation with the switch in the driver s door Press and hold button G until tailgate starts to open or close Operation with switches in the tailgate To open the tailgate push and hold the touchpad switch under the tailgate moulding until tailgate starts to move ...

Page 26: ...ed by the switch in the driver s door To change the mode turn the switch Normal mode о power tailgate opens to full height Intermediate mode power tailgate opens to a reduced height that can be adjusted Mode Off tailgate can be operated manually Adjust reduced opening height in intermediate mode 1 Turn operation mode switch to о or 2 Open power tailgate with any operation switch 3 Stop movement at...

Page 27: ...obstacles for resuming normal power operation If the vehicle is equipped with a factory fitted towing equipment the operation of the power tailgate is automatically deactivated when towing a trailer General hints for operating tailgate 9 Warning Do not drive with the tailgate open or ajar e g when transporting bulky objects since toxic exhaust gases which can not be seen or smelled could enter the...

Page 28: ... be closed or the system cannot be activated If the ignition was on the driver s door must be opened and closed once so that the vehicle can be secured Unlocking the vehicle disables the mechanical anti theft locking system This is not possible with the central locking button Activating Press e on the radio remote control twice within 15 seconds Anti theft alarm system The anti theft alarm system ...

Page 29: ...assenger compartment monitoring Activation without monitoring of passenger compartment and vehicle inclination Switch off the monitoring of passenger compartment and vehicle inclination when people or animals are being left in the vehicle because of high volume ultrasonic signals movements triggering the alarm and when the vehicle is on a ferry or train 1 Close tailgate bonnet windows and sunroof ...

Page 30: ...control or by switching on the ignition The anti theft alarm system can be deactivated only by pressing button c or by switching on the ignition Immobiliser The system is integrated into the ignition switch and checks whether the vehicle is allowed to start with the key being used If the transponder in the key is recognized the engine can be started The electronic immobiliser activates itself auto...

Page 31: ...In position 0 no mirror is selected Folding For pedestrian safety the exterior mirrors will swing out of their normal mounting position if they are struck with sufficient force Reposition the mirror by applying slight pressure to the mirror housing Electric folding Turn control to 7 then push the control down Both exterior mirrors will fold Push the control down again both exterior mirrors return ...

Page 32: ... this function can be changed in the menu Settings in the Info Display Vehicle personalisation 3 96 The settings can be saved for the key being used 3 21 Heated Operated by pressing the Ü button Heating works with the engine running and is switched off automatically after a short time Parking assist Both exterior mirrors are automatically aimed at the rear tyres as a parking aid when reverse gear ...

Page 33: ...ed or closed with the window winders Power windows 9 Warning Take care when operating the power windows Risk of injury particularly to children If there are children on the rear seats switch on the child safety system for the power windows Keep a close watch on the windows when closing them Ensure that nothing becomes trapped in them as they move Power windows can be operated with ignition on with...

Page 34: ...o stop movement operate the switch once more in the same direction Safety function If the window glass encounters resistance above the middle of the window during automatic closing it is immediately stopped and opened again Override safety function In the event of closing difficulties due to frost or the like pull and hold the switch The window moves up without safety function To stop movement rel...

Page 35: ... code is displayed in the Driver Information Center Vehicle messages 3 90 Activate the window electronics as follows 1 Close doors 2 Switch on ignition 3 Close the window completely and keep the switch pulled for additional 2 seconds 4 Repeat for each window Heated rear window Operated by pressing the Ü button Heating works with the engine running and is switched off automatically after a short ti...

Page 36: ...ake care when operating the sunroof Risk of injury particularly to children Keep a close watch on the movable parts when operating them Ensure that nothing becomes trapped in them as they move Sunroof Saloon Open or close Press p or r gently to the first detent sunroof is opened or closed with enabled safety function as long as the switch is operated Press p or r firmly to the second detent and th...

Page 37: ... then release the sunroof is opened automatically with enabled safety function To stop movement operate the switch once more Close Press r gently to the first detent sunroof is closed from full open or spoiler position with enabled safety function as long as the switch is operated Press r firmly to the second detent and then release the sunroof is completely closed automatically with enabled safet...

Page 38: ...otely from outside the vehicle Press and hold e button to close the sunroof Release the button to stop the movement Initialising of the roof If the sunroof cannot be closed e g after disconnecting the vehicle battery activate the sunroof electronics as follows If sunroof is closed keep the switch r pressed for 10 seconds If sunroof is open keep the switch r pressed until sunroof is fully closed Th...

Page 39: ...osition 9 Warning Only drive with the head restraint set to the proper position The middle of the head restraint should be at eye level If this is not possible for extremely tall people set to highest position and set to lowest position for small people Adjustment Head restraints on front seats Height adjustment Press the button adjust height and engage ...

Page 40: ...es may only be attached to the front passenger head restraint if the seat is not in use Head restraints on rear seats Height adjustment Pull the head restraint upwards or press the catch to release and push the head restraint downwards Front seats Seat position 9 Warning Only drive with the seat correctly adjusted Sit with buttocks as far back against the backrest as possible Adjust the distance b...

Page 41: ...ents There should be at least one hand of clearance between head and the roof frame Your thighs should rest lightly on the seat without pressing into it Adjust the head restraint 3 39 Adjust the height of the seat belt 3 47 Adjust the thigh support so that there is a space approx two fingers wide between the edge of the seat and the hollow of the knee Adjust the lumbar support so that it supports ...

Page 42: ...djust inclination and release lever Allow the backrest to engage audibly Do not lean on backrest when adjusting Seat height Press switch top seat higher bottom seat lower Seat inclination Lever pumping motion up front end higher down front end lower ...

Page 43: ...the lever and slide the thigh support Power seat adjustment 9 Warning Care must be taken when operating the power seats There is a risk of injury particularly for children Articles could become trapped Keep a close watch on the seats when adjusting them Vehicle passengers should be informed accordingly Seat positioning Move front of switch forwards backwards Seat height Move switch upwards downwar...

Page 44: ...rage is acknowledged by an acoustic signal Retrieving settings Keep position button 1 or 2 pressed until the stored seat and mirror positions have been reached Easy exit function For easy exit from the vehicle the power driver seat moves rearwards when vehicle is stationary the key is out of the ignition switch and the driver s door is opened Activation or deactivation of this function can be chan...

Page 45: ... The control indicator in the button or in the display indicates the setting Prolonged use of the highest setting for people with sensitive skin is not recommended Seat heating is operational when engine is running Ventilating Adjust ventilation to the desired setting by pressing the A button for the driver seat one or more times with the ignition on The control indicator in the display indicates ...

Page 46: ...ts are only designed for use by one person at a time They are not suitable for people younger than 12 years of age or smaller than 150 cm 59 inches Periodically check all parts of the belt system for damage and proper functionality Have damaged components replaced After an accident have the belts and triggered belt tensioners replaced by a workshop Note Make sure that the belts are not damaged by ...

Page 47: ...ers can only be triggered once Note Do not affix or install accessories or other objects that may interfere with the operation of the belt tensioners Do not make any modifications to belt tensioner components as this will invalidate the vehicle type approval Three point seat belt Fitting Withdraw belt from retractor guide it untwisted across the body and insert the latch plate in the buckle Tensio...

Page 48: ...oss the shoulder It must not lie across the throat or upper arm Do not adjust while driving Removing To release belt press red button on belt buckle Seat belts on the rear seats The seat belt for the rear centre seat can only be withdrawn from the retractor if the backrest is in the rear position Using the seat belt while pregnant 9 Warning The lap belt must be positioned as low as possible across...

Page 49: ... cover them with other materials Each airbag is triggered only once Have deployed airbags replaced by a workshop Do not make any modifications to the airbag system as this will invalidate the vehicle type approval In the event of airbag deployment have the steering wheel the instrument panel all panelling parts the door seals the handles and the seats removed by a workshop Control indicator v for ...

Page 50: ...n is only provided when the seat is in the proper position 3 40 Keep the area in which the airbag inflates clear of obstructions Fit the seat belt correctly and engage securely Only then the airbag is able to protect Side airbag system The side airbag system consists of an airbag in each front seat backrest and in the rear outboard seat backrests This can be identified by the word AIRBAG The side ...

Page 51: ...sists of an airbag in the roof frame on each side This can be identified by the word AIRBAG on the roof pillars The curtain airbag system is triggered in the event of an accident of a certain severity in the depicted area The ignition must be on The risk of injury to the head in the event of a side impact is considerably reduced 9 Warning Keep the area in which the airbag inflates clear of obstruc...

Page 52: ... to choose the position front passenger airbags are deactivated and will not inflate in the event of a collision Control indicator illuminates continuously A child restraint system can be installed in accordance with the chart Child restraint installation locations 3 54 V front passenger airbags are active No child restraint systems can be installed As long as the control indicator is not illumina...

Page 53: ...he system when the child s head can no longer be properly supported at eye height The childs cervical vertebrae are still very weak and in an accident they suffer less stress in the semi prone rearward position than when sitting upright Children under 12 years or under 150 cm 59 inches tall should only travel in an appropriate child restraint system When transporting children use the child restrai...

Page 54: ...o 4 years X U1 U2 U2 U2 Group II 15 to 25 kg or approx 3 to 7 years X X U U Group III 22 to 36 kg or approx 6 to 12 years X X U U 1 Only if front passenger seat airbag systems are deactivated If the child restraint system is being secured using a three point seat belt move seat height adjustment to uppermost position and ensure that vehicle safety belt runs forwards from the upper anchorage point ...

Page 55: ... IL IL B ISO F2 IL IL IUF IL IUF B1 ISO F2X IL IL IUF IL IUF A ISO F3 IL IL IUF IL IUF IL Suitable for particular ISOFIX restraint systems of the specific vehicle restricted or semi universal categories The ISOFIX restraint system must be approved for the specific vehicle type IUF Suitable for ISOFIX forward facing child restraint systems of universal category approved for use in this mass group X...

Page 56: ... in the weight class 9 to 18 kg B1 ISO F2X Forward facing child restraint system for smaller children in the weight class 9 to 18 kg C ISO R3 Rear facing child restraint system for children of maximum size in the weight class up to 13 kg D ISO R2 Rear facing child restraint system for smaller children in the weight class up to 13 kg E ISO R1 Rear facing child restraint system for young children in...

Page 57: ...ld restraint systems for ISOFIX may be used ISOFIX mounting brackets are indicated by a label on the backrest Top tether child restraint systems Fasten Top tether child restraint systems to the fastening eyes behind the rear head restraints or at the backside of the front passenger seat backrest The strap must run between the two guide rods of the head restraint When using Top tether for seat moun...

Page 58: ...ents 58 Load compartment 60 Roof rack system 68 Loading information 69 Storage compartments Glovebox The glovebox features a pen holder The glovebox should be closed whilst driving Cupholders Cupholders are located in the centre console ...

Page 59: ... is folded down Sunglasses storage Fold down and open Do not use for storing heavy objects Armrest storage Storage in the front armrest Push button to fold up the armrest Storage in the rear armrest Fold down armrest and open cover Close cover before folding the armrest up ...

Page 60: ...o one or both sides and fold down the backrests onto the seat cushion To fold up raise backrests and guide them into upright position until they engage audibly Ensure seat belts of the outboard seats are placed in the corresponding belt guides The backrests are only engaged when the red marks on both sides near the release lever are not visible Opening the pass through in the rear centre backrest ...

Page 61: ...ding on the version storage boxes are available under the load compartment cover Load compartment cover Do not place any objects on the cover 5 door Saloon Removing Unhook retaining straps from tailgate Pull cover from the side guides Fitting Engage cover in side guides and fold downwards Attach retaining straps to tailgate Station wagon Closing Pull the cover towards the rear using the handle unt...

Page 62: ...ght side and remove from retainers The removed cover can be stored under the load compartment floor 3 65 Installation Insert the left side of the load compartment cover in the recess pull the release lever up and hold insert the right side of the load compartment cover and engage Blind at the tailgate To cover the load compartment complete mount the blind at four fixing points on the inside of the...

Page 63: ...esh pockets hooks service box strap set The components are fitted in rails on both side panels using adapters and hooks Installation of adapters in the rails Fold open the handle plate insert adapter into upper and lower groove of rail and move to required position Turn handle plate upwards to lock the adapter To remove turn handle plate upwards and move out of the rail Net pocket Insert adapters ...

Page 64: ...the rail and then press in the lower groove To remove firstly pull out of the upper groove Service box Install two hooks in the upper rail Insert upper brackets of the box from above into the hooks Alternatively install both hooks in the lower rail Plug in the lower brackets of the box from above into the lower hooks ...

Page 65: ...rs must not be transported behind the safety net Safety net behind the front seats Push head restraints down and fold down rear seat backrests 3 60 Front installation openings in the roof frame latch rod of the net at one side compress rod and latch at the other side Fit the hooks of the small belts into the Top Tether mounting loops on the back side of the folded rear seat backrests Fit the hooks...

Page 66: ... 61 To unlock turn cassette slightly backwards and remove it upwards from the retainers Installation of the cassette Remove load compartment cover Insert the cassette into the retainers on left and right side Note the signs L left side and R right side on the cassette as installation hint Turn cassette slightly forwards to lock Stowage of safety net and load compartment cover Rear safety net casse...

Page 67: ...rtment cover with the upper side downwards and with the release lever in the front right edge into the hollow Warning triangle Saloon Stow the warning triangle in the space behind the strap on the right side of the load compartment Station wagon Stow the warning triangle in the space behind the straps on the inside of the tailgate ...

Page 68: ...agon Stow the first aid kit in the space behind a strap on the inside of the tailgate Roof rack system Roof rack For safety reasons and to avoid damage to the roof the vehicle approved roof rack system is recommended Follow the installation instructions and remove the roof rack when not in use Mounting roof rack Saloon Open all doors ...

Page 69: ...to lashing eyes 3 63 Secure loose objects in load compartment to prevent sliding When transporting objects in the load compartment the backrests of the rear seats must not be angled forward Do not allow the load to protrude above the upper edge of the backrests Do not place any objects on the load compartment cover or the instrument panel and do not cover the sensor on top of the instrument panel ...

Page 70: ...Driving with a roof load increases the sensitivity of the vehicle to cross winds and has a detrimental effect on vehicle handling due to the vehicle s higher centre of gravity Distribute the load evenly and secure it properly with retaining straps Adjust the tyre pressure and vehicle speed according to the load conditions Check and retighten the straps frequently The permissible roof load is 100 k...

Page 71: ...t steering wheel then engage lever and ensure it is fully locked Do not adjust steering wheel unless vehicle is stationary and steering wheel lock has been released Steering wheel controls The Infotainment system the Cruise control and the Traffic Sign Detection system can be operated via the controls on the steering wheel Further information is available in the Infotainment system manual Cruise c...

Page 72: ... single swipe when the windscreen wiper is off press the lever down Do not use if the windscreen is frozen Switch off in car washes Adjustable wiper interval Wiper lever in position P Turn the adjuster wheel to adjust the desired wipe interval short interval turn adjuster wheel upwards long interval turn adjuster wheel downwards ...

Page 73: ...f water on the windscreen and automatically regulates the frequency of the windscreen wiper Adjustable sensitivity of the rain sensor Turn the adjuster wheel to adjust the sensitivity low sensitivity turn adjuster wheel downwards high sensitivity turn adjuster wheel upwards Keep the sensor free from dust dirt and ice Windscreen washer ...

Page 74: ...wer position intermittent operation middle position off Push lever Washer fluid is sprayed on the rear window and the wiper swipes for a few strokes The rear window wiper comes on automatically when the windscreen wiper is switched on and reverse gear is engaged Activation or deactivation of this function can be changed in the menu Settings in the Info Display Vehicle personalisation 3 96 The rear...

Page 75: ...oad surface may already be icy even though the display indicates a few degrees above 0 C Clock Date and time are shown in the Info Display Set date and time Press the CONFIG button The menu Settings is displayed Select Time Date Vehicle personalisation 3 96 Settings for time and date can be adjusted See Infotainment system manual for further information RDS clock synchronization The RDS signal of ...

Page 76: ...ceed the maximum power consumption of 150 watts 9 Danger Power outlet works under high electrical voltage With ignition off the power outlets are deactivated Additionally the power outlets are deactivated in the event of low battery voltage Electrical accessories that are connected must comply with the electromagnetic compatibility requirements laid down in DIN VDE 40 839 Do not connect any curren...

Page 77: ...ray cover Press ashtray cover to open Press in cigarette lighter Switches off automatically once the element is glowing Pull out lighter Ashtrays Caution To be used only for ash and not for combustible rubbish Press ashtray cover to open To empty grip both sides of the ashtray insert and remove ...

Page 78: ...ometer The top line displays the recorded distance since the last reset To reset hold the reset knob depressed for a few seconds with the ignition on Tachometer Displays the engine speed Drive in a low engine speed range for each gear as much as possible Caution If the needle is in the red warning zone the maximum permitted engine speed is exceeded Engine at risk ...

Page 79: ...ature gauge Displays the coolant temperature left area engine operating temperature not yet reached central area normal operating temperature right area temperature too high Caution If engine coolant temperature is too high stop vehicle switch off engine Danger to engine Check coolant level Service display The engine oil life system lets you know when to change the engine oil and filter Based on d...

Page 80: ...Press the SET CLR button to reset while applying the brake pedal When the system has calculated that engine oil life has been diminished Change Engine Oil Soon or a warning code appears in the Driver Information Center Have engine oil and filter changed by a workshop within one week or 500 km 300 miles whichever occurs first Driver Information Center 3 87 Service information 3 187 Control indicato...

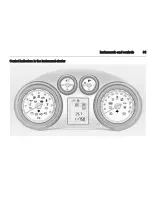
Page 81: ...Instruments and controls 81 Control indicators in the instrument cluster ...

Page 82: ...ter the ignition is switched on until the seat belt is fastened Flashes After starting off until the seat belt is fastened Seat belt reminder on rear seats or X depending on the display flashes or illuminates Illuminates After the ignition is switched on when the seat belt is fastened Flashes After starting off when the seat belt is unfastened Fastening the seat belt 3 47 Airbag and belt tensioner...

Page 83: ...nit may cease to be effective Seek the assistance of a workshop Malfunction indicator light Z illuminates or flashes yellow Illuminates when the ignition is switched on and goes out shortly after the engine starts Illuminates when the engine is running Fault in the emission control system The permitted emission limits may be exceeded Seek the assistance of a workshop immediately Flashes when the e...

Page 84: ...ctrical parking brake is in service mode Stop vehicle apply and release the electrical parking brake to reset 9 Warning Have the cause of the fault remedied immediately by a workshop Antilock brake system ABS u illuminates yellow Illuminates for a few seconds after the ignition is switched on The system is ready for operation when the control indicator goes out If the control indicator does not go...

Page 85: ...workshop Flashes The system is actively engaged Engine output may be reduced and the vehicle may be braked automatically to a small degree Electronic Stability Control off n flashes yellow Flashes when the system is deactivated Traction Control system off k flashes yellow Flashes when the system is deactivated Preheating and diesel particle filter illuminates or flashes yellow Illuminates Preheati...

Page 86: ... engine is off considerably more force is needed to brake and steer Do not remove key until vehicle is stationary otherwise the steering wheel lock could engage unexpectedly Check oil level before seeking assistance of a workshop 3 151 Low fuel i illuminates yellow Illuminates when level in fuel tank is too low Catalytic converter 3 124 Bleeding the diesel fuel system 3 154 Immobiliser d flashes y...

Page 87: ...illuminates green Illuminated when the front fog lights are on 3 105 Rear fog light r illuminates yellow Illuminated when the rear fog light is on 3 105 Cruise control m illuminates white Illuminated when the system is on 3 136 Door open h illuminates red Illuminates when a door or the tailgate is open Information displays Driver Information Center The Driver Information Center DIC is located in t...

Page 88: ... to highlight a menu option or to set a numeric value Press the SET CLR button to select a function or to confirm a message Vehicle personalisation 3 96 Trip computer 3 95 Traffic sign detection 3 92 Graphic Info Display Colour Info Display Depending on the Infotainment system the Graphic Info Display is available in two versions Displays time outside temperature date or Infotainment system when i...

Page 89: ...ultifunction knob of the Infotainment system function buttons and multifunction knob of the multifunction unit in the centre console Selecting with the Infotainment system Select menu items via the menus and the Infotainment system buttons The multifunction knob is used to select an item and confirm To exit a menu press BACK Selecting with the multifunction unit Select menu items via the menus and...

Page 90: ...heel switch ignition off and then on 8 Switch ignition off and then on repeat breath test 9 Turn steering wheel start engine again 10 Brakes overheated 11 Brake pads worn 12 Vehicle overloaded 13 Compressor overheated No Vehicle message 15 Centre high mounted brake light failure 16 Service brake lights 17 Headlight levelling malfunction 18 Left low beam failure 19 Rear fog light failure 20 Right l...

Page 91: ...sensors detected 59 Open and then close driver window 60 Open and then close front passenger window 61 Open and then close rear left window 62 Open and then close rear right window 65 Theft attempted 66 Service theft alarm system 67 Service steering wheel lock 68 Service power steering 69 Service suspension system 70 Service level control system 71 Service rear axle No Vehicle message 73 Service A...

Page 92: ...If a certain speed is exceeded with parking brake applied If a programmed speed is exceeded If a warning message or a warning code appears in the Driver Information Center If the parking assist detects an object When the vehicle is parked and or the driver s door is opened When the key is in the ignition switch With exterior lights on If the trailer hitch is not engaged Traffic sign detection Func...

Page 93: ...self when the vehicle speed is getting slower or if visibility of traffic signs is poor Display indication Traffic signs are displayed on the page Traffic sign detection in the Trip Fuel Information Menu chosen via the adjuster wheel on the turn signal lever 3 87 Speed limits are only shown on this page No overtake signs are displayed as popup on each page of the menu When another function on the ...

Page 94: ...ere are bad environmental conditions like strong rain snow direct sunlight or shadows In this case No Traffic Sign Detection due to Weather is indicated on the display Caution The system is developed as memory function to show designated traffic signs for a defined route section Do not let yourself misled to ignore other traffic signs which are not displayed Do not let this special feature tempt y...

Page 95: ...y different trip distances To reset press the reset knob or press the SET CLR button for a few seconds Range Range is calculated from current fuel tank content and current consumption The display shows average values After refuelling the range is updated automatically after a brief delay When the fuel level in the tank is low a message appears in the Driver Information Center and in the Info Displ...

Page 96: ...vehicle s behaviour can be personalised via changing the settings in the Driver Information Center and in the Info Display Depending on vehicle equipment and country specific regulations some of the functions described below might not be available Settings in the Driver Information Center The menus and functions can be selected by the buttons on the turn signal lever Press the MENU button to selec...

Page 97: ...ngs Navigation settings Vehicle settings Display settings In the corresponding submenus the following settings can be changed Sport mode settings The driver can select the functions which will be activated in Sport mode 3 134 Sport suspension Damping becomes harder Engine Gearbox Accelerator pedal and gear change characteristics become more responsive Sport steering Steering support reduced All wh...

Page 98: ...tion of the power seat Tilt mirror in reverse Activate or deactivate the parking assist function of the exterior mirrors Auto mirror folding Activate or deactivate folding of the exterior mirrors with radio remote control Personalisation by driver Activate or deactivate the personalisation function Rear auto wipe in rear reverse Activate or deactivate automatically switching on of the rear window ...

Page 99: ...eactivate the time delay of the automatic door locking function Remote Lock Unlock Start Flash lights Activate or deactivate the hazard warning flasher feedback whilst unlocking Remote key door unlock Change the configuration to unlock only the driver s door or the whole vehicle whilst unlocking Relock remote door Activate or deactivate the automatic relock function after unlocking without opening...

Page 100: ...enter with Uplevel Display the current status of the automatic light control is displayed When switching on ignition automatic light control is active Control indicator 8 3 86 Tail lights Tail lights are shining together with headlights and sidelights Tail lights on station wagon Additional tail light assemblies existing of tail lights and hazard warning flash lights are located in the tailgate fr...

Page 101: ... and intensity of light are variably triggered depending on the light conditions weather and road type Playstreet lighting Activated automatically at low speed up to approx 30 km h 20 mph The light cone is turned at an angle of 8 to the roadside Town lighting Activated automatically at a speed up to approx 55 km h 34 mph and when street lights are detected by the light sensor The light range is re...

Page 102: ... km h 10 mph forward High Beam Assist This feature allows high beam as main driving light by night and when vehicle speed is faster than 40 km h 25 mph It switches to low beam when the camera in the windscreen detects the lights of oncoming or preceding vehicles in urban areas if the vehicle speed is slower than 20 km h 12 mph or if it is foggy or snowy If there are no restrictions detected the sy...

Page 103: ...ight range adjustment Manual headlight range adjustment To adapt headlight range to the vehicle load to prevent dazzling turn knob to required position 0 front seats occupied 1 all seats occupied 2 all seats occupied and load compartment laden 3 driver s seat occupied and load compartment laden Dynamic automatic headlight levelling 3 101 Headlights when driving abroad The asymmetrical headlight be...

Page 104: ...bove f will not flash when function is deactivated Hazard warning flashers Operated with the button The hazard warning flashers activate automatically if the airbags deploy Turn and lane change signals lever up right turn signal lever down left turn signal If the lever is moved past the resistance point the turn signal is switched on constantly When the steering wheel moves back the turn signal is...

Page 105: ...osition Auto switching on rear fog light will switch headlights on automatically Light switch in position 8 rear fog light can only be switched on with front fog lights The vehicle rear fog light is deactivated when towing Parking lights When the vehicle is parked the parking lights on one side can be activated 1 Switch off ignition 2 Move turn signal lever all the way up right parking lights or d...

Page 106: ...s Interior lighting Instrument panel illumination control Brightness of the following lights can be adjusted when the exterior lights are on Instrument panel illumination Steering wheel controls Info Display Infotainment system operation elements Climate control operation elements Illuminated switches Turn knob k and hold until the desired brightness is obtained Interior lights During entry and ex...

Page 107: ...or lighting comes on when headlights are switched on Entry lighting Welcome lighting Headlights tail lights reversing lights number plate lights instrument panel light interior lights and puddle lights are switched on for a short time by unlocking the vehicle with the radio remote control This function facilitates locating the vehicle when it is dark The lighting switches off immediately when the ...

Page 108: ...3 Open driver s door 4 Pull turn signal lever 5 Close driver s door If the driver s door is not closed the lights switch off after two minutes Exit lighting is switched off immediately if the turn signal lever is pulled while the driver s door is open Activation deactivation and duration of this function can be changed in the menu Settings in the Info Display Vehicle personalisation 3 96 The setti...

Page 109: ...onfirms the activation of the battery discharge protection will be displayed in the Driver Information Center Switching off electric lights To prevent discharge of the battery when the ignition is switched off some interior lights are switched off automatically after some time ...

Page 110: ...troduction Operation The Infotainment system is operated as described in the Infotainment system manual Radio Radio reception Radio reception may be disrupted by static noise distortion or loss of reception due to changes in distance from the transmitter multi path reception due to reflection shadowing ...

Page 111: ... storage device must not be longer than 70 mm Otherwise use an extension cable for connecting For connecting use an adapter lead Phone Mobile phones and CB radio equipment Installation instructions and operating guidelines The vehicle specific installation instructions and the operating guidelines of the mobile phone and handsfree manufacturer must be observed when installing and operating a mobil...

Page 112: ...phone is 2 watts for GSM 900 or 1 watt for the other types For reasons of safety do not use the phone while driving Even use of a handsfree set can be a distraction while driving 9 Warning Operation of radio equipment and mobile telephones which fail to meet above mentioned mobile telephone standards is only permitted using an antenna located outside of the vehicle Caution Mobile telephones and ra...

Page 113: ...bution Fan speed Heated rear window Ü 3 35 Temperature red warm blue cold Heating will not be fully effective until the engine has reached normal operating temperature Air distribution s to windscreen and front door windows M to head area via adjustable air vents K to foot well Intermediate settings are possible Fan speed Adjust the air flow by switching the fan to the desired speed ...

Page 114: ...ation system 4 Operated with the 4 button 9 Warning The exchange of fresh air is reduced in air recirculation mode In operation without cooling the air humidity increases so the windows may mist up The quality of the passenger compartment air deteriorates which may cause the vehicle occupants to feel drowsy Air distribution to s Air recirculation is deactivated Maximum cooling Briefly open the win...

Page 115: ...dual zone temperature setting The dual zone climate control allows different climatisation temperatures for driver and front passenger side Single zone controls Temperature Air distribution Fan speed AUTO automatic mode 4 air recirculation V demisting and defrosting Dual zone controls Temperature on driver side Air distribution Fan speed Temperature on front passenger side AUTO automatic mode 4 ai...

Page 116: ...al zone climate control Each change of settings is shown in the Info Display for a few seconds Climate control system settings are saved in the key used to lock the vehicle The electronic climate control system is only fully operational when the engine is running For correct operation do not cover the sensor on the instrument panel Automatic mode AUTO Basic setting for maximum comfort Press AUTO b...

Page 117: ...mperature is set the climate control system runs at maximum cooling If the maximum temperature is set the climate control system runs at maximum heating Dual zone climate control for a common temperature setting use the menu Settings Demisting and defrosting the windows V Press button V Press cooling button n Temperature and air distribution are set automatically and the fan runs at high speed Swi...

Page 118: ...essing the right button longer the fan runs with maximum speed To return to automatic mode Press AUTO button Air distribution Press s M or K for desired adjustment Activation is indicated by the LED in the button s to windscreen and front door windows M to head area via adjustable air vents K to foot well Combinations are possible Return to automatic air distribution Deactivate corresponding setti...

Page 119: ...so the windows may mist up The quality of the passenger compartment air deteriorates which may cause the vehicle occupants to feel drowsy Basic settings Some settings can be changed in the menu Settings in the Info Display Vehicle personalisation 3 96 Auxiliary heater Air heater Quickheat is an electric auxiliary air heater which warms up the passenger compartment more quickly Air vents Adjustable...

Page 120: ... and spores from the air entering the vehicle through the air intake Air conditioning regular operation In order to ensure continuously efficient performance cooling must be operated for a few minutes once a month irrespective of the weather and time of year Operation with cooling is not possible when outside temperature is too low Service For optimal cooling performance it is recommended to annua...

Page 121: ...nction in this situation e g brake servo unit power steering Driving in this manner is a danger to yourself and others Pedals To ensure the pedal travel is uninhibited there must be no mats in the area of the pedals Starting and operating New vehicle running in Do not brake unnecessarily hard for the first few journeys During the first drive smoke may occur because of wax and oil evaporating off t...

Page 122: ... running see Automatic Starter Control Before restarting or to switch off the engine turn key back to 0 Automatic Starter Control This function controls the engine start procedure The driver does not have to hold the key in position 3 Once applied the system will go on starting automatically until the engine is running Because of the checking procedure engine starts running after a short delay Rea...

Page 123: ...erse gear or set the selector lever to P before switching off the ignition Turn the front wheels towards the kerb Lock the vehicle and activate the anti theft alarm system Engine exhaust 9 Danger Engine exhaust gases contain poisonous carbon monoxide which is colourless and odourless and could be fatal if inhaled If exhaust gases enter the interior of the vehicle open the windows Have the cause of...

Page 124: ...ing engine speed above 2000 revolutions per minute Shift down if necessary Diesel particle filter cleaning is then started Stopping the journey or switching off the engine during cleaning is not recommended Caution If the cleaning process is interrupted more than once there is a great risk of provoking severe engine damage Cleaning takes place quickest at high engine speeds and loads The control i...

Page 125: ...y a workshop as soon as possible In an emergency driving can be continued for a short period keeping vehicle speed and engine speed low Automatic transmission The automatic transmission permits manual gearshifting manual mode or automatic gearshifting automatic mode Transmission display The mode or selected gear is shown in the transmission display Selector lever P park position wheels are locked ...

Page 126: ...engine braking effect select a lower gear in good time when driving downhill Rocking the vehicle Rocking the vehicle is only permissible if the vehicle is stuck in sand mud or snow Move the selector lever between D and R in a repeat pattern Do not race the engine and avoid sudden acceleration Parking Apply the parking brake and engage P The ignition key can only be removed when the selector lever ...

Page 127: ...ifts to a lower gear depending on engine speed Fault In the event of a fault g illuminates Additionally a code number or a vehicle message is displayed in the Driver Information Center Vehicle messages 3 90 The transmission no longer shifts automatically Continued travel is possible with manual shifting Only the highest gear is available Depending on the fault 2nd gear may also be available in man...

Page 128: ...r N If P or N is engaged again the selector lever will be locked in position again Have the cause of the power supply interruption remedied by a workshop 4 Mount selector lever trim on centre console and refit Remove ignition key from ignition switch Take the special tool from the inside of the glove box cover Insert the special tool into the opening below the ignition lock as far as it will go an...

Page 129: ... vehicle stationary pull up the button on the selector lever and engage the gear If the gear does not engage set the lever in neutral release the clutch pedal and depress again then repeat gear selection Do not grind the clutch unnecessarily When operating depress the clutch pedal completely Do not use the pedal as a foot rest Caution It is inadvisable to drive with hand resting on the selector le...

Page 130: ...ly when the brake pedal is depressed firmly Considerably more force is needed for this The braking distance is extended Seek the assistance of a workshop before continuing your journey When the engine is not running the support of the brake servo unit disappears once the brake pedal has been depressed once or twice Braking effect is not reduced but braking requires significantly greater force It i...

Page 131: ...l or uphill slope To release the parking brake pull the lever up slightly press the release button and fully lower the lever To reduce the operating forces of the parking brake depress the foot brake at the same time Control indicator R 3 83 Electrical parking brake Applying when vehicle is stationary Pull switch m the electrical parking brake operates automatically with an adequate force For maxi...

Page 132: ...or j and by a code number or a vehicle message which is displayed in the Driver Information Center Vehicle messages 3 90 Apply electrical parking brake pull and hold the switch m for more than 5 seconds If control indicator m illuminates electrical parking brake is applied Release electrical parking brake push and hold the switch m for more than 2 seconds If control indicator m goes out electrical...

Page 133: ...tion TC can be switched off when spinning of drive wheels is required press button b shortly Control indicator k illuminates TC is reactivated by pressing the b button again TC is also reactivated the next time the ignition is switched on Electronic Stability Control Electronic Stability Control ESC improves driving stability when necessary regardless of the type of road surface or tyre grip It al...

Page 134: ... illuminates TOUR mode press button TOUR LED illuminates Normal mode both buttons SPORT and TOUR are not pressed no LED illuminates Deactivate SPORT mode and TOUR mode by pressing corresponding button once more In each driving mode Flex Ride networks the following electronic systems Continuous Damping Control Accelerator Pedal Control Steering Control All wheel drive Automatic transmission SPORT m...

Page 135: ...te of the vehicle If necessary the control unit of DMC automatically changes the settings within the selected driving mode or when recognising greater variations the driving mode is changed for the length of variation If for example Normal mode is selected and DMC detects a sporty driving behaviour DMC changes several settings of the Normal mode into sporty settings The DMC changes to Sport mode i...

Page 136: ...increased by depressing the accelerator pedal When the accelerator pedal is released the previously stored speed is resumed The speed cannot be accelerated by turning the thumb wheel to SET while first gear is selected Increase speed With cruise control active hold thumb wheel turned to RES or briefly turn to RES repeatedly speed increases continuously or in small increments Alternatively accelera...

Page 137: ...and giving acoustic signals It is the driver however who bears full responsibility for the parking manoeuvre The system consists of four ultrasonic parking sensors in each of the front and rear bumpers Control indicator r 3 85 Activation When reverse gear is engaged the system is activated automatically The front parking assist can also be activated at a low speed by pressing the r button An illum...

Page 138: ... r illuminates or a message is displayed in the Driver Information Center Vehicle messages 3 90 Advanced parking aid The advanced parking aid system manoeuvres the driver into a parking slot by giving instructions on the Driver Information Center and acoustic signals It is the driver however who bears full responsibility for accepting the parking slot suggested by the system and the parking manoeu...

Page 139: ...opped by the driver within 10 metres 11 yards after the message is given The system calculates the optimal route into the parking slot Then it manoeuvres the driver into the slot by giving detailed instructions The instructions show a hint when driving faster than 30 km h 18 mph the demand to stop the vehicle when a parking slot is detected the direction of driving during the parking manoeuvre the...

Page 140: ... parking aid messages appear again and parking can be continued Deactivation The system is deactivated by pushing the button parking manoeuver successfully ended driving faster than 30 km h 18 mph switching off the ignition Deactivation by the driver or by the system during manoeuvring will be indicated by Parking Deactivated in the Driver Information Center Fault A message appears in the Driver I...

Page 141: ...d when the connector is plugged in Sensor could detect a nonexisting object echo disturbance caused by external acoustical or mechanic disturbances Advanced parking aid system may not respond to changes in the parking space after initiating a parallel parking manoeuver Lane departure warning The lane departure warning system observes the lane markings in which the vehicle is driving via a front ca...

Page 142: ...on is indicated by a message in the Driver Information Center It is also not ready to operate at speeds below 60 km h 37 mph Fault The lane departure warning system may not operate correct when the windshield is not clean there are bad environmental conditions like strong rain snow direct sunlight or shadows no lane marking can be detected If lane departure warning system detects one of this condi...

Page 143: ...ontent max 50 ppm Equivalent standardised fuels with a biodiesel FAME according to EN14214 content of max 7 by volume like DIN 51628 or equivalent standards may be used Do not use marine diesel oils heating oils or entirely or partially plant based diesel fuels such as rape seed oil or bio diesel Aquazole and similar diesel water emulsions Diesel fuels must not be diluted with fuels for petrol eng...

Page 144: ...ecial fuel filler caps Fuel consumption CO2 Emissions The determination of fuel consumption is regulated by European directive 715 2007 692 2008 A The directive is oriented to actual driving practices Urban driving is rated at approx 1 3 and extra urban driving with approx 2 3 Cold starts and acceleration phases are also taken into consideration The specification of CO2 emission is also a constitu...

Page 145: ...pling ball However do not do so if a stabiliser which acts on the coupling ball is being used to reduce snaking movements For trailers with low driving stability and trailers with a permitted gross vehicle weight of more than 1400 kg the use of a stabiliser is strongly recommended when driving above 80 km h 50 mph If the trailer starts snaking drive more slowly do not attempt to correct the steeri...

Page 146: ...ight distribution when loading the trailer The maximum permissible vertical coupling load 85 kg is specified on the towing equipment identification plate and in the vehicle documents Always aim for the maximum load especially in the case of heavy trailers The vertical coupling load should never fall below 25 kg Rear axle load When the trailer is coupled and the towing vehicle fully loaded the perm...

Page 147: ...handle is pulled out and the ball neck is disengaged Take the released coupling ball bar and raise it up until it engages Be sure to have the coupling ball bar correctly engaged and the released handle guided back to its hidden initial position otherwise the buzzing tone will not stop Stow hide coupling ball bar Pull the grip under the rear bumper fascia at an angle of approx 45 to the ground ...

Page 148: ...mitted only when the coupling ball bar is fitted correctly If the coupling ball bar does not engage correctly or if the release handle is impossible to guide to its hidden initial position in the housing or if the buzzing tone sounds after engaging the coupling ball bar seek the assistance of a workshop Eye for break away stopping cable Attach break away stopping cable to eye Trailer stability ass...

Page 149: ... several months Wash and wax the vehicle Have the wax in the engine compartment and underbody checked Clean and preserve rubber seals Change engine oil Drain washer fluid reservoir Check coolant antifreeze and corrosion protection Adjust tyre pressure to the value specified for full load Park vehicle in dry well ventilated place Engage first or reverse gear or set selector lever to P Prevent the v...

Page 150: ...es is available on our website Only entrust this work to an authorised recycling centre Vehicle checks Performing work 9 Warning Only perform engine compartment checks when the ignition is off The cooling fan may start operating even if the ignition is off 9 Danger The ignition system and Xenon headlights use extremely high voltage Do not touch Bonnet Opening Pull the release lever and return it t...

Page 151: ...sable to check the engine oil level manually before embarking on a long journey Check with the vehicle on a level surface The engine must be at operating temperature and switched off for at least 5 minutes Pull out the dipstick wipe it clean insert it to the stop on the handle pull out and read the engine oil level Insert dipstick to the stop on the handle and make half a turn Different dipsticks ...

Page 152: ...e coolant The coolant provides freeze protection down to approx 28 C Caution Only use approved antifreeze Coolant level Caution Too low a coolant level can cause engine damage If the cooling system is cold the coolant level should be above the filling line mark Top up if the level is low On another version the filling line mark is inside the filler opening To check open the cap 9 Warning Allow the...

Page 153: ...on Center Vehicle messages 3 90 Continued driving is possible but have the brake lining replaced as soon as possible Once new brake linings are installed do not brake unnecessarily hard for the first few journeys Brake fluid 9 Warning Brake fluid is poisonous and corrosive Avoid contact with eyes skin fabrics and painted surfaces The brake fluid level must be between the MIN and the MAX marks When...

Page 154: ...st be deactivated as follows Switch the ignition on then off disconnect the vehicle s battery within 15 seconds Battery discharge protection 3 108 Diesel fuel system bleeding If the tank has been run dry the diesel fuel system must be bled Switch on the ignition three times for 15 seconds at a time Then start the engine for a maximum of 40 seconds Repeat this process after no less than 5 seconds I...

Page 155: ...witch off the relevant switch or close the doors Only hold a new bulb at the base Do not touch the bulb glass with bare hands Use only the same bulb type for replacement Replace headlight bulbs from within the engine compartment Halogen headlights Headlights have separate systems for high beam 1 inner bulbs and low beam 2 outer bulbs Low beam 1 Rotate cap 1 anti clockwise and remove ...

Page 156: ...e 5 Rotate bulb carrier clockwise as far as it will go 6 Fit cap and rotate clockwise High beam 1 Rotate cap 2 anti clockwise and remove 2 Detach wiring connector from bulb 3 Disengage spring clip from retainer by pressing forward and then swing downwards 4 Withdraw bulb from reflector housing 5 When installing the new bulb insert lugs in the reflector recesses and engage the spring clip 6 Install...

Page 157: ...ckwise and remove 2 Press latches and withdraw sidelight bulb holder from reflector 3 Remove bulb from socket and renew bulb 4 Insert holder in reflector Fit cap and rotate clockwise Front turn signal 1 Rotate bulb holder anti clockwise and disengage ...

Page 158: ...eflector rotate clockwise to engage Xenon headlights 9 Danger Xenon headlights work under extremely high electrical voltage Do not touch Have bulbs replaced by a workshop Fog lights Have bulbs replaced by a workshop Tail lights Saloon 1 Release cover and remove 2 Unscrew two plastic securing nuts from the inside by hand ...

Page 159: ...ckwise remove and renew bulb Tail light brake light 1 Turn signal light 2 Tail light 3 Reverse light Rear fog light may be only on one side 4 6 Insert bulb holder into the tail light assembly and screw into place Connect wiring plug Install tail light assembly in body and tighten securing nuts Close cover and engage 7 Switch on ignition operate and check all lights Station Wagon 1 Release and open...

Page 160: ...n Detach wiring plug from bulb holder 4 To change only the tail light 1 rotate plastic nut anticlockwise and remove it from the bulb holder Push bulb into socket slightly rotate anti clockwise remove and renew bulb Insert plastic nut into bulb holder and rotate clockwise 5 To change the other lights unscrew the screws and remove bulb holder ...

Page 161: ... on ignition operate and check all lights Additional tail lights in the tailgate frame 1 Open tailgate 2 Release cover in side trim panel and remove 3 Press out lamp housing from the inside of the side trim panel 4 Rotate plastic nut anticlockwise and remove from the bulb holder 5 Push bulb into socket slightly rotate anti clockwise remove and renew bulb Insert plastic nut into bulb holder by rota...

Page 162: ... on the cable 3 Lift flap and disconnect wiring plug from bulb holder 4 Rotate bulb holder anti clockwise to disengage 5 Remove bulb from holder and renew bulb 6 Insert bulb holder in bulb housing and rotate clockwise 7 Connect wiring plug to bulb holder 8 Insert and engage bulb housing Interior lights Courtesy light reading lights Have bulbs replaced by a workshop ...

Page 163: ...are three fuse boxes in the vehicle in the front left of the engine compartment in the interior behind the storage compartment or in right hand drive vehicles behind the glovebox behind a cover on the left side of the load compartment Before replacing a fuse turn off the respective switch and the ignition A blown fuse can be recognized by its melted wire Do not replace the fuse until the cause of ...

Page 164: ...164 Vehicle care Fuse extractor A fuse extractor may be located in the fuse box in the engine compartment Place the fuse extractor on the various types of fuse from the top or side and withdraw fuse ...

Page 165: ...s and remove No Circuit 1 Transmission control module 2 Engine control module 3 4 5 Ignition Transmission control module Engine control module 6 Windscreen wiper 7 8 Fuel injection ignition system 9 Fuel injection ignition system 10 Engine control module 11 Lambda probe 12 Starter 13 Sensor throttle heating 14 Lighting 15 Rear window wiper ...

Page 166: ...ontrol module 33 Heated front seats 34 Sunroof 35 Infotainment system 36 37 Right high beam 38 Left high beam 39 40 After boil pump 41 Vacuum pump 42 Radiator fan 43 44 Headlamp washer system 45 Radiator fan 46 Terminal 87 main relay 47 Lambda probe 48 Fog lights No Circuit 49 Right low beam 50 Left low beam 51 Horn 52 Ignition 53 Ignition ventilated front seats 54 Ignition 55 Power windows mirror...

Page 167: ...x cover and let it engage by pressing If the fuse box cover is not closed correctly malfunction may occure Instrument panel fuse box The fuse box is behind the storage compartment in the instrument panel Open compartment compress the locking tabs fold compartment down and remove In right hand drive vehicles the fuse box is located behind a cover in the glovebox Open the glovebox and remove the cov...

Page 168: ...l unit 11 Interior fan 12 Power seats 13 Power seats 14 Diagnostic connector 15 Airbag No Circuit 16 Central locking system tailgate 17 Air conditioning system 18 Transportation fuse 19 Memory 20 Automatic occupant sensing system 21 Instrument 22 Ignition 23 Body control unit 24 Body control unit 25 Ignition switch 26 Power outlet load compartment Load compartment fuse box The fuse box is on the l...

Page 169: ...ntrol system 14 15 16 No Circuit 17 Seat heating 18 Power tailgate lock 19 Sunshade switch 20 Cooling fan driver seat 21 Ignition 22 Sunshade 23 Anti theft alarm system 24 Sidelight left 25 Sidelight right 26 Lighting Cornering light 27 Lighting Cornering light 28 29 Transportation fuse 30 Transportation fuse 31 Active damping system High beam assist Cruise control Traffic sign detection Lane depa...

Page 170: ...w the spare wheel Spare wheel 3 179 Wheels and tyres Tyre condition wheel condition Drive over edges slowly and at right angles if possible Driving over sharp edges can cause tyre and wheel damage Do not trap tyres on the kerb when parking Regularly check the wheels for damage Seek the assistance of a workshop in the event of damage or unusual wear Tyres Tyres of size 205 60 R 16 215 55 R 17 225 5...

Page 171: ...o applies to vehicles with tyre pressure monitoring system Unscrew the valve cap On vehicles with tyre pressure monitoring system and metal tyre valve shafts screw the adapter onto the valve The adapter is located in the glovebox Tyre pressure 3 215 and on the label on the front left door frame The tyre pressure data refers to cold tyres It applies to summer and winter tyres Always inflate the spa...

Page 172: ... warning code in the Driver Information Center Furthermore considerable pressure differences between the tyres on one axle or a considerably increased tyre pressure are displayed by a warning message or by a warning code in the Driver Information Center Major pressure differences are indicated additionally by the control indicator w Control indicator w 3 85 Vehicle messages 3 90 If the tyre pressu...

Page 173: ...n swap in the Driver Information Center If problems occur during the relearn process a warning message or a warning code is displayed in the Driver Information Center Temperature compensation Cold tyres decrease the tyre pressure warm tyres increase the tyre pressure The tyre pressure monitoring system considers this effect for the warning messages The tyre pressure value displayed in the Driver I...

Page 174: ... used are not factory approved the tyres must not have a rim protection ridge Wheel covers must not impair brake cooling 9 Warning Use of unsuitable tyres or wheel covers could lead to sudden pressure loss and thereby accidents Wheel caps Tyres of size 245 35 R20 have a specific wheel cap To remove the cap from the dismantled wheel first disengage the arms one by one Then press the cap in the midd...

Page 175: ...aired with the tyre repair kit 9 Warning Do not drive faster than 80 km h 50 mph Do not use for a lengthy period Steering and handling may be affected If you have a flat tyre Apply the parking brake and engage first gear reverse gear or P The tyre repair kit is in a compartment under the floor cover in the load compartment 1 Take the tyre repair kit from the compartment 2 Remove the compressor 3 R...

Page 176: ...the rocker switch on the compressor to I The tyre is filled with sealant 11 The compressor pressure gauge briefly indicates up to 6 bar whilst the sealant bottle is emptying approx 30 seconds Then the pressure starts to drop 12 All of the sealant is pumped into the tyre Then the tyre is inflated 13 The prescribed tyre pressure should be obtained within 10 minutes Tyre pressure 3 215 When the corre...

Page 177: ...ct value Repeat the procedure until there is no more loss of pressure If the tyre pressure has fallen below 1 3 bar the vehicle must not be used Seek the assistance of a workshop 18 Stow away tyre repair kit in load compartment Note The driving characteristics of the repaired tyre is severely affected therefore have this tyre replaced If unusual noise is heard or the compressor becomes hot turn co...

Page 178: ...ing is soft a solid board max 1 cm 0 4 inches thick should be placed under the jack No people or animals may be in the vehicle when it is jacked up Never crawl under a jacked up vehicle Do not start the vehicle when it is raised on the jack Clean wheel nuts and thread before mounting the wheel 1 Disengage wheel nut caps with a screwdriver and remove Pull off the wheel cover with the hook Vehicle t...

Page 179: ...t locates securely and tighten each nut in a crosswise sequence Tightening torque is 150 Nm 10 Align the valve hole in the wheel cover with the tyre valve before installing Install wheel nut caps 11 Stow the replaced wheel 3 175 and the vehicle tools 3 170 12 Check the tyre pressure of the installed tyre and also the wheel nut torque as soon as possible Have the defective tyre renewed or repaired ...

Page 180: ...irectional tyres Fit directional tyres such that they roll in the direction of travel The rolling direction is indicated by a symbol e g an arrow on the sidewall The following applies to tyres fitted opposing the rolling direction Driveability may be affected Have the defective tyre renewed or repaired as soon as possible Do not drive faster than 80 km h 50 mph Drive particularly carefully on wet ...

Page 181: ...other during the jump starting process Apply the parking brake transmission in neutral automatic transmission in P Lead connection order 1 Connect the red lead to the positive terminal of the booster battery 2 Connect the other end of the red lead to the positive terminal of the discharged battery 3 Connect the black lead to the negative terminal of the booster battery 4 Connect the other end of t...

Page 182: ...move downwards The towing eye is stowed with the vehicle tools 3 170 Screw in the towing eye as far as it will go until it stops in a horizontal position Attach a tow rope or better still a tow rod to the towing eye The towing eye must only be used for towing and not for recovering the vehicle Switch on ignition to release steering wheel lock and to permit operation of brake lights horn and windsc...

Page 183: ...ission and Front wheel drive The vehicle must be towed facing forwards not faster than 80 km h 50 mph nor further than 100 km 60 miles In all other cases and when the transmission is defective the front axle must be raised off the ground Vehicles with automatic transmission and All wheel drive The vehicle must be towed facing forwards If the vehicle is towed with all four wheels on the ground the ...

Page 184: ...rn slightly clockwise and close cap Appearance care Exterior care Locks The locks are lubricated at the factory using a high quality lock cylinder grease Use de icing agent only when absolutely necessary as this has a degreasing effect and impairs lock function After using de icing agent have the locks regreased by a workshop Washing The paintwork of your vehicle is exposed to environmental influe...

Page 185: ...g Wax the vehicle regularly at the latest when water no longer beads Otherwise the paintwork will dry out Polishing is necessary only if the paint has become dull or if solid deposits have become attached to it Paintwork polish with silicone forms a protective film making waxing unnecessary Plastic body parts must not be treated with wax or polishing agents Windows and windscreen wiper blades Use ...

Page 186: ...n the coupling ball bar with a steam jet or high pressure jet cleaner Interior care Interior and upholstery Only clean the vehicle interior including the instrument panel fascia and panelling with a dry cloth or interior cleaner The instrument panel should only be cleaned using a soft damp cloth Clean fabric upholstery with a vacuum cleaner and brush Remove stains with an upholstery cleaner Clean ...

Page 187: ... system however every 15 000 km 10 000 miles or 1 year at the latest whichever occurs first Service display 3 79 Confirmations Confirmation of service is recorded in the Service and Warranty Booklet The date and mileage is completed with the stamp and signature of the servicing workshop Make sure that the Service and Warranty Booklet is completed correctly as continuous proof of service is essenti...

Page 188: ...nd United Kingdom For all other countries the international schedule is valid Service operations by year1 km x 1000 1 miles x 1000 1 1 30 20 2 60 40 3 90 60 4 120 80 5 150 100 Check visually control unit lighting unit and signalling equipment as well as airbag check steering wheel lock and ignition switch X X X X X Replace batteries for radio remote control Do not forget the second key Every 2 yea...

Page 189: ...greement with customer Replace air cleaner insert Every 4 years 60 000 km 40 000 miles Replace spark plugs Every 4 years 60 000 km 40 000 miles A 20 NHT A 28 NET Every 8 years 120 000 km 80 000 miles Visually inspect ribbed V belt X X Replace ribbed V belt A 16 XER A 18 XER A 16 LET A 20 NHT A 28 NET A 20 DTC A 20 DTJ A 20 DTH A 20 DTR Every 10 years 150 000 km 100 000 miles Replace ribbed V belt ...

Page 190: ...ct oil level2 X X X X X Check hydraulic power steering HPS oil level cap with dipstick X X X X X Change engine oil and engine oil filter X X X X X o Drain water from fuel filter diesel with high humidity and or lower grade fuel X X X X X Replace and drain fuel filter diesel grade EN 590 X X Visually inspect wheel mounting and suspension springs front and rear brake lines brake pressure hoses fuel ...

Page 191: ...ery 2 years Undo wheel fastening take care if tyre pressure monitoring system is present and tighten to torque 150 Nm The wheel nut taper is not allowed to be greased or oiled during assembly Check tyre condition Check correct tyre pressure including spare wheel With tyre repair kit check completeness and expiry date of kit X X Annual service if annual mileage exceeds 20 000 miles Visually inspect...

Page 192: ...rive final inspection check steering wheel lock and ignition switch instruments and indicator lights entire brake system steering air conditioning engine body and running gear reset service interval display X X X X X For Germany only emission test and genaral inspection note in Service and Warranty Booklet For the first time after 3 years then every 2 years Additional operations o Under extreme op...

Page 193: ...the second key Every 2 years Check windscreen wiper windscreen washer system and headlight washer system X X X X X Check coolant level antifreeze pale orange 4 correct X X X X X Check brake fluid level4 correct X X X Check battery terminals are firmly located check battery eye X X X X X Replace pollen filter or activated carbon filter X X o If air is badly polluted has a high dust or sand content ...

Page 194: ... A 18 XER A 16 LET A 20 NHT A 28 NET A 20 DTC A 20 DTJ A 20 DTH A 20 DTR Every 10 years 150 000 km 100 000 miles Replace ribbed V belt of water pump power steering pump A 16 XER A 18 XER A 16 LET Every 10 years 120 000 km 80 000 miles Check valve clearance adjust A 16 XER A 18 XER Every 10 years 150 000 km 100 000 miles Replace toothed belt and tension roller A 16 XER A 18 XER A 16 LET A 20 DTC A ...

Page 195: ...iesel grade EN 590 X X Visually inspect wheel mounting and suspension springs front and rear brake lines brake pressure hoses fuel lines and exhaust system X X Check exterior of body underbody corrosion protection and note any damage in the Service and Warranty Booklet X X X X X o Visually inspect front and rear wheel brakes4 X X X X X Engine transmission AT MT inspect air conditioning compressor ...

Page 196: ...if annual mileage exceeds 20 000 miles Visually inspect first aid kit presence in designated stowage compartment completeness and expiry date lashing eyes and warning triangle Every 2 years Check correct headlight adjustment including auxiliary headlamps X X Grease door hinges door stop lock cylinder striker plate bonnet lock tailgate hinges X X Test drive final inspection check steering wheel loc...

Page 197: ...luctuations Police vehicles taxis and driving school vehicles are also classified as operating under extreme conditions Under extreme operating conditions it may be necessary to have certain scheduled service work done more frequently than the scheduled intervals Seek technical advice on the servicing requirements dependent on the specific operating conditions Recommended fluids lubricants and par...

Page 198: ...nditions Engine oil additives The use of engine oil additives could cause damage and invalidate the warranty Engine oil viscosity Use only engine oil viscosities SAE 0W 30 0W 40 5W 30 or 5W 40 The SAE viscosity rating defines the ability of an oil to flow When cold oil is more viscous than when hot Multigrade oil is indicated by two figures The first figure followed by a W indicates low temperatur...

Page 199: ... identification 199 Vehicle data 201 Vehicle identification Vehicle Identification Number The Vehicle Identification Number is visible through the windscreen Identification plate The identification plate is located on the front left door frame ...

Page 200: ... specific data The combined total of front and rear axle loads must not exceed the permissible gross vehicle weight For example if the front axle is bearing its maximum permissible load the rear axle can only bear a load that is equal to the gross vehicle weight minus the front axle load The technical data is determined in accordance with European Community standards We reserve the right to make m...

Page 201: ...wer kW 85 132 103 162 191 at rpm 6000 5500 6300 5300 5500 Torque Nm 155 230 175 350 350 at rpm 4000 2200 5500 3800 2000 4000 1900 4500 Fuel type Petrol Petrol Petrol Petrol Petrol Octane rating RON recommended 95 95 95 95 95 possible 98 98 98 98 98 possible 91 911 91 91 911 Oil consumption l 1000 km 0 6 0 6 0 6 0 6 0 6 1 Possible only if high engine load full load or driving in mountainous terrain...

Page 202: ...DTC A20DTJ A20DTH A20DTR Number of cylinders 4 4 4 4 Piston displacement cm3 1956 1956 1956 1956 Engine power kW 81 96 118 140 at rpm 4000 4000 4000 4500 Torque Nm 260 300 350 400 at rpm 1750 2500 1750 2500 1750 2500 2000 Fuel type Diesel Diesel Diesel Diesel Oil consumption l 1000 km 0 6 0 6 0 6 0 6 ...

Page 203: ...transmission 240 149 237 147 250 155 Engine A20DTC A20DTJ A20DTH A20DTR Maximum speed2 km h mph Manual transmission 190 118 205 127 218 135 3 Automatic transmission 204 127 215 134 3 2 The maximum speed indicated is achievable at kerb weight without driver plus 200 kg payload Optional equipment could reduce the specified maximum speed of the vehicle 3 Value was not available at time of printing ...

Page 204: ...c transmission 234 145 231 144 248 154 Engine A20DTC A20DTJ A20DTH A20DTR Maximum speed2 km h mph Manual transmission 185 115 200 124 212 132 3 Automatic transmission 198 123 210 130 3 2 The maximum speed indicated is achievable at kerb weight without driver plus 200 kg payload Optional equipment could reduce the specified maximum speed of the vehicle 3 Value was not available at time of printing ...

Page 205: ... 0 13 0 14 3 16 9 17 9 extra urban l 100 km 5 9 4 6 0 6 7 7 0 7 0 7 2 7 4 7 9 total l 100 km 7 6 4 7 8 8 9 9 6 9 2 9 8 10 9 11 6 CO2 g km 179 4 184 209 225 215 229 256 272 Engine A20DTC A20DTJ A20DTH A20DTR urban l 100 km 7 6 7 6 9 3 7 6 9 3 4 extra urban l 100 km 4 8 4 8 5 3 4 8 5 3 4 total l 100 km 5 8 5 8 6 8 5 8 6 8 4 CO2 g km 154 154 179 154 179 4 4 Value was not available at time of printing...

Page 206: ... A20NHT All wheel drive A28NET urban l 100 km 4 4 4 4 4 4 extra urban l 100 km 4 4 4 4 4 4 total l 100 km 4 4 4 4 4 4 CO2 g km 4 4 4 4 4 4 Engine A20DTC A20DTJ A20DTH A20DTR urban l 100 km 4 4 4 4 extra urban l 100 km 4 4 4 4 total l 100 km 4 4 4 4 CO2 g km 4 4 4 4 4 Value was not available at time of printing ...

Page 207: ...oon 4 door Engine Manual transmission Automatic transmission without with air conditioning kg A16XER A18XER 1503 A16LET 1570 A20DTC 1613 A20DTH 1613 1613 A20DTJ 1613 1613 A20DTR 1665 1690 A20DTR All wheel drive 1780 1805 A20NHT 1613 1655 A20NHT All wheel drive 1733 1770 A28NET All wheel drive 1810 1835 ...

Page 208: ...or Engine Manual transmission Automatic transmission without with air conditioning kg A16XER A18XER 1503 A16LET 1585 A20DTC 1613 A20DTH 1613 1655 A20DTJ 1613 1655 A20DTR 1680 1705 A20DTR All wheel drive 1795 1820 A20NHT 1645 1670 A20NHT All wheel drive 1733 1785 A28NET All wheel drive 1825 1843 ...

Page 209: ...gine Manual transmission Automatic transmission without with air conditioning kg A16XER 1610 A16LET 1660 A18XER 1613 A20DTC 1730 A20DTH 1733 1733 1743 A20DTJ 1730 1733 A20DTR 1733 1775 A20DTR All wheel drive 1843 1900 A20NHT 1725 1733 A20NHT All wheel drive 1843 1843 A28NET All wheel drive 1940 1953 ...

Page 210: ...ngine Manual transmission Automatic transmission without with air conditioning kg A16XER 1672 A16LET 1729 A18XER 1692 A20DTC 1778 A20DTH 1806 1829 A20DTJ 1793 1819 A20DTR 1822 1846 A20DTR All wheel drive 1938 1962 A20NHT 1789 1813 A20NHT All wheel drive 1905 1929 A28NET All wheel drive 1968 1992 ...

Page 211: ...ngine Manual transmission Automatic transmission without with air conditioning kg A16XER 1687 A16LET 1744 A18XER 1707 A20DTC 1793 A20DTH 1821 1844 A20DTJ 1808 1834 A20DTR 1837 1861 A20DTR All wheel drive 1953 1977 A20NHT 1804 1828 A20NHT All wheel drive 1920 1944 A28NET All wheel drive 1983 2007 ...

Page 212: ...ngine Manual transmission Automatic transmission without with air conditioning kg A16XER 1784 A16LET 1837 A18XER 1799 A20DTC 1899 A20DTH 1918 1942 A20DTJ 1908 1941 A20DTR 1932 1956 A20DTR All wheel drive 2053 2077 A20NHT 1899 1923 A20NHT All wheel drive 2021 2045 A28NET All wheel drive 2074 2098 ...

Page 213: ...idth with two exterior mirrors mm 2084 2084 2084 Height without antenna mm 1498 1498 1520 Length of load compartment floor mm 1003 1003 1086 Length of load compartment with folded rear seats mm 1895 1895 1908 Load compartment width mm 1027 1027 1030 Load compartment height mm 356 436 677 Wheelbase mm 2737 2737 2737 Turning circle diameter m 11 4 11 4 11 4 ...

Page 214: ...LET A18XER A20NHT A28NET including Filter l 4 5 4 5 4 5 6 0 6 3 between MIN and MAX l 1 0 1 0 1 0 1 0 1 0 Engine A20DTC A20DTJ A20DTH A20DTR including Filter l 4 5 4 5 4 5 4 5 between MIN and MAX l 1 0 1 0 1 0 1 0 Fuel tank Petrol diesel nominal capacity l 70 ...

Page 215: ...ll load Engine Tyres front rear front rear front rear kPa bar psi kPa bar psi kPa bar psi kPa bar psi kPa bar psi kPa bar psi A16XER 205 60 R165 220 2 2 32 200 2 0 29 270 2 7 39 260 2 6 38 220 2 2 32 270 2 7 39 215 60 R16 215 55 R175 225 45 R185 6 225 55 R17 225 50 R175 6 235 45 R185 245 45 R18 245 40 R196 245 35 R206 5 Only permitted as winter tyres ...

Page 216: ...ar psi kPa bar psi kPa bar psi kPa bar psi kPa bar psi kPa bar psi A16 LET 225 50 R175 6 220 2 2 32 200 2 0 29 220 2 2 32 270 2 7 39 225 45 R185 6 215 55 R175 220 2 2 32 200 2 0 29 270 2 7 39 260 2 6 38 220 2 2 32 270 2 7 39 225 55 R17 235 45 R185 245 45 R18 245 40 R196 245 35 R206 5 Only permitted as winter tyres 6 Reinforced variant XL ...

Page 217: ... rear kPa bar psi kPa bar psi kPa bar psi kPa bar psi kPa bar psi kPa bar psi A18XER 205 60 R165 220 2 2 32 200 2 0 29 270 2 7 39 260 2 6 38 220 2 2 32 270 2 7 39 215 60 R16 215 55 R175 225 55 R17 225 50 R175 6 225 45 R185 6 235 45 R185 245 45 R18 245 40 R196 245 35 R206 5 Only permitted as winter tyres 6 Reinforced variant XL ...

Page 218: ...a bar psi kPa bar psi A20NHT with manual transmission 225 50 R175 6 240 2 4 35 220 2 2 32 250 2 5 36 300 3 0 43 225 45 R185 6 215 55 R175 220 2 2 32 200 2 0 29 270 2 7 39 260 2 6 38 220 2 2 32 270 2 7 39 225 55 R17 235 45 R185 245 45 R18 245 40 R196 245 35 R206 230 2 3 33 210 2 1 30 270 2 7 39 260 2 6 38 250 2 5 36 300 3 0 43 5 Only permitted as winter tyres 6 Reinforced variant XL ...

Page 219: ...bar psi kPa bar psi A20NHT with automatic transmission 225 50 R175 6 240 2 4 35 220 2 2 32 250 2 5 36 300 3 0 43 225 45 R185 6 215 55 R175 220 2 2 32 200 2 0 29 270 2 7 39 260 2 6 38 220 2 2 32 270 2 7 39 225 55 R17 235 45 R185 245 45 R18 245 40 R19 6 245 35 R206 240 2 4 35 220 2 2 32 270 2 7 39 260 2 6 38 250 2 5 36 300 3 0 43 5 Only permitted as winter tyres 6 Reinforced variant XL ...

Page 220: ... kPa bar psi kPa bar psi kPa bar psi kPa bar psi kPa bar psi kPa bar psi A20DTC 225 50 R175 6 220 2 2 32 200 2 0 29 220 2 2 32 270 2 7 39 225 45 R 185 6 215 60 R16 220 2 2 32 200 2 0 29 270 2 7 39 260 2 6 38 220 2 2 32 270 2 7 39 215 55 R175 225 55 R17 235 45 R185 245 45 R18 5 Only permitted as winter tyres 6 Reinforced variant XL ...

Page 221: ... psi A20DTJ with manual transmission 215 60 R16 220 2 2 32 200 2 0 29 270 2 7 39 260 2 6 38 230 2 3 33 280 2 8 41 225 50 R175 6 225 45 R 185 6 215 55 R175 220 2 2 32 200 2 0 29 270 2 7 39 260 2 6 38 220 2 2 32 270 2 7 39 225 55 R17 235 45 R185 245 45 R18 245 40 R196 245 35 R206 230 2 3 33 210 2 1 30 270 2 7 39 260 2 6 38 230 2 3 33 280 2 8 41 5 Only permitted as winter tyres 6 Reinforced variant X...

Page 222: ...psi A20DTJ with automatic transmission 215 60 R16 230 2 3 33 210 2 1 30 270 2 7 39 260 2 6 38 230 2 3 33 280 2 8 41 225 50 R175 6 225 45 R185 6 215 55 R175 220 2 2 32 200 2 0 29 270 2 7 39 260 2 6 38 220 2 2 32 270 2 7 39 225 55 R17 235 45 R185 245 45 R18 245 40 R196 245 35 R206 230 2 3 33 210 2 1 30 270 2 7 39 260 2 6 38 230 2 3 33 280 2 8 41 5 Only permitted as winter tyres 6 Reinforced variant ...

Page 223: ... transmission 215 60 R16 230 2 3 33 210 2 1 30 270 2 7 39 260 2 6 38 240 2 4 35 290 2 9 42 225 50 R175 6 240 2 4 35 220 2 2 32 240 2 4 35 290 2 9 42 225 45 R 185 6 215 55 R 175 220 2 2 32 200 2 0 29 270 2 7 39 260 2 6 38 220 2 2 32 270 2 7 39 225 55 R 17 235 45 R185 245 45 R18 245 40 R196 245 35 R206 220 2 2 32 210 2 1 29 270 2 7 39 260 2 6 38 230 2 3 33 280 2 8 41 5 Only permitted as winter tyres...

Page 224: ...ar psi kPa bar psi A20DTH with automatic transmission 225 50 R175 6 240 2 4 35 220 2 2 32 240 2 4 35 290 2 9 42 225 45 R 185 6 215 55 R 175 220 2 2 32 200 2 0 29 270 2 7 39 260 2 6 38 220 2 2 32 270 2 7 39 225 55 R 17 235 45 R185 245 45 R18 245 40 R196 245 35 R206 220 2 2 32 200 2 0 29 270 2 7 39 260 2 6 38 230 2 3 33 280 2 8 41 5 Only permitted as winter tyres 6 Reinforced variant XL ...

Page 225: ...20DTR 215 55 R175 220 2 2 32 200 2 0 29 270 2 7 39 260 2 6 38 230 2 3 33 280 2 8 41 225 55 R17 235 45 R185 245 45 R18 245 40 R196 225 50 R175 6 240 2 4 34 220 2 2 32 250 2 5 36 300 3 0 43 225 45 R185 6 245 35 R206 230 2 3 33 210 2 1 30 270 2 7 39 260 2 6 38 240 2 4 34 290 2 9 41 All Temporary spare wheel 420 4 2 61 420 4 2 61 420 4 2 61 420 4 2 61 5 Only permitted as winter tyres 6 Reinforced vari...

Page 226: ...psi kPa bar psi kPa bar psi kPa bar psi kPa bar psi kPa bar psi A16XER 205 60 R165 220 2 2 32 240 2 4 34 270 2 7 39 290 2 9 41 220 2 2 32 290 2 9 42 215 60 R16 215 55 R 17 225 50 R176 225 45 R 185 6 235 45 R185 245 45 R18 225 55 R17 220 2 2 32 240 2 4 34 300 3 0 43 300 3 0 43 220 2 2 32 290 2 9 42 5 Only permitted as winter tyres 6 Reinforced variant XL ...

Page 227: ... bar psi kPa bar psi kPa bar psi kPa bar psi A18XER 205 60 R165 220 2 2 32 240 2 4 34 270 2 7 39 290 2 9 41 220 2 2 32 290 2 9 42 215 60 R16 215 55 R 17 225 50 R176 225 45 R 185 6 235 45 R185 245 45 R18 245 40 R196 245 35 R206 225 55 R17 220 2 2 32 240 2 4 34 300 3 0 43 300 3 0 43 220 2 2 32 290 2 9 42 5 Only permitted as winter tyres 6 Reinforced variant XL ...

Page 228: ...Pa bar psi kPa bar psi A16 LET 225 50 R176 220 2 2 32 240 2 4 34 270 2 7 39 290 2 9 42 220 2 2 32 290 2 9 42 215 55 R 17 235 45 R185 245 45 R18 245 40 R196 245 35 R206 225 55 R17 220 2 2 32 240 2 4 34 300 3 0 43 300 3 0 43 220 2 2 32 290 2 9 42 225 45 R 185 6 230 2 3 33 250 2 5 36 270 2 7 39 290 2 9 42 240 2 4 34 310 3 1 45 6 Reinforced variant XL 5 Only permitted as winter tyres ...

Page 229: ... 36 320 3 2 46 235 45 R185 225 45 R 185 6 270 2 7 39 290 2 9 42 270 2 7 39 290 2 9 42 280 2 8 40 350 3 5 51 215 55 R 176 230 2 3 33 250 2 5 36 270 2 7 39 290 2 9 42 250 2 5 36 320 3 2 46 225 55 R17 220 2 2 32 240 2 4 34 300 3 0 43 300 3 0 43 220 2 2 32 290 2 9 42 245 45 R18 220 2 2 32 240 2 4 34 270 2 7 39 290 2 9 42 230 2 3 33 300 3 0 43 245 40 R196 220 2 2 32 240 2 4 34 270 2 7 39 290 2 9 42 220...

Page 230: ...0 2 5 36 270 2 7 39 290 2 9 42 240 2 4 35 310 3 1 45 A20DTC 225 50 R176 220 2 2 32 240 2 4 34 270 2 7 39 290 2 9 42 230 2 3 33 300 3 0 43 215 55 R 17 235 45 R185 225 45 R 185 6 250 2 5 36 270 2 7 39 250 2 5 36 320 3 2 46 245 45 R18 220 2 2 32 240 2 4 35 270 2 7 39 290 2 9 42 220 2 2 32 290 2 9 42 225 55 R17 220 2 2 32 240 2 4 35 300 3 0 43 300 3 0 43 220 2 2 32 290 2 9 42 6 Reinforced variant XL 5...

Page 231: ... manual transmission 225 45 R 185 6 250 2 5 36 270 2 7 39 250 2 5 36 320 3 2 46 215 55 R 17 220 2 2 32 240 2 4 35 270 2 7 39 290 2 9 42 230 2 3 33 300 3 0 43 225 50 R176 235 45 R185 225 55 R17 220 2 2 32 240 2 4 35 300 3 0 43 300 3 0 43 220 2 2 32 290 2 9 42 245 45 R18 220 2 2 32 240 2 4 35 270 2 7 39 290 2 9 42 220 2 2 32 290 2 9 42 245 40 R196 245 35 R206 5 Only permitted as winter tyres 6 Reinf...

Page 232: ...85 6 250 2 5 36 270 2 7 39 250 2 5 36 320 3 2 46 215 55 R 17 220 2 2 32 240 2 4 35 270 2 7 39 290 2 9 42 230 2 3 33 300 3 0 43 225 50 R176 235 45 R185 225 55 R17 220 2 2 32 240 2 4 35 300 3 0 43 300 3 0 43 220 2 2 32 290 2 9 42 245 45 R18 220 2 2 32 240 2 4 35 270 2 7 39 290 2 9 42 220 2 2 32 290 2 9 42 245 40 R196 245 35 R206 220 2 2 32 240 2 4 35 270 2 7 39 290 2 9 42 230 2 3 33 300 3 0 43 5 Onl...

Page 233: ...38 330 3 3 48 215 55 R 17 230 2 3 33 250 2 5 36 270 2 7 39 290 2 9 42 240 2 4 35 310 3 1 45 225 50 R176 225 55 R 17 220 2 2 32 240 2 4 35 300 3 0 43 300 3 0 43 220 2 2 32 290 2 9 42 235 45 R185 230 2 3 33 250 2 5 36 270 2 7 39 290 2 9 42 230 2 3 33 300 3 0 43 245 45 R18 220 2 2 32 240 2 4 35 270 2 7 39 290 2 9 42 220 2 2 32 290 2 9 42 245 40 R196 245 35 R206 220 2 2 32 240 2 4 35 270 2 7 39 290 2 ...

Page 234: ... 38 330 3 3 48 215 55 R 17 230 2 3 33 250 2 5 36 270 2 7 39 290 2 9 42 240 2 4 35 310 3 1 45 225 50 R176 225 55 R 17 220 2 2 32 240 2 4 35 300 3 0 43 300 3 0 43 220 2 2 32 290 2 9 42 235 45 R185 230 2 3 33 250 2 5 36 270 2 7 39 290 2 9 42 240 2 4 35 310 3 1 45 245 45 R18 220 2 2 32 240 2 4 35 270 2 7 39 290 2 9 42 220 2 2 32 290 2 9 42 245 40 R196 245 35 R206 230 2 3 33 250 2 5 36 270 2 7 39 290 2...

Page 235: ...o 3 people ECO with up to 3 people With full load Engine Tyres front rear front rear front rear kPa bar psi kPa bar psi kPa bar psi kPa bar psi kPa bar psi kPa bar psi All Temporary spare wheel 420 4 2 61 420 4 2 61 420 4 2 61 420 4 2 61 ...

Page 236: ...i kPa bar psi kPa bar psi kPa bar psi kPa bar psi A20NHT with manual transmission 225 50 R175 6 250 2 5 36 230 2 3 33 250 2 5 36 300 3 0 43 225 45 R 185 6 215 55 R175 230 2 3 33 210 2 1 30 270 2 7 39 260 2 6 38 240 2 4 35 290 2 9 42 225 55 R17 235 45 R185 245 45 R18 245 40 R19 245 35 R206 240 2 4 35 220 2 2 32 270 2 7 39 260 2 6 38 250 2 5 36 300 3 0 43 5 Only permitted as winter tyres 6 Reinforce...

Page 237: ...bar psi kPa bar psi A20NHT with automatic transmission 225 50 R175 6 260 2 6 38 240 2 4 35 260 2 6 38 310 3 1 45 225 45 R 185 6 215 55 R175 230 2 3 33 210 2 1 30 270 2 7 39 260 2 6 38 240 2 4 35 290 2 9 42 225 55 R17 235 45 R185 245 45 R18 245 40 R19 245 35 R206 250 2 5 36 230 2 3 33 270 2 7 39 260 2 6 38 250 2 5 36 300 3 0 43 5 Only permitted as winter tyres 6 Reinforced variant XL ...

Page 238: ... bar psi kPa bar psi A20DTR with manual transmission 225 50 R175 6 250 2 5 36 230 2 3 33 260 2 6 38 310 3 1 45 225 45 R 185 6 215 55 R 175 220 2 2 32 200 2 0 29 270 2 7 39 260 2 6 38 230 2 3 33 280 2 8 41 225 55 R 17 235 45 R185 245 45 R18 245 40 R19 245 35 R206 240 2 4 35 220 2 2 32 270 2 7 39 260 2 6 38 250 2 5 36 300 3 0 43 5 Only permitted as winter tyres 6 Reinforced variant XL ...

Page 239: ...ar psi kPa bar psi A20DTR with automatic transmission 225 50 R175 6 250 2 5 36 230 2 3 33 260 2 6 38 310 3 1 45 225 45 R 185 6 215 55 R 175 230 2 3 33 210 2 1 30 270 2 7 39 260 2 6 38 240 2 4 35 290 2 9 42 225 55 R 17 235 45 R185 245 45 R18 245 40 R19 245 35 R206 240 2 4 35 220 2 2 32 270 2 7 39 260 2 6 38 250 2 5 36 300 3 0 43 5 Only permitted as winter tyres 6 Reinforced variant XL ...

Page 240: ...bar psi kPa bar psi kPa bar psi kPa bar psi A28NET with manual transmission 225 50 R175 6 270 2 7 39 250 2 5 36 270 2 7 39 320 3 2 46 225 45 R185 6 215 55 R175 260 2 6 38 240 2 4 35 270 2 7 39 320 3 2 46 225 55 R17 235 45 R185 245 45 R18 245 40 R19 245 35 R206 270 2 7 39 250 2 5 36 280 2 8 41 330 3 3 48 5 Only permitted as winter tyres 6 Reinforced variant XL ...

Page 241: ... psi kPa bar psi kPa bar psi A28NET with automatic transmission 225 50 R175 6 270 2 7 39 250 2 5 36 280 2 8 41 330 3 3 48 225 45 R 185 6 215 55 R175 225 55 R17 235 45 R185 245 45 R18 245 40 R19 270 2 7 39 250 2 5 36 280 2 8 41 330 3 3 48 245 35 R206 All Temporary spare wheel 420 4 2 61 420 4 2 61 420 4 2 61 420 4 2 61 5 Only permitted as winter tyres 6 Reinforced variant XL ...

Page 242: ... 3 2 46 215 55 R176 225 55 R17 220 2 2 32 220 2 2 32 300 3 0 43 300 3 0 43 220 2 2 32 290 2 9 42 225 45 R 185 6 270 2 7 39 270 2 7 39 280 2 8 41 340 3 4 49 235 45 R185 250 2 5 36 250 2 5 36 270 2 7 39 290 2 9 42 260 2 6 38 330 3 3 48 245 45 R18 220 2 2 32 220 2 2 32 270 2 7 39 290 2 9 42 230 2 3 33 300 3 0 43 245 40 R19 220 2 2 32 220 2 2 32 270 2 7 39 290 2 9 42 220 2 2 32 290 2 9 42 245 35 R206 ...

Page 243: ...8 215 55 R176 225 55 R17 220 2 2 32 220 2 2 32 300 3 0 43 300 3 0 43 220 2 2 32 290 2 9 42 225 45 R 185 6 270 2 7 39 270 2 7 39 280 2 8 41 340 3 4 49 235 45 R185 250 2 5 36 250 2 5 36 270 2 7 39 290 2 9 42 260 2 6 38 330 3 3 48 245 45 R18 220 2 2 32 220 2 2 32 270 2 7 39 290 2 9 42 230 2 3 33 300 3 0 43 245 40 R19 220 2 2 32 220 2 2 32 270 2 7 39 290 2 9 42 220 2 2 32 290 2 9 42 245 35 R206 240 2 ...

Page 244: ...ansmission 215 55 R176 280 2 8 41 280 2 8 41 300 3 0 43 340 3 4 49 225 50 R176 225 55 R17 250 2 5 36 250 2 5 36 300 3 0 43 300 3 0 43 270 2 7 39 340 3 4 49 225 45 R 185 6 270 2 7 39 270 2 7 39 280 2 8 41 340 3 4 49 245 35 R206 245 45 R18 260 2 6 38 260 2 6 38 280 2 8 41 340 3 4 49 235 45 R185 245 40 R19 240 2 4 35 240 2 4 35 270 2 7 39 270 2 7 39 250 2 5 36 320 3 2 46 6 Reinforced variant XL 5 Onl...

Page 245: ...340 3 4 49 225 50 R176 225 55 R17 260 2 6 38 260 2 6 38 300 3 0 43 300 3 0 43 270 2 7 39 340 3 4 49 225 45 R 185 6 270 2 7 39 270 2 7 39 280 2 8 41 340 3 4 49 245 35 R206 245 45 R18 270 2 7 39 270 2 7 39 280 2 8 41 340 3 4 49 235 45 R185 270 2 7 39 270 2 7 39 280 2 8 41 340 3 4 49 245 40 R19 240 2 4 35 240 2 4 35 270 2 7 39 270 2 7 39 260 2 6 38 330 3 3 48 All Temporary spare wheel 420 4 2 61 420 ...

Page 246: ...246 Technical data Towing hitch installation dimensions Saloon ...

Page 247: ...Technical data 247 Station wagon ...

Page 248: ...o the vehicle is required This will take place when the vehicle is serviced in a workshop Some data is electronically fed into GM global diagnostic systems The manufacturer will not access information about a crash event or share it with others except with the consent of the vehicle owner or if the vehicle is leased with the consent of the lessee in response to an official request of police or sim...

Page 249: ...Customer information 249 ...

Page 250: ... Ashtrays 77 Automatic anti dazzle 33 Automatic light control 101 Automatic locking 23 Automatic transmission 125 Auxiliary devices 111 Auxiliary heater 119 B Battery 153 Battery discharge protection 108 Bonnet 150 Brake and clutch system 83 Brake assist 132 Brake fluid 153 Brakes 130 153 Bulb replacement 155 C Capacities 214 Cargo management system 63 Car Pass 19 Catalytic converter 124 Central l...

Page 251: ... Exterior lighting 13 F Fault 127 First aid kit 68 Fixed air vents 120 Fog light 87 Fog lights 158 Folding 31 Front airbag system 49 Front fog lights 105 Fuel consumption CO2 Emissions 144 205 Fuel for diesel engines 143 Fuel for petrol engines 143 Fuel gauge 79 Fuses 163 G General information 145 Glovebox 58 Graphic Info Display Colour Info Display 88 H Halogen headlights 155 Hand brake 131 Hazar...

Page 252: ...utside temperature 74 Overrun cut off 122 P Parking 18 123 Parking assist 32 137 Parking brake 131 Parking lights 105 Performance 203 Performing work 150 Pollen filter 120 Power outlets 76 Power seat adjustment 43 Power windows 33 Preheating and diesel particle filter 85 Q Quickheat 119 R Radio reception 110 Radio remote control 19 Reading lights 107 Rear fog light 87 Rear fog lights 105 Rear wind...

Page 253: ... display 125 Tread depth 173 Trip computer 95 Trip odometer 78 Turn and lane change signals 104 Turn signal 82 Tyre chains 174 Tyre designations 171 Tyre pressure 171 Tyre pressure monitoring system 85 172 Tyre pressures 215 Tyre repair kit 175 Tyres 170 U Ultrasonic parking assist 85 Using this manual 3 V Variable effort steering 84 Vehicle dimensions 213 Vehicle Identification Number 199 Vehicle...

Page 254: ...254 ...

Reviews: