9
COOKING TECHNIQUES
INDIRECT CONVECTION COOKING
This method is ideal for cooking large cuts of meat such as
roasts or poultry with or without a rotisserie. The food is
cooked by hot air circulating around it.
1. For most applications of convection cooking with and
without a rotisserie, a drip pan is recommended to
catch the drippings. Place drip pan on top of the Flav-
R-Wave, beneath centre of food. Put half to one inch
of water in the drip pan. Fruit juice, wine or a marinade
may also be added to enhance the flavour. Do not let
the drip pan run dry.
2. In most cases convection cooking with and without a
rotisserie is best with the cover closed and the heat
reduced. All burners can be set to low or the outside
burners can be set to medium and the middle burner(s)
can be turned off. Turning the center burner off will
prevent juices in the drip pan from burning.
3. Prior to placing the meat on the barbecue, baste the
meat with vegetable oil. This will enhance the browning
on the outside of the meat.
4. When cooking without a drip pan, close attention must
be paid to avoid the risk of grease fire and is not
recommended.
5. Use oven mitts when working around the barbecue to
avoid injury.
6. Turn barbecue off and allow it to cool before removing
drip pan. The fat drippings are highly flammable and
must be handled carefully to avoid injury.
7. For convection cooking roasts and poultry without a
rotisserie, place meat in a roasting rack directly on the
grids.
INDIRECT CONVECTION AND ROTISSERIE
COOKING GUIDE
BEEF ROAST
3-6 LB
MED/LOW
2 - 4 HRS
BEEF ROAST
6-10 LB
MED/LOW
3 - 5 HRS
PORK ROAST
2-5 LB
MED/LOW
2 - 4 HRS
PORK ROAST
6-10 LB
MED/LOW
3 - 5 HRS
TURKEY OR CHICKEN
2-5 LB
MED/LOW
2 - 4 HRS
TURKEY OR CHICKEN
5-10 LB
MED/LOW
3 - 5 HRS
When using rotisserie burner, set heat at Med. / High.
ROTISSERIE COOKING
Follow the steps for Indirect Convection Cooking above.
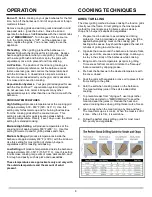
1. The rotisserie can
accommodate up
to 7 kg (15lb) of
meat with the
limiting factor of
rotating clearance.
For best results the
meat should be
centered on the
center line of spit to
eliminate an out-of-
balance condition.
2. The rotisserie can be used with the cooking grids in
place if space allows.
3. Fasten the meat securely on the spit prior to placing it
on the barbecue. For poultry, tie the wings and legs in
tightly to avoid contact with drip pan.
Rear Burner Rotisserie
Certain models feature a rear burner for rotisserie cooking.
The rear burner rotisserie method is the ultimate for
cooking roasts and poultry. With the heat source located
behind the food, there is no chance of a flare up caused by
fat drippings. Cook with confidence knowing you will get
perfect results every time. A dish or drip pan placed below
the spit will collect the juices for basting or for preparing a
sauce.
The spring loaded rear burner may be easily removed when
not in use.
To operate your rear burner, follow the lighting directions on
page 6.
MEAT TEMPERATURE GUIDE
RARE
MED.
WELL
BEEF / LAMB / VEAL
130°F / 55°C
145°F / 63°C
160°F / 70°C
PORK
150°F / 65°C
170°F / 77°C
POULTRY
170°F / 77°C
For best results use a meat thermometer.
DIRECT GRILLING GUIDE
1”
THICKNESS
HEAT
SETTING
TIME PER
SIDE
TOTAL
TIME
CHICKEN
MED / WELL
MEDIUM
3 / 3 / 3 / 3
12 MIN.
CHICKEN
WINGS
MED / WELL
MED / LOW
5 / 5 / 5 / 5
20 MIN.
HAMBURGER
MEDIUM
MEDIUM
3 / 3 / 3 / 3
12 MIN.
HAMBURGERS
3/4” FROZEN
MEDIUM
MEDIUM
3 / 3 / 3 / 3
12 MIN.
FISH FILLET
MEDIUM
MEDIUM
2 / 2 / 2 / 2
8 - 10 MIN.
LOBSTER
TAILS SPLIT
MEDIUM
MEDIUM
4 / 4 / 4 / 4
16 - 20 MIN.
Use same technique as the perfect steak grilling guide


