background image

27

Other operations

Case 1

When an error occurs, “Error!! *-**” or an error message 
appears on the display of this unit. (Letters and 
numbers appear in place of the asterisks.) Refer to the 
descriptions below to check the meaning.

Error code

*-10, *-20

: The LAN cable could not be recognized. 

Connect the LAN cable properly.

*-11,*-13,*-21,*-28

: Internet connection could not 

be established. Check the following points.


Confirm that the IP address, subnet mask, 
gateway address and DNS server setting are 
correct.


Confirm that the router is turned on.


Confirm that the unit and router are connected 
with a LAN cable.


Check the router setting. For the setting, see the 
instruction manual of the router.


This unit may fail in network connection if your 
network environment does not allow multiple 
device connections. Consult your Internet 
service provider (ISP).


You need a router separately if your modem 
does not have the router function. Depending on 
your network connection environment, you need 
to configure the proxy server. For information 
on the configuration, consult the document 
provided by your carrier or ISP provider.


If you still cannot connect to the Internet, the 
DNS server or proxy server may be temporarily 
down. 
Check the service status with your ISP provider.

Others

: Retry from the beginning. If the error 

persists, check the error code and contact Onkyo 
Support shown at the end of the manual.

Case 2

If an error occurs during updating, disconnect and 
reconnect the power cord, and retry updating.

Case 3

If you do not have access to the Internet, contact Onkyo 
Support shown at the end of manual.

Updating the firmware via USB connection

Use the USB port to update the firmware.


You need a 32 MB or larger capacity USB flash drive 
for updating.

Precautions when updating the firmware


Before updating, stop playback and disconnect 
anything connected to the USB ports.


While updating, never put the unit into standby mode, 
or disconnect the power cord or the USB flash drive 
being used for the update.


Do not access this unit from a computer during an 
update.


Completing the update takes about five minutes.


Settings are retained after an update

Update procedures

1.  Connect a USB flash drive to the computer that you 

are using and delete any files on it.

2.  Download the firmware file to the computer from our 

website.
Decompress the downloaded file on the computer.


Do not change the names of the decompressed 
files.

3.  Copy the decompressed files to the root folder of the 

USB flash drive.
Do not copy any files other than the decompressed 
files. Do not copy the compressed file.

4.  Confirm that this unit is on.
5.  Connect the USB flash drive with the decompressed 

files to the USB port on the front of the unit.

6.  Press the INPUT button to change the source to 

USB(F).
“Now Initializing…” appears on the display, followed by 
the name of the USB flash drive.


Loading the USB flash drive takes about 20 to 30 
seconds.

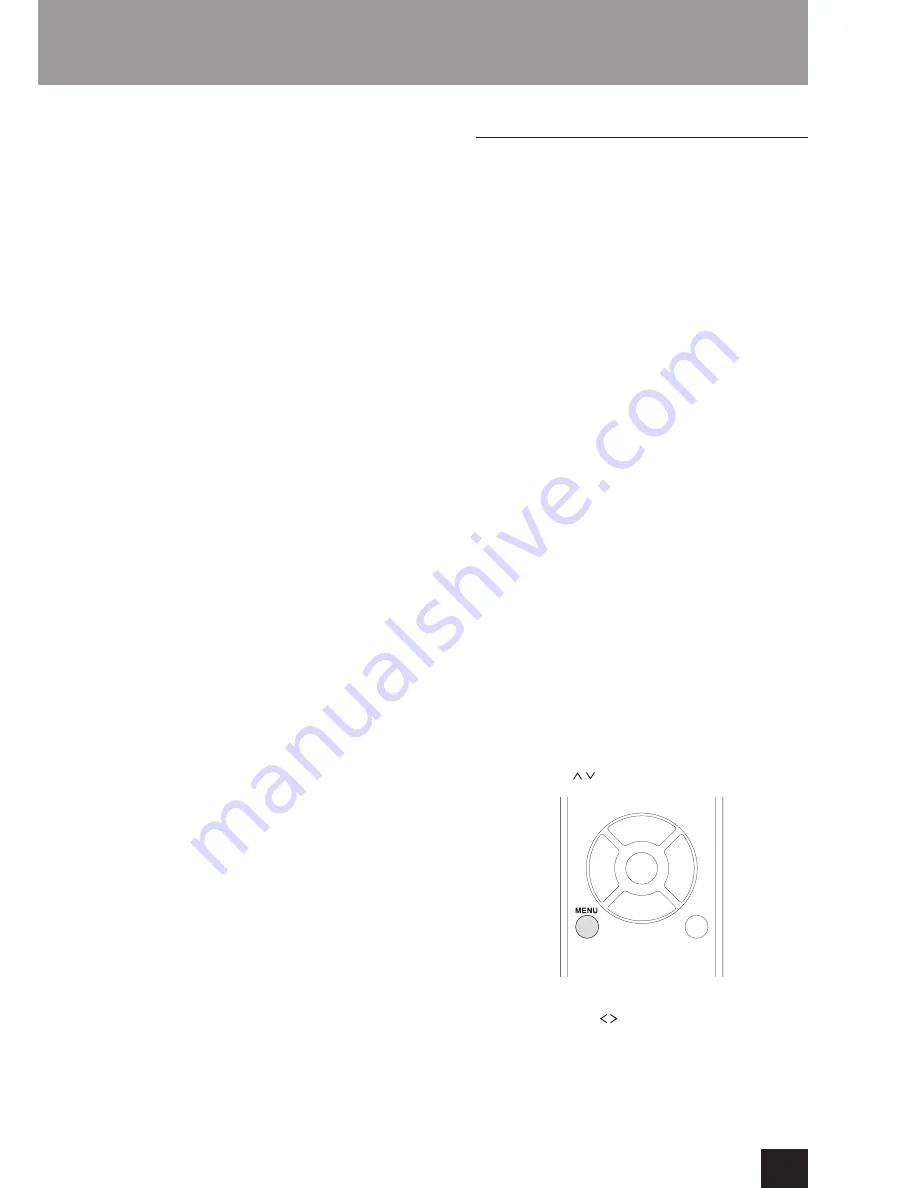
7.  Press the MENU button to open the menu and use 

the direction ( / ) buttons to select “Update”.

8.  Press the ENTER button.
9.  Use the direction ( / ) buttons to select “CN via 

USB?” and press the ENTER button.


This selection will not appear (and cannot be 
selected) if the flash drive does not contain 
firmware that can be used to update the unit.

Summary of Contents for C-N7050

Page 1: ...f parts 7 Basic operation 11 Listening to CDs 13 Listening to files on a USB flash drive iPod iPhone 14 Memory playback random playback repeat playback 16 Using network services 18 Settings 23 Other operations 26 C N7050 Network CD Player En ...

Page 2: ...B 17 Using network services 18 vTuner Internet Radio 18 Store favorite vTuner Internet Radio programs 18 Storing other Internet radio programs My Favorites 19 Adding a program 19 Starting playback 20 DLNA 20 About DLNA 20 Setting up Windows Media Player 20 DLNA playback 21 Using the Play To feature 21 Home Media playing music files in a shared folder 22 About a shared folder 22 Setting the compute...

Page 3: ...tion The mains plug is used as the disconnect device the disconnect device shall remain readily operable CAUTION Do not expose this apparatus to drips or splashes Do not place any objects filled with liquids such as vases on the apparatus Do not install this apparatus in a confined space such as a book case or similar unit The apparatus should be located close enough to the AC outlet so that you c...

Page 4: ...ng two conditions 1 This device may not cause harmful interference and 2 this device must accept any interference received including interference that may cause undesired operation CAUTION Changes or modifications to this equipment not expressly approved by Onkyo CORPORATION for compliance will void the user s warranty This equipment has been teste d and found to comply with the limits for a Class...

Page 5: ...ANCE OF PROCEDURES OTHER THAN THOSE SPECIFIED HEREIN MAY RESULT IN HAZARDOUS RADIATION EXPOSURE The label on the right is applied on the rear panel 1 This unit is a CLASS 1 LASER PRODUCT and employs a laser inside the cabinet 2 To prevent the laser from being exposed do not remove the cover Refer servicing to qualified personnel For European Models Declaration of Conformity We declare under our so...

Page 6: ... dissipation leave at least 20 cm 8 between this unit and walls and other equipment when installing it If you put it in a rack take precautions to prevent overheating by leaving at least 5 cm 2 open above the top of the unit and at least 10 cm 4 open behind the unit Do not put cloth on top of the unit or place the unit on top of bedding or thick carpet Doing so could cause the unit to overheat or ...

Page 7: ...ers cannot be input through this unit s USB ports 9 Display DISPLAY button Changes the information shown F Remote control signal receiver When using the remote control point it toward this receiver G Preset PRESET button You can store specific vTuner Internet Radio programs as favorites for easy playback Storing to the PRESET button 1 Play the radio station to add 2 Press and hold one of the PRESE...

Page 8: ...rcially available LAN cable to connect this port to a wired network or Internet connection When changing the input source this port is identified as NET 4 RI REMOTE CONTROL jack When connecting the unit to the RI jack of an Onkyo amplifier or receiver using the included RI cable you can control the unit using the remote control of the amplifier or receiver For information on the controllable funct...

Page 9: ... to stop playback 8 ENTER button Use to confirm menu selections and setting values 9 Direction buttons Use in menus and to change selected items F MENU button Press to open the menu screen G RANDOM button Use to change the random play back setting H MEMORY button Use to set memory playback I Number buttons Use these to input track file and folder numbers Alphanumeric characters period slash and ar...

Page 10: ...REMAIN indicator When the source is set to CD this indicator shows what information about the disc is being displayed TOTAL Total disc playback time REMAIN Remaining playback time of track being played TOTAL REMAIN Remaining playback time of disc being played 7 FOLDER indicator When the source is set to CD and a disc containing audio files is loaded this indicator appears The number of folders is ...

Page 11: ... position where it was paused press the CD play pause button again During pause appears on the display To pause an USB connected device Press the USB play pause button To resume playback from the position where it was paused press the USB play pause button again During pause appears on the display Stopping playback Press the stop button to stop playback Skipping to search for a track Turn the main...

Page 12: ...c playback Various file information including the title artist and album ID3 tag information for the MP3 WAV file playing back is shown Elapsed time of current track File name Folder name Title if file has ID3 tag Artist if file has ID3 tag Album if file has ID3 tag Sampling rate and bit rate If the file currently playing back exceeds 99 minutes and 59 seconds is shown Characters in track and fold...

Page 13: ...3 WAV discs Navigation mode You can select files and folders using the folder hierarchy 1 When stopped press the stop button Root appears on the display and navigation mode is activated Pressing the stop button when STOP KEY is set to Navigation activates navigation mode 2 Press the play button The name of the first folder inside the Root directory appears If there are no folders the name of the f...

Page 14: ... its volume label will be displayed In this state you can press the play pause button to start playing in order the tracks in the first folder that contains audio files on the USB flash drive 3 Press the MENU ENTER dial The name of the track or folder appears Using the remote control you can also press the MENU ENTER button 4 Turn the MENU ENTER dial to select a track and press the play pause butt...

Page 15: ...pear when no iPod is connected 2 Connect the USB port on the front of the main unit to your iPod using its accessory USB cable Connect an iPod to the iPod iPhone USB connector on the front of the unit 3 Operate the iPod to start playback USB iPod appears on the display No information about the content is shown If an iPod is connected to this unit it will only be recharged when this unit is ON Rech...

Page 16: ...tton Checking the program content When stopped use the search buttons to showtrack numbers and playback times Clearing tracks from the program When stopped press the CLEAR button to remove the last track that was added to the program Adding tracks to the end of the program When stopped use the skip buttons to show the track that you want to add and press the play button to add it to the end of the...

Page 17: ...n using an audio CD or MP3 WAV disc Each time you press the REPEAT button the icon shown on the left side of the display will change as follows Repeat playback and random playback can be used together Repeat All Repeat 1 Repeat Off Repeat playback will be canceled in the following cases When the unit is put into standby If the disc tray is opened When using a USB flash drive Each time you press th...

Page 18: ...es to make accessing them easier There are two ways to do this 1 Add it to My Favorites Press the NET button to open the network service menu and use the My Favorites item to add a favorite program to it 1 After selecting the radio station to add press and hold the remote control MENU button You can add a radio station even while it is playing back 2 Use the direction buttons to select My Favorite...

Page 19: ...w these procedures to add them to the My Favorites list in the network service menu Network service menu Press the NET button and press the direction buttons to select the menu as follows vTuner Internet Radio My Favorites DLNA Home Media This unit supports Internet radio stations that use the PLS M3U and podcast RSS formats Even if an Internet radio station uses one of these formats playback migh...

Page 20: ...onents computers and other devices in a home network This unit allows you to use DLNA to play music files stored on a computer or a hard disk connected to your home network NAS device Make sure this unit and a computer or NAS device are connected to the same router To play a music file with DLNA you need a NAS device or the like with DLNA server functions and a DLNA player software to stream the m...

Page 21: ...nit s audio file list This is because the Windows library index has not been refreshed You can either wait for the index to refresh automatically or you can manually rebuild the index See Windows online help for instructions about how to do this Using the Play To feature The Play To function allows you to operate DLNA compliant controller devices and computers on a home network and enables this un...

Page 22: ...es and click OK in the dialog box Creating a shared folder 1 Select and right click the folder to share 2 Select Properties 3 Select Advanced Sharing on the Sharing tab Select the Share this folder check box and click OK 4 Click Share for Network File and Folder Sharing 5 Select Everyone from the pull down menu Click Add and click Share To set a user name and password to a shared folder set Permis...

Page 23: ... you complete making settings press the RETURN button to close the menu screen When you press the RETURN button while viewing the NET Setting submenu Network Save will appear Press the ENTER button to save the settings If you press the RETURN button the menu screen will close without saving the setting changes MP3 Setting You can set how MP3 WAV file information is shown and how MP3 WAV discs are ...

Page 24: ...ted An Internet connection is necessary to listen to Internet radio The Net Standby setting is not necessary for connecting this unit to a network If DHCP is set to Enable default IP Address Subnet Mask Gateway and DNS Server settings will appear but cannot be changed If DHCP is set to Disable IP Address Subnet Mask Gateway and DNS Server will appear and must be set When you press the RETURN butto...

Page 25: ...z or more sampling frequency will be down converted to PCM 44 1 48 kHz before being output DSD audio will be digitally output at PCM 44 1 kHz Mode 2 default setting Use this mode for a device compatible with up to PCM 192 kHz digital signal input Audio with up to PCM 192 kHz sampling frequency will be output without conversion DSD audio will be digitally output at PCM 44 1 kHz Mode 3 This mode con...

Page 26: ...rk Use the network connection on the rear panel to update the firmware Precautions when updating the firmware Make sure that this unit is turned on and the Ethernet cable is connected to the rear panel of this unit While updating never disconnect or turn off this unit While updating never disconnect and reconnect the Ethernet cable While updating never disconnect and reconnect the power cord Do no...

Page 27: ...access to the Internet contact Onkyo Support shown at the end of manual Updating the firmware via USB connection Use the USB port to update the firmware You need a 32 MB or larger capacity USB flash drive for updating Precautions when updating the firmware Before updating stop playback and disconnect anything connected to the USB ports While updating never put the unit into standby mode or disconn...

Page 28: ...meaning Error codes Meaning and countermeasures 10 20 The USB flash drive could not be recognized Confirm that the USB flash drive or USB cable is securely connected to the USB port on the front of the unit 14 The root folder of the USB flash drive does not contain a firmware file or the firmware file is for a different model for example Follow the instructions on the C N7050 product website to do...

Page 29: ... disc use a felt tip permanent marker The use of a ballpoint pen or other pen with a hard tip could damage the disc making it unplayable Never use commercially available CD stabilizers Doing so could make the disc unplayable or damage the unit If a CD R CD RW disc that has a printable label surface is left in this unit for a long time it could stick to the inside and become extremely difficult to ...

Page 30: ...ng could occur This unit cannot play audio files with copyright protection from a disc USB and Networks Audio files playable by this unit This unit can play the following types of audio files over a USB or network connection This unit supports gapless playback of a USB flash device in the following conditions When WAV FLAC and Apple Lossless files are consecutively played back and they have the sa...

Page 31: ...he connected media is not supported Not Connected appears on this unit s display This unit cannot play back audio files if copyright protection is used Do not connect computers to this unit s USB ports Audio from computers cannot be input through this unit s USB ports This unit might not be able to use media that is loaded into a USB card reader Depending on the USB flash drive and its contents re...

Page 32: ... possible Check the file format For information about playable file formats see MP3 WAV formats for CDs and Audio files playable by this unit for USB and playback over the network The names of tracks artists and albums are not shown There is no ID3 tag information for the music file Use a computer for example to prepare MP3 files with corrected ID3 tag information Some characters are not shown cor...

Page 33: ... using antivirus or security software the unit might not be able to connect to it This unit uses a microprocessor so noise and other external interference could cause it to stop functioning properly If this should occur unplug the unit s power from the outlet and wait a little while before plugging the power in again and retrying the operation If the unit still does not function properly after doi...

Page 34: ...l Coaxial 0 5 V p p 75 Ω Operation Condition Temperature Humidity 5 C 35 C 41 F 95 F 5 85 Power Supply AC 220 240 V 50 Hz Power Consumption 30 W Stand by Power Consumption 5 5 W Dimensions W H D 435 102 302 mm 17 1 8 4 11 7 8 inches Weight 4 6 kg 10 1 8 lbs Disc Compatibility CD DA CD R CD RW Discs that have not been properly finalized may only be partially playable or not playable at all Audio Ou...

Page 35: ... not modify copy republish translate exploit create derivative works upload post transmit sell or distribute in any manner any information content or services available through this device unless expressly permitted by the appropriate copyright patent trademark and or other intellectual property owner including without limitation content owner or service provider THE CONTENT AND SERVICES AVAILABLE...

Page 36: ...m Unit 1033 10 F Star House No 3 Salisbury Road Tsim Sha Tsui Kowloon Hong Kong Tel 852 2429 3118 Fax 852 2428 9039 http www hk onkyo com 1301 555 Tower No 555 West NanJing Road Jing an District Shanghai China 200041 Tel 86 21 52131366 Fax 86 21 52130396 http www cn onkyo com The Americas China Europe Asia Oceania Middle East Africa Please contact an Onkyo distributor referring to Onkyo SUPPORT si...

Reviews: