background image

67

Using the Timers

The CD/HDD receiver has three timers: the sleep timer 
for turning the CD/HDD receiver off after a specified 
period, the play timer for automated playback, and the 
record timer for automated recording.
Up to four programmable timers are available for the 
play and record timers.
The timers can be used with other Onkyo components 
that are connected to the CD/HDD receiver via 

u

 (

see 

page 19

 for hookup details).

With the sleep timer, you can set the CD/HDD receiver 
so that it automatically turns off after a specified period. 
This timer is convenient when you want to fall asleep 
while listening to music.

Checking the Remaining Sleep Time

To check the remaining sleep time, press the [SLEEP] 
button.
Note that if you press the [SLEEP] button while the 
remaining sleep time is 10 minutes or less, the sleep 
timer is canceled..

Canceling the Sleep Timer

To cancel the sleep timer, press the [SLEEP] button 
repeatedly until “Sleep Off” appears and the SLEEP 
indicator disappears.

Note:

During recording, the sleep timer can be set. When the sleep 
time period has expired during recording, the CD/HDD 
receiver will cancel the recording and enter the Standby 
mode.

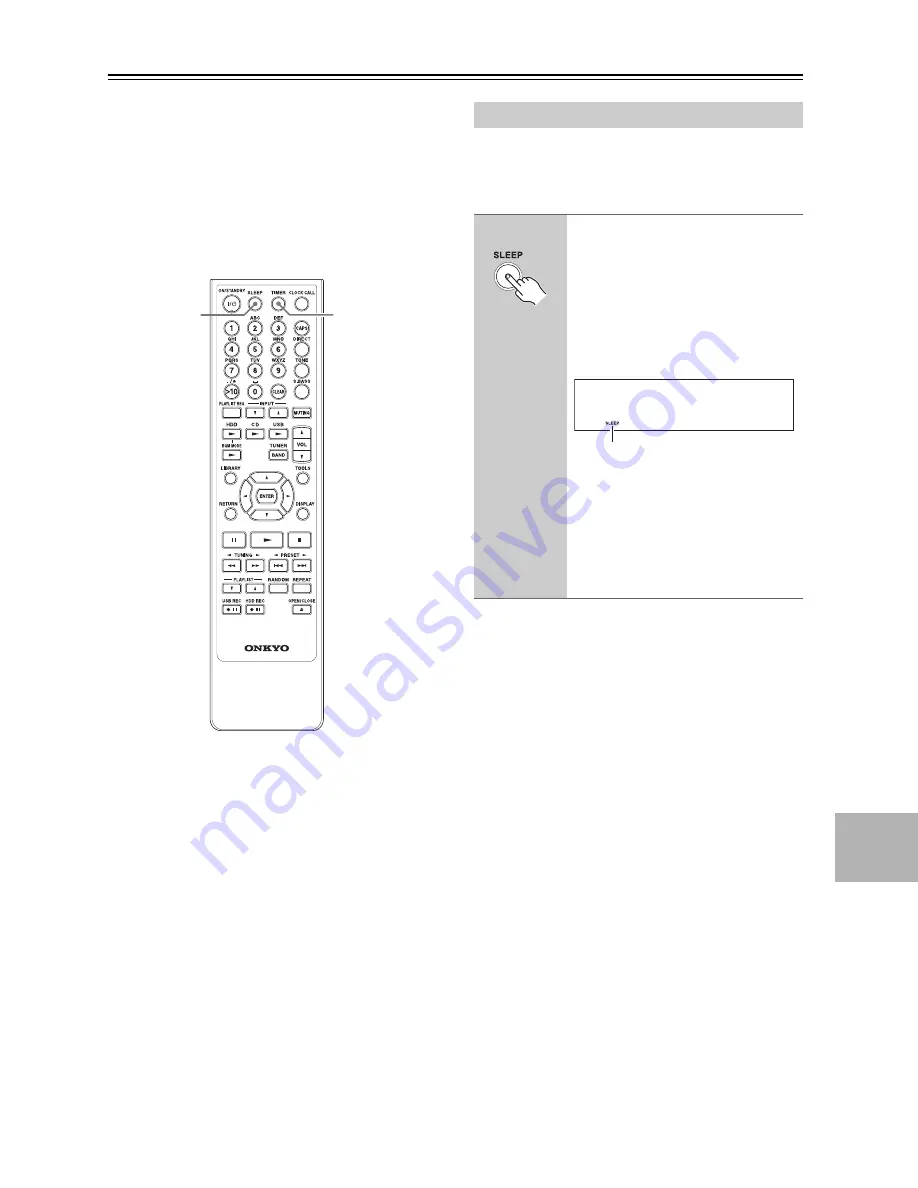
TIMER

SLEEP

Using the Sleep Timer

1

Press the [SLEEP] button repeat-
edly to select the required sleep 
time.

The SLEEP indicator and “Sleep 90 
min” appear on the display, as shown.
With the [SLEEP] button, you can set 
the sleep time from 90 to 10 minutes in 
10 minute increments.

To set the sleep time in 1 minute incre-
ments from 99 to 1, use the Up and 
Down [

q

]/[

w

] buttons during the sleep 

time is displayed. The sleep time 
appears on the display for about 8 sec-
onds, then the previous display reap-
pears.

Sleep  90 min

SLEEP indicator

Summary of Contents for BR-925UKD

Page 1: ... you to obtain optimum performance and listening enjoyment from your new CD HDD receiver Please retain this manual for future reference Contents Getting Started 2 Connections 15 Turning On First Time Setup 22 Basic Operation 24 Playing Listening Playing CDs 28 Listening to the Radio 32 USB Device Playback 44 Playing External Components 48 Recording Transferring Data 49 Playing the HDD 57 Clock and...

Page 2: ...aratus does not operate normally by following the operating instructions Adjust only those controls that are covered by the oper ating instructions as an improper adjustment of other controls may result in damage and will often require extensive work by a qualified tech nician to restore the apparatus to its normal operation E If the apparatus has been dropped or damaged in any way and F When the ...

Page 3: ...e marks on the case This unit s top and rear panels may get warm after prolonged use This is normal If you do not use this unit for a long time it may not work properly the next time you turn it on so be sure to use it occasionally When you ve finished using this unit remove all discs and turn off the power 9 Installing this Unit Install this unit in a well ventilated location Ensure that there s ...

Page 4: ...d in accordance with the following code As the colours of the wires in the mains lead of this appa ratus may not correspond with the coloured markings identifying the terminals in your plug proceed as follows The wire which is coloured blue must be connected to the terminal which is marked with the letter N or coloured black The wire which is coloured brown must be connected to the terminal which ...

Page 5: ...mpatible Remote Control iPod Control Capable 1 VLSC and the VLSC logo are registered trademarks of Onkyo Corporation 2 Manufactured under license from Audyssey Laboratories U S and foreign patents pending Audyssey Dynamic EQ and Audyssey EQ are trademarks of Audyssey Laboratories 3 iPod is a trademark of Apple Inc registered in the U S and other countries 4 Windows Media and the Windows logo are t...

Page 6: ...ts Keep this in mind when installing If another remote controller of the same type is used in the same room or the CD HDD receiver is installed close to equipment that uses infrared rays the remote control ler may not work reliably Don t put anything such as a book on the remote con troller because the buttons may be pressed inadvertently thereby draining the batteries The remote controller may no...

Page 7: ...d Components Radio Digital audio player 1 Playing iPod thru USB port page 45 Accessing from PC 2 page 55 Playing CDs page 28 Recording CDs page 51 Playing an external component page 48 Recording from an external component page 53 Listening to the radio page 32 Recording the radio page 53 Playing music from USB device page 45 Transferring the data page 54 Transferring the data page 54 USB mass stor...

Page 8: ...e over 10 C per hour When there is the possibility of moisture condensation occurring Onkyo recommend that you wait for approx one hour after turning the power on before using the CD HDD receiver Advice on data backup The HDD may fail even in normal use for example a sudden data loss or failure caused by electrical service interrup tion If the HDD fails for some reason the data cannot be restored ...

Page 9: ...nto AM FM Radio Stations 32 Displaying Radio Information 33 Receiving RDS 33 Listening to DAB Digital Radio 34 Presetting FM Stations Automatically Auto Preset 37 Presetting AM FM DAB Stations Manually 38 Selecting Preset Stations 39 Editing Presets 40 USB Device Playback 44 Compatible USB Devices 44 USB Device Folders and Files 44 Basic Operations of Playback 45 Playing Selected Tracks 46 Switchi...

Page 10: ...ton 28 Stops CD playback i USB port 45 A USB mass storage device such as a USB flash drive or MP3 music player containing music files can be plugged in here and the music files can be selected and played through the CD HDD receiver j Play Pause 1 3 button 28 Starts CD playback Pressing it during playback pauses playback k LIBRARY button 28 Displays the list of tracks l RETURN button Returns to the...

Page 11: ... being displayed j TIMER indicators Show the status of the timers TIMER Lights up when a timer has been programmed 1 2 3 4 Light up when a timer has been programmed Lights up when a timer has been programmed for recording k SLEEP indicator Lights up when the Sleep function has been set l MUTING indicator Flashes while the CD HDD receiver is muted m Dynamic EQ indicator Lights up when the Audyssey ...

Page 12: ...ital output such as a CD recorder MD recorder games con sole satellite tuner or personal computer Use a commercially available optical digital audio cable square to make the connection h u REMOTE CONTROL 19 This u Remote Interactive jack can be con nected to an u jack on another Onkyo component The CD HDD receiver s remote controller can then be used to control that component To use u you must mak...

Page 13: ...24 INPUT q w buttons Used to switch the input source HDD 1 button Switches to HDD for playback CD 1 button Switches to CD for playback USB 1 button Switches to USB for playback These buttons also work in the Standby mode f BGM MODE 1 button 60 Used to play tracks in HDD in BGM mode This button also works in the Standby mode Except for music files recorded from the FM AM DAB or external components ...

Page 14: ...p p DIRECT button 25 Used to switch to the Direct mode q TONE button 25 Used to adjust the bass and treble r S BASS button 25 Sets the Super Bass function s CLEAR button 43 Used to delete the input letters t MUTING button 25 Mutes the output of the CD HDD receiver u VOL q w button 24 Adjust the volume level v TUNER BAND button 39 Selects AM FM or DAB radio as the input source w TOOLS button Used t...

Page 15: ...t Terminal The optical digital input terminal of the CD HDD receiver is a type of terminal with cover Insert the opti cal digital cable while pushing the cover inwards Notes Plug or unplug the optical digital cable in straight direc tion If you plug or unplug the cable slantingly the cover may be damaged Do not put anything on top of the CD HDD receiver as it may interfere with proper ventilation ...

Page 16: ...t the positive and negative wires Doing so may damage the CD HDD receiver Also be careful not to touch the rear panel Twist the speaker cord sufficiently The contact between bare wire and rear panel may cause a short circuit Be careful not to confuse the positive and negative ter minals or L and R speakers during the connection Doing so may result in unnatural sound Do not connect both speaker cab...

Page 17: ...eiver is ready for use you ll need to tune into an FM radio station and adjust the position of the FM antenna to achieve the best possible reception 2 Use thumbtacks or something similar to fix the FM antenna into position Caution Be careful that you don t injure yourself when using thumbtacks AM ANTENNA push terminals FM ANTENNA jack DAB antenna jack Insert the plug fully into the jack Thumbtacks...

Page 18: ... same antenna for both FM and TV reception as this can cause interference problems If cir cumstances demand it use a TV FM antenna splitter as shown Connecting an Outdoor AM Antenna If good reception cannot be achieved using the supplied AM loop antenna an outdoor AM antenna can be used in addition to the loop antenna as shown Outdoor AM antennas work best when installed horizon tally outside but ...

Page 19: ...D receiver s remote controller When playback is started on the component connected via u the CD HDD receiver will automatically select it as the input source When you start playback on the component connected via u if the CD HDD receiver is on Standby it will auto matically turn on Similarly when the CD HDD receiver is set to Standby all components connected via u will also go on Standby Notes No ...

Page 20: ... dig GAME dig or PC dig so that it matches the type of component that you connect see page 48 The CD HDD receiver supports only a 16 bit PCM signal with a sampling rate of between 44 1 kHz and 48 kHz Some components require the settings of forced conversion to PCM Connect the CD HDD receiver s LINE 1 IN jacks to the TV s audio output jacks Connecting a Subwoofer Connecting a Component with a Digit...

Page 21: ...lt in is recom mended Some routers have a modem built in and some ISPs require you to use specific routers Please consult your ISP or computer dealer if you re unsure CAT5 Ethernet cable Use a shielded CAT5 Ethernet cable straight type to connect the CD HDD receiver to your home network Internet Access A narrowband Internet connection e g 56K modem ISDN will not provide satisfactory results so a b...

Page 22: ...eceiver enters the Standby mode Notes Before connecting the power cord connect all of your speakers and AV components Turning on the CD HDD receiver may cause a momentary power surge that might interfere with other electrical equipment on the same circuit If this is a problem plug the CD HDD receiver into a different branch circuit 2 Press the ON STANDBY button on the CD HDD receiver or remote con...

Page 23: ...f for some reason the clock cannot be set automatically see Setting AccuClock to Use a Specific Station on page 65 and Setting the Clock Manually on page 66 Turning Off the AccuClock Function If you don t want AccuClock to automatically update the clock each day you can turn it off as follows Note The AccuClock function cannot be turned off until the clock has been set Setting the Clock with the A...

Page 24: ...the input source If you press this button repeatedly you can switch the radio band These buttons also work in the Standby mode Turn the VOLUME control clockwise to increase the volume or counterclockwise to decrease it You can also use remote controller s VOL q w but ton The default setting is 10 You can adjust the volume from MIN 01 through 41 to MAX Turn down the volume then connect your stereo ...

Page 25: ...ASS button while the Direct function is on the Direct function will be turned off TONE S BA MUTI ENTER q w DIRE S Bass On S BASS indicator Using the Direct Function Press the DIRECT button When the Direct function is on the tone controls are bypassed so you can enjoy a pure sound and the DIRECT indicator lights up To turn off the Direct function press the DIRECT button again When the Direct functi...

Page 26: ...hen press ENTER The above is an example when D 112E is selected Complete will be displayed and the setting is completed Audyssey Dynamic EQ becomes active and the Dynamic EQ indicator lights up Audio Record Tool Audyssey EQ Audio Dynamic EQ Audio Audyssey EQ D 112E Dynamic EQ indicator 1 Press the TOOLS button 2 Use the Up and Down q w but tons to select Audio and then press ENTER 3 Use the Up and...

Page 27: ...uted by selecting the option 1 Erase one folder or file selected will be erased Example Deleting an album Select an album and execute one file folder erase 1 Erase The list is displayed in a set of search categories such as the artist album and track Unlike the USB device it is always necessary to read the track list for copying erasing or editing The operation cannot be performed by selecting onl...

Page 28: ...remove the CD Basic Operations of Playback 1 1 0 0 OPEN CLOSE Disc tray Switch the input source to CD see page 24 1 Load the CD 1 Press the Open Close 0 button to open the disc tray 2 Place the CD on the tray with the label side facing up Place 8 cm CDs in the center of the tray 3 Press the Open Close 0 button to close the disc tray For audio CDs the CD HDD receiver starts a search for CD informat...

Page 29: ...ck Switching the Display Track 15 16 To select Press Track 5 Track 10 Track 15 Used to enter numbers over 10 Track03 Track02 Track01 Track01 Track02 2 line display 3 line display Artist name 1 14 Track01 00 00 Album name 1 14 Track01 Track01 00 00 Album name 128 kbps Track01 MP3 Album name Total 14 38 56 Audio CDs Data CDs Artist name Track number Total tracks Format Album name Track name Total ti...

Page 30: ...he input source to CD Press the INPUT q w buttons You can also use the INPUT SELECTOR button to select the input source 2 Press the TOOLS button and then press ENTER with Tool selected 3 Use the Up and Down q w but tons to select Gracenote Ser vice and then press ENTER 4 Use the Up and Down q w but tons to select On and then press ENTER The CD HDD receiver starts a search for CD information after ...

Page 31: ...ly until both the REPEAT and REPEAT 1 indicators disappear Repeat playback is cancelled when you turn off the CD HDD receiver Random Playback 1 Press the RANDOM button repeatedly until the RANDOM indi cator appears 2 To start random playback press the Play 1 button The following display appears for three seconds 1 RANDOM Artist name Album name 1 14 00 00 RANDOM indicator Artist name Track03 3 14 0...

Page 32: ...10 kHz steps for AM In Manual Tuning mode the frequency stops changing when you release the button Press the button repeatedly to change the frequency one step at a time ENTER TUNING Switch the input source to FM or AM see page 24 FM 87 50 MHz ch AUTO FM STEREO TUNER Band Frequency When tuned into a station the Tuned indicator appears When tuned into a stereo FM station the FM STEREO indicator app...

Page 33: ...y when the CD HDD receiver is tuned to an FM station that supports RDS Notes If the signal from an RDS station is weak RDS data may be displayed intermittently or not at all The message Waiting may appear while the RT data is being received 2 If the selected preset has no name it will be skipped and the next Program Service Name will be displayed Displaying Radio Information DISPLAY Receiving RDS ...

Page 34: ...ress the TOOLS button and then press ENTER with Tool selected 3 Use the Up and Down q w buttons to select Auto Tuning and then press ENTER 4 Use the Up and Down q w buttons to select OK see DAB Setup on page 36 and then press ENTER to start the Auto Tuning function The number of stations found and the scanning progress are shown on the display To cancel Auto Tuning press the ENTER or RETURN button...

Page 35: ...lays the signal quality 0 59 Poor reception 60 79 Good reception 80 100 Excellent reception 5 Multiplex Name Displays the name of the current multiplex 6 Multiplex Number and Frequency Displays the number and frequency of the current multiplex 1 Press the BAND button to select DAB 2 Use the Fast Reverse and Fast Forward 5 4 buttons to select the DAB stations If a secondary service is available a r...

Page 36: ...options and then press ENTER Tuning Aid With the Tuning Aid you can adjust the position and direction of the DAB antenna while monitoring the sig nal strength on the display If the letter B appears on the display it means the signal strength is Bad If the letter G appears it means the signal strength is Good To make the letter G appear adjust the antenna to get the best signal strength 1 Press the...

Page 37: ...he BAND or INPUT q w button to select FM Make sure the FM antenna is positioned to achieve the best possible reception 2 Press the TOOLS button and then press ENTER with Tool selected 3 Use the Up and Down q w but tons to select Auto Preset and then press ENTER BAND TOOLS ENTER Any existing presets will be deleted when the Auto Preset function is run Auto Preset Caution or FM 87 50 MHz ch Audio Re...

Page 38: ...S ENTER You can store up to 40 stations as presets and this can be any combination of AM FM and DAB sta tions For example 27 FM and 13 AM or 20 FM 12 AM and 8 DAB Although AM and FM presets share the same numbers they re selected independently For example preset 1 will store an AM station when the AM band is selected and an FM station when the FM band is selected Stations can be stored to presets ...

Page 39: ...ound interruption can be reduced When returning to Auto Tuning Mode press the ENTER again Normally leave the AUTO indicator displayed The CD HDD receiver automatically receives FM radio in stereo Selecting Preset Stations 1 Use the BAND or INPUT q w button to select AM FM or DAB The preset you selected the last time you listened to the radio will still be selected 2 Use the Previous and Next 7 6 b...

Page 40: ...OLS button and then press ENTER with Tool selected 3 Use the Up and Down q w but tons to select PresetCopy and then press ENTER The number of the preset to be copied flashes BAND TOOLS ENTER PRESET Audio Record Tool Tool 03 Preset Copy 4 Use the Up and Down q w but tons to select the destination pre set and then press ENTER If no station has yet been stored in the destination preset the station is...

Page 41: ...umber of the preset to be copied flashes 4 Press ENTER 5 The confirmation message Erase OK appears Use the Up and Down q w buttons to select Yes and then press ENTER Complete will be displayed and the preset s name has been deleted To cancel the erase operation use the Up and Down q w buttons to select No and then press ENTER BAND TOOLS ENTER PRESET Audio Record Tool Preset Write Tool Preset Erase...

Page 42: ... letters a Lowercase letters 1 Numbers and symbols Umlaut letters and symbols 5 Selecting letters Press the number buttons repeatedly to select the available letters For example press the 2 button repeatedly to select A B or C Press the 0 button repeatedly to select 0 or space After you select a desired character move to the next input position by press ing the Left and Right e r buttons Selecting...

Page 43: ... to select the character immediately after the insertion point That character flashes 2 Press the Up q button to display 3 Enter a character to be inserted following step 5 of Naming Presets on page 42 4 Press ENTER to finish the insertion Pressing the RETURN button cancels the insertion and displays the previous display Erasing a Preset s Name 1 Switch the input source to FM or AM see page 24 2 P...

Page 44: ...d directly For the functions of the iPod and USB devices see their instruction manuals When connecting the iPod use a USB cable compatible with the iPod Available functions or operation may vary depending on the software version of the iPod Update the iPod soft ware to the latest version before using Onkyo accepts no responsibility whatsoever for the loss or damage to data stored on the iPod or US...

Page 45: ...ke approximately one minute to recognize the iPod so wait until the recognition is com pleted 2 Switch the input source to USB Press the INPUT q w buttons You can also use the INPUT SELECTOR button to select the input source The track information appears on the dis play of the CD HDD receiver ONKYO logo appears on the display of the iPod 3 Start playback Press the Play Pause 1 3 or Play 1 button T...

Page 46: ...n 2 Use the Up and Down q w buttons to select a desired folder and then press ENTER 3 Use the Up and Down q w buttons to select a desired track 3 Press ENTER to start playback Songs Track01 Track02 Track01 Track02 Switching the Display Track03 Track02 Track01 Track01 Track02 2 line display 3 line display Artist name 1 14 Track01 00 00 Album name 128 kbps Track01 MP3 Album name 1 14 Track01 00 00 A...

Page 47: ...andom or repeat playback Tips The range of tracks to be played in random and repeat playback varies depending on the devices connected For the USB devices except for the iPod all tracks are played randomly or repeatedly For the iPod tracks in the same folder as the selected track are played randomly or repeatedly Note If the USB device contains folders deeper than eight levels the repeat random pl...

Page 48: ... the input source Direct Change While the CD HDD receiver is in Standby mode if you turn on the power or start the playback of the com ponents with an u connection the CD HDD receiver will automatically turn on When the CD HDD receiver is set to Standby mode the compo nents with an u connection will also enter Standby mode Auto Power ON Standby INPUT 1 Switch the input source to a com ponent you w...

Page 49: ...ver for the loss or damage to data stored on a USB mass storage device when that device is used with the CD HDD receiver Onkyo recommend that you back up your important music files beforehand Recording may be slow depending on the USB device If many tracks are stored in the USB flash memory approx 60 000 files or more it may take some time for the recording operation When you record to an SD memor...

Page 50: ...vices Setting for Recording Format Extension Bit rate Sampling frequency MP3 MPEG 2 Audio Layer 3 mp3 128 kbps 160 kbps 192 kbps 256 kbps 1 44 1 kHz WMA 2 Windows Media Audio V8 0 wma 128 kbps 160 kbps 192 kbps 44 1 kHz WAV wav 1 Press the TOOLS button 2 Use the Up and Down q w but tons to select Record and then press ENTER Audio Record Tool 3 Use the Up and Down q w but tons to select the record ...

Page 51: ... the next available recording is displayed Example Wait COPY 42 min When you use other CDs for recording continuous recording is possible It is also prohibited to record 16 or more CDs within approx 74 minutes Recording CDs Disc tray CD HDD CD USB 1 Load the CD you want to record 1 Press the Open Close 0 button to open the disc tray 2 Place the CD on the tray with the label side facing up Place 8 ...

Page 52: ...o its nor mal display for CD operation LIBRARY REC MULTI JOG REC 1 HDD REC 1 USB Ready USB 164 MB free 1 1 Track 03 14 Destination of recording Format 1 Load the CD When the CD has been loaded switch the input source to CD 2 Press the LIBRARY button After the message CD reading appears the list of tracks is displayed 3 Use the Up and Down q w but tons to select a track you want to record 4 Press t...

Page 53: ...ress the Play 1 button or ENTER The above is an example when the HDD REC y3 button is pressed 5 Press the Stop 2 button to can cel the recording Complete will be displayed and the recording ends To pause recording press the Pause 3 button To resume recording press it again or Ready or 20080820_0034 FM 76 50MHz 00 00 25 Complete Recording from Line Input 1 Switch the input source Press the INPUT q ...

Page 54: ...in Play ing Selected Tracks on the pages shown below When selecting tracks in the HDD see page 58 When selecting tracks in the USB see page 46 3 Press the y3 button according to the transfer destination When transferring to the HDD press the HDD REC y3 button When transfer ring to a USB device press the USB REC y3 button You can also use the y REC button and MULTI JOG dial on the CD HDD receiver H...

Page 55: ...lity Network Audio FTP User name FTP Network 4 Select Open and then press ENTER After FTP Starting is displayed FTP Stop appears 5 Start Windows Explorer on your computer access the CD HDD receiver by specifying the IP address When Address Bar is not displayed on Windows Explorer display Address Bar according to the Windows operation If a username and password have been set in the CD HDD receiver ...

Page 56: ... w but tons to select the track or album 3 Press the TOOLS button and then press ENTER with Tool selected 4 Use the Up and Down q w but tons to select Song Erase and then press ENTER Songs Track01 Track02 Track01 Track02 Audio Record Tool Tool Song Erase 5 Erasing one track or one folder Use the Up and Down q w buttons to select 1 Erase and then press ENTER Erasing all items Use the Up and Down q ...

Page 57: ... To pause playback Press the remote controller s Pause 3 button or the CD HDD receiver s Play Pause 1 3 button To resume playback press the Play Pause 1 3 button again To stop playback Press the Stop 2 button on the CD HDD receiver or remote controller To select tracks Press the RETURN button to return to the track list then press the Up and Down q w buttons to select a track To select the previou...

Page 58: ...numerous data such as albums and artists are contained in the list There are three modes L Large M Medium and S Small Normally the selection item is shifted one by one How ever in the Jump Mode some selection items are skipped in the list The L Large mode has the largest skipping range and S Small mode has the smallest To activate the Jump Mode During the list display press the Left and Right e r ...

Page 59: ...rack 01 Album name 1 14 Track 01 00 00 Album name 128 kbps Track 01 MP3 128 kbps MP3 00 08 Album name Track 01 Artist name Track 01 1 14 00 48 During the list display 2 line display 3 line display During stop Artist name Track number Total tracks Album name Format Format Bit rate During playback and pause Progress bar Track number Total tracks Elapsed time of current track Elapsed time of current ...

Page 60: ...k number To perform these operations cancel the random playback Creating and Playing the Playlist You can select your favorite tracks in numerous music files in the HDD and add them to the playlist Adding a track to the playlist Playing the playlist 1 Press the remote controller s INPUT q w buttons to switch the input source to HDD 2 Press the PLAYLIST q w buttons Each time the button is pressed t...

Page 61: ...2 Select a track or album you want to erase Press the LIBRARY button and select the category you want to search such as artist album or track Tip Even when erasing an entire album you need to select any track in the album 3 Press the TOOLS button and then press ENTER with Tool selected 4 Use the Up and Down q w but tons to select Song Erase and then press ENTER Audio Record Tool Edit Name Tag Song...

Page 62: ...ng character groups Each time you press the button the character group switches Rename Playlist Edit Name Tag Tool Tool Name Edit Edit Name Tag Tool A Edit Name Tag Character group Input position 8 Selecting letters Press the number buttons repeatedly to select the available letters For exam ple press the 2 button repeatedly to select A B or C Press the 0 button repeatedly to select 0 or space Aft...

Page 63: ...esired playlist and then press ENTER 3 Use the Up and Down q w but tons to select the track you want to remove 4 Press the TOOLS button and then press ENTER with Tool selected PLAYLIST PlayList1 PlayList2 Track 01 Track 02 Audio Record Tool 5 Use the Up and Down q w but tons to select Clear Playlist and then press ENTER 6 Removing one track Use the Up and Down q w buttons to select 1 Clear and the...

Page 64: ...y to select one of the following character groups Each time you press the button the character group switches PLAYLIST PlayList1 PlayList2 Audio Record Tool Tool A Edit Name Tag Character group Input position 6 Selecting letters Press the number buttons repeatedly to select the available letters For exam ple press the 2 button repeatedly to select A B or C Press the 0 button repeatedly to select 0...

Page 65: ...d 5 4 buttons the CD HDD receiver will automatically search for a suitable station The RDS indicator appears when tuned into a station that supports RDS The RDS indicator will flash while the CD HDD receiver searches for a station and light up continuously when a station is found Timer 2 Timer 1 Clock Clock RDS CT Station FM 87 50MHz The asterisks indicate that the AccuClock function is on 6 When ...

Page 66: ...q w but tons to set the year You can also use the remote controller s number buttons to enter the year 5 Press ENTER 6 Use the Up and Down q w but tons to set the date You can also use the remote controller s number buttons to enter the date q w e r TIMER ENTER Number buttons Timer 2 Timer 1 Clock Clock Adjust Mode Manual Adjust Clock Adjust Date 2008 01 01 TUE 7 Press ENTER The time setting proce...

Page 67: ...SLEEP button while the remaining sleep time is 10 minutes or less the sleep timer is canceled Canceling the Sleep Timer To cancel the sleep timer press the SLEEP button repeatedly until Sleep Off appears and the SLEEP indicator disappears Note During recording the sleep timer can be set When the sleep time period has expired during recording the CD HDD receiver will cancel the recording and enter ...

Page 68: ...AB LINE TAPE DOCK or DIGITAL Select a preset for FM AM or DAB Timer 1 Off Timer Mode TIMER indicator TIMER number 6 Set the day and time Use the Up and Down q w buttons to select Once or Every and then press ENTER Select Once for on off operation Select Every to perform the same operation every week Use the Up and Down q w buttons to set the day and then press ENTER If you selected Once Use the Up...

Page 69: ...to play Use the Up and Down q w buttons to select the source and then press ENTER You can select the following sources FM AM DAB or LINE Select a preset for FM AM or DAB 6 Select the source you want to record Use the Up and Down q w buttons to select the source and then press ENTER You can select the following sources HDD USB or TAPE When selecting an external component you need to use an u capabl...

Page 70: ...ss the ENTER The timer setting display appears Check the setting items while switching it by pressing the ENTER repeatedly When the setting item you want to change is displayed change it 3 When the check is completed press the ENTER to close Turning Off a Timer Once a timer has been programmed you can turn it off as necessary For example while you re on holiday you may want to turn off the timer y...

Page 71: ...h as a DSL or cable modem 192 168 xxx xxx DNS Address DNS server address primary The Domain Name System DNS associates various information with domain names A DNS server is a special type of computer on the Internet used to support the DNS ISPs give their customers the public IP address of the DNS server 192 168 xxx xxx Proxy In computer networks a proxy server acts an intermediate gateway between...

Page 72: ...ttings message is displayed the screen returns to the menu list Setting the Proxy Configure the Proxy setting when your ISP specifies it If not specified the Proxy setting is not necessary 1 Press the TOOLS button 2 Use the Up and Down q w buttons to select Network and then press ENTER 3 Use the Up and Down q w buttons to select Proxy and then press ENTER 4 Use the Up and Down q w buttons to selec...

Page 73: ...ata CDs contain MP3 WMA AAC or WAV files organized into folders Precautions on DualDiscs The CD HDD receiver is designed to play discs in con formity with the CD standards The DualDisc is a two sided disc made up of a DVD standard compatible side and a music specific side However the music specific side is not compatible with the CD standards so it may not be played with the CD HDD receiver DualDi...

Page 74: ...t can affect the sound quality and should be removed as follows Using a clean soft cloth wipe from the center outwards as shown Never wipe in a circular direction To remove stubborn dust or dirt wipe the disc with a damp soft cloth and then dry it with a dry cloth Never use solvent based cleaning fluids such as thin ner or benzine commercially available cleaners or antistatic sprays intended for v...

Page 75: ... the file and folder structure is very complicated the CD HDD receiver may not be able to read or play all of the files With CD ROM CD R and CD RW discs that contain many files and folders and files not limited to music files it may take a long time to read the disc Onkyo recommend that you include only music files on your discs use about 20 folders and limit folder nesting to three levels deep Th...

Page 76: ...it works as a SHUF FLE button However the input source is set to CD R it works as a RANDOM button In the same way when the CD recorder is connected to the OPTICAL DIGITAL IN jack and the input source is set to CD R dig it works as a RANDOM button See the instruction manual for each connected component for details For column items with no notation buttons will not function when pressed 6 4 1 2 5 3 ...

Page 77: ...6 Make sure the CD HDD receiver s volume control is not set to minimum see page 24 Make sure the correct input source is selected see page 24 Make sure the CD HDD receiver is not muted see page 25 While headphones are connected the speakers output no sound see page 24 The sound quality is not good Make sure the speaker cables are connected with the correct polarity see page 16 Make sure all audio ...

Page 78: ...yers Playback jumps The CD HDD receiver is being subjected to vibration or the disc is scratched or dirty see page 74 The disc will not play Make sure the loaded disc is supportable by the CD HDD receiver see page 73 Make sure the disc has been loaded correctly with the label side facing up Check to see if the surface of the disc is dirty see page 74 If condensation is suspected turn on the CD HDD...

Page 79: ...age 37 The clock and timer settings will be lost Set the clock and timers again see page 65 Can t adjust the frequency of the radio Use the Fast Reverse and Fast Forward 5 4 buttons to change the frequency of the radio see page 32 RDS doesn t work The FM station you are tuned to doesn t support RDS Install an outdoor FM antenna see page 18 Change the position or direction of your outdoor FM antenn...

Page 80: ...tteries with new ones Do not mix different types of batteries or new and old batteries The remote controller is too far away from the CD HDD receiver or there s an obstacle between them see page 6 The CD HDD receiver s remote control sensor is being subjected to bright light inverter type fluorescent light or sunlight The CD HDD receiver is located behind the glass doors of a audio rack or cabinet...

Page 81: ...changing the Input Selector from DOCK RI dock to another be sure to stop the iPod Others Onkyo is not responsible for damages such as CD rental fees due to unsuccessful recordings caused by the unit s malfunction Before you record important data make sure that the material will be recorded correctly Disposal and transporting the CD HDD receiver Delete all the tracks or data in the hard disk drive ...

Page 82: ...or 25 8 Ω Input Sensitivity and Impedance 150 mV 50 kΩ LINE1 DOCK CDR IN MD TAPE IN Output Level and Impedance 150 mV 2 2 kΩ DOCK CDR OUT MD TAPE OUT Frequency Response 10 Hz 100 kHz 3 dB LINE1 DOCK CDR MD TAPE Tone Control 6 dB 80 Hz BASS 8 dB 10 kHz TREBLE 7 dB 80 Hz S BASS Signal to Noise Ratio 100 dB LINE1 DOCK CDR MD TAPE IHF A Speaker Impedance 4 Ω 16 Ω Tuner Section FM Tuning Frequency Rang...

Page 83: ...OTE DATA THE GRACENOTE SOFTWARE OR GRACENOTE SERVERS EXCEPT AS EXPRESSLY PERMITTED HEREIN You agree that your non exclusive license to use the Gracenote Data the Gracenote Software and Gracenote Servers will terminate if you violate these restrictions If your license terminates you agree to cease any and all use of the Gracenote Data the Gracenote Software and Gracenote Servers Gracenote reserves ...

Page 84: ... Fax 201 785 2650 http www us onkyo com ONKYO EUROPE ELECTRONICS GmbH Liegnitzerstrasse 6 82194 Groebenzell GERMANY Tel 49 8142 4401 0 Fax 49 8142 4401 555 http www eu onkyo com ONKYO EUROPE UK Office Suite 1 Gregories Court Gregories Road Beaconsfield Buckinghamshire HP9 1HQ UNITED KINGDOM Tel 44 0 1494 681515 Fax 44 0 1494 680452 ONKYO CHINA LIMITED Unit 1 12 9 F Ever Gain PlazaTower 1 88 Contai...

Reviews: