66
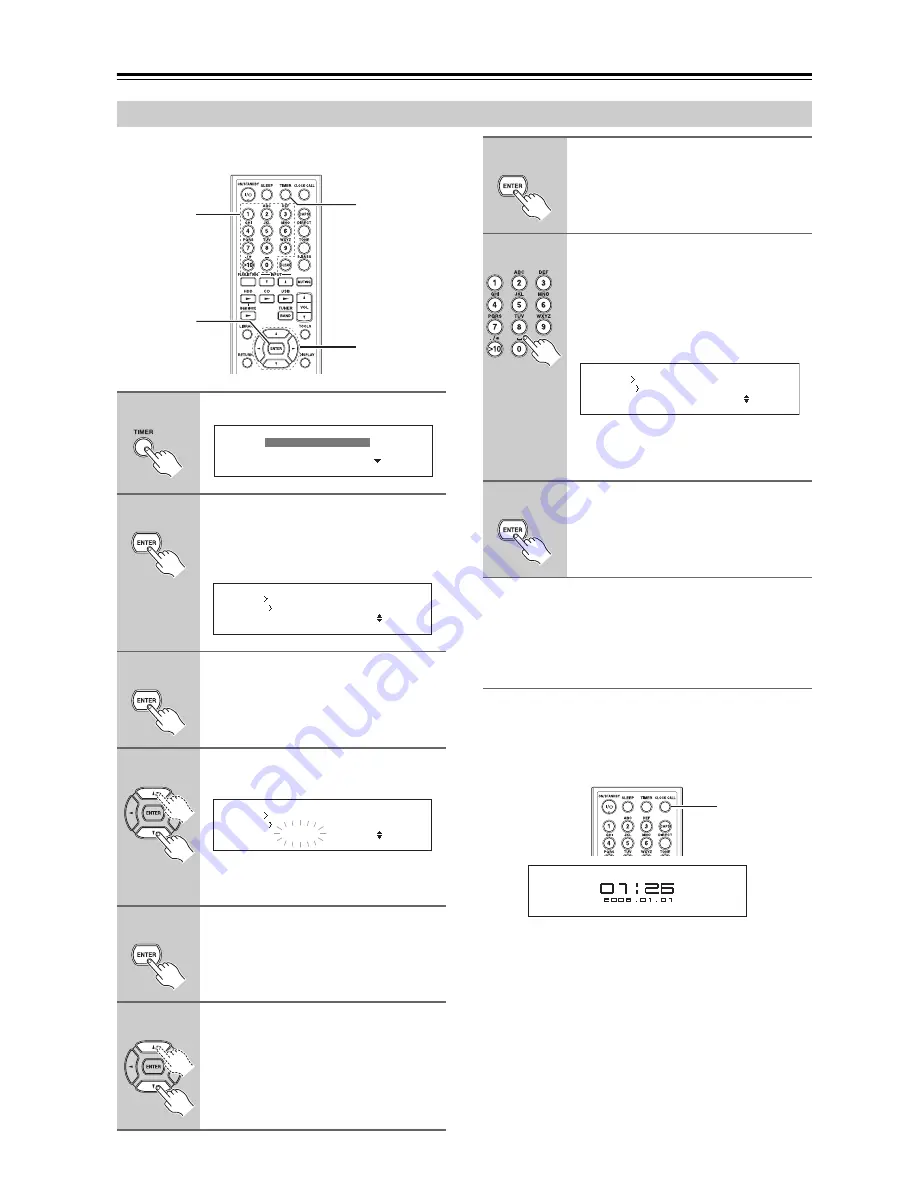
Setting the Clock
—Continued
The time can be displayed in 24-hour format.
Tip:
To cancel the clock setting, press the [RETURN] button
repeatedly.
Displaying the Day and Time
To display the day and time, press the remote controller’s
[CLOCK CALL] button.
If the CD/HDD receiver is on Standby, the time is dis-
played for a certain time.
Setting the Clock Manually
1
Press the [TIMER] button.
2
Press [ENTER] with “Clock”
selected.
The sub-menu appears and the CD/HDD
receiver enters clock setting mode.
3
Press [ENTER] with “Manual
Adjust” selected.
The clock setting procedure starts.
4
Use the Up and Down [
q
]/[
w
] but-
tons to set the year.
You can also use the remote controller’s
number buttons to enter the year.
5
Press [ENTER].
6
Use the Up and Down [
q
]/[
w
] but-
tons to set the date.
You can also use the remote controller’s
number buttons to enter the date.
q
/
w
/
e
/
r
TIMER
ENTER
Number
buttons
Timer 2
Timer 1
Clock
Clock
Adjust Mode
:Manual Adjust
Clock
Adjust Date
:2008. 01. 01 (TUE)
7
Press [ENTER].
The time setting procedure starts.
8
Use the remote controller’s num-
ber buttons to set the time.
Enter a four-digit number, hour(00-23)
and minute(00-59). You can also use the
Up and Down [
q
]/[
w
] buttons to enter
the time.
If you press the remote controller’s [>10]
button, you can move the clock forward/
backward 12 hours.
9
Press [ENTER].
“Complete!” will be displayed and the
clock is set.
Clock
Adjust Time
:
0:00
CLOCK CALL


