


3
Setting up your OneScreen GoSafe
Desktop Stand:
The OneScreen GoSafe Desktop Stand is an ideal option if the scanner is to be placed at the reception desk or a
table next to the entrance. People entering can immediately scan their faces before proceeding further. The
stand comes with screws and a bolt to fix the main assembly of the scanner firmly with the base.
Installing the Desktop Stand:
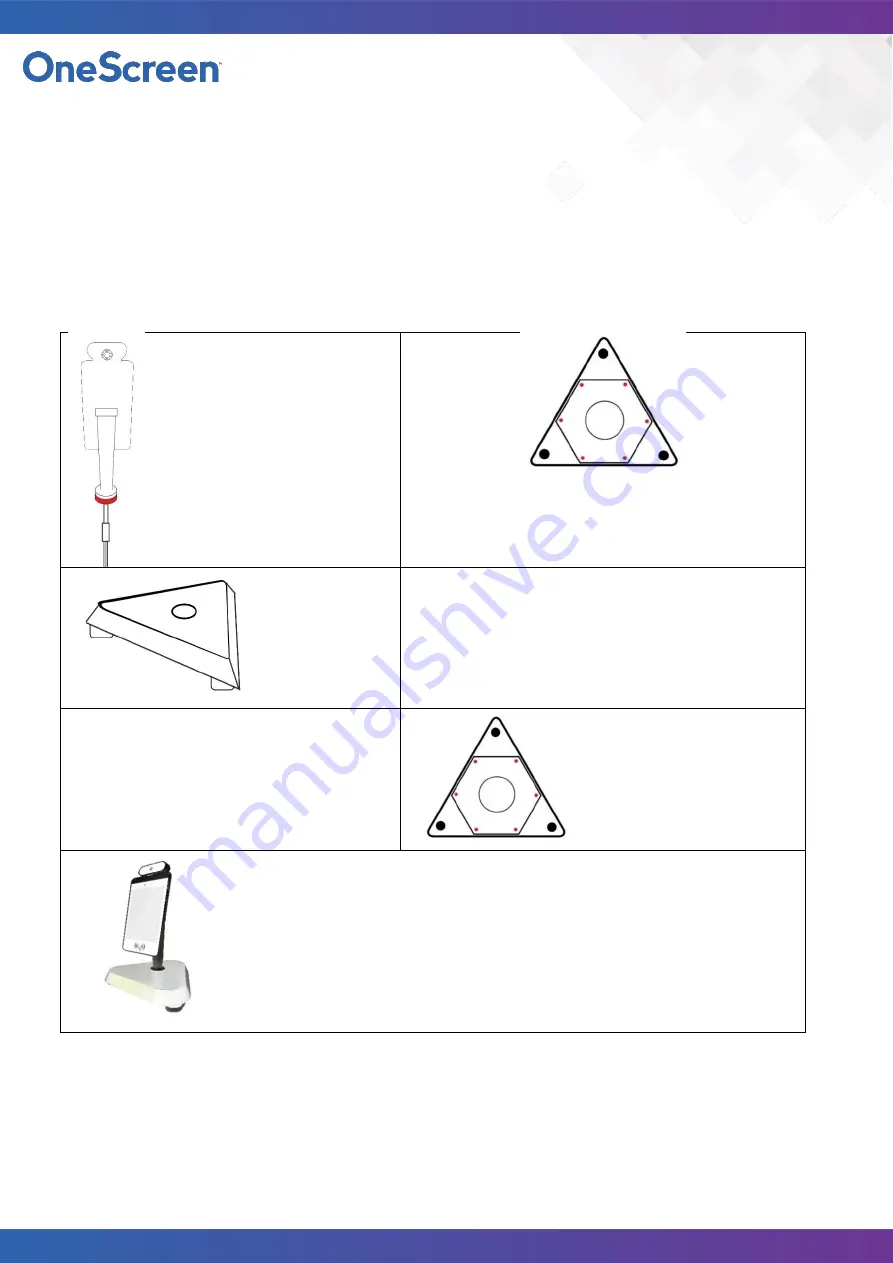
Step 1:
Remove the pre-installed bolt
(marked
in
red)
from
the
OneScreen GoSafe Device. Pass the
bolt through all the cables to
remove it. Put it aside as we will
need to use this again when
securing the GoSafe Device.
Step 2:
Use a screw driver to remove the 6 screws (marked in red)
in order to take off the bottom plate from the OneScreen
Desktop Stand’s base.
Step 3:
Pass the cables
through the hole
on top of the
Desktop Stand.
Step 4:
Pass the cables through the bolt removed in step 1 and
secure the OneScreen GoSafe on the Desktop Stand.
Tighten the bolt on the Desktop Stand so that the GoSafe
stands firmly on the mount.
Step 5:
Connect the RJ45 (Ethernet) cable, power
connector and USB connector (White) to the
ports on the inside of the Desktop Stand.
Step 6:
Conceal all remaining cables
inside the desktop stand and
put back the bottom plate
removed in step 2. Secure the
plate with the 6 screws
(marked in red)
Step 7:
Connect the power cable to the power input port on the stand.
Connect a USB mouse to the USB port on the stand
Connect an ethernet cable (if using ethernet instead of WiFi) to the RJ45
(ethernet) port on the stand.
Power on the device to start using it.


