19
oneida-air.com
Vortex Assembly Instructions
FIG. 19
19
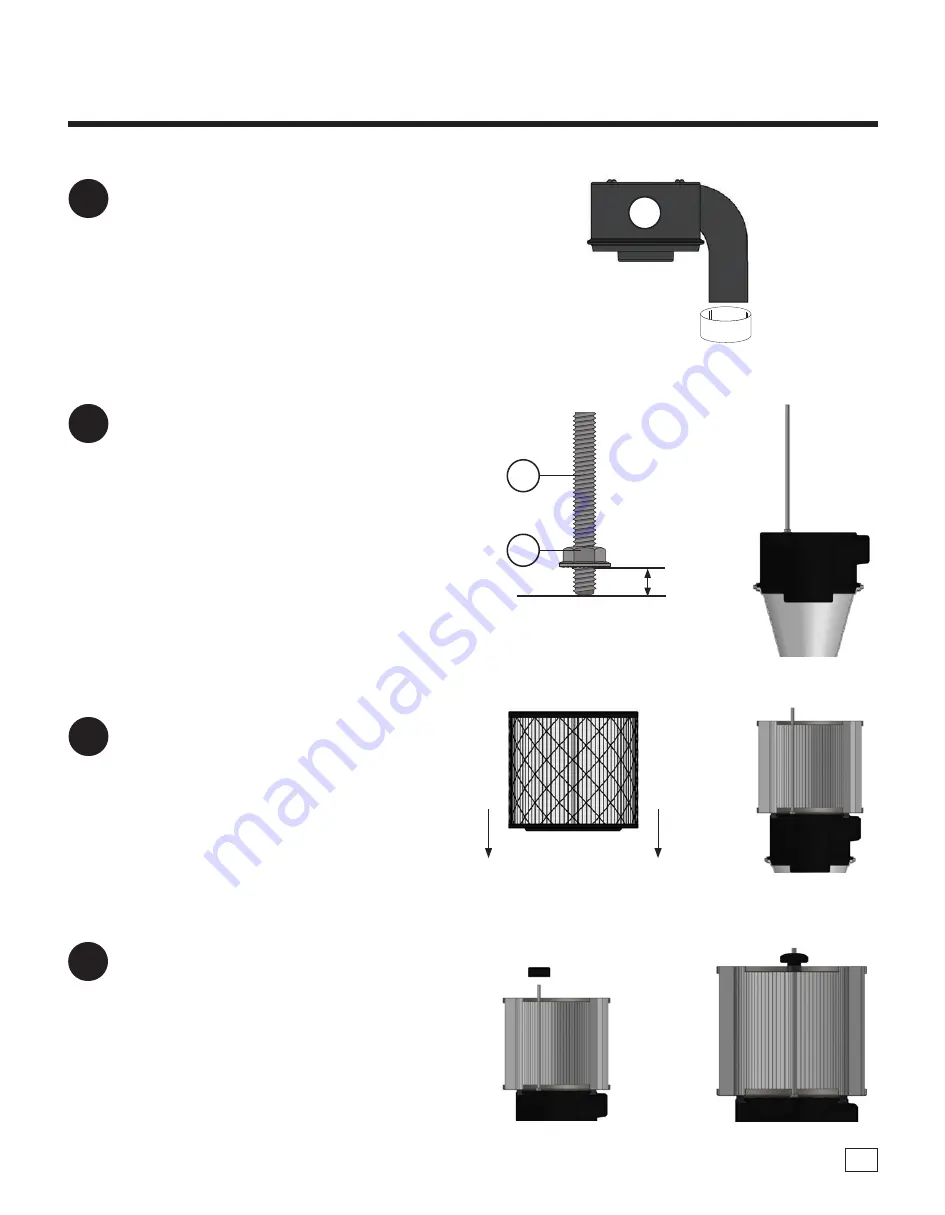
Remove cardboard ring from Vortex Barrel
(S2) Inlet; you may need pliers to do so.
20
Thread a Whiz-Lock Nut (S4D) onto each
Threaded Rod (S4C), flat side down, until it
is about 1" deep. [FIG. 20a] Then screw each
Threaded Rod (S4C) into the threaded inserts
on top of the Vortex Barrel (S2) so that the flat
side of the Whiz-Lock Nut is flush with the
Barrel. Finger tighten the rod and then use a
wrench to firmly tighten the Whiz-Lock Nut
down to the Barrel [FIG. 20b].
Note: Do not over-tighten the nuts. These nuts
are only meant to keep the rod from unscrewing
during use.
21
Place the HEPA Filter (S1) over the Threaded
Rods (S4C) with the gasket side facing down
[FIG. 21a].
The Rods should pass through the holes in the
tabs of the bottom of the Filter and through
the holes in the top of the Filter and the Filter
should align snugly with the top of the Vortex
Barrel [FIG. 21b].
1"
FIG. 20b
FIG. 20a
FIG. 21b
FIG. 21a
FIG. 22b
FIG. 22a
22
Install the Rubber Spacer (S4B) onto the top
of each Threaded Rod (S4C), with the flat side
facing up and the tapered side facing down
[FIG. 22a].
Thread the Thumb Nut (S4A) onto the top of
each Threaded Rod (S4C), tightening firmly
against the Rubber Spacer (S4B) below it [FIG.
22b].
S2
S4D
S4C


