background image


00075262.DOC, Version 1.0 

22/36 

This  device  has  left  our  premises  in  absolutely  perfect  condition.  In  order  to  maintain  this  condition  and  to 
ensure a safe operation, it is absolutely necessary for the user to follow the safety instructions and warning 
notes written in this user manual. 

 
Important: 

Damages caused by the disregard of this user manual are not subject to warranty. The dealer will 
not accept liability for any resulting defects or problems. 

 
If the device has been exposed to drastic temperature fluctuation (e.g. after transportation), do not switch it 
on  immediately.  The  arising  condensation  water  might  damage  your  device. Leave  the  device  switched  off 
until it has reached room temperature. 
 
Please make sure that there are no obvious transport damages. Should you notice any damages on the A/C 
connection cable or on the casing, do not take the device into operation and immediately consult your local 
dealer. 
 
This device falls under protection-class II and features a protective insulation. The power plug must only be 
plugged into a suitable outlet. The voltage and frequency must exactly be the same as stated on the device. 
Wrong voltages or power outlets can lead to the destruction of the device and to mortal electrical shock. 
 
Always plug in the power plug least. The power plug must always be inserted without force. Make sure that 
the  plug  is  tightly  connected  with the  outlet.  Never  let  the  power  cord  come  into  contact  with  other  cables! 
Handle the power cord and all connections with the mains with particular caution! Never touch them with wet 
hands, as this could lead to mortal electrical shock. 
 
Never modify, bend, strain mechanically, put pressure on, pull or heat up the power cord. Never operate next 
to sources  of  heat  or  cold.  Disregard  can  lead  to  power  cord  damages,  fire  or  mortal  electrical  shock.  The 
cable insert or the female part in the device must never be strained. There must always be sufficient cable to 
the  device.  Otherwise,  the  cable  may  be  damaged  which  may  lead  to  mortal  damage.  Make  sure  that  the 
power cord is never crimped or damaged by sharp edges. Check the device and the power cord from time to 
time.  If  extension  cords  are  used,  make  sure  that  the  core  diameter  is  sufficient  for  the  required  power 
consumption  of  the  device.  All  warnings  concerning  the  power  cords  are  also  valid  for  possible  extension 
cords. 
 
Always disconnect from the mains, when the device is not in use or before cleaning it. Only handle the power 
cord  by  the  plug.  Never  pull  out  the  plug  by  tugging  the  power  cord.  Otherwise,  the  cable  or  plug  can  be 
damaged  leading  to  mortal  electrical  shock.  If  the  power  plug  or  the  power  switch  is  not  accessible,  the 
device  must  be  disconnected  via  the  mains.  If  the  power  plug  or  the  device  is  dusty,  the  device  must  be 
taken  out  of  operation,  disconnected  and  then  be  cleaned  with  a  dry  cloth.  Dust  can  reduce  the  insulation 
which may lead to mortal electrical shock. More severe dirt in and at the device should only be removed by a 
specialist. 
 
There  must  never  enter  any  liquid  into  power  outlets,  extension  cords  or  any  holes  in  the  housing  of  the 
device. If you suppose that also a minimal amount of liquid may have entered the device, it must immediately 
be  disconnected.  This  is  also  valid,  if  the  device  was  exposed  to  high  humidity.  Also  if  the  device  is  still 
running,  the  device  must  be  checked  by  a  specialist  if  the  liquid  has  reduced  any  insulation.  Reduced 
insulation can cause mortal electrical shock. 
 
There must never be any objects entering into the device. This is especially valid for metal parts. If any metal 
parts like staples or coarse metal chips enter into the device, the device must be taken out of operation and 
disconnected immediately. Malfunction or short-circuits caused by metal parts may cause mortal injuries. 
 

CAUTION:

 Turn the amplifier on last and off first! Keep away children and amateurs! 


CAUTION:

 High volumes can cause hearing damage! 

 
Please  note  that  damages  caused  by  manual  modifications  on  the  device  or  unauthorized  operation  by 
unqualified  persons  are  not  subject  to  warranty.  There  are  no  serviceable  parts  inside  the  device. 
Maintenance and service operations are only to be carried out by authorized dealers. 


Summary of Contents for XCP-1400MT

Page 1: ...Copyright Nachdruck verboten Reproduction prohibited F r weiteren Gebrauch aufbewahren Keep this manual for future needs BEDIENUNGSANLEITUNG USER MANUAL XCP 1400MT CD PLAYER...

Page 2: ...00075262 DOC Version 1 0 2 36...

Page 3: ...SB Ger te und Speicherkarten an w hlen Error Bookmark not defined Wiedergabe starten unterbrechen 15 Titel und Ordner anw hlen 14 Schneller Vor und R cklauf 15 Zeitanzeige umschalten 15 Wiedergabemodu...

Page 4: ...hing over the time indication 31 Selecting the operating mode 31 8 ADVANCECED FUNCTIONS 32 Pitch adjustment 32 Activating Master Tempo 32 Matching the beat between two titles Pitch Bend 32 Return to t...

Page 5: ...nau beachten die Bedienungsanleitung als Teil des Produkts betrachten die Bedienungsanleitung w hrend der Lebensdauer des Produkts behalten die Bedienungsanleitung an jeden nachfolgenden Besitzer oder...

Page 6: ...ngerungsleitungen verwendet muss sichergestellt werden dass der Adernquerschnitt f r die ben tigte Stromzufuhr des Ger tes zugelassen ist Alle Warnhinweise f r die Netzleitung gelten auch f r evtl Ve...

Page 7: ...arf nur in einer H henlage zwischen 20 und 2000 m ber NN betrieben werden Nehmen Sie das Ger t erst in Betrieb nachdem Sie sich mit seinen Funktionen vertraut gemacht haben Lassen Sie das Ger t nicht...

Page 8: ...ogdials mit Moduswahl Pitch Bend schnelle oder framegenaue Suche Bequeme Titelwahl ber Skip und 10 Taste Pitchregelung 4 8 16 Pitch Bend Tasten Cue Funktion Nahtlose Loop Reloop Funktion Einzel oder G...

Page 9: ...on ist aktiviert Das Display blendet KEY ein und der Schieberegler PITCH kann zur Beschleunigung und Verlangsamung der Wiedergabegeschwindig keit verwendet werden ohne die Stimmlage eines Titels zu ve...

Page 10: ...blinkt sie 15 Taste PITCH Zum Anw hlen des der Geschwindigkeitseinstell bereichs 4 8 oder 16 16 Tasten IN OUT RELOOP Tasten zum Speichern und zur Wiedergabe einer Endlosschleife Continuous Loop IN Bes...

Page 11: ...Verst rker Mischpulte bzw andere Ger te mit Line Pegel Eing ngen Tasten 2 5 7 12 14 16 19 Diese Tasten haben die gleichen Funktionen wie die Tasten am Ger t 22 Tasten 0 9 Zifferntasten zur Direktanwa...

Page 12: ...ge zu blinken f LOOP Zeigt durch Blinken dass der Startpunkt einer Schleife gespeichert wurde und durch permanentes Aufleuchten dass eine Schleife abgespielt wird g PROGRAM Blinkt bei der Programmieru...

Page 13: ...arauf dass die Belegung rechts links an den Ger ten bereinstimmt 2 Schlie en Sie den XCP 1400MT mit der beiliegenden Anschlussleitung ans Netz an Fernbedienung 1 Zum Einsetzen der Batterien entfernen...

Page 14: ...die Wiedergabe mit der Taste II oder der Taste Schalten Sie erst dann das Ger t mit dem Netzschalter aus CD einlegen 1 Zum Einlegen einer CD ffnen Sie die CD Schublade mit der Taste Die Kontroll LED...

Page 15: ...r schnellen Vor und R cklauf k nnen Sie auch die Tasten und auf der Fernbedienung verwenden F r den schnellen Vorlauf halten Sie die Taste gedr ckt f r den schnellen R cklauf die Taste Wiedergabemodu...

Page 16: ...sst sich der Takt eines Titels an den Takt eines zweiten Titels von einer weiteren Signalquelle anpassen synchronisieren Dadurch wird beim berblenden von einem zum anderen Titel der Rhythmus nicht unt...

Page 17: ...t gespeichert Die Taste CUE blinkt wiederholt Endlosschleife abspielen Ein zeitlich unbegrenzter Abschnitt kann beliebig oft ohne Tonunterbrechung wiederholt werden Diese Endlosschleife Seamless Loop...

Page 18: ...RAM auf der Fernbedienung um den Programmiermodus zu aktivieren Auf dem Display blinkt die Einblendung PROGRAM Zus tzlich wird die erste Speicherplatznummer P01 und daneben die Titelnummer angezeigt 2...

Page 19: ...ub usw gereinigt werden Verwenden Sie zur Reinigung ein fusselfreies angefeuchtetes Tuch Auf keinen Fall Alkohol oder irgendwelche L sungsmittel zur Reinigung verwenden Im Ger teinneren befinden sich...

Page 20: ...igkeitsanpassung 4 8 16 Display Titelabspielzeit Titelrestspielzeit Gesamtrestspielzeit Klirrfaktor 0 09 Ger uschspannungsabstand 70 dB Frequenzgang 20 20 000 Hz Audioausgang Stereo Cinch 2 V Fernbedi...

Page 21: ...s manual consider this manual to be part of the total product keep this manual for the entire service life of the product pass this manual on to every further owner or user of the product download the...

Page 22: ...to mortal damage Make sure that the power cord is never crimped or damaged by sharp edges Check the device and the power cord from time to time If extension cords are used make sure that the core diam...

Page 23: ...ns Do not permit operation by persons not qualified for operating the device Most damages are the result of unprofessional operation Never use solvents or aggressive detergents in order to clean the d...

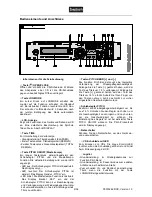
Page 24: ...elector pitch bend fast or frame search Comfortable track selection via skip buttons and 10 button Pitch adjustment 4 8 16 Pitch bend buttons Cue function Seamless loop reloop function Single or conti...

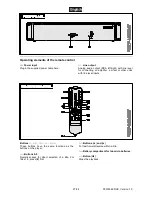
Page 25: ...es KEY and the tonal pitch of the title remains constant when the speed is changed with the pitch slide control 7 Buttons PITCH BEND and During playback the function Pitch Bend creates a temporary cha...

Page 26: ...T light The loop will continue to play until the button OUT is pressed once again RELOOP starts the loop once again 13 Button CUE When pressing the button in pause mode and during playback the unit st...

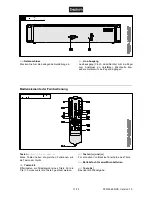
Page 27: ...for connecting an amplifier a mixer or other units with line level inputs Buttons 2 5 7 12 14 16 19 These buttons have the same functions as the buttons on the player 22 Buttons 0 9 Numerical keys fo...

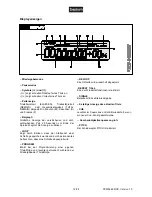
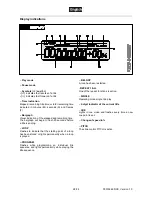
Page 28: ...onds before a title is ending f LOOP Flashes to indicate that the starting point of a loop has been stored or lights permanently when a loop is played g PROGRAM Flashes while programming an individual...

Page 29: ...ed power cable to connect the XCP 1400MT to the mains Remote control 1 To insert the batteries remove the cover on the rear side of the remote control 2 Insert two 1 5 V micro batteries type AAA as in...

Page 30: ...e CD tray again with the button The display will show CLOSE The control LED flashes during the read in Selecting titles 1 For selecting titles use the buttons and which allow to skip one title or seve...

Page 31: ...nd frames 1 frame 1 75 second 1 With the button TIME the time indication can be switched over first actuation of the button remaining title time indication REMAIN second actuation of the button total...

Page 32: ...les Pitch Bend With the function pitch bend the beat of the current title can be matched synchronized to the beat of a music piece playing on another player Thus the rhythm will not be interrupted whi...

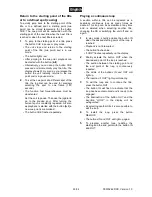
Page 33: ...t is constantly repeated As soon as playback is started with the button II a new cue point is memorized The button CUE flashes repeatedly Playing a continuous loop A section within a title can be repe...

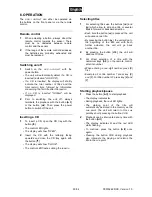
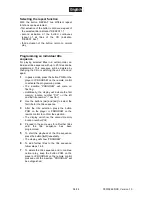
Page 34: ...o activate the programming mode The insertion PROGRAM will come on flashing Additionally the display will indicate the first memory location number P01 on the left and the title number next to it 2 Us...

Page 35: ...We recommend a frequent cleaning of the device Please use a soft lint free and moistened cloth Never use alcohol or solvents There are no serviceable parts inside the device Maintenance and service o...

Page 36: ...at 8 and 12 cm Pitch adjustment 4 8 16 Display elapsed time remain time total remain time Distortion 0 09 S N ratio 70 dB Frequency range 20 20 000 Hz Audio output stereo RCA 2 V Remote control 2 x 1...

Reviews: